
As an Amazon Associate I earn from qualifying purchases. All claims are strictly my personal opinion.
My top pick

Minwax Pre-Stain Wood Conditioner
The conditioner with the most complete maker directions: sand to 220, wait 5 to 15 minutes, wipe off, stain within 2 hours.

Pre-stain wood conditioner is a thin, clear coat that evens out how a board soaks up stain, and you need it on soft or porous woods like pine, birch, maple and alder, where stain otherwise goes on blotchy. It isn’t needed on every board. Dense, even-grained hardwoods usually take stain fine without it, and gel stain or a washcoat can stand in on the woods that don’t. What matters just as much is the step before it: how you sand decides how much stain the wood takes in the first place.
Below is which woods need conditioner, why blotching happens, the sanding that comes before it, how to apply it and how long the makers say to wait, oil-based versus water-based conditioner, the alternatives, and the products I’d put on the bench.
⚡ Quick Answer
Use it: on pine, fir, birch, maple, alder and other soft or porous woods before a liquid stain. Minwax Pre-Stain Wood Conditioner is the one the label says to use with oil-based stain.
Sand first: Minwax says to finish with 220 grit and remove the dust before the conditioner goes on. A random orbital sander and a stack of 80 to 220 grit discs cover the whole sequence.
Skip it: when you’re using gel stain, or when a test board shows an even color. Always test on a scrap of the same wood first.
Which Woods Need Pre-Stain Wood Conditioner?
Minwax says its conditioner can be applied over any wood, but is especially necessary on soft or porous woods like pine, alder, birch and maple. Its how-to section also lists fir and aspen, and its finishing FAQ names pine, fir and spruce as soft woods that blotch, and maple, alder and aspen as porous ones.
| Wood | Conditioner? | What the source says |
|---|---|---|
| Pine, fir, spruce | Yes | Minwax names them as soft woods that stain unevenly |
| Birch | Yes | Listed on the Minwax product page as a wood where it is especially necessary |
| Maple | Yes | Listed as a porous wood that needs it |
| Alder, aspen | Yes | Both appear in Minwax’s lists |
| Cherry, poplar | Test first | Not named in the Minwax pages I read; many finishers treat them as blotch-prone, so a test board decides |
| Oak, walnut | Usually not | Not named by the maker as blotching woods; conditioner is optional, and a test board settles it |
Softwoods
Pine is the classic case. Boards cut from it mix soft earlywood and harder latewood, and stain sinks into some areas and sits on others. If you’re staining a pine bookcase, a bench or a set of shelves, plan on conditioner as part of the job, not as an extra.
Hardwoods That Blotch
Maple and birch are hardwoods, but the makers still list them, because their tight, uneven pores take stain in patches. That’s why the species name matters more than the label “hardwood” or “softwood”. Cherry and poplar are the two I’d always put on a test board before committing, since the Minwax pages I read don’t name them either way.
Woods That Usually Don’t
Oak and walnut aren’t on the maker’s blotch lists. Open-pored woods like oak take stain through the pores and rarely show the patchy look pine does. A conditioner will still even the color, but it also lightens it, so on these woods it’s a choice, not a rule.
Why Wood Blotches
Blotching is uneven stain absorption. Minwax’s FAQ puts it plainly: some woods have a tendency to absorb stain unevenly. Areas that soak up more stain look dark, areas that soak up less look pale, and the result is a patchwork instead of a smooth tone. Streaks follow grain lines, and the pale and dark patches often repeat across the board.
Sanding makes it better or worse. Scratches left by a coarse grit hold extra stain and show up as dark lines. Dust packed into the pores blocks stain in some spots and not others. A surface sanded unevenly takes stain unevenly. Conditioner partly evens out the absorption, but it can’t hide scratches you left behind, which is why the sanding step comes first.
Sanding Before Conditioner
Minwax’s directions for its conditioner start with bare or stripped wood that is clean and dry, sanded with 220 grit following the grain, with the dust removed afterward. That’s the finish line for the sanding. You get there by stepping through grits so each one removes the scratches of the one before; my guide to what grit sandpaper to use on wood lays out the sequence, and my how to sand wood guide covers technique.
The Final Grit
Minwax’s conditioner page says 220. Its finishing FAQ adds a related point: for a darker color, finish the sanding with a coarser grit, 150 to 180, because the coarser surface lets the wood take in more stain. The reverse follows: sand finer and the color comes out lighter. Pick the final grit for the color you want, then keep it the same across every board in the project, so the color matches.
Sand With the Grain, Then Clean
Cross-grain scratches show up under stain as dark lines you can’t brush out. Sand with the grain on the last two grits, wipe off the dust with a vacuum and a clean cloth, and check the board under a raking light. Any scratch you can see now will be much darker after staining. For a flat board, a random orbital sander handles the grits quickly; use a sanding block for edges and for the last pass with the grain.
⚠️ Important
Don’t sand out the conditioner. Sand first, condition second. Minwax’s water-based conditioner is the exception, because its directions include a light sanding after the conditioner has dried, to smooth raised grain (see below).
How to Apply Pre-Stain Wood Conditioner
These steps follow the Minwax Pre-Stain Wood Conditioner directions, which I’ve read on the maker’s pages. Check the can you buy, because other brands give different times.
- Start with bare, clean, dry wood sanded to 220 grit with the dust removed.
- Stir well before and during use, and don’t thin it.
- Brush or wipe on a generous coat with the grain. Very absorbent woods may need a second coat, according to Minwax’s FAQ.
- Let it penetrate for 5 to 15 minutes.
- Wipe off the excess with a clean, dry cloth.
- Stain within 2 hours. Minwax says to apply the stain within two hours of the conditioner.
- Finish with a clear protective coat once the stain has dried.
How Long to Wait Before Staining
For the oil-based Minwax conditioner, the wait is built into the directions: wipe the excess after 5 to 15 minutes, then stain within 2 hours. Minwax lists the dry time as 15 minutes. If you wait much longer than the window, the conditioner can dry down and block stain, which is why the label sets an upper limit. I don’t have a maker source for what exactly goes wrong past two hours, so I’d treat the window as a hard line and follow your can.
Coverage
Minwax lists coverage at 100 to 125 square feet per quart, interior use only. Small projects like a shelf or a drawer front need only the half-pint size.
One Coat or Two
One coat is the default. A second coat only makes sense on very absorbent boards, and then it’s the conditioner that gets the second coat, not extra stain over blotchy areas. Wipe off the excess as the label says, and don’t leave puddles to dry on the surface.
Oil-Based vs Water-Based Conditioner
The conditioner has to match the stain. Minwax makes separate conditioners for water-based and oil-based stains, per its FAQ. The oil-based Pre-Stain Wood Conditioner page describes it as promoting uniform acceptance of oil-based wood stain. Minwax’s water-based version is described as working with water-based stains, so mixing the two is where people go wrong.
The Water-Based Version
The Minwax Water Based Pre-Stain Wood Conditioner has different directions: let it penetrate for 1 to 5 minutes, wipe off the excess, and after 15 to 30 minutes lightly sand with fine sandpaper to smooth raised grain. Minwax says it helps control grain raising on both soft and hard woods, and the page doesn’t give a stain window; it says to apply the stain according to the label of the stain. The coverage is 100 to 125 square feet per quart, one coat.
Varathane and Other Brands
Varathane, General Finishes, Old Masters and others all sell conditioners, and wait times differ between them. I couldn’t confirm Varathane’s current label wording from the maker, so I’m not quoting it here. Read the can, and note whether it says oil-based, water-based or both.
Alternatives: Gel Stain, Washcoat and Sanding Sealer
Gel Stain
Minwax’s FAQ says gel stains are heavy-bodied and don’t dive as deep into the wood as regular stains do. Because they sit nearer the surface, they’re less affected by the wood’s condition, which can give a more even result on difficult woods, and Minwax suggests considering its Gel Stain on them. The trade-off is that the color reads more like a coat than a stain, and it hides less of the grain.
Washcoat
A washcoat is a thin coat of the finish you plan to use, often a thinned shellac or varnish, brushed on before the stain so it partly seals the pores. It does the same job as conditioner, with the same side effect: the color comes out lighter. I don’t have a maker source for a mix ratio, so I’m not giving one. Use the thinning instructions on the can of finish you plan to use, and try it on a board first.
Sanding Sealer
A sanding sealer does a similar job but is sold as a ready product that sands smooth and gives a base for the topcoat. My guide to sanding sealer explains what it is and when it helps. On blotch-prone wood, sealer under stain behaves like a washcoat: less stain gets in, and the color is lighter.
Can You Make Your Own?
People do, with thinned finish or even diluted glue, but no maker publishes a home recipe, and a mix that’s too strong seals the wood so the stain can’t enter. If you want a predictable result, buy the product; if you try a homemade one, do it only on scrap.
Test Board First
Every one of the sources above ends in the same place: try it on a scrap. Take an offcut of the same board, sand it through your exact sequence to the same final grit, apply conditioner the way you will on the project, wait the same time, then stain and finish half of it. Compare the finished half with a bare, stained half.
- Use the same board. Pieces of the same species can differ from board to board.
- Keep the same time. The wait between conditioner and stain changes the color.
- Look in daylight. Blotches that vanish under a shop light show up by a window.
- Let it dry fully. A wet stain looks darker and more even than it will be.
If the stain-only half looks fine, you may not need the conditioner on that wood. If it blotches, you have your answer, and you haven’t lost the project.
The Products I’d Use
The product facts below are from the makers’ own pages, and the Amazon listings for the items that don’t have one. I don’t show customer ratings or prices, which change daily.
Minwax Pre-Stain Wood Conditioner
Best Conditioner for Pine and Other Soft Woods Under Oil-Based Stain
This is the one I’d start with, because the maker’s directions are complete and specific. Minwax says it can go over any wood and is especially necessary on pine, alder, birch and maple. The sequence is sand to 220, brush on, wait 5 to 15 minutes, wipe off, stain within 2 hours. It’s for interior use, and Minwax lists coverage at 100 to 125 square feet per quart.
- ✅ Complete directions with times
- ✅ Names the woods it is meant for
- ✅ Available in half-pint, quart and gallon sizes
- ❌ Interior use only
- ❌ Meant for oil-based stain; water-based stain needs the water-based version
Best For: Pine, birch, maple and alder furniture and shelving stained with oil-based stain.
Minwax Water Based Pre-Stain Wood Conditioner

Best Conditioner for Water-Based Stain
Use this version, not the oil-based one, under water-based stain. Minwax’s page calls for a short 1 to 5 minute penetration, a wipe-off, and a light sanding after 15 to 30 minutes to flatten raised grain. Check that the can says water-based before you buy.
Best For: Projects finished with water-based stain.
Minwax Wood Finish Stain

The Stain That Goes Over the Conditioner
Conditioner only matters if you stain within the window, so have the stain open and the brush ready before you start. Minwax’s directions say to apply the stain within two hours of the conditioner. Check the color on your test board, and finish with a clear protective coat once the stain has dried.
- ✅ Same brand as the conditioner, so the directions line up
- ❌ Color on pine depends on the conditioner and the final grit
Best For: Pairing with the Minwax conditioner on interior projects.
Varathane Premium Fast Dry Wood Stain
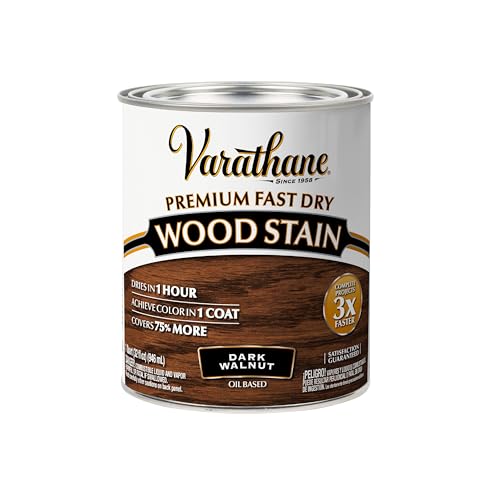
A Second Stain Brand to Compare on Your Test Board
If you’re not set on Minwax, Varathane is the other stain I’d put on the test board next to it. I’m not stating its drying time or its conditioner pairing here, because I couldn’t open the maker’s label this session. Read the can for both, and use a conditioner the label names.
- ✅ Easy to compare against Minwax on scrap
- ❌ Wait times not stated here; check the can
Best For: Comparing a second stain brand on scrap before committing.
Bosch ROS20VSC Random Orbital Sander

Best Sander for Prepping Boards Before Stain
Even stain starts with an even surface, and a random orbital sander is the tool that leaves one without the swirl marks of a plain orbital. The ROS20VSC is the one I’d pick for this job in a home shop. I’m not listing its specs because I haven’t confirmed them against Bosch’s page this session; the Amazon listing has them. See my how to sand wood guide for technique.
- ✅ Random orbit pattern avoids swirl marks
- ✅ Takes the full 80 to 220 sequence
- ❌ Specs not stated here; read the listing
Best For: Tabletops, panels and shelves before conditioner and stain.
Sanding Discs, 80 to 220 Grit Assortment

Best Way to Cover the Whole Grit Sequence
An assortment lets you step from 80 up to 220 without a trip to the store, which matters because the last grit is the one the conditioner and stain react to. Minwax’s directions end at 220. The POWERTEC pack linked here is 5-inch, 8-hole discs in 80, 100, 120, 150 and 220 grit, so check that your sander takes a 5-inch, 8-hole pad before you order.
- ✅ Covers 80 through 220 in one pack
- ✅ Lets you match the final grit across every board
- ❌ 5-inch, 8-hole only; check your pad before buying
Best For: Stepping through grits before conditioning and staining.
How I Put This Guide Together
The conditioner and stain facts come from Minwax’s pages for its Pre-Stain Wood Conditioner, its Water Based Pre-Stain Wood Conditioner and its woodworking FAQ. Where I couldn’t open a maker’s page, I say so and leave the fact out. The sanding sequence matches my wood grit guide, and the full staining sequence is in my how to stain wood guide. I don’t show customer ratings or prices. More on how I choose the products I recommend.
🏆 The Verdict
Use pre-stain wood conditioner on pine, birch, maple, alder and other soft or porous woods, sand to 220 first, match the conditioner to your stain, and stain inside the window on the can. Try gel stain or a washcoat if you’d rather not condition, and always run a test board. For oil-based stain I’d reach for Minwax Pre-Stain Wood Conditioner, with a random orbital sander doing the prep.
❓ Frequently Asked Questions
Do you really need Pre-Stain Wood Conditioner?+
What is the best wood conditioner to use before staining?+
How do you use Minwax pre-stain wood conditioner?+
What to use instead of Pre-Stain Wood Conditioner?+
Can I make my own pre-stain conditioner?+
Conclusion
Conditioner is cheap insurance on pine, birch, maple and alder, and a test board tells you whether the rest of your wood needs it. Get the sanding right first, because even conditioner can’t hide scratches: finish at the grit the label names, clean the dust, and stain inside the time window. When the wood is stained, my guide to how to stain wood takes you through the remaining steps, and the sanding sealer guide covers the coat that goes on top.

