
As an Amazon Associate I earn from qualifying purchases. All claims are strictly my personal opinion.
Use 150-grit sandpaper or a 220-grit mesh screen to sand drywall joint compound. That is what USG, the maker of Sheetrock compound, specifies: when you dry-sand, use nothing coarser than 150-grit paper or 220-grit abrasive mesh cloth. Save 220-grit paper or a fine sponge for a light pass after primer, and keep coarser grits like 100 or 120 for hard ridges in setting-type compound, if you use them at all.
Below is the grit for every stage, the difference between a sanding sponge, a pole sander and a power drywall sander, how to tell when the wall is sanded enough, and the times you shouldn’t sand at all.

Drywall Sandpaper Grit Chart
| Grit | Use it for | Watch out for |
|---|---|---|
| 100-120 | Knocking down hard ridges in setting-type (hot) compound | Coarser than USG allows on its ready-mixed compound. Gouges soft mud and scuffs the face paper. |
| 150 paper ⭐ | The main grit for taped seams, screw spots, corner bead and patches | Slow on thick ridges: knock those off with your taping knife first |
| 220 mesh screen | The same job on a pole sander; USG treats it as the equivalent of 150 paper | Cuts harder than 220 paper, so don’t use it for the pass after primer |
| 220 paper or fine sponge | A light pass after primer, tiny spackle touch-ups | Clogs fast on bare compound and can polish it, so paint sheen looks uneven |
⚡ The Abrasives I’d Buy
For the main sanding by hand: Gator 150-grit drywall sheets on a hand sander.
On a pole sander: Gator 220-grit sanding screens, flipped when one side wears.
For corners and patches: a 3M dual-grit drywall sponge, used damp.
For the pass after primer: a 3M fine sanding sponge, with a light touch.
Not sanding drywall? The sandpaper grit chart and grit finder gives the sequence for wood, metal, car paint, plastics and more.
What Grit to Sand Drywall at Each Stage
Between Coats of Joint Compound
You don’t need sandpaper between most coats. USG’s instructions say to let each coat dry and “smooth lightly as required”, which usually means scraping off ridges and lumps with your taping knife before the next coat. If a coat dried with obvious tool marks, a quick pass with 150 grit keeps them from showing through the next one.
After the Final Coat of Mud
This is where most of the sanding happens. Go over the joints with 150-grit paper on a hand sander, or a 220-grit screen on a pole sander, feathering 6 to 8 inches beyond the edges of each joint. Sand only the compound and keep off the bare drywall paper as much as you can. If a joint still has a hard ridge, scrape it rather than reaching for coarser paper.
After Primer, Before Paint
Primer raises the paper fibers and shows every flaw. Once it’s dry, a very light pass with 220-grit paper or a fine sanding sponge knocks off the fuzz and specks. Don’t try to level anything at this stage: if a joint still shows, add a skim coat of compound, sand it and prime again.
Patches and Spackle
USG’s own patch instructions suggest a wet sponge to avoid dust and scuffing, or dry-sanding with 150-grit paper or 220-grit mesh. Spackle is soft, so press lightly or you will dish it out below the wall. My step-by-step is in how to sand a drywall patch.
Ceilings
Same grits as walls, 150 paper or a 220 screen, on a pole sander or a long-reach drywall sander, with even lighter pressure: gravity works against you and it’s easy to over-sand. Hold a bright light at a low angle so you can see what you are doing, and wear eye protection.
Setting-Type Compound
Setting-type (“hot”) compound dries much harder than ready-mixed mud. Many finishers use it only for the first coat and top it with an all-purpose or lightweight compound that sands easily. If you do have to sand a setting-type coat, some pros start at 100 or 120 to cut the ridges, then finish at 150. Test on a hidden spot first: hard compound next to soft paper is exactly where coarse grits gouge.
Sanding Sponge vs Pole Sander vs Drywall Sander
The grit stays the same whichever tool you use. What changes is how much wall you can cover, how flat the result is and how much dust you make.
| Tool | Best for | Abrasive | Dust | Cost |
|---|---|---|---|---|
| Sanding sponge | Patches, inside corners, around outlets, touch-ups | Medium/fine sides; fine after primer | Lowest when used damp | $ |
| Hand sander | One room, seams within reach | 150 paper or 220 screen | High | $ |
| Pole sander | Ceilings, tall walls, long seams | 220 screen or 150 paper | High, but it stays away from your face | $ |
| Power drywall sander | Basements, additions, whole-house work | Hook-and-loop discs, same 150 rule | Low with a vacuum attached | $$-$$$ |
Sanding Sponge
A sponge flexes into corners and around boxes where a flat pad can’t go, and you can rinse and reuse it. Used damp, it smooths compound with almost no airborne dust, which is why USG suggests a wet sponge for patches. The trade-off is flatness: a soft sponge follows small dips instead of bridging them, so it is a detail tool, not the way to do a whole wall.
Hand Sander and Pole Sander
Both hold a flat 4-1/4 x 11-1/4 inch sheet of paper or screen. The flat pad bridges low spots and levels the joint, which is what you want on long seams. A pole sander is the same pad on a swivel head and a long handle: it reaches ceilings and the tops of walls without a ladder, and it keeps the dust further from your face. Mesh screens suit poles best because they don’t tear on the swivel head and you can flip them.
Power Drywall Sander
A power drywall sander spins a large disc on a long boom and pulls the dust into a vacuum. For a single patch it is overkill. For a basement or an addition it does the main sanding far faster and with much less mess, and the dust control is worth it in a house you live in. The grit rule doesn’t change: use the finest disc that levels the joint, usually 150 or finer on all-purpose compound. I compare the DEWALT 20V MAX cordless, the Bosch GTR55-85 and the Festool Planex in my best sanders for walls and drywall. For a small job, a regular 1/4-sheet sander also works: see sheet sander vs random orbital sander.
My Picks for Each Stage
Gator Drywall Sanding Sheets, 150 Grit

Best for the Main Sanding
150 grit is the grit USG names for dry-sanding its compound, and these sheets are made for it: silicon carbide grain that Gator says leaves a smoother finish on drywall, a resin coating that resists heat and humidity, and a hook-and-loop backing for quick changes on a hand sander. Gator rates 120 and 150 for moderate sanding and blending of compound.
- ✅ The grit USG recommends
- ✅ Silicon carbide cuts fast on mud
- ✅ Hook-and-loop for quick changes
- ❌ Six sheets: buy two packs for a whole room
Gator Drywall Sanding Screens, 220 Grit
Best for a Pole Sander
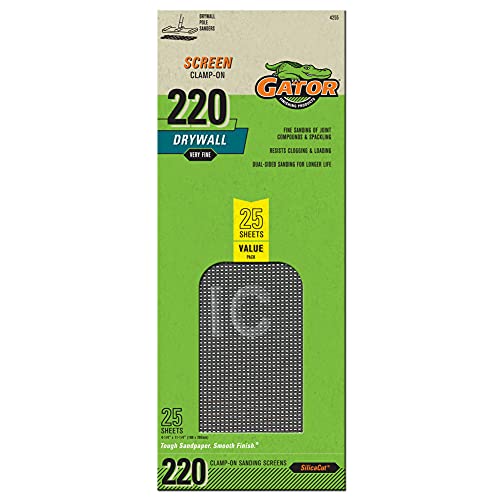
USG lists 220-grit mesh as the alternative to 150 paper, and this pack gives you 25 screens precut and notched to fit most drywall pole sanders. The open mesh lets dust fall through instead of clogging, it doesn’t tear like paper on a swivel head, and both sides are abrasive, so you flip it when the first side wears.
- ✅ USG’s mesh equivalent of 150 paper
- ✅ Precut for pole sanders
- ✅ Two usable sides
- ❌ Cuts harder than 220 paper: not for the pass after primer
3M Drywall Sanding Sponge, Fine/Medium

Best for Corners and Patches
A dual-grit sponge: the medium side removes compound, the fine side smooths it, so one block covers a whole patch. The foam flexes to sand flat or contoured surfaces, which makes it the easiest tool for inside corners and around outlets, and you can rinse and reuse it. Used damp, it keeps dust down in a lived-in room.
- ✅ Two grits in one block
- ✅ Flexes into corners and contours
- ✅ Rinse and reuse
- ❌ Small block: slow on whole walls
3M Sanding Sponge Block, Fine, Extra Large

Best for the Pass After Primer
After primer you want a gentle, even touch, and a fine-grit sponge gives exactly that. This 3M block is extra large at 2-7/8 x 8 in, so it bridges small dips instead of following them, and it works wet or dry on drywall, paint and wood. Keep one for the final check before paint.
- ✅ Large flat face for an even finish
- ✅ Wet or dry, reusable
- ❌ Not for leveling bare mud
Putting the Grits in Order
- Scrape before you sand. Knocking ridges off with a taping knife is what lets 150 grit do the job, so you never need coarser paper.
- 150 paper or a 220 screen on the mud. Light pressure on the joints and screw spots, feathering the edges into the wall.
- 220 paper or a fine sponge after primer, one light pass, then paint.
The full process, from prep and corners to ceilings and dust control, is in my guide on how to sand drywall. To keep dust off everything else, a shop vac with a fine filter on the sander’s port helps a lot: see my picks for the best shop vac for dust collection.
💡 Pro Tip
If the paper fuzzes up where you sanded through the compound, don’t sand it more: that makes it worse. Seal it with primer, then apply a thin skim coat of compound and sand that lightly at 150.
How to Tell When Drywall Is Sanded Enough
- The raking light shows no ridges or tool marks. Move the light along each joint; shadows mean high spots.
- Your hand slides over the joint without catching. Run a flat palm across it, not your fingertips.
- The edges of the compound disappear into the paper. You shouldn’t feel or see a step where the mud ends.
- There is no fuzzy paper. Fuzz means you went through the compound: stop, prime and skim that spot.
Primer is the final check. It shows every flaw sanding missed, so look again in raking light after the first coat of primer, before the paint.
Should You Use 400 or 600 Grit Before Painting Drywall?
No. Those are grits for sanding between coats of varnish or wet sanding car paint, not for drywall. Paint needs a little texture to grip, and USG says surfaces must be dry, dust-free and “not glossy” before decorating: very fine paper polishes the compound instead. Stop at 150 on the mud and 220 for the light pass after primer.
When Not to Sand Drywall
- When the mud is still damp. It gums up the paper and tears out of the joint.
- On the bare drywall paper. Sanding the paper face raises fuzz that shows through paint.
- When a wet sponge will do. For small touch-ups in a furnished room, a damp sponge smooths compound with almost no dust.
- In older homes, before testing. Joint compound in homes built before about 1980 may contain asbestos, and old paint may contain lead. Have it tested before you sand.
🏆 The Short Version
150-grit paper or a 220-grit screen for joint compound, as USG recommends, and 220 paper or a fine sponge for a light pass after primer. Scrape ridges instead of reaching for coarse paper. Use a sponge for corners and patches, a pole sander for ceilings and long seams, and a power drywall sander for whole rooms. Light pressure every time.
❓ Frequently Asked Questions
Is 220 grit good for drywall?
Is 120 grit sandpaper good for drywall?
How fine should you sand drywall?
What grit sandpaper for drywall spackle?
When should you not sand drywall?
Should I use a drywall sanding screen or sandpaper?
What grit sandpaper for a drywall ceiling?
Working on a tricky wall or ceiling? Ask in the comments and I’ll help you pick the grit and the tool.

