
As an Amazon Associate I earn from qualifying purchases. All claims are strictly my personal opinion.
Wood filler used in this guide

DAP Plastic Wood-X with DryDex
A latex filler that goes on pink and dries natural, so you know when to sand; it can be sanded, drilled, stained and painted.

To use wood filler, clean the hole down to sound, dry wood, mask the area around it, press the filler in firmly with a flexible putty knife and leave it slightly proud of the surface. Fill anything deeper than about 1/4″ in layers, let the filler dry completely, then sand it flush with a block and remove every trace of dust before you paint, stain or clear-coat. Blotches come from filler smeared into the grain around the hole, so keep it inside the repair.
This guide covers the whole job: tools, step-by-step application, drying times from the makers’ data sheets, sanding, and the part most repairs get wrong, staining and painting over filler without a pale halo or a dull patch. To pick a product, my best wood filler roundup compares five by type of repair; if you’re not sure filler is the right product at all, start with wood filler vs wood putty.
⚡ Quick Answer
Prep: clean, dry, sound wood; dig out loose fibers; tape around the hole.
Fill: press it in hard, leave it slightly proud, scrape the surface clean. Layers of about 1/4″ for deep holes.
Dry: 2 to 6 hours for shallow fills, up to 36 hours for deep ones with a latex filler; 15 minutes for a two-part filler.
Finish: sand flush with a block, dust off, then paint, or test your stain on scrap before you trust it.
Wood Filler, Putty or Grain Filler?
Wood filler goes into bare wood before you sand and finish: it dries hard and becomes part of the surface. Wood putty goes on after the finish, stays soft and is wiped off, not sanded. Grain filler is a thin paste spread over open-grain wood like oak or mahogany to level the pores before a smooth finish; it isn’t for holes. Within wood fillers, the size of the damage decides:
- Nail holes, small cracks and dents: a one-part latex filler.
- Holes up to about 3/4″: latex filler in layers of about 1/4″.
- Deeper holes, rot and missing chunks: a two-part filler or epoxy putty, which cure by reaction and don’t shrink.
- Loose or broken joints: no filler at all. Filler isn’t an adhesive; use wood glue and clamps.
What You’ll Use
A filler for the size of the repair, a flexible knife to put it in, and something flat to sand it with. Product facts come from the makers’ data sheets and product pages.
DAP Plastic Wood-X with DryDex
Wood Filler Used in This Guide
A latex, knife-grade filler that suits most of the repairs in this guide: nail holes, gouges, cracks and chipped edges in furniture, trim, cabinets and doors. Its DryDex indicator goes on pink and turns natural when the filler is dry, which removes the most common mistake, sanding too soon. DAP’s data sheet lists 2 to 6 hours for shallow fills up to 1/8″ and up to 36 hours for fills of 1/4″ and deeper, and says that once dry it can be sanded, planed, cut, drilled, screwed, nailed, stained and painted. The thick paste stays put on vertical surfaces and corners, and cleans up with water while wet.
- ✅ Pink-to-natural dry indicator
- ✅ Holds on edges and vertical surfaces
- ✅ Takes screws and nails once dry
- ❌ Deep fills take a day and a half
- ❌ Stain match still needs a test
Best For: Nail holes, cracks, dents and chipped edges in wood you’ll paint or finish.
Minwax Stainable Wood Filler
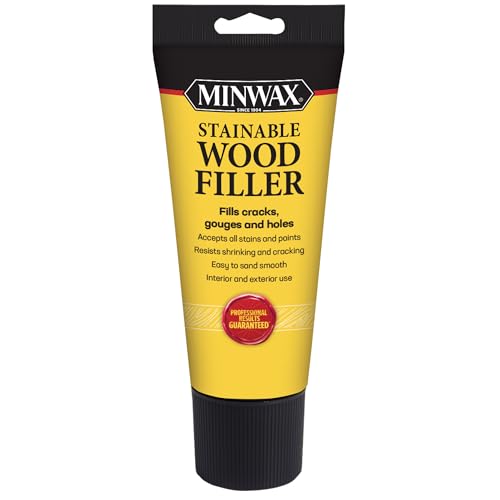
For Wood You’ll Stain
A latex filler that Minwax formulates to accept its penetrating stains: Wood Finish, Gel Stain and Water-Based Stain. It’s made for cracks, small gouges, nail holes and knot holes in unfinished wood, indoors or out. Minwax’s directions are the clearest of any filler maker on the limits: don’t use it on holes larger than 3/4″, fill deeper holes in 1/4″ layers (2 to 6 hours each), expect most shallow repairs to dry within 2 hours, and test your stain over the filler on scrap wood before you fill the real piece. For rotted wood, Minwax says to harden the fibers with its Wood Hardener first.
- ✅ Formulated for Minwax stains
- ✅ Shallow fills dry in about 2 hours
- ✅ Interior and exterior
- ❌ Not for holes over 3/4″
- ❌ Unfinished wood only
Best For: Furniture, tabletops and trim you’re about to stain.
3M Bondo Wood Filler

For Large Holes and Rot
When a hole is too deep or wide for a latex filler, switch to a two-part filler. Bondo Wood Filler is mixed with the cream hardener in the box and cures by chemical reaction, so 3M describes the repair as permanent and non-shrinking, and it’s sandable in 15 minutes. It’s sold for damaged and rotted wood on interior and exterior surfaces such as trim, siding, window sills, doors and furniture, and it’s paintable, stainable and water resistant. The trade-off is a short working time once mixed and a strong smell: mix small batches, ventilate, and wear the rubber gloves 3M lists as an extra.
- ✅ Fills deep holes in one go
- ✅ Sandable in 15 minutes
- ✅ Non-shrinking
- ❌ Minutes of working time once mixed
- ❌ Strong odor
Best For: Holes deeper than 1/4″, broken edges and rotted exterior wood.
Red Devil 4824 1-1/2″ Flex Putty Knife
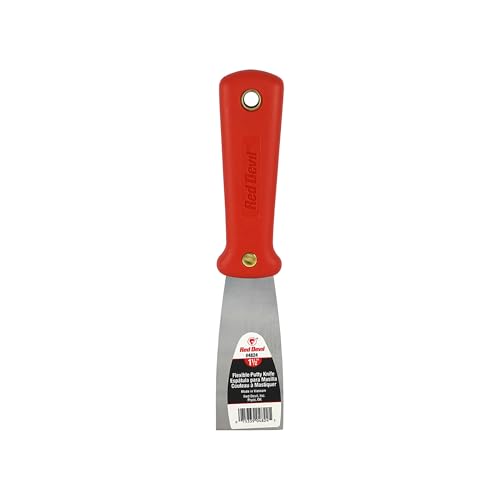
The Applicator
A narrow, flexible putty knife is the right tool for most wood filler: the 1-1/2″ blade fits nail holes and trim, and the flex lets you press filler in hard and then scrape the surface clean in one stroke, which is how you keep filler out of the surrounding grain. Red Devil’s blade is high-carbon steel that runs through the solvent-resistant handle.
- ✅ Flexible blade presses and scrapes clean
- ✅ Narrow enough for trim
- ✅ Inexpensive
- ❌ Too narrow for large patches
Best For: Pressing filler into holes and scraping the surface clean.
3M Single Angle Sanding Sponge, Fine

For Sanding Flush
Sand filler with something flat behind the paper. A firm sanding sponge or block keeps the patch level with the wood around it, where loose paper under your fingers dishes the soft filler and leaves a hollow that shows under paint or finish. This 3M sponge is a large all-purpose block in fine grit with one angled edge, and it can be used wet or dry and rinsed out to reuse.
- ✅ Keeps the patch flat
- ✅ Angled edge for corners
- ✅ Washable and reusable
- ❌ One grit per sponge
Best For: Sanding patches flush by hand on furniture and trim.
You’ll also want masking tape, a stiff knife or old chisel to clean out the hole, a damp rag, sandpaper in 120 and 180 or 220 grit (see my sandpaper grit chart), a vacuum or tack cloth, and scrap wood of the same species if you plan to stain.
How to Use Wood Filler, Step by Step
1. Clean the Hole Down to Sound Wood
Both DAP and Minwax start their directions the same way: the surface must be clean, dry and sound. Pick out splinters and loose fibers, vacuum the dust out, and wipe off oil or wax. On old finished furniture, scuff around the hole; DAP’s data sheet calls for de-glossing a surface if needed so the filler bonds. If the wood is soft or rotten, dig back to firm wood; Minwax recommends its Wood Hardener on rotted fibers before filling. DAP also specifies that the surface, the filler and the air should all be above 40°F.
2. Mask Around the Repair
DAP recommends masking tape around the damage before you fill. It keeps filler out of the surrounding grain, which is what causes blotches under stain, and it limits how much you have to sand. A single nail hole only needs a careful knife; a crack, a gouge or anything you’ll stain is worth taping.
3. Press It In Hard
Stir the filler with the knife (DAP’s directions), take a small amount on the tip of the blade, and press it into the hole firmly from more than one direction so it fills the bottom and pushes out the air. Filler that only bridges the top of a hole leaves a void that sinks or cracks later.
4. Leave It Slightly Proud, Then Scrape the Surface Clean
Both makers say the same thing: overfill slightly, so there’s material to sand back, but don’t overspread onto the surrounding surface. Leave a small mound over the hole and drag the flexible blade across it at a low angle to clean the wood around it. Wipe any smear off with a damp rag while the filler is wet; once dry, it has to be sanded or scraped away.
5. Fill Deep Holes in Layers
A latex filler dries by evaporation, so a thick blob dries slowly from the outside in and can shrink or crack. For damage deeper than 1/4″, DAP says to apply thin layers and let each dry before the next; Minwax gives the same figure, 1/4″ at a time at 2 to 6 hours per layer, and sets an upper limit of 3/4″ for its stainable filler. Beyond that, or when a corner is missing, use a two-part filler like Bondo Wood Filler.
6. Let It Dry Completely
Sanding too early is the most common way to ruin a repair: the outside feels hard, the inside is still soft, and the patch tears out or sinks a day later. Drying depends on depth, temperature and humidity. The makers’ figures:
- DAP Plastic Wood-X: 2 to 6 hours for shallow fills up to 1/8″, up to 36 hours for fills of 1/4″ and deeper. It turns from pink to natural when dry.
- Minwax Stainable Wood Filler: most shallow repairs within 2 hours; 2 to 6 hours per 1/4″ layer.
- Bondo Wood Filler: sandable in 15 minutes, because it cures by reaction rather than drying.
If you’re not sure, wait longer. A fingernail pressed into the center of the patch tells you more than touching the edge.
7. Sand It Flush
Sand the patch level with the grain, using a block or firm sponge. DAP calls for medium sandpaper on its filler: start around 120 grit to knock down the mound and finish with the grit you’re using on the rest of the piece, usually 180 or 220. Keep the block flat and stop when the patch is level; filler is softer than most hardwoods, and loose paper scoops it into a shallow dish that shows under gloss paint. Then sand a little past the edge of the repair to remove any film of filler left on the grain. If the patch has sunk or shows a pinhole, add a thin skim coat and sand again. My guide to what grit sandpaper for wood covers the full sequence.
8. Remove the Dust
Vacuum and wipe with a tack cloth or a barely damp rag; Minwax’s directions say to remove all sanding residue before staining, topcoating or painting. Dust left in the pores around the patch takes stain differently from the wood, the same way smeared filler does.
💡 Pro Tip: Check Your Patches With a Raking Light
Before you fill, and again after you sand, hold a work light low to the surface so it skims across the wood. Holes, dents, a sunken patch or a film of filler left on the grain all throw a shadow or a dull sheen that overhead light hides. Mark each spot with a pencil tick on the tape so none gets missed.
How to Stain Over Wood Filler Without Blotches
This is where most filler repairs fail. Wood takes stain through its pores and open fibers; filler has neither, so even a filler sold as stainable rarely ends up exactly the color of the wood around it. Worse, filler smeared beyond the hole seals the surrounding grain, and that ring takes less stain than the rest of the board: a pale halo bigger than the hole itself. Four ways to get a repair that disappears:
Test on Scrap First
Both DAP and Minwax tell you to test your stain over the filler on scrap wood before you fill the real piece. Drill a few holes in an offcut of the same species, fill and sand them the same way, and stain them with the same stain and number of coats. Minwax formulates its Stainable Wood Filler for its own stains, so if you’re using one, that pairing is the best starting point; the test is still required.
Keep Filler Off the Grain
Masking tape, a clean scrape with the knife, a damp-rag wipe while the filler is wet, and sanding a little past the edge of the patch: these four habits prevent the halo, and no stain trick fixes it afterward.
Or Stain First, Then Fill
DAP’s product page puts it plainly: if the wood is to be stained, stain before filling. Stain and finish the piece, then fill small holes with a color-matched wood putty or wax stick, which go on finished wood and never need sanding. It’s the most reliable way to hide nail holes in stained trim and furniture.
Touch Up the Color
If a patch still reads lighter after staining, darken it with a stain marker or a fine artist’s brush and a little of the same stain before the topcoat, on the patch only. A few painted grain lines that continue the lines of the wood make the eye stop seeing the repair. My guide on how to stain wood covers the rest of the piece.
How to Paint or Clear-Coat Over Wood Filler
Paint hides color differences, so painted repairs are the easy case. DAP says its filler can take latex paint immediately after sanding, or oil-based paint after 12 hours. Prime the patch, or the whole piece, before the color coats: filler absorbs paint differently from wood, and an unprimed patch often shows as a dull spot in satin or gloss paint. Outdoors, DAP says repairs exposed to water must be sealed with a waterproof coating before they get wet.
Under a clear finish a filler patch stays visible, so choose a filler close to the wood’s finished color and brush the first coat lightly over it. For polyurethane, see my guide on how to apply polyurethane.
Wood Filler for Specific Repairs
Nail Holes in Trim
Set the nail heads just below the surface, fill each hole with a dab of filler on the tip of the knife and scrape it flush in one stroke. On trim you’ll paint, that’s all it needs before a light sanding and primer. On trim that’s already finished, use putty or a wax stick instead.
Cracks and Splits
Clean the crack out, press the filler along it with the knife held across the crack, and scrape it level. A crack that opens and closes with the seasons will push a hard filler out again; a board that has split right through needs glue and clamps, not filler.
Broken Edges and Corners
DAP says its thick, knife-grade filler can be molded and sculpted, which suits corners and unsupported surfaces. Build the corner slightly oversize in layers, let it dry, then shape it back with a block or file. For a corner that takes knocks, a two-part filler or epoxy putty lasts longer. For stripped hinge screws, a glued-in hardwood dowel is stronger than any filler.
Common Wood Filler Mistakes
- Sanding before it’s dry: the patch tears out or sinks. Wait the full drying time, longer for deep fills.
- Filler smeared on the grain: pale halo under stain. Tape, scrape clean, sand past the edge.
- Sanding with paper in your hand: a dished patch that shows under paint. Use a block.
- Skipping the stain test: a repair darker or lighter than the wood. Test on scrap, or stain first and use putty.
- Using filler on finished wood: you’d have to sand through the finish. Use putty instead.
🏆 The Short Version
Clean the hole, tape around it, press the filler in with a flexible knife and leave it just proud of the surface without smearing it on the grain. Fill deep holes in layers, wait until it’s completely dry, sand it flush with a block and dust off. For most repairs, use a latex filler like DAP Plastic Wood-X; for wood you’ll stain, Minwax Stainable Wood Filler and a test on scrap; for big holes and rot, a two-part filler like Bondo.
❓ Frequently Asked Questions
How long should I leave wood filler to dry?+
Can you paint over wood filler?+
What is the best wood filler for cabinet doors?+
Can you stain wood filler?+
How do you use wood filler on large holes?+
How do you use wood filler on edges and corners?+
Should you use wood filler or caulk on trim?+
Conclusion
Wood filler works when the hole is clean, the filler is pressed in and kept inside the repair, deep holes are built up in layers, and nothing gets sanded until it’s completely dry. Sand flush with a block, dust off, and the patch is ready for primer and paint. For stain, test on scrap first, or stain before you fill and use putty. Have a repair you’re not sure how to fill? Ask in the comments.

