

As an Amazon Associate I earn from qualifying purchases. All claims are strictly my personal opinion.

If you’ve ever tried to sand a door with just one tool, you already know how quickly that plan falls apart. Flat faces, recessed panels, moulding profiles, tight corners around glass — a single sander simply can’t handle all of it. After sanding more doors than I care to count across interior paint jobs, exterior refinishes, and new installs, I’ve landed on a reliable toolkit that covers every zone a door throws at you. This guide is part of my broader Blog on all things sanding and woodworking, and here I’m sharing the exact picks I’d reach for in 2026.
What ties the best door sanders together is a short checklist: lightweight enough for one-handed vertical use, nimble enough to navigate hardware and moulding detail, and capable of producing a genuinely finish-ready surface. The tools below cover the full range — from premium all-day workhorses to the specialist detail sander that quietly becomes indispensable the moment you start on a panel door.
⚡ Quick Pick
In a hurry? My top choice is the Mirka DEOS Electric Handheld Sander — a brushless-motor orbital that’s whisper-smooth, nearly vibration-free, and purpose-built for door sanding in tight spaces.
If you want a solid mid-range option, go with the Bosch ROS20VSC — it delivers professional swirl-free results at a fraction of the top-tier price.
For the trickiest panel corners and moulding detail, the BLACK+DECKER Mouse Detail Sander is the specialist finishing move that gets you from 80% done to truly complete.
Best Sanders for Doors Comparison
I tested and researched each of these sanders specifically for door work — weighing factors like pad size, vibration, one-handed control, dust collection, and how each handles the transition between flat faces and detailed panel work. Here’s how they stack up side by side.
| Product | ⭐ Mirka DEOS Handheld Sander 🏆 EDITOR’S CHOICE |
Festool ETS EC150/5 EQ-Plus | Festool ETS 125 REQ-Plus | Bosch ROS20VSC | BLACK+DECKER BDEMS600 Mouse |
|---|---|---|---|---|---|
| Image | 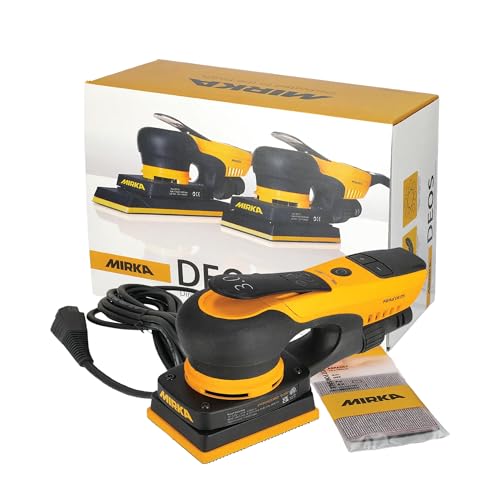 |
 |
 |
 |
 |
| Price | $$$$ | $$$$ | $$$ | $$ | $ |
| Pad Size | 3″ x 4″ (compact) | 6″ round | 5″ round | 5″ round | Triangular point |
| Motor Type | Brushless 250W electric | EC brushless electric | Brushed electric | Brushed electric | Brushed electric |
| Orbit / Stroke | 3mm orbit | 5mm orbit | 2.5mm orbit | Random orbital | Detail orbital |
| Weight | 0.97 kg (2.1 lbs) | ~1.2 kg | ~1.1 kg | ~1.2 kg | ~0.6 kg |
| Dust Collection | ✅ Extractor-ready | ✅ Best-in-class | ✅ Best-in-class | ✅ Microfilter canister | ✅ Basic bag |
| Variable Speed | ✅ Yes | ✅ Yes | ✅ Yes | ✅ Yes | ❌ No |
| Best For | Tight spaces, all door types | Large flush door faces | Glazed & panel doors | Best value all-rounder | Corners & moulding detail |
| Warranty | 2 years | 1 year | 1 year | 1 year | 2 years |
| Availability | Shop Now | Shop Now | Shop Now | Shop Now | Shop Now |
⚡ Key Takeaways
- My top pick is the Mirka DEOS Electric Handheld Sander — a brushless 250W orbital that’s purpose-built for tight spaces and delivers dust-free, near-zero-vibration sanding on every door type.
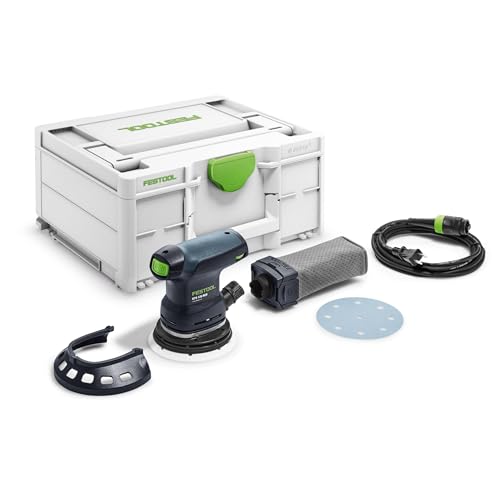
- Best for large flush door faces: the Festool ETS EC150/5 EQ-Plus — the bigger 6″ pad covers more ground per pass with exceptional finish quality.
- Best for glazed and panel doors: the Festool ETS 125 REQ-Plus — the compact 5″ pad navigates around window panes and panel moulding without a scratch.
- Best value all-rounder: the Bosch ROS20VSC — professional swirl-free results at a genuinely accessible price point.
- Essential detail specialist: the BLACK+DECKER Mouse Detail Sander — the only tool that properly reaches panel corners, moulding profiles, and recesses that stop every other sander cold.
💡 Pro Tip
Whenever possible, remove the door from its hinges before sanding. Laying it flat on sawhorses gives you far better control, prevents sawdust from settling into the hinge mortises, and means gravity isn’t working against you the whole time. It takes five minutes and makes a noticeable difference to the quality of the result — especially on the top rail and any recessed panel work.
Best Sanders for Doors Reviews
Below I’ve reviewed each sander in detail — covering what it does well, where it fits in a door-sanding workflow, and exactly who it’s best suited for. I’ve ordered them from my overall top pick down through the specialists, so you can read straight through or jump to the review that matches your needs.
Mirka DEOS Electric Handheld Sander
The Mirka DEOS is my top pick for door sanding in 2026, and it earns that spot by solving the exact problems that make door work tricky. Its compact 3″×4″ rectangular pad is a natural fit for the geometry of door stiles and rails — it follows the straight edges cleanly, gets closer to hardware and glass than any round pad can, and the 250W brushless motor delivers consistent power without the heat buildup that plagues brushed motors during long sessions. At just 0.97 kg, it’s genuinely comfortable to hold one-handed vertically against a mounted door for extended periods.
Key Features:
- ✅ 250W brushless motor for consistent, efficient performance
- ✅ 3mm orbit delivers smooth, swirl-free finishes
- ✅ Compact 3″×4″ pad fits naturally along door edges and stiles
- ✅ Ultra-lightweight at 0.97 kg — ideal for one-handed vertical sanding
- ✅ Dust extractor-compatible for near-zero airborne dust
- ✅ Low vibration design reduces fatigue over long sessions
- ✅ Variable speed control for delicate final passes
- ❌ Premium price point — a real investment
- ❌ Mirka-specific accessories add to running costs
What I liked most about the DEOS is how it handles the transition between zones on a panel door. Most sanders force you to stop and swap tools when you move from the flat stile to the area near a moulding border — the DEOS’s compact footprint lets you keep moving and get much closer to those transitions before you need to bring in the detail sander. Connected to a dust extractor, the workspace stays remarkably clean, which matters enormously when you’re refinishing a door in situ inside the house.
Best For
Anyone who wants one premium sander that handles all door types — from plain flush doors to detailed panel and glazed doors — with minimal fatigue and maximum finish quality. Particularly well suited to professional painters and serious DIYers who sand doors regularly.
Festool 576339 6-Inch Random Orbital Sander ETS EC150/5 EQ-Plus
The Festool ETS EC150/5 EQ-Plus steps up to a 6″ sanding pad while keeping the same compact, palm-friendly body that makes Festool sanders so well suited to door work. That larger pad means noticeably faster coverage on the flat faces of door panels and stiles — you cover the same area in fewer passes — and the EC brushless motor handles it without complaint, maintaining constant speed even under load. This is the tool I’d pick when the priority is speed on large, open door faces.
Key Features:
- ✅ 6″ pad — faster coverage on large door faces
- ✅ 5mm sanding stroke for efficient material removal
- ✅ EC technology with sanding pad brake for longer tool life
- ✅ Compact design weighing only 2.5 lbs (1.2 kg) for ergonomic use
- ✅ Vibration Control System technology for smoother, lower-fatigue operation
- ✅ Stepless speed pre-selection with constant speed under load
- ✅ Best-in-class Festool dust extraction
- ✅ Built to last many years of professional use
- ❌ Significant price premium over mid-range alternatives
- ❌ Festool proprietary sanding discs add ongoing running costs
What makes this tool exceptional for doors specifically is the combination of Festool’s EC brushless motor technology and their Vibration Control System. When you’re sanding a door vertically in place, fatigue accumulates fast — and this machine is almost eerily smooth in the hand. The dust extraction is Festool-class, meaning near-zero dust at the surface when connected to a compatible extractor, which matters significantly if you’re working inside the house. If you want the fastest, smoothest finish on flush and flat-panel doors and you’ll use it regularly, this is a tool you’ll still be reaching for a decade from now.
Best For
Professional woodworkers and serious DIYers who prioritize speed and finish quality on large flush doors and wide flat panel faces. If coverage rate is your number-one concern and budget is secondary, this is the pick.
Festool 576070 Random Orbital Sander ETS 125 REQ-Plus
One of the finest one-handed random orbital sanders ever made. The Festool ETS 125 REQ-Plus is more compact than the ETS EC150 above, which for door work is often a genuine advantage — the smaller 5″ pad navigates around window panes, glazing bars, and panel moulding with significantly less risk of accidentally sanding surrounding detail or glass. It’s the tool I’d pick for a door with complex panel work or glazing, whereas the ETS EC150 wins on a plain flush door where coverage speed matters more.
Key Features:
- ✅ Compact 5″ pad — more precise around glazing and panel moulding
- ✅ Ergonomically formed for comfortable use in any size hand
- ✅ Balanced vibration stop (VS) design for smooth, swirl-free finish
- ✅ Step-less variable speed for different surfaces and final passes
- ✅ Jetstream design for highly efficient dust removal and longer abrasive life
- ✅ Comes in new SysGen3 Systainer for easy storage and transport
- ✅ Built to last a lifetime with proper care
- ❌ Premium price — a significant investment
- ❌ Smaller pad means slightly slower coverage compared to the ETS EC150
The ergonomics are exceptional for vertical sanding — the body fits naturally in one hand, the balance is perfect, and the balanced vibration stop (VS) design produces a flawless finish with zero swirl marks even on delicate stained surfaces. Step-less variable speed lets you dial back for final passes on sensitive finishes. If you’re a professional who sands doors regularly and wants a tool that will still be working perfectly in ten years, this one earns its keep every single time.
Best For
Panel doors with glazing bars, decorative moulding, or any door where precision around details is more important than raw coverage speed. Also the go-to for fine stained finishes where swirl marks are unacceptable.
Bosch ROS20VSC Random Orbit Sander
The Bosch ROS20VSC is my recommendation for anyone who wants professional results without the Festool price tag — and it’s genuinely excellent value. For door sanding in particular, its two standout qualities are weight and maneuverability. It’s one of the lightest sanders in its class, which makes a real difference when you’re holding it vertically against a mounted door for extended periods, and the compact body handles exceptionally well with just one hand.
Key Features:
- ✅ Outstanding value — professional quality at an accessible price
- ✅ Very lightweight — ideal for one-handed vertical in-place sanding
- ✅ Variable speed dial for smooth finishing control
- ✅ Effective dust collection with microfilter canister
- ✅ Swirl-free random orbital finish on painted or stained doors
- ✅ Comes with a practical carrying case
- ❌ Not quite at Festool’s peak finish quality level
- ❌ Pad can warm up during very long continuous sessions
Performance-wise it punches well above its price: the variable speed is smooth and responsive, the dust collection with the microfilter canister is genuinely effective, and the swirl-free random orbital action produces a clean, professional finish on painted or stained door faces. For a homeowner or tradesperson who wants a high-quality, long-lasting door sander at a fair price, this is exactly where I’d point them. I’ve also found it pairs brilliantly with the work covered in my guide to the Best Sanders for Cabinets 2026 — many of the same techniques apply.
Best For
Homeowners and tradespeople who want professional door-sanding results without the premium tool investment. This is the sander I’d give to someone doing their first full house repaint — it will not let them down.
BLACK+DECKER BDEMS600 Mouse Detail Sander
The B+D Mouse is the secret weapon I hinted at in the introduction — and if you’re working on any door with panels, moulding, or glazing bars, it’s genuinely indispensable. The pointed triangular pad is designed specifically to reach the kinds of places that stop every other tool on this list cold: the tight inside corners of panel recesses, the profiled moulding that borders each panel, and the junction between a glazing bar and the door frame. These are exactly the spots where old paint builds up thickest and where a missed finish is most visible once the new coat goes on.
Key Features:
- ✅ Pointed triangular pad reaches panel corners and moulding profiles
- ✅ The only power tool option that handles detailed door work properly
- ✅ Detail finger attachment for even tighter spots
- ✅ Lightweight and easy to control in confined spaces
- ✅ Exceptional value — very budget-friendly
- ❌ Not a replacement for a pad sander on open flat faces
- ❌ Small pad means very slow coverage on large areas
Used after one of the orbital sanders above has handled the flat faces, the Mouse takes care of everything that remains. Think of it not as an alternative to the other tools on this list, but as the finishing move that gets you from 80% done to truly complete. It’s very well built for its price, easy to control in tight spaces, and so affordable that there’s really no reason not to own one if you ever sand a panel door. If you’re also tackling stairs with similar moulding profiles, I cover some great options in my Best Sanders for Stairs 2026 guide.
Best For
Anyone tackling panel doors, glazed doors, or any door with decorative moulding. This is a companion tool, not a standalone sander — but as a companion, it’s absolutely essential and nothing else comes close.
How to Sand a Door: In-Place vs. Removed
The two main scenarios for door sanding are quite different in practice, and knowing which approach suits your situation can save a lot of frustration. Here’s how I approach each one, and when I’d choose one over the other.
Sanding a Door In Place (Mounted)
Working on a mounted door is the more practical option for a quick refresh or a light scuff sand between coats. Use a lightweight one-handed sander — the Mirka DEOS, Bosch ROS20VSC, or either Festool model — and work methodically from top to bottom. Keep your sander moving at all times and use the lightest pressure that still removes material; gravity wants the tool to drag downward and leave heavier marks at the bottom of each pass if you’re not careful.
Tape off glass panes and hardware before you start, and keep a vacuum close by. Sanding dust on a vertical surface falls straight down and settles on every horizontal surface below — floor, skirting boards, furniture. A connected dust extractor like the Mirka’s makes this much more manageable indoors.
Sanding a Door Removed (Flat)
This is the better approach whenever a thorough job is needed. Remove the door, pull the hinges and hardware, and lay it flat across a pair of sawhorses at a comfortable working height. You now have full access to every surface including the top and bottom rails, the sander isn’t fighting gravity, and you can lean into the work with both hands when needed.
Work the flat faces first with your main orbital sander, handle the panel detail with the detail sander, then finish with hand sanding any remaining spots before reinstalling. The extra time to remove and rehang the door is small compared to the total job time — and the quality difference is significant. If you’re tackling a full house repaint, this is how the professionals do it. Pair that workflow with the right abrasives — my guide to the Best Sanders for Removing Paint 2026 goes into detail on grit selection for stripping painted doors.
Tackling Panel Doors
Panel doors require a zoned approach. Sand each flat section — the stiles, rails, and panel faces — independently with your main orbital sander, always working with the grain. Then switch to the detail sander for panel corners and moulding profiles, and finish with hand sanding any remaining tight spots before reinstalling.
The key is to work each zone to completion before moving to the next, rather than trying to do everything in one broad pass with one tool. It takes more patience but the result is a finish where nothing was missed — no paint ridges in panel corners, no unsanded strip along the moulding border.
⚠️ Important
On exterior doors, always check the condition of the wood before sanding. If there are soft, punky areas — particularly at the bottom rail where water collects — treat them with a wood hardener before sanding, not just sand them away. Sanding over soft, damaged wood removes material without solving the underlying problem and can turn a small issue into a much larger one.
How to Choose the Best Sander for Your Door
Not every door-sanding job calls for the same tool. Before spending money on a new sander, it’s worth thinking through these key factors to match the right tool to your specific project.
Door Type: Flush vs. Panel
Flush doors are the simplest case — a large flat surface on each face with minimal detail. A 5″ or 6″ random orbital sander handles these brilliantly, and coverage speed becomes more important than precision. The Festool ETS EC150 or the Mirka DEOS both excel here.
Panel doors are a different challenge entirely. You have flat stiles and rails, recessed panel faces, and profiled moulding borders — at least three distinct zones that each require a different approach. A good door-sanding kit for a panel door includes a main random orbital for the flat zones and a detail sander for everything else. Don’t try to do it all with one tool.
In-Place vs. Removed Sanding
If you’re sanding the door while it’s still mounted on its hinges, weight is the most important spec on your sander. Something like the Mirka DEOS at 0.97 kg feels completely different from a heavier tool after 30 minutes of vertical sanding. Go as light as possible for mounted work.
If you always remove doors and work flat, weight matters less and coverage speed becomes the priority — which is where the 6″ Festool ETS EC150 earns its keep.
Dust Management
If you’re sanding indoors, dust collection is non-negotiable. Sanding a door in a hallway or bedroom without dust control means fine dust settling over every surface in the room for hours. The Mirka DEOS and both Festool sanders connect to dedicated extractors for near-zero ambient dust. The Bosch ROS20VSC’s microfilter canister is a solid middle ground. For more on choosing the right tool for indoor wood projects, my Best Sanders for Walls 2026 guide covers the same dust-management principles in detail.
Grit Selection
Getting the grit progression right matters as much as choosing the right sander. For stripping an existing painted or stained finish, start at 80 grit to cut through the old coating, move to 120 to level the surface, then finish at 180 or 220 before repainting. For a light scuff sand between coats, 220 grit alone is usually enough. For bare new wood being finished for the first time, 120 followed by 180 or 220 is the standard approach.
ℹ️ Did You Know?
Most paint adhesion failures on doors trace back to inadequate surface prep rather than the paint itself. A thorough scuff sand with 220 grit between coats — even on a smooth factory-primed door — dramatically improves how well the topcoat bonds and how long it lasts. It takes ten minutes and makes a measurable difference to durability.
🏆 The Verdict
The Mirka DEOS Electric Handheld Sander is my overall pick for door sanding in 2026 — its brushless motor, near-zero vibration, and compact 3″×4″ pad solve the specific challenges of door work better than anything else on this list. For a mid-range alternative that still delivers professional results, the Bosch ROS20VSC is outstanding value and I’d recommend it without hesitation. And no matter which main sander you choose, if your doors have any panel detail at all, add the BLACK+DECKER Mouse to your kit — it’s the tool that takes a good finish job and makes it a great one.
❓ Frequently Asked Questions
What type of sander is best for sanding doors?+
What grit sandpaper should I use on a door?+
Can I sand a door without removing it from its hinges?+
How do I sand the detailed moulding around door panels?+
Should I use a belt sander on a door?+
Conclusion
Sanding doors is one of those tasks where having the right tool for each zone makes an enormous difference to the final result. With the Mirka DEOS handling tight spaces and all-round door work, the Festool ETS EC150 covering large flat faces at speed, the Bosch ROS20VSC delivering professional results at a more accessible price, and the BLACK+DECKER Mouse tackling every corner and moulding profile the others can’t reach — no part of even the most ornate panel door is beyond your reach.
If you’re building out your wider sanding toolkit, my guide to the Best Sanders for Wood 2026 is a great companion read, and if you’re wondering when a sander is the smarter choice over a multi-tool, I cover exactly that in Why You Should Use a Sander Over an Oscillating Tool. If you have questions about your specific door project, drop a comment below — I’m always happy to help. Thanks for reading!
