
As an Amazon Associate I earn from qualifying purchases. All claims are strictly my personal opinion.
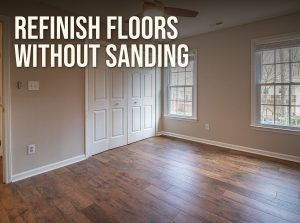
You can refinish hardwood floors without sanding them to bare wood, as long as the existing finish is intact and you’re not changing the color. The standard way is a screen and recoat: clean the floor, scuff the old finish with a buffer and a fine sanding screen, vacuum, and apply one or two fresh coats of floor finish. The other way is a chemical recoat, where a liquid etches the old finish instead of a screen. Either way, the old finish has to be roughed up somehow, or the new coat won’t stick.
Below is how to tell whether your floor qualifies, the two tests to run before you start, the screen and recoat method step by step, how the chemical recoat systems work, and what to do with a floor that only needs cleaning and polish. The criteria come from the National Wood Flooring Association (NWFA) guidelines and from the finish makers Minwax and Bona.
⚡ Quick Answer
Works when: the finish is dull or lightly scratched but not worn through, peeling or waxed, and you’re keeping the same color.
Method: clean, screen with a buffer (or a pad by hand in small rooms), vacuum and tack, then 1 to 2 coats of a floor finish such as Bona Traffic HD or Minwax Ultimate Floor Finish.
Doesn’t work for: deep scratches, dents, gray worn-through wood, a color change or a waxed floor. Those need a full sand and refinish.
Can You Refinish Hardwood Floors Without Sanding?
Yes, within limits. “Without sanding” really means without sanding to bare wood. What you’re doing is adding a new layer of finish on top of the old one, and finish only bonds to finish that has been cleaned and abraded. The NWFA describes two basic recoat methods: a screen and recoat, which lightly abrades the top of the old finish with a screen or pad and then adds a topcoat, and a chemical etching and recoat system, where the old surface is etched with a solution and recoated with no sanding or screening at all.
What a Recoat Can Fix
- A dull, matte look in traffic lanes where the finish is worn but still there.
- Fine surface scratches and scuffs that sit in the finish, not in the wood.
- A floor that looks “dry” and patchy after years of cleaning.
What It Can’t Fix
The NWFA is explicit: if the floor has visible dents, wear patterns or permanent cupping, recoating is not a viable solution and it needs a full sanding. Minwax’s floor finish instructions add three more cases where you must sand to bare wood: you want to change the color; the finish is cracking, peeling or completely worn away in areas; or shellac, lacquer, wax, or products containing wax or stearates have been applied. If any of these describe your floor, my guide on how to refinish hardwood floors covers the full sand and refinish.
Screen and Recoat vs Full Refinish
| Screen and recoat | Full sand and refinish | |
|---|---|---|
| Removes wood | No, only scuffs the finish | Yes, down to bare wood |
| Machines | Buffer with screen (or a pad by hand) | Drum or orbital floor sander, edger, buffer |
| Coats of finish | 1 to 2 | 2 to 4 |
| Fixes deep scratches, dents, gray wood | No | Yes |
| Color change | No | Yes |
| Time for one room | About a day | Two to four days |
For what each option costs in your rooms, DIY or with a contractor, use my hardwood floor refinishing cost calculator; it has a screen and recoat setting.
Two Tests Before You Start
Most failed recoats fail for one reason: the new finish doesn’t stick to whatever is already on the floor. The NWFA notes that adhesion is affected by surface contaminants such as wax, grease and many maintenance products, and that one brand or type of finish may not be compatible with another. These two tests take ten minutes and tell you whether to go ahead.
Test 1: Is There Wax on the Floor?
The NWFA describes three ways to check for wax. Try them in a spot that gets traffic and regular cleaning, not in a closet, because closets often never got the same maintenance products:
- Mineral spirits: rub a little on a clean white rag over the floor. A yellow or brown stain on the rag means paste wax is probably present.
- Scratch: lightly abrade the floor with a piece of screen or sandpaper. If the residue balls up, it’s a paraffin-based product.
- Water drops: put two drops of water on the floor. If white spots appear after about 10 minutes, the finish is probably wax.
If the floor is waxed, a polyurethane recoat is off the table. The NWFA suggests rewaxing a waxed floor whenever possible rather than resanding.
Test 2: Will the New Finish Stick?
The NWFA says to always test in several areas, following the finish maker’s recommendations, to be sure the new finish will adhere and dry properly. Clean and screen a small patch in a hidden spot and in a traffic lane, apply the finish you plan to use, let it dry for a day, then press a strip of painter’s tape onto it and pull it off sharply. If finish comes away on the tape, or the coat looks crawled, fish-eyed or cloudy, stop: the floor has a contaminant or an incompatible finish, and it needs either a chemical recoat system or a full sanding.
How to Screen and Recoat Hardwood Floors
The NWFA’s screen and recoat method has four steps: clean the floor as the finish maker recommends, lightly abrade the old finish, vacuum and tack, and apply the finish at the maker’s coverage rate with the maker’s recommended applicator. Here’s what each looks like in practice.
Step 1: Empty and Deep-Clean the Floor
Take everything out of the room and clean the floor with a hardwood cleaner that leaves no residue, not an oil soap or a “shine” product. Bona’s Traffic HD data sheet says the floor must be free from wax, polish and oily residues before recoating. Let the floor dry completely.
Step 2: Screen the Old Finish
Fit a buffer with a fine sanding screen under its driver pad and run it over the whole floor with the grain, overlapping each pass by half the machine’s width, as the NWFA’s intercoat abrasion guidance describes. Keep the machine moving smoothly to avoid swirls. You’re not trying to remove the finish, only to turn the shiny surface into an even, dull haze. Bona’s recoat instructions use 120 grit to hand-abrade the corners and edges the buffer can’t reach; a sanding block or a pad on a pole does the same along the baseboards.
- Which buffer: a 175 rpm rotary floor machine is the standard. Rental shops carry 17″ models, and smaller 13″ machines are sold for home use. Match the screen size to the pad.
- Small rooms by hand: in a bathroom, hallway or closet, you can screen by hand with a sanding sponge or a pad on a pole sander. It’s slower, but the abrasion is the same.
- Don’t go through: if you see bare wood appear on the edges of boards, stop on that spot. Recoated bare wood shows as a lighter patch.
Step 3: Vacuum and Tack
Vacuum the floor twice, including the gaps between boards and the top of the baseboards, then tack it. The NWFA says to tack with a clean cloth wet with a solvent compatible with your finish: water for waterborne finishes, mineral spirits for oil-based ones. Bona specifies its microfiber tacking pad, dry or slightly dampened with water. Any dust left now ends up in the new coat.
Step 4: Apply One or Two Coats
Cut in the edges with a brush, then pull the finish across the floor with the grain using a T-bar or a pad applicator, keeping a wet edge, working toward the door. Minwax says a screen and recoat with its Ultimate Floor Finish needs only two coats, with at least two hours between them and no sanding between coats if the second goes on within 24 hours. Bona’s Traffic HD goes on at 350 to 400 sq ft per gallon, and its data sheet warns in capitals not to spread it too thin.
Step 5: Let It Cure
Minwax says floors finished with its Ultimate Floor Finish take light foot traffic in 24 hours, and that you shouldn’t put rugs down or clean the floor for seven days. Bona Traffic HD is about 80% cured after one day and fully cured in about three. Lift furniture back in, never drag it, and put felt pads under the legs.
💡 Pro Tip
Do the recoat before the finish wears through, not after. A floor that gets a screen and recoat every few years, while the finish is still intact, can go much longer between full sandings, and every full sanding removes wood you can’t put back.
Chemical Recoat: Refinishing With No Screening at All
Chemical recoat systems replace the screen with a liquid that cleans and etches the old finish so a new coat can bond. They are what “sandless refinishing” services and kits usually mean.
How the Bona Recoat System Works
Bona’s Recoat System is a professional process that, according to its technical data sheet, removes contaminants and prepares the floor for a new coat of Bona Traffic or Traffic HD, with Bona’s guarantee covering the cost of sanding and refinishing if the finish doesn’t adhere when the process is followed. The steps, in short:
- Spread Bona Remover at 400 to 500 sq ft per gallon, about 200 sq ft at a time.
- Abrade it into the floor with a 175 rpm buffer fitted with Bona’s recoat abrasive drive plate.
- Squeegee it out and rinse the floor with Bona’s PowerScrubber and Bona Rinse.
- Repeat the whole preparation a second time, which the warranty requires.
- Rinse again, wet-tack, let it dry and apply one coat of Bona Traffic or Traffic HD.
Bona recommends it for all polyurethane-finished floors and for prefinished floors with aluminum oxide finishes, which are hard to screen. Two cautions from the data sheet: on hand-scraped or distressed floors, test first by hand-abrading a hidden spot with a 220 grit screen, and don’t proceed if that removes finish from the high points; and if you need a second coat, abrade only with a 320 grit maroon pad, because the process temporarily weakens the finish.
Is Sandless Refinishing Any Good?
For the right floor, yes: it gives the same result as a screen and recoat with less dust, and it’s the safer route for prefinished floors. It does exactly what a recoat does and nothing more, so it won’t remove deep scratches, gray wood or dents, whatever a service’s marketing says. Ask any sandless refinishing company which finish they apply and whether they run an adhesion test first.
Engineered and Prefinished Floors
Engineered and factory-finished floors are the best candidates for a recoat, because their thin top layer can only be sanded a limited number of times. The finish is the question. The NWFA notes that factory finishes with high-abrasion aluminum oxide may need to be pretreated with a chemical etching solution approved by the finish maker, and Bona lists prefinished aluminum oxide floors as a recommended use for its recoat system. Before recoating a prefinished floor, check the flooring maker’s care instructions: some specify their own recoat product or warn that a recoat voids the finish warranty.
Making Old Floors Look Better Without Any Recoat
If the finish is in good condition and the floor just looks tired, cleaning may be enough. A neutral hardwood floor cleaner and a microfiber mop remove the film that makes floors look gray, and a dedicated floor machine with a soft pad can deep-clean a whole room.
The Problem With Floor Polishes and Restorers
Hardwood floor polishes and “restorers” add a temporary shiny layer on top of the finish. They can make a dull floor look better for months, but they are exactly the kind of residue that finish makers say must be removed before any recoat. If you think you’ll want a screen and recoat later, clean the floor rather than polishing it, or plan to strip the polish first with the remover its maker sells.
What You Need
Everything for a DIY screen and recoat. The specs come from the makers; I don’t show prices or ratings, which change daily.
Bona Traffic HD Waterborne Floor Finish

Best Recoat Finish for Busy Floors
A two-part waterborne finish (finish plus hardener) used by many flooring pros, and the finish Bona’s own recoat system is built around. Bona’s data sheet gives 350 to 400 sq ft per gallon, 2 to 3 hours between coats, no abrasion needed between coats within 48 hours, and about three days to full cure. Once mixed, Bona says it must be used within 4 hours, so mix only what you’ll apply.
- ✅ Hardener for high scratch resistance
- ✅ Fast recoat and cure
- ❌ Two-part mixing, 4-hour pot life
Best For: Kitchens, hallways and homes with pets.
Minwax Ultimate Floor Finish

Easiest One-Part Recoat Finish
A one-part waterborne floor finish with screen and recoat instructions printed in its data sheet: two coats for a recoat, at least two hours apart, no sanding between coats within 24 hours, and about 500 sq ft per gallon. Minwax says it doesn’t amber quickly and cleans up with soap and water. Light foot traffic in 24 hours; no rugs for seven days.
- ✅ No mixing
- ✅ Two coats in one day
- ❌ Not over wax, shellac or lacquer
Best For: A first DIY recoat on a polyurethane floor.
Prolux Core 13″ Floor Buffer

Buffer to Own for Regular Recoats
If you’ll screen and recoat every few years, owning a buffer beats renting one each time. Prolux’s 13″ model has a low-speed 150 rpm high-torque motor, a 13″ cleaning path, a 50 ft cord and a 5-year motor guarantee, and Prolux designed it for home and office use. Pair it with 13″ sanding screens for the screening step; between recoats it machine-scrubs the floor.
- ✅ Slow speed suits screening
- ✅ Doubles as a floor scrubber
- ❌ Smaller path than a 17″ rental machine
Best For: Homeowners and landlords who recoat regularly.
17″ Floor Sanding Screens, 120 Grit
For a Rented 17″ Buffer
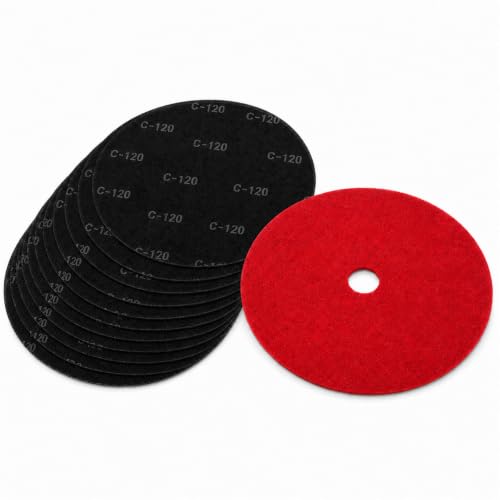
If you rent the buffer, buy the screens online in advance in the size the machine takes. This pack has ten 17″ mesh screens in 120 grit, silicon carbide, which suits screening an intact finish before a recoat. One screen does a fair amount of floor because the open mesh doesn’t clog quickly; flip it when it stops cutting.
- ✅ Fits standard 17″ buffers
- ✅ Mesh resists clogging
- ❌ Check the pad size before ordering
Best For: Screening with a rented buffer.
Bona Hardwood Floor Cleaner, 128 oz Refill

For the Pre-Clean and Ongoing Care
A waterborne hardwood floor cleaner from the same maker as the recoat finish, in a gallon refill for spray mops and bottles. Use it for the deep clean before screening, and afterwards for regular cleaning instead of polishes or oil soaps, which leave residues that make the next recoat harder.
- ✅ Residue-free cleaning before a recoat
- ✅ Large refill size
- ❌ Cleans only; won’t hide scratches
Best For: Prep cleaning and everyday care on finished floors.
How I Put This Guide Together
The recoat methods, wax tests and the limits of recoating come from the National Wood Flooring Association’s Sanding and Finishing Guidelines and Methods. The screen and recoat criteria and the cure times come from the Minwax Ultimate Floor Finish technical data sheet, and the chemical recoat process from the Bona Recoat System and Bona Traffic HD technical data sheets. Product specs come from the makers. More on how I choose the sanders I recommend.
🏆 The Verdict
If the finish is dull but intact, the color is right and nobody has waxed the floor, you don’t need to sand to bare wood. Test for wax and adhesion, deep-clean, screen with a buffer, vacuum and tack, and apply two coats of a floor finish such as Minwax Ultimate Floor Finish or Bona Traffic HD. For prefinished aluminum oxide floors, use a chemical recoat system. Deep scratches, dents and gray wood still need a full refinish.
❓ Frequently Asked Questions
What is screen and recoat for hardwood floors?+
How can I make my old hardwood floors look better without refinishing?+
Is sandless refinishing any good?+
Can you screen and recoat engineered hardwood floors?+
Is it possible to recoat prefinished hardwood floors?+
Does buffing hardwood floors remove scratches?+
Conclusion
A screen and recoat is the cheapest, fastest way to make a tired hardwood floor look finished again, and doing one before the finish wears through is the best way to put off a full sanding for years. Run the wax and adhesion tests first, clean thoroughly, and let the finish cure before the furniture goes back. If the tests fail or the damage is in the wood, see my guide on how to refinish hardwood floors and the floor sander rental guide. Questions about your floor? Ask in the comments.

