What Grit Sandpaper for Car Paint (and How to Wet Sand)

What grit sandpaper for car paint: wet sanding a dark car panel with a sheet of fine sandpaper

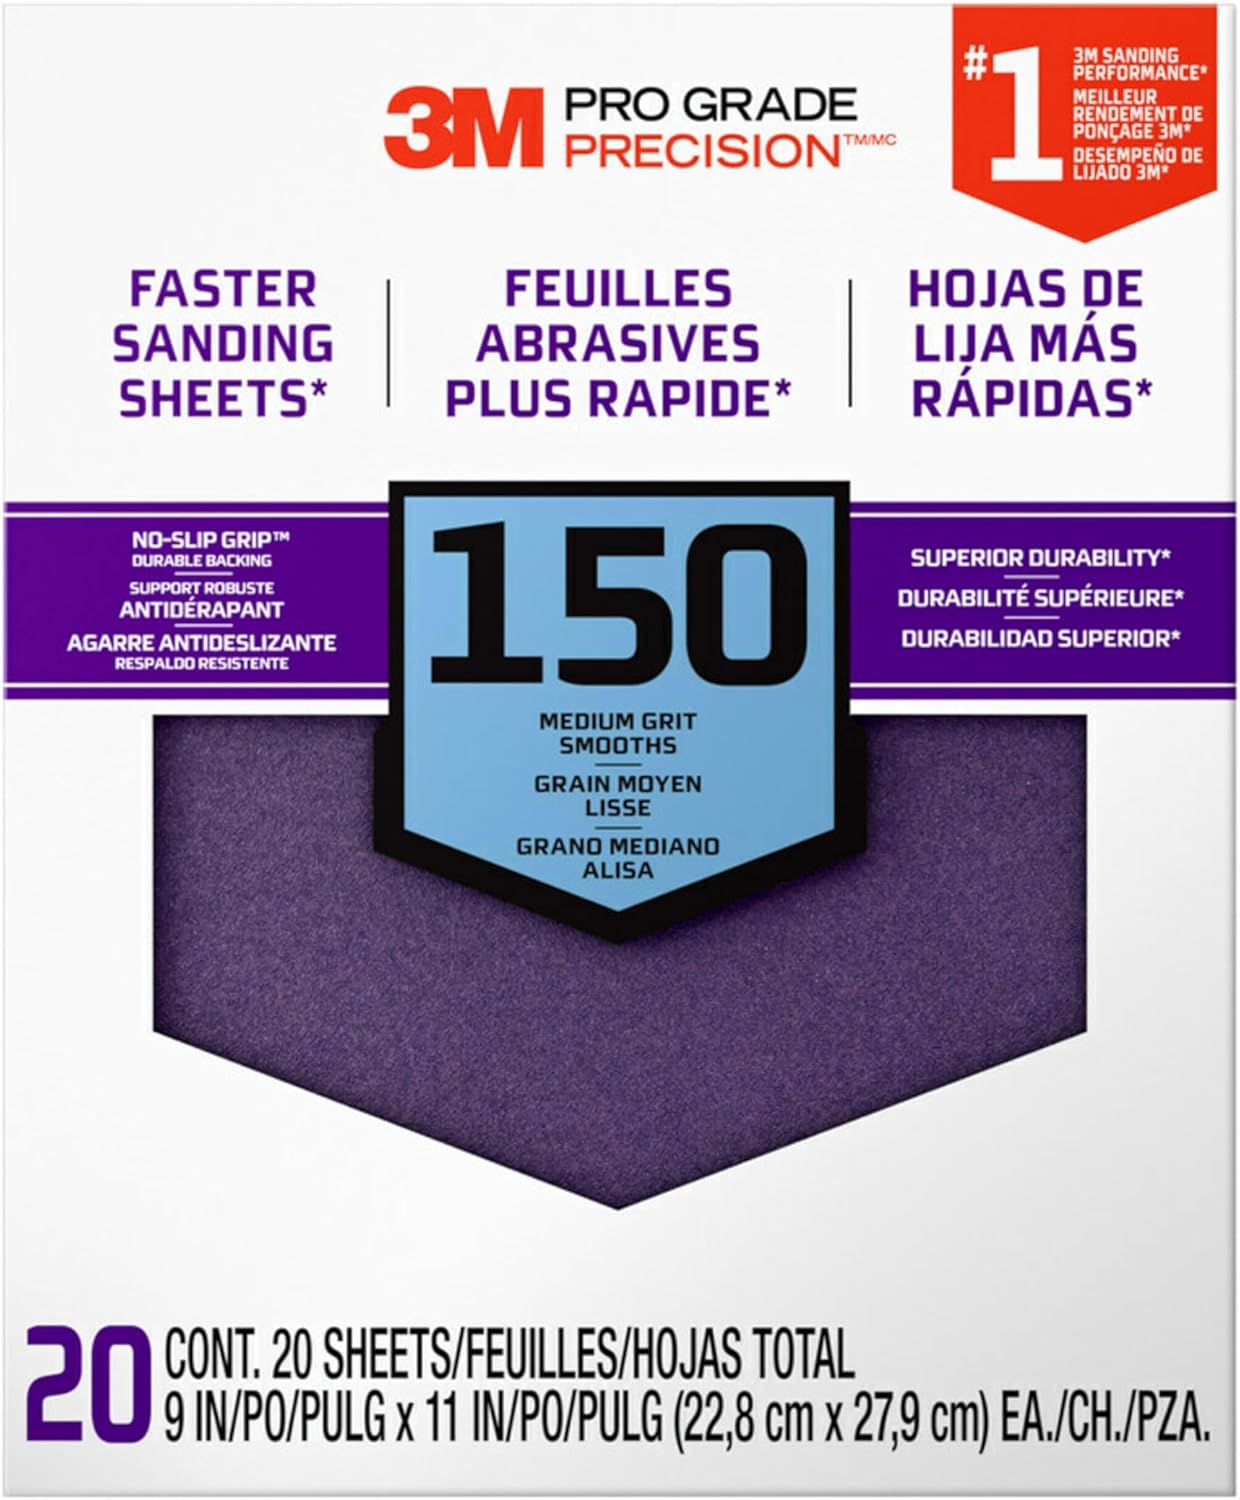
For car paint, the grit depends on the step: 80 to 180 to take paint and filler down, 320 before primer, 400 to 600 on primer before color, and 1500 to 3000 wet to take defects out of cured clear coat before polishing. Each grit only has to remove the scratches of the one before it, so you never jump from 180 straight to 2000, and you never touch paint you want to keep with anything coarser than about 1000.

Below is a grit chart for every stage of a paint job, a step-by-step guide to wet sanding clear coat, the mistakes that burn through paint, and the few supplies worth buying. If you are shopping for a machine for the coarse stages, see my guide to the best sander for auto body work.

⚡ Quick Answer

Removing paint or shaping filler: 80 grit, then 180 to feather the edges.

Before primer: 320. Before base coat: 600 (400 only if your paint’s data sheet allows it).

Wet sanding clear coat: 1500, then 2000, then 3000, then compound and polish. A pack like the 3M Wetordry 03006 covers 1000 to 2500.

Car Paint Sandpaper Grit Chart

These ranges follow the auto body grit guides published by Summit Racing and by NAINC, which agree on the sequence and differ only by a step here and there. When your primer or paint comes with a technical data sheet, its grit wins over any chart, including this one.

Job Grit Wet or dry Notes
Stripping paint to metal 40 to 80 Dry Usually on a DA sander; 80 leaves less to fix
Shaping body filler 80 Dry 40 only for reinforced filler; block sand, don’t chase it with a DA
Feathering edges, removing chips 150 to 180 Dry Blends the old paint into bare metal or filler
Final sanding before primer 320 Dry Removes 180 scratches that primer won’t fill
Sanding primer before color 400 to 600 Dry or wet 600 is the safe default under base coat
Scuffing old paint for a blend 600 to 800 Wet Dulls the surface so new clear bonds
Removing runs, dust nibs, orange peel 1500 to 2000 Wet Clear coat only; 1000 for a heavy run
Refining before polish 2500 to 3000 Wet Makes compounding much faster

Why the Order Matters

Summit Racing puts the rule in one line: each grit in the sequence is chosen because it can completely remove the scratches left by the step before. That is why you can start later in the chart when the surface is already good (a small chip can start at 180, primer that needs no corrections can go straight to 600), but you can never skip ahead. Paint and primer shrink as they cure, and a 180 scratch that looks filled today shows through the color a week later.

What Grit to Wet Sand Car Paint

Wet sanding is almost always done on clear coat, to flatten orange peel or take out a run, dust nib or bug stuck in the finish. The usual sequence is 1500, then 2000, then 3000, followed by a cutting compound and a finishing polish. Start at 1000 or 1200 only for a heavy run, and only on fresh paint with plenty of clear on it.

3M sells its Wetordry assortment for exactly this job: its listing describes the 1000, 1500, 2000 and 2500 grit sheets as meant for clear coat sanding and paint defect removal, wet or dry. Base coat is a different story: in a base and clear system you normally leave the base coat alone once it is sprayed, and if it needs a fix, the paint’s data sheet tells you how.

⚠️ Important

Every pass removes clear coat, and a factory finish has no clear to spare. Don’t wet sand edges, body lines or the tops of creases, where the clear is thinnest and burns through first. If you can’t tell how much clear a panel has, test in a hidden spot or leave it to a body shop with a paint thickness gauge.

How to Wet Sand a Car, Step by Step

  1. Let the paint cure. Follow the clear coat’s data sheet. Sanding soft clear clogs the paper and leaves deep marks.
  2. Wash and dry the panel, so grit on the surface doesn’t get dragged under the paper.
  3. Mask edges and body lines with tape, so you can’t sand through them by accident.
  4. Soak the paper in a bucket of water with a drop of car wash soap for a few minutes. The soap helps the paper glide.
  5. Wrap the paper on a block or pad. Fingers alone press harder in some spots than others and leave grooves. A flexible foam block follows curved panels.
  6. Keep the surface wet with a spray bottle, and sand with light pressure in straight, overlapping strokes. Change direction by 90 degrees with each new grit, so you can see when the old scratches are gone.
  7. Squeegee and check often. Wipe the slurry off and look at the panel under light. When the surface is an even, flat haze with no shiny low spots, that grit is done.
  8. Step up through the grits: 1500, 2000, then 3000. Each one only needs to remove the previous scratch.
  9. Compound, then polish. A cutting compound on a machine polisher removes the 3000 haze, and a finishing polish brings back the gloss.

Wet Sanding vs Dry Sanding

Dry sanding is faster and is the normal way to work filler, bare metal and most primer, usually with a DA sander and dust extraction. Wet sanding keeps the paper from loading up, cuts more smoothly and leaves a finer scratch, which is what you want on clear coat and on primer just before color. Wet or dry paper made with a waterproof backing, like the 3M Wetordry line, works both ways.

Common Mistakes

  • Skipping grits. Going from 180 to 600 on primer leaves scratches that show through the color.
  • Sanding the whole car at 1500 “to be safe”. Wet sanding removes clear; sand only where there is a defect or orange peel you need to flatten.
  • Using your fingertips. They leave grooves. Use a block.
  • Letting the surface dry out. Dry spots clog the paper and it starts to scratch.
  • Stopping at 2000 and polishing by hand. It works on a small spot, but a machine polisher and a finer last grit save hours on a whole panel.
  • Using woodworking paper on paint. Wood sheets are built for different jobs; for grit choices on wood, see what grit sandpaper for wood.

⚠️ Protect Your Lungs

Dry sanding filler, primer and old paint makes fine dust, and old finishes can contain lead. Wear a fitted respirator with particulate filters, and read the paint maker’s safety sheet before you spray anything. My guide to the best respirators covers the filter types.

What You Need

For the coarse stages, a 5″ or 6″ DA (random orbital) sander with hook-and-loop discs saves most of the work; I compare air and electric models in the best sander for auto body guide. For wet sanding, all you need is good paper and a block. For the whole process on a car, from rust to primer, see how to sand a car.

3M Wetordry Sandpaper 03006, Assorted 1000 to 2500

3M Wetordry sandpaper assorted grit pack 1000 to 2500

Best Paper for Wet Sanding Clear Coat

One sheet each of 1000, 1500 and 2500 and two of 2000 grit, 3-2/3″ x 9″, with a silicon carbide abrasive on a flexible waterproof backing. 3M lists the pack for clear coat sanding and paint defect removal, wet or dry. Five sheets are enough for spot repairs on a panel or two; for a whole car, buy the grits you use most in larger packs.

Shop Now at Amazon

  • ✅ The grits you need for clear coat
  • ✅ Wet or dry
  • ❌ Only five sheets
  • ❌ No 3000 in the pack

Best For: Runs, dust nibs and orange peel on a panel or two.


Dura-Block 6-Piece Auto Body Sanding Block Set
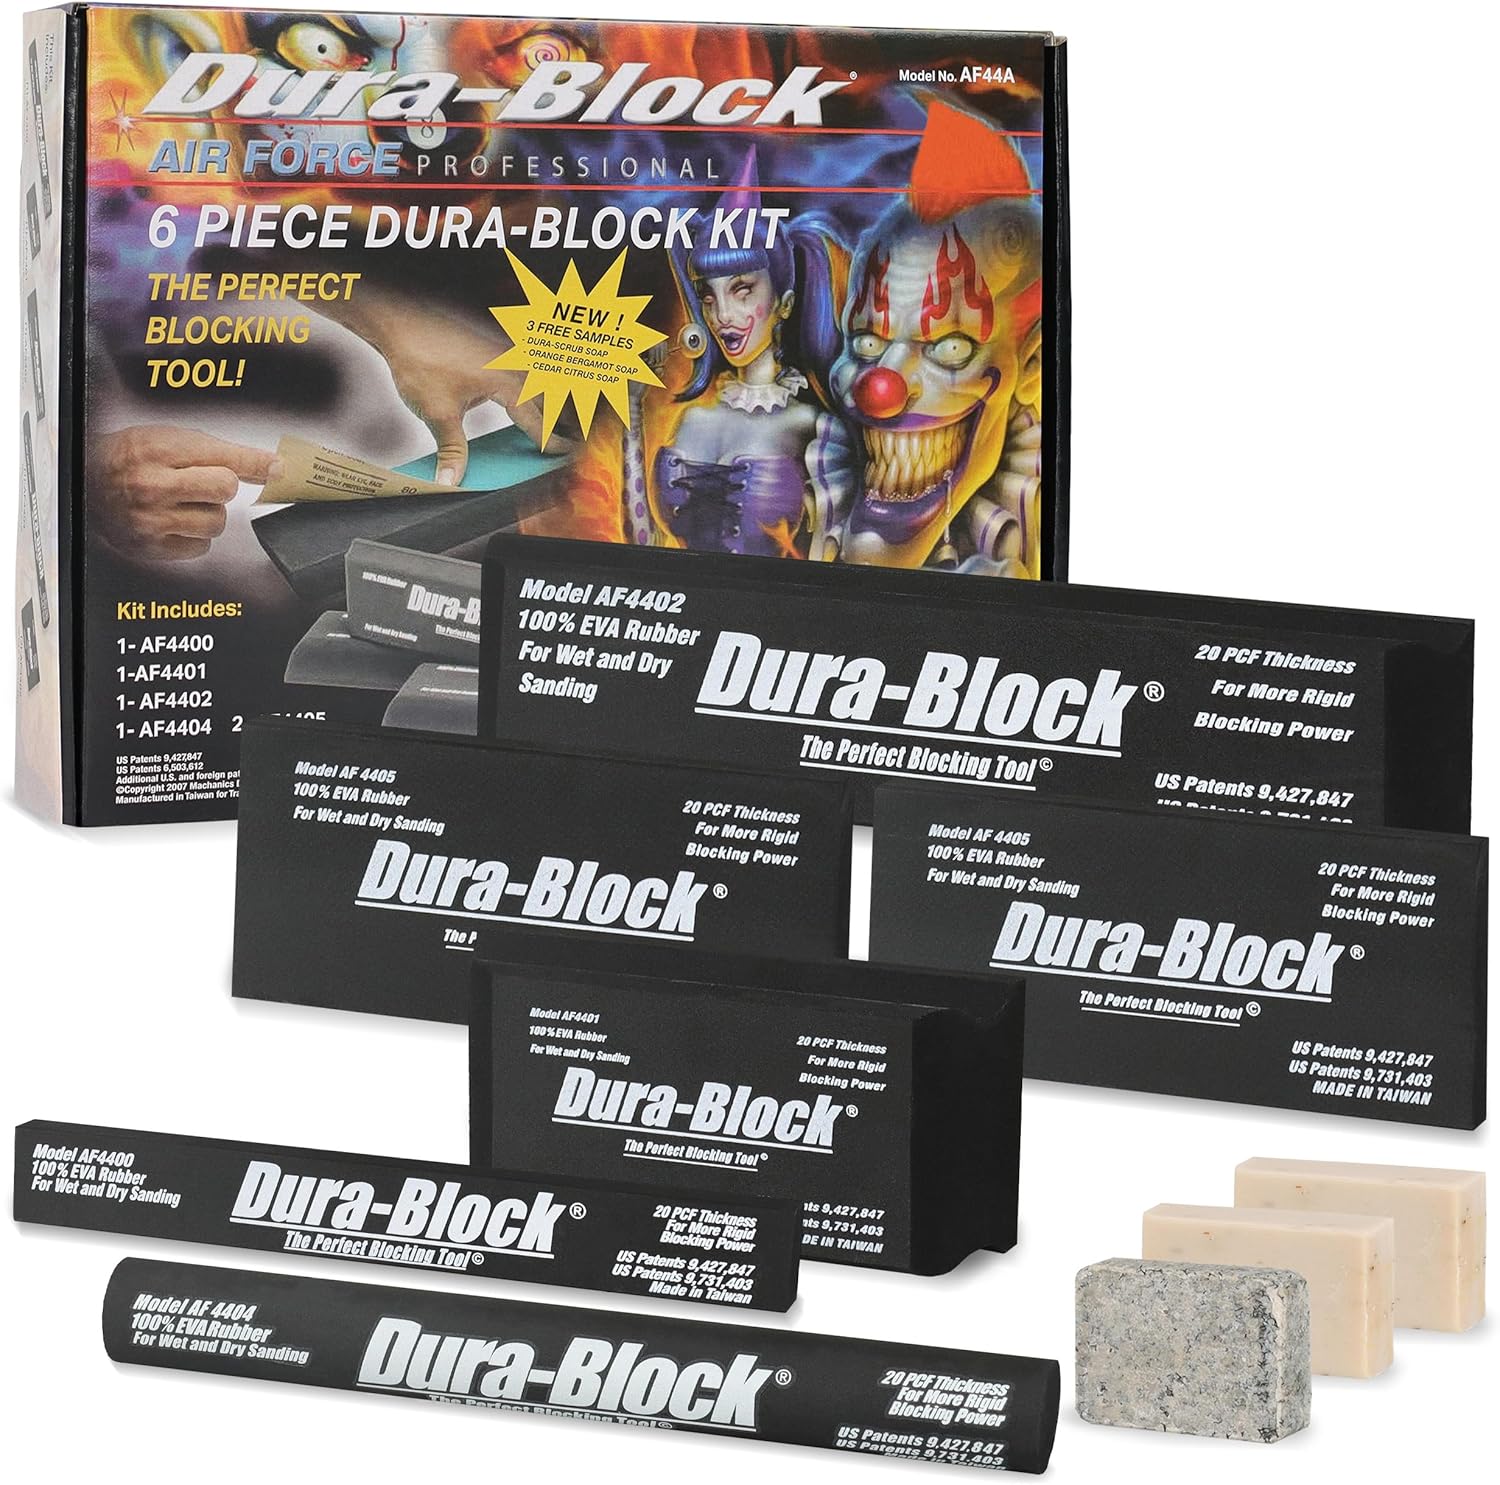
Dura-Block six piece flexible foam auto body sanding block set

Best Sanding Blocks for Car Panels

Six closed-cell EVA foam blocks that don’t soak up water, so they work the same wet or dry: an 11″ standard block for panels, a 2/3 and a 1/3 block, an 11″ round block for concave creases, and two scuff blocks. You stick PSA (sticky-back) sandpaper to the face, which isn’t included. A long, flat block is what levels filler and primer; fingers alone leave grooves.

Shop Now at Amazon

  • ✅ Sizes for panels, flares and creases
  • ✅ Won’t soak up water
  • ❌ Needs PSA paper, sold separately

Best For: Block sanding filler and primer, and wet sanding larger areas.


🏆 The Verdict

Work down the chart and don’t skip steps: 80 for paint and filler, 180 to feather, 320 before primer, 600 before color, and 1500 to 3000 wet on clear coat before you compound and polish. Keep a block under the paper, keep the surface wet, and stay away from edges and body lines. When a run is too deep for paper and a block, it is a job for a machine: start with the best sanders for auto body work.

❓ Frequently Asked Questions

Will 2000 grit sandpaper scratch car paint?+
Yes. 2000 grit leaves a fine, even haze of scratches, and that is the point: it flattens orange peel and defects in the clear coat, and the haze comes out with compound and polish afterwards. Don’t use it on paint you don’t plan to polish, and don’t use it on a base coat that has no clear over it.
Will 220 grit remove paint?+
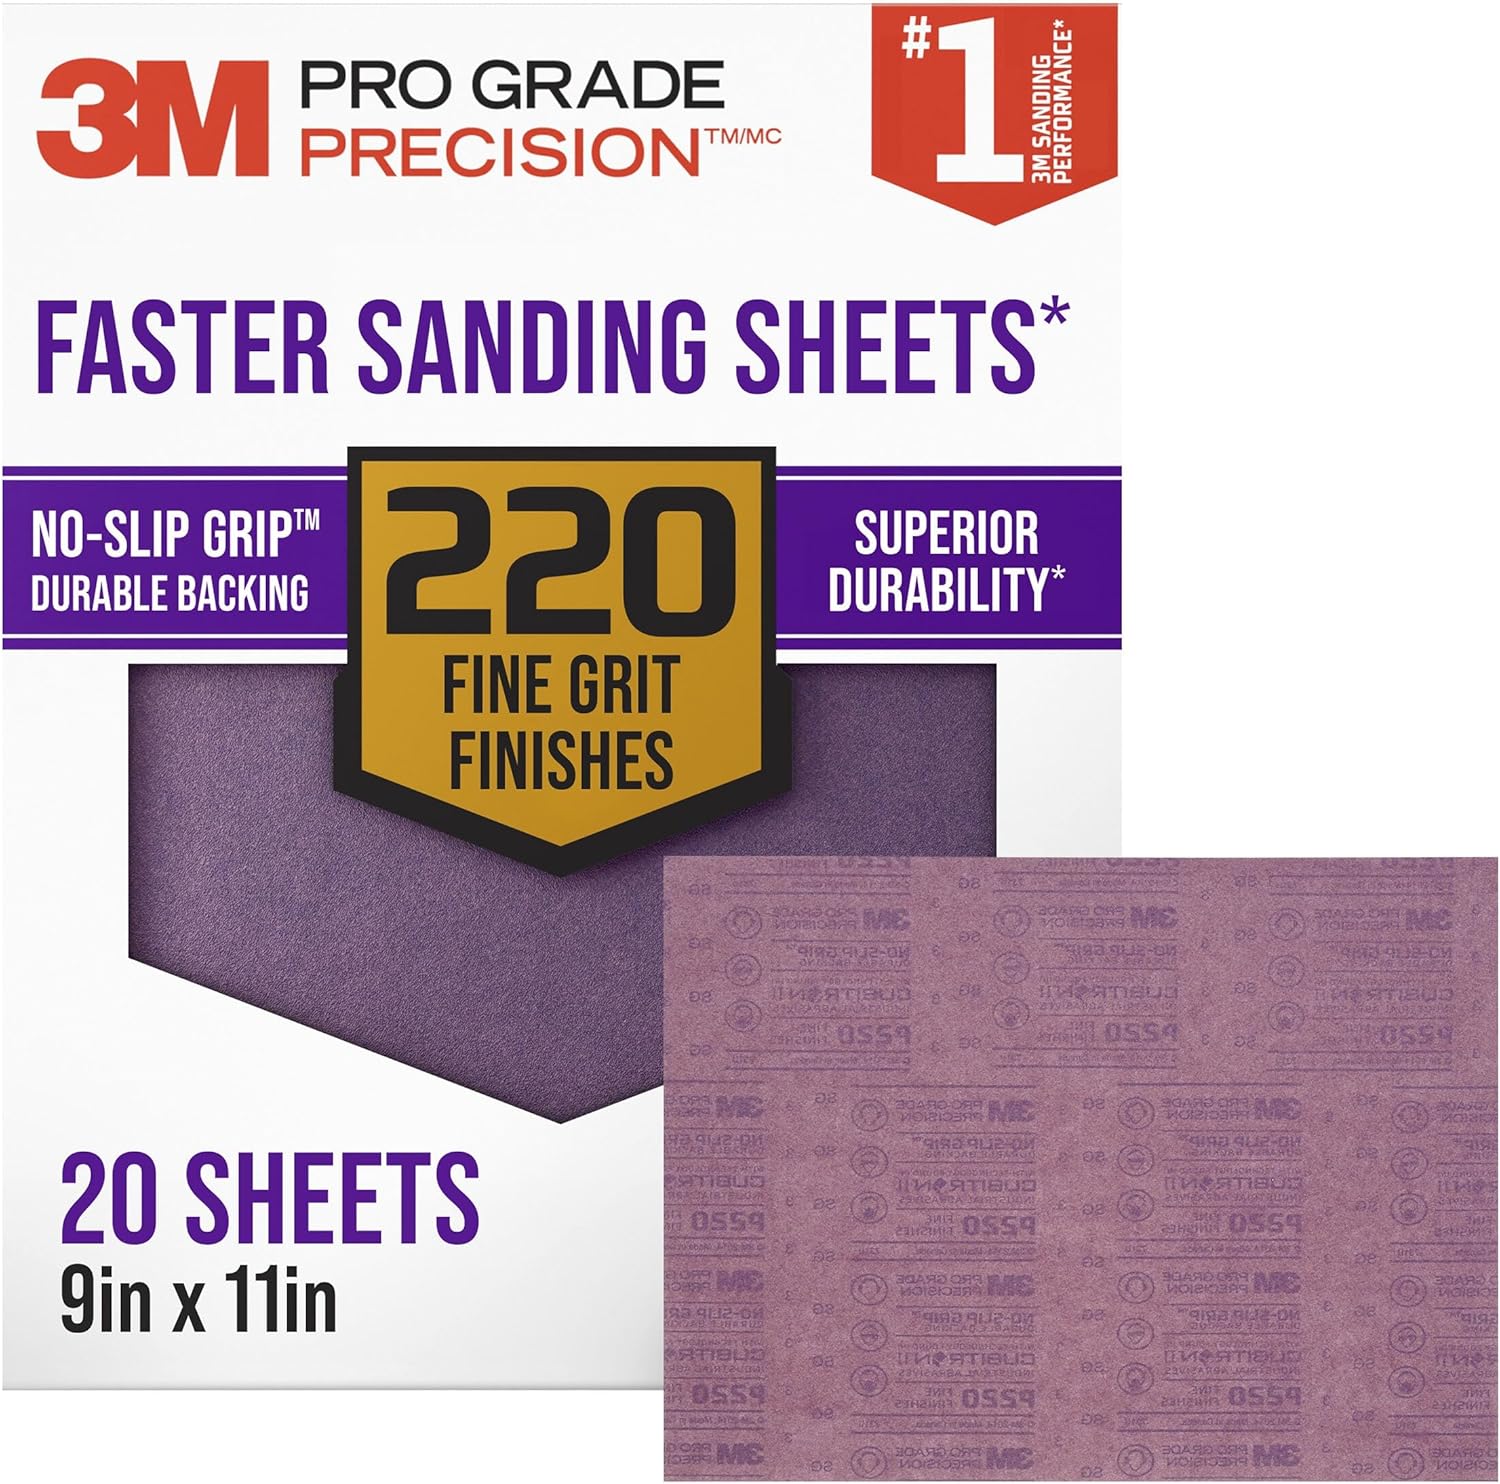
Yes, quickly. 220 cuts through clear coat and color in a few passes, which is why grits in the 150 to 220 range are used to feather the edges of a repair and sand out chips. To strip a whole panel, 80 grit on a DA sander is much faster. Never use 220 on paint you want to keep.
Is 3000 grit safe for car paint?+
On cured clear coat, used wet with light pressure and followed by polish, yes: it is the last refining step before compound. It still removes a little clear with every pass, so use it only where you have sanded with 1500 or 2000 first, and keep away from edges and body lines.
Should I use 400 or 600 grit before paint?+
600 is the safer choice before a base coat: Summit Racing lists 600 as the final sanding before paint, and NAINC gives 600 to 800. Coarser 400 scratches can show through thin metallic colors. Some sealers and single-stage paints accept 400, but only use it when the paint’s technical data sheet says so.
What grit sandpaper is best for auto body work?+
There isn’t one grit; it’s a sequence. 80 for paint removal and shaping filler, 150 to 180 to feather edges, 320 before primer, 400 to 600 on primer before color, and 1500 to 3000 wet on clear coat. Buy the coarse grits as DA discs and the fine grits as wet or dry sheets.

Working on a repair right now? Tell me the stage you’re at and the problem you see in the comments, and I’ll suggest the grit to use next.

How to Use a Belt Sander: Step-by-Step Guide

How to use a belt sander: woodworker sanding a board with a handheld belt sander

To use a belt sander, start it off the wood, set it down flat, and move it steadily back and forth with the grain while you work across the board in overlapping passes, letting the sander’s weight do the cutting. Never stop in one spot and never press down: a belt sander removes wood so fast that a pause of a second or two leaves a dip you can see through the finish.

This guide covers choosing and fitting the belt, tracking, the right grit for each job, a step-by-step technique for flat surfaces, edges and paint, and the mistakes that cause gouges. If you don’t own one yet, my belt sander reviews compare the handheld models.

⚡ Quick Answer

Direction: always with the grain, moving the whole time.

Pressure: none. The weight of the sander is enough.

Grit: 40 to 60 for paint and heavy removal, 80 for leveling, 120 to finish the belt stage, then switch to a random orbital.

What You Need

  • A handheld belt sander. 3″ x 21″ and 3″ x 18″ are the common home-shop sizes; 4″ x 24″ machines remove more but are heavy.
  • Belts in three or four grits that match your sander’s size exactly.
  • Clamps or a bench stop, because a belt sander pulls the work toward you. A pair of one-handed bar clamps is enough.
  • Dust collection: the dust bag at minimum, a shop vacuum if your sander has a port.
  • Hearing and eye protection and a dust mask. Belt sanders are loud and throw more dust than any other handheld sander.
  • A belt cleaning stick, which makes belts last much longer on resinous wood and paint.

Which Grit to Use

Job Belt grit Next step
Stripping paint or varnish 40 to 60 80, then a random orbital
Leveling rough boards and glue-ups 60 to 80 120 on the belt sander
Trimming a door or scribing to a wall 80 Ease the edge by hand
Smoothing before a random orbital 100 to 120 Random orbital at 120 or 150, then 180 to 220

Most belt sanding stops at 120. Finer belts exist, but a random orbital removes the belt’s straight scratches better than a finer belt does. For the full sequence after the belt stage, see what grit sandpaper for wood.

How to Install and Track the Belt

  1. Unplug the sander or take the battery out.
  2. Release the tension lever, which pulls the front roller back.
  3. Check the arrow printed on the inside of the belt and match it to the rotation arrow on the sander. A belt run backwards can come apart at the splice.
  4. Slide the belt on, centered on both rollers, and close the tension lever.
  5. Adjust the tracking. Hold the sander upside down, clear of your body and anything else, switch it on for a moment, and turn the tracking knob until the belt runs centered without touching the housing. Many newer sanders track automatically and have no knob.

How to Use a Belt Sander, Step by Step

  1. Secure the workpiece. Clamp it, or butt it against a bench stop. The belt drives the work backwards toward you if it can move.
  2. Mark the surface. Light pencil squiggles across the board show you where you have sanded and where the high spots still are.
  3. Start the sander in the air, then lower it flat onto the wood, rear of the platen first, so the front edge doesn’t dig in.
  4. Move with the grain. Slide the sander forward and back along the grain in long, steady strokes, and shift sideways by about half the belt width on each pass.
  5. Keep it moving and keep it flat. Don’t tip it onto a side or let it sit still. At the ends of the board, keep at least two thirds of the platen on the wood so you don’t round the edge over.
  6. Let it work. No downward pressure; your hands only guide it. If it bogs down, the belt is dull or clogged.
  7. Check your progress. When all the pencil marks are gone at the same time, the surface is level. Re-mark and move to the next grit.
  8. Lift the sander off before you switch it off, so the coasting belt doesn’t leave a mark.
  9. Finish with a random orbital. Belt scratches are straight and deep; a random orbital at 120 or 150 erases them. See how to use an orbital sander.

⚠️ Important

Keep the cord behind you and over your shoulder, away from the belt. Wait until the belt stops completely before you set the sander down: a running belt sander can drive itself off the bench.

Belt Sander Techniques for Specific Jobs

Flattening a Tabletop or Glue-Up

Start at 80 and sand diagonally across the joints, about 45 degrees to the grain, in both directions, to knock down the high glue lines quickly. Then switch to passes with the grain to remove the diagonal scratches, and move to 120. The whole method, from glue-up to finish, is in how to sand and refinish a table.

Removing Paint

Use 40 or 60 grit and a light touch, and clean the belt often, because paint melts and clogs it. A belt sander only works on flat surfaces; for molding and detail, use a scraper or chemical stripper. My guide on how to strip paint from wood compares the three methods, and the best sanders to remove paint covers the machines.

⚠️ Lead Paint

In a home built before 1978, test the paint for lead before you sand it. A belt sander turns lead paint into fine dust faster than any other tool.

Edges and Ends

Clamp a scrap block flush with each end of a narrow edge so the platen has more surface to ride on, or clamp two boards together side by side. Both keep the sander from rocking and rounding the edge.

Trimming Doors and Scribing

For a small amount off a door, sand the edge with the grain at 80, working from each end toward the middle so the end grain on the stiles doesn’t splinter. For more than about a sixteenth of an inch, a power planer is faster and straighter: see belt sander vs planer.

Using It Upside Down

Some belt sanders can be clamped upside down in a stand to work as a small stationary sander for shaping. Only do this with a model and stand designed for it. For regular shaping, a benchtop machine is safer; see my benchtop belt sander and belt and disc sander guides.

Common Belt Sander Mistakes

  • Stopping in one place. The most common cause of dips and gouges.
  • Sanding across the grain in the final passes. Cross-grain belt scratches show under any stain.
  • Pressing down. It overheats the belt, slows the motor and digs in.
  • Tipping at the edges. Rounds over corners and ends.
  • Using it on veneer or plywood faces. It can cut through the veneer in seconds.
  • Running a clogged belt. A loaded belt burns the wood. Clean it or change it.

Not sure a belt sander is the right tool at all? Belt sander vs orbital sander explains where each one wins.

Belt Sanders and Belts I’d Start With

SKIL 7510-01 3″ x 18″ Belt Sander

SKIL 7510-01 3 x 18 inch belt sander with pressure control

Best Belt Sander for Learning the Technique

The SKIL 7510-01 is built around the most common beginner mistake: its pressure control technology warns you when you press too hard. The 6 A motor drives a 3″ x 18″ belt that tracks itself, the micro-filtration box catches fine dust, the port fits standard 1-1/4″ vacuum hoses, and the housing lets you sand flush to an edge. It sits in the lowest price tier.

Shop Now at Amazon

  • ✅ Warns you when you press too hard
  • ✅ Auto-tracking belt
  • ✅ Vacuum-ready
  • ❌ 3″ x 18″ belts are shorter and wear faster than 3″ x 21″

Best For: A first belt sander and occasional leveling or paint removal.


Makita 9903 3″ x 21″ Belt Sander

Makita 9903 3 x 21 inch variable speed belt sander

Best Belt Sander for Regular Use

The Makita 9903 gives you the control that makes belt sanding easier: a variable speed dial from 690 to 1,440 ft/min, so you can slow the belt down for paint and softwood, and an auto-tracking belt that stays centered without adjustment. Makita rates the 8.8 A motor at 85 dB, the nose and side sand flush to a wall, and it comes with a dust bag. It’s a premium-tier tool.

Shop Now at Amazon

  • ✅ Wide variable speed range
  • ✅ Tracks itself
  • ✅ Sands flush to walls
  • ❌ Premium price tier
  • ❌ 9.5 lb, heavier than the SKIL

Best For: Frequent furniture work, tabletops and finish carpentry.


POWERTEC 3″ x 21″ Sanding Belts, 18 Pack

POWERTEC 3 x 21 inch aluminum oxide sanding belts assortment

Belts for 3″ x 21″ Sanders

Three belts each of 60, 80, 120, 180, 240 and 400 grit, in aluminum oxide on a cloth backing. The listing names the Makita 9903, WEN 6321 and CRAFTSMAN CMEW213 among the compatible sanders. For most jobs you’ll use the 60, 80 and 120; the finer belts are for metal and for touch-ups. Check that your sander takes 3″ x 21″ belts before you order.

Shop Now at Amazon

  • ✅ Covers every belt-sanding grit
  • ✅ Cloth backing
  • ❌ Fits 3″ x 21″ sanders only

Best For: Stocking up on the grits in the chart above.


POWERTEC 71002 Abrasive Cleaning Stick

POWERTEC natural rubber abrasive cleaning stick for sanding belts

Makes Every Belt Last Longer

An 8-1/2″ natural rubber stick that you hold against the running belt to pull out dust, pitch and dried residue. A clogged belt burns the wood and cuts slowly; cleaning it takes a few seconds. Keep your hands well back from the belt, and note that POWERTEC says it works best on cured or dry residue and isn’t meant for conveyor-feed sanders.

Shop Now at Amazon

  • ✅ Cleans belts in seconds
  • ✅ Lowest price tier
  • ❌ Less effective on wet or gummy finish

Best For: Paint removal and resinous woods like pine.


🏆 The Verdict

Using a belt sander well comes down to three habits: keep it moving, keep it flat, and let its weight do the work. Clamp the work, go with the grain, stop at 120 and hand over to a random orbital. For a first belt sander, the SKIL 7510-01 warns you when you press too hard; for heavy, regular use, the Makita 9903 adds variable speed and a belt that tracks itself.

❓ Frequently Asked Questions

Do you go back and forth with a belt sander?+
Yes. Move it forward and back along the grain in long, steady strokes, and shift sideways by about half the belt width with each pass so the passes overlap. What you must not do is hold it still or make short scrubbing strokes in one spot, which cut a hollow.
Do you press down on a belt sander?+
No. The weight of the sander is all the pressure it needs; your hands only guide it and keep it flat. Pressing down slows the belt, heats and clogs the abrasive and makes the sander dig in. Some sanders, like the SKIL 7510-01, have pressure control that warns you when you press too hard.
How to use a sander correctly?+
Pick the right sander for the job, start with the coarsest grit the surface needs, and move through the grits without skipping more than one. Start the sander before it touches the wood, keep it flat and moving, let its weight do the work, and wipe off the dust between grits. With a belt sander, always follow the grain.
How to use a belt sander to remove paint?+
Test for lead first if the house was built before 1978. Then use a 40 or 60 grit belt on flat surfaces only, with light pressure and the dust port connected to a vacuum. Keep moving with the grain, clean the belt with a cleaning stick as soon as it starts to clog, and switch to 80 once you reach bare wood before finishing with a random orbital.

Have a belt sander question I didn’t answer? Ask in the comments and I’ll reply.

Sanding Between Coats of Polyurethane: When, What Grit and How

Yes, sand between coats of polyurethane: a light scuff with 320-grit sandpaper once each coat is dry knocks off dust nibs and raised grain and gives the next coat a surface to grip. After the first coat, when the grain stands up most, 220 grit is fine. You’re not trying to remove the finish, just to dull the shine evenly, then wipe off every bit of dust before the next coat.

This guide covers when it’s really necessary and when you can skip it, the grit for each coat, sandpaper vs steel wool, by hand or with a sander, and what goes wrong when you don’t sand.

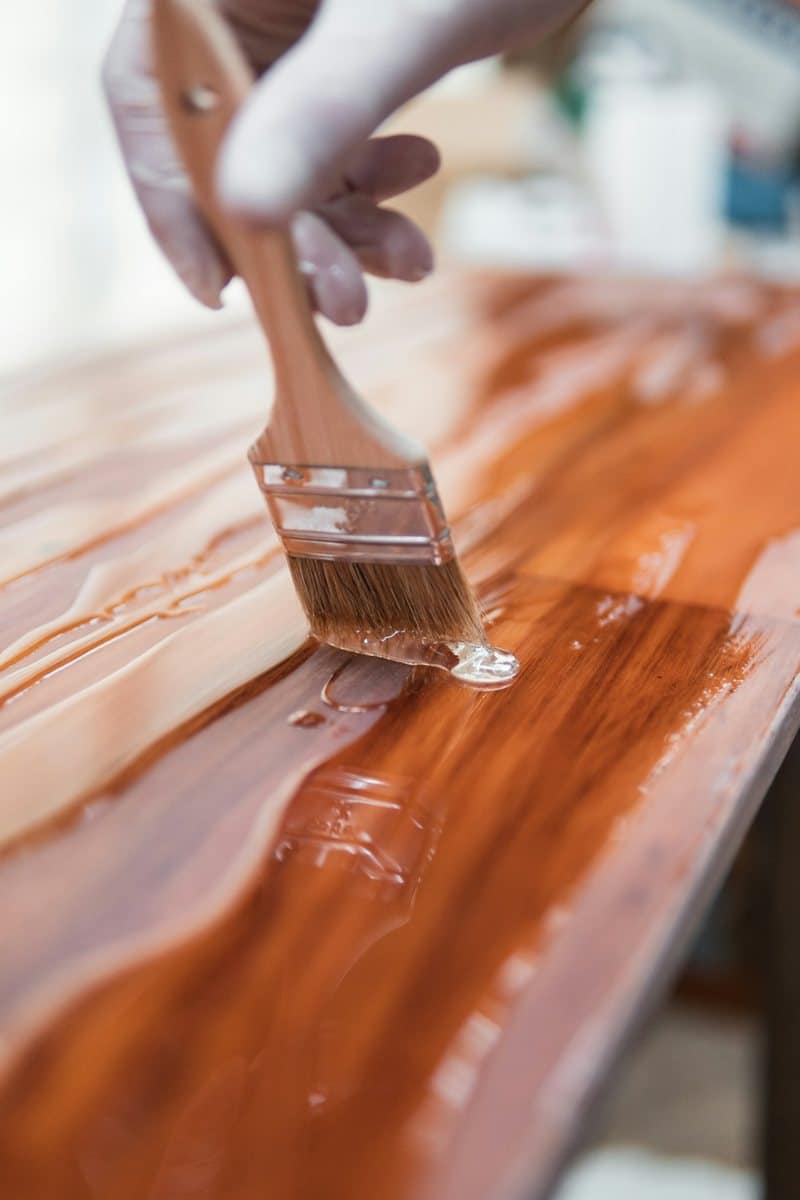
Brushing a coat of clear polyurethane onto a wooden tabletop

⚡ Quick Answer

After coat 1: 220 to 320 grit, to flatten raised grain.

Between later coats: 320 grit, light pressure, just until the surface looks evenly dull.

Before the final coat (optional): 400 grit for the smoothest base.

Then: vacuum, wipe with a tack cloth, and recoat within the time on your can.

What You’ll Use

Consumables are cheap, and the right ones make the difference between a smooth finish and scratches under the next coat.

Product Use it for Price Buy
⭐ 3M Wetordry 320, 25 sheets Hand-sanding between coats on a block $ Shop Now at Amazon
3M Fine Sanding Sponge Edges, legs, spindles and profiles $ Shop Now at Amazon
Mirka Abranet 320, 5″ mesh discs Large flat surfaces with a random orbital sander $ Shop Now at Amazon
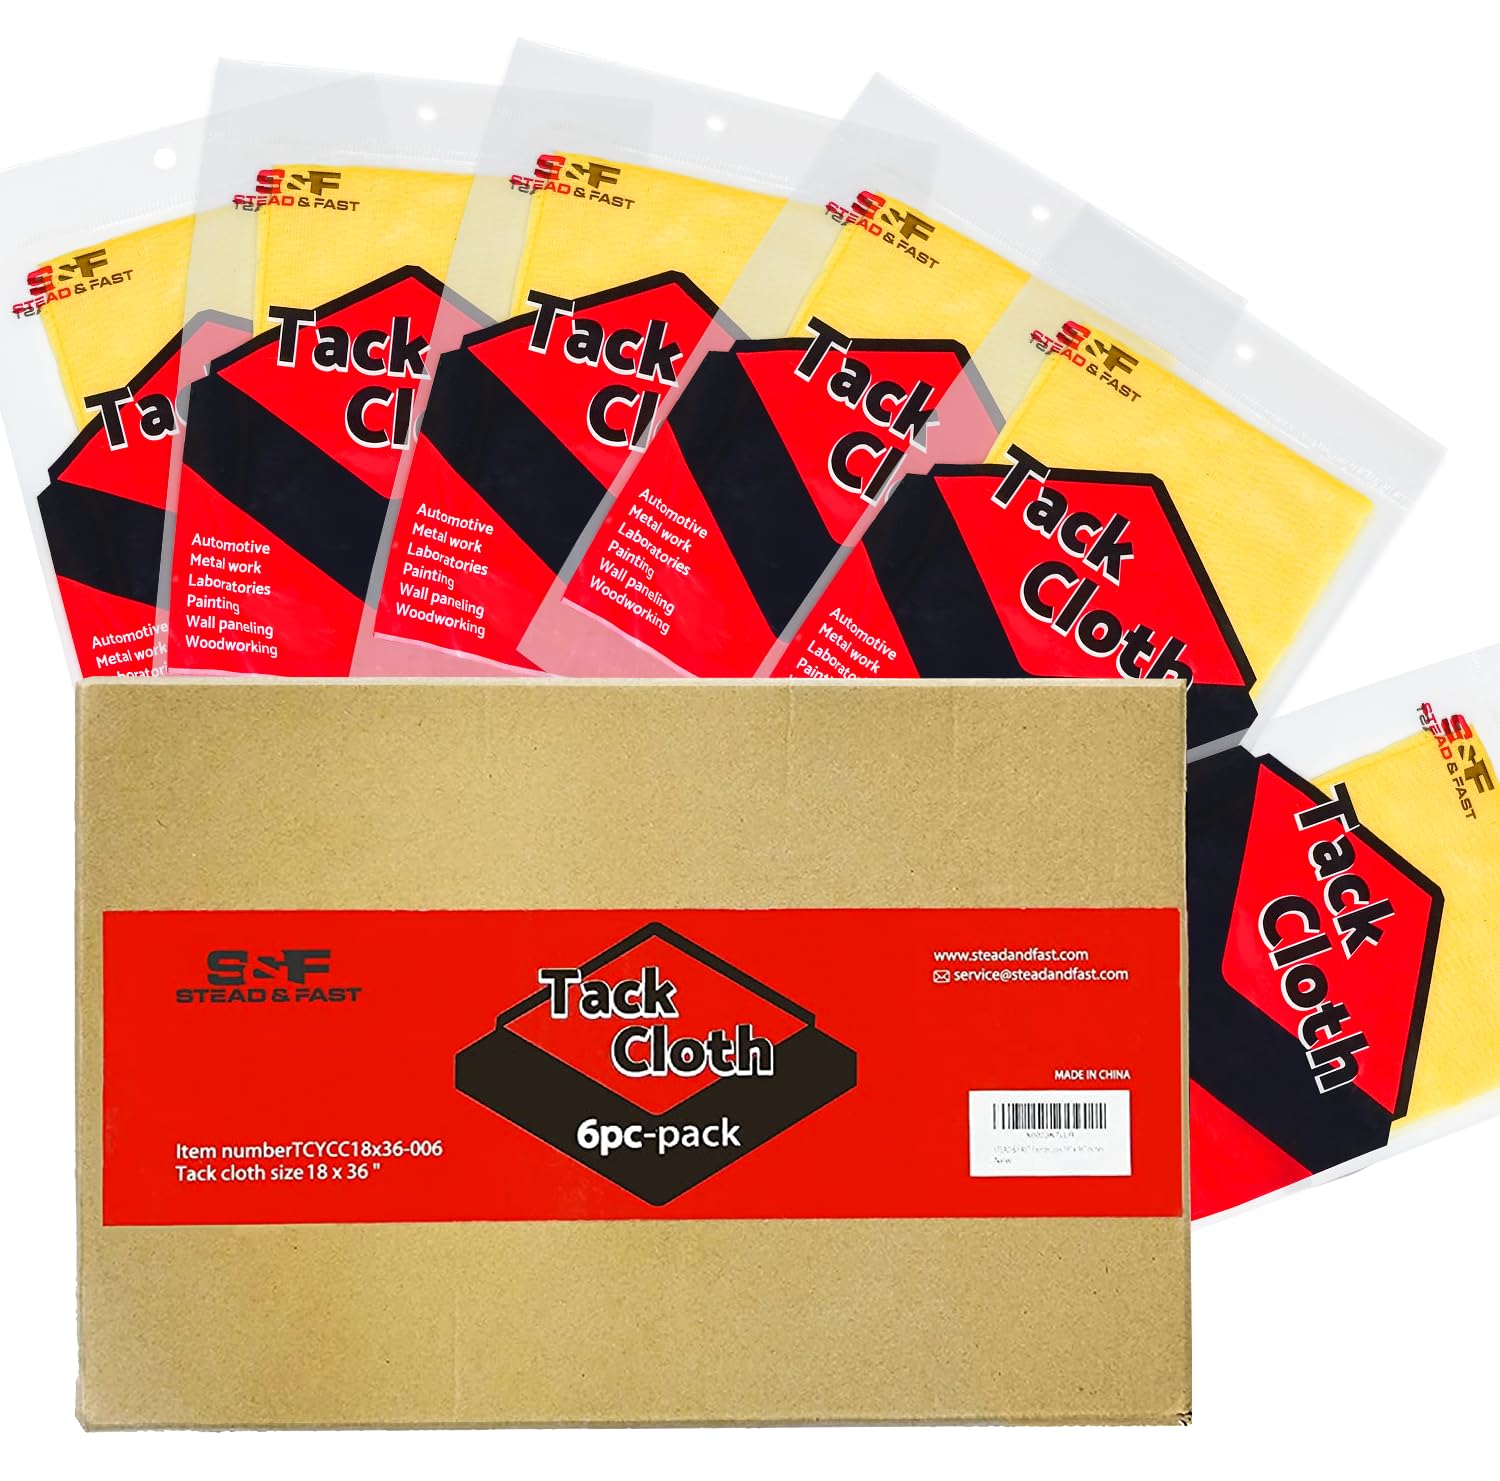
S&F STEAD & FAST Tack Cloth Lifting the last dust before you recoat $ Shop Now at Amazon
DEWALT DWE6411K Sheet Sander Flat panels and tabletops with ordinary 320 paper $$ Shop Now at Amazon

Is It Absolutely Necessary to Sand Between Coats of Polyurethane?

Not always, but usually worth it. Sanding between coats does two jobs:

  • Smoothness. Every coat catches dust, the odd bug and raised wood fibers. If you don’t knock them off, the next coat builds on top of them and they’re there for good.
  • Adhesion. Once a coat has cured past the maker’s recoat window, the next coat bonds best to a surface that has been scuffed. Within the window, many polyurethanes bond chemically to the coat below, and the label will tell you whether sanding is then optional.

So the honest answer: read your can. If you recoat inside the window it gives, you can skip sanding for adhesion, and just remove any nibs. If you’ve missed the window, or you want a glass-smooth result, sand every coat but the last.

What Grit to Sand Polyurethane Between Coats

When Grit Why
After the first coat 220-320 The first coat raises the grain most, especially water-based poly. A slightly coarser grit levels it faster.
Between later coats ⭐ 320 Removes nibs and dulls the surface without cutting through.
Before the final coat 320-400 A finer scratch for the smoothest last coat.
After the final coat Don’t Leave it. Rubbing out a fully cured finish to a set sheen is a separate job.

Going coarser than 220 between coats leaves scratches the next coat won’t hide. Going much finer than 400 barely scuffs the surface, which defeats the purpose. The full grit chart for bare wood is in my what grit sandpaper for wood guide, and my picks for the rest of the sequence are in the best sandpaper for wood.

💡 Grit Scales

US sandpaper uses the CAMI scale; European brands like Mirka use FEPA “P” grades. Above about 220 they drift apart, and a P-grade is finer than the same CAMI number: a CAMI 320 is roughly a P400. Both of the 320s below are fine for between coats.

How to Sand Between Coats of Polyurethane

  1. Let the coat dry fully. Use the time on your can. If the sandpaper gums up and the dust clumps instead of turning to fine white powder, it isn’t ready.
  2. Sand lightly, with the grain. By hand, wrap the paper around a flat block or use a sponge. Barely any pressure: the weight of your hand is enough.
  3. Stop when it looks evenly dull. You’re aiming for a uniform haze. A few small shiny spots are low areas: leave them rather than sanding through the edges to reach them.
  4. Go easy on edges and corners. The finish is thinnest there and cuts through first. One pass is enough.
  5. Remove every bit of dust. Vacuum with a brush attachment, then wipe with a lightly unfolded tack cloth, no pressure.
  6. Recoat within the window on the can.

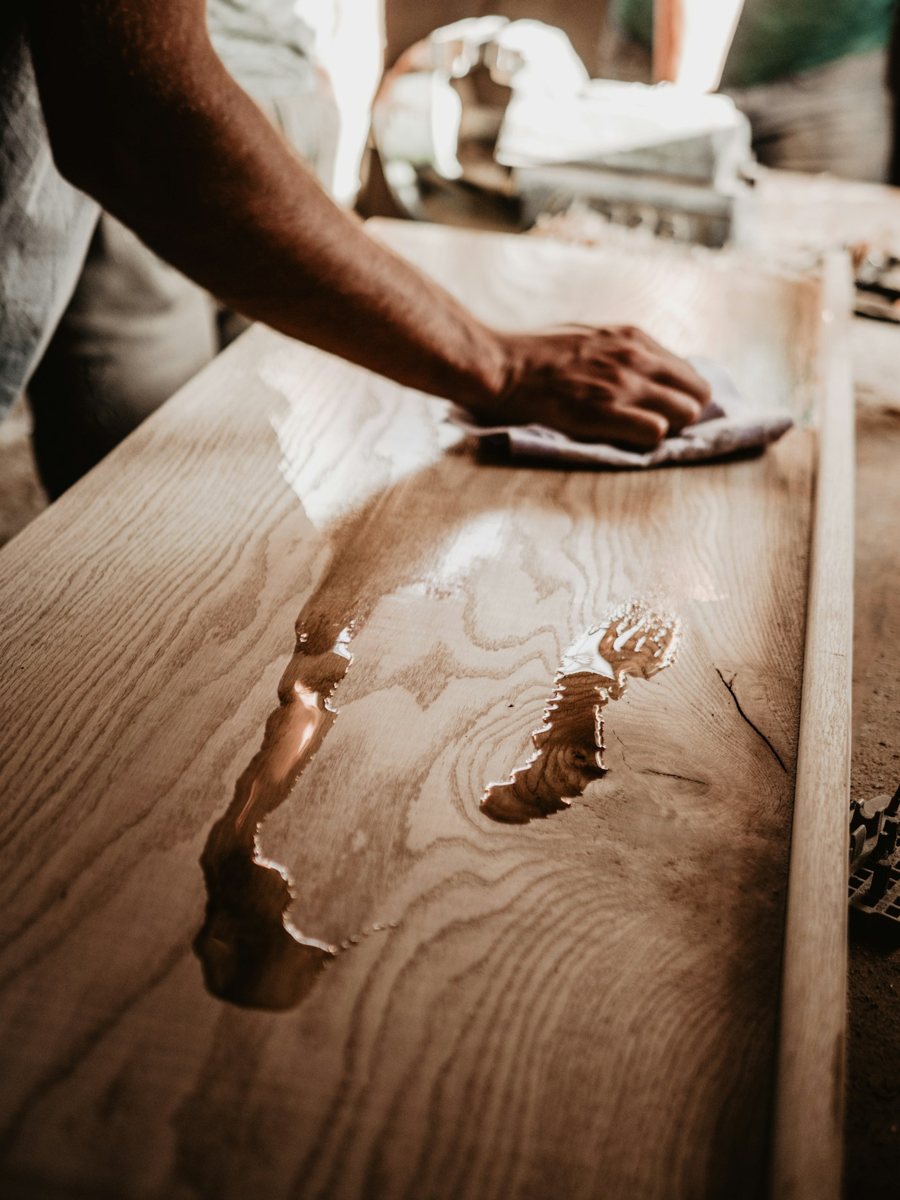
Wiping sanding dust off a board with a cloth before the next coat

The Abrasives I’d Use

3M Wetordry Sandpaper, 320 Grit

3M Wetordry Sandpaper, 320 grit, 25 sheets, 9 x 11 inch

Best Sandpaper Between Coats

3M sells this pack for exactly this job: its listing calls it sandpaper “for final or between coats sanding”. It’s silicon carbide, a sharp mineral that cuts cleanly at fine grits, on waterproof paper you can use dry or with water to reduce clogging. 25 full 9 x 11 in sheets cut into quarters for a block or a 1/4-sheet sander, which is enough for a lot of coats.

Shop Now at Amazon

  • ✅ Made for between-coats sanding
  • ✅ Wet or dry
  • ✅ 25 sheets, cut to any size
  • ❌ Needs a block for flat results

3M Sanding Sponge Block, Fine

3M Sanding Sponge Block, single angle, fine grit, extra large

Best for Edges and Curved Parts

Paper on a hard block digs into edges and can’t follow a turned leg. A fine sanding sponge flexes, spreads the pressure, and is much less likely to cut through the finish on an edge. This 3M block is extra large, 2-7/8 x 8 in, works wet or dry, and rinses clean to reuse.

Shop Now at Amazon

  • ✅ Gentle on edges and profiles
  • ✅ Wet or dry, reusable
  • ❌ 3M gives “fine”, not a grit number

Mirka Abranet 5″ Mesh Discs, 320

Mirka Abranet 5 inch 320 grit mesh sanding discs, hook and loop, 50 pack

Best for Big Flat Surfaces With a Sander

On a large tabletop or a set of cabinet doors, a random orbital sander with a mesh disc scuffs evenly and fast. Abranet’s open mesh lets a vacuum pull the dust through the whole disc, and Mirka says it resists clogging, which is the usual problem with fine paper on finish. The 50 discs are P320 (FEPA) and fit any 5″ hook-and-loop sander regardless of hole pattern. Run the sander at a low speed setting and keep it flat.

Shop Now at Amazon

  • ✅ Dust extraction through the whole disc
  • ✅ Resists clogging on finish
  • ✅ Fits any 5″ hook-and-loop pad
  • ❌ Only for flat surfaces

S&F STEAD & FAST Tack Cloth

S&F STEAD & FAST tack cloth, 6 pack, 18 x 36 inch

Best for the Last of the Dust

A vacuum gets most of the dust; a tack cloth gets the rest. These are 18 x 36 in cotton cheesecloth, individually wrapped, and wax and silicone free, which matters because wax or silicone left on the surface can cause the next coat to fisheye. Unfold one loosely and drag it over the surface with no pressure. With water-based poly, some finishers prefer a cloth barely dampened with water instead: check what your finish’s maker recommends.

Shop Now at Amazon


By Hand or With a Sander?

By hand is safest and all you need for furniture, doors and small projects: paper on a block for flat parts, a sponge for edges and curves. A sander saves time on big flat surfaces, as long as you use a fine grit, a low speed and no pressure.

Sheet Sander: DEWALT DWE6411K

DEWALT DWE6411K quarter sheet palm sander

A 1/4-sheet sander is the classic tool for sanding between coats: its small fixed orbit scuffs evenly without cutting in, and it clamps ordinary sandpaper, so a quarter of a 3M 320 sheet fits straight on. The DEWALT DWE6411K (2.3 A, 14,000 OPM) has a paper clamp that holds the sheet tight and a punch for dust holes. For why a square pad suits this job, see sheet sander vs random orbital sander; for a random orbital with a low speed setting, see my best random orbital sanders.

Shop Now at Amazon


Sandpaper or Steel Wool Between Coats?

Sandpaper, in most cases. Paper on a block cuts flat and levels nibs; steel wool follows the surface, so it dulls the shine but doesn’t flatten much. Steel wool also sheds tiny fibers. Under oil-based poly that’s a nuisance; under water-based poly, any fiber left behind can rust and leave dark specks in the finish. If you like the feel of wool on curved parts, use a synthetic abrasive pad instead: it does the same job without metal fibers.

Oil-Based vs Water-Based Polyurethane

  • Water-based dries fast and raises the grain noticeably on the first coat, so the first sanding matters most. Avoid steel wool.
  • Oil-based dries slowly and needs longer before it sands to a powder rather than gumming. Give it the full time on the can, more in cool or humid weather.

Floors

On a floor, the same idea applies at a different scale: a light “screening” between coats with a floor buffer and a fine screen or pad, then a thorough vacuum and tack. A handheld sander is too slow for a whole room. My guides on sanding wood floors yourself and the best sanders for floors cover the equipment.

Common Mistakes

  • Sanding too soon. Gummy paper and dust balls mean the coat isn’t dry.
  • Sanding through on edges. One light pass on edges, never more.
  • Chasing shiny spots. Low spots stay shiny. Leave them; the next coat fills them.
  • Leaving dust. Every speck you miss is sealed in the next coat.
  • Using a coarse grit. Scratches from 150 or 180 show through clear finish.

🏆 The Short Version

Let each coat dry, scuff it with 320 grit (220 to 320 after the first coat) on a block or a fine sponge for edges, stop when it’s evenly dull, remove the dust with a vacuum and a tack cloth, and recoat within the time on your can. Use a sheet sander or mesh discs on big flat surfaces. Skip steel wool under water-based poly. Starting from an old finish? See how to remove stain from wood and how to sand and refinish a table.

❓ Frequently Asked Questions

Is it absolutely necessary to sand between coats of polyurethane?+
Not always. If you recoat within the window printed on the can, many polyurethanes bond to the coat below without sanding. But a light sanding still removes dust nibs and raised grain, so the finish ends up smoother. If you’ve missed the recoat window, sanding is needed so the next coat grips.
What grit do I use to sand between coats of polyurethane?+
Use 320 grit between coats, with light pressure. After the first coat, when the grain is raised, 220 to 320 is fine. Before the final coat you can go to 400 for the smoothest base. Coarser than 220 leaves scratches that show through a clear finish.
Is it better to use sandpaper or steel wool between coats of polyurethane?+
Sandpaper is usually better: on a block it levels dust nibs, while steel wool only dulls the surface. Steel wool also sheds fibers that can rust under water-based polyurethane and leave dark specks. If you prefer a pad for curved parts, use a synthetic abrasive pad instead of steel wool.
Can I apply a second coat of polyurethane without sanding?+
Yes, if you’re within the recoat time on the can and the first coat is free of dust and raised grain. The coats will bond. Any nibs or specks in the first coat will stay under the second, though, so a quick scuff with 320 grit is still the better habit.
What happens if you don’t sand between coats of polyurethane?+
Within the recoat window, usually nothing bad for adhesion, but dust nibs and raised grain get sealed in and the finish feels rough. Outside the window, the next coat may not bond well and can peel or scratch off more easily. Sanding fixes both problems.
Can you wet sand between coats of polyurethane?+
You can, with waterproof wet/dry paper such as 3M Wetordry, and it reduces clogging and dust. Use very little water, wipe the slurry off completely and let the surface dry before recoating. Wet sanding is more often used to rub out the final, fully cured coat; between coats, dry sanding is simpler for most people.

Have a finish that isn’t coming out smooth? Tell me what you’re using in the comments and I’ll help you track down the problem.

What Grit to Sand Drywall: The Grit for Every Stage

Sand drywall joint compound with 120-grit sandpaper, smooth it with 150 grit, and use 220 grit only for a light pass after primer. Coarser grits like 80 are for knocking down heavy ridges on hard setting-type compound, and even then only with care, because they gouge soft mud and scuff the paper face of the drywall.

Below is the grit for every stage, what changes for patches, ceilings, spackle and hand sanding, whether to use paper, sponges or mesh screens, and the times you shouldn’t sand at all.

Hand-sanding a wall with a folded sheet of sandpaper

Drywall Sandpaper Grit Chart

Grit Use it for Watch out for
60-80 Knocking down heavy ridges and lumps, mostly on hard setting-type compound Gouges soft all-purpose mud and tears the drywall paper. Rarely needed.
100-120 ⭐ The main working grit: leveling taped joints, screw dimples and patches Leaves light scratches that 150 removes
150-180 Smoothing and feathering edges before primer Too slow to level ridges on its own
220 A light pass after primer to knock off raised fibers and specks Clogs fast on bare compound; can polish mud so paint sheen looks uneven

⚡ The Abrasives I’d Buy

For the main sanding: 3M Pro-Pak 120-grit drywall paper, cut to fit a hand sander or pole sander.

For corners and patches: a 3M dual-grit drywall sponge, medium side first, fine side to finish.

For the pass after primer: a 3M fine sanding sponge, with a light touch.

The Grit for Each Drywall Stage

Between Coats of Joint Compound

You don’t need to sand between every coat. Scrape off ridges and lumps with your taping knife once the coat is dry, then apply the next one. If a coat dried with obvious tool marks, a quick pass with 120 grit keeps them from telegraphing through the next coat.

After the Final Coat of Mud

This is where most of the sanding happens. Use 120 grit to level the joints and blend the edges into the wall, then go over the same areas with 150 grit to remove the scratches. Sand only the compound, feathering 6 to 8 inches beyond the edges of each joint, and keep off the bare drywall paper as much as you can.

After Primer, Before Paint

Primer raises the paper fibers and shows every flaw. Once it’s dry, a very light pass with 220 grit, or a fine sanding sponge, knocks off the fuzz and specks. Don’t try to level anything at this stage: if a joint still shows, add a skim coat of compound, sand it and prime again.

Patches and Spackle

Small spackle repairs need only 150 to 220 grit, often just a fine sanding sponge: spackle is soft and a coarse grit digs a dish into it. Bigger patches with joint compound follow the same 120 then 150-220 sequence as a seam. My step-by-step for patches is in how to sand a drywall patch.

Ceilings

Same grits as walls, 120 then 150, but with a pole sander or a long-reach drywall sander, and even lighter pressure: gravity works against you and it’s easy to over-sand. Use a bright light held at a low angle to see what you’re doing, and wear eye protection.

Sanding Drywall by Hand

By hand, wrap 120-grit paper around a flat sanding block or use a sponge, and move in light circles or along the joint rather than scrubbing back and forth in one spot. Hand sanding gives the most control on patches, corners and small rooms. For whole rooms, a pole sander or power sander saves your arms.

Paper, Sponge or Mesh Screen?

  • Drywall sandpaper is cut to fit hand and pole sanders and uses a backing that resists tearing and clogging. The best choice for the main sanding.
  • Sanding sponges flex around corners and contours, can be rinsed and reused, and with a damp sponge you create much less dust. Best for corners, patches and touch-ups.
  • Mesh sanding screens are open, so dust falls through instead of clogging them, and you can flip them to use both sides. Popular on pole sanders. Some finishers find a screen cuts faster than paper with the same number and go one step finer; try it on a hidden spot first.

My Picks for Each Stage

3M Pro-Pak Drywall Sanding Paper, 120 Grit

3M Pro-Pak Drywall Sanding Paper, 120 grit, 25 sheets

Best for the Main Sanding

A pack of 25 sheets of 120 grit, sized 4.2 x 11.25 in to fit standard hand and pole sanders. 3M makes it for joint compound, plaster and spackling, with a heavy-duty paper backing that resists tearing and a coating that resists clogging, the two things that slow drywall sanding down. It can also be used wet.

Shop Now at Amazon

  • ✅ Made for joint compound, plaster and spackle
  • ✅ Tear and clog resistant
  • ✅ Pre-cut for hand and pole sanders
  • ❌ 120 grit only in this pack: buy a finer grit separately

3M Drywall Sanding Sponge, Fine/Medium

3M Drywall Sanding Sponge, fine and medium grit

Best for Corners and Patches

A dual-grit sponge: the medium side removes compound, the fine side smooths it, so one block covers a whole patch. The foam flexes to sand flat or contoured surfaces, which makes it the easiest tool for inside corners and around outlets, and you can rinse and reuse it. Used damp, it also keeps dust down in a lived-in room.

Shop Now at Amazon

  • ✅ Two grits in one block
  • ✅ Flexes into corners and contours
  • ✅ Rinse and reuse
  • ❌ Small block: slow on whole walls

3M Sanding Sponge Block, Fine, Extra Large

3M Sanding Sponge Block, single angle, fine grit, extra large

Best for the Pass After Primer

After primer you want a gentle, even touch, and a fine-grit sponge gives exactly that. This 3M block is extra large at 2-7/8 x 8 in, so it bridges small dips instead of following them, and it works wet or dry on drywall, paint and wood. Keep one for the final check before paint.

Shop Now at Amazon

  • ✅ Large flat face for an even finish
  • ✅ Wet or dry, reusable
  • ❌ Not for leveling bare mud

For Whole Rooms: a Drywall Sander

For a basement, an addition or a whole-house repaint, a power drywall sander with a vacuum does the 120 and 150 stages far faster and with much less dust. The same grits apply: 120 to level, 150 to smooth. I compare the DEWALT 20V MAX cordless, the Bosch GTR55-85 and the Festool Planex in my best sanders for walls and drywall. For a single patch, a regular 1/4-sheet sander is plenty: see sheet sander vs random orbital sander.

How to Sand Drywall for a Smooth Finish

  1. Wait until the compound is fully dry. It should be uniformly light in color, with no dark damp patches.
  2. Protect the room. Seal doorways with plastic, cover vents, and wear a dust mask rated for fine particles and eye protection.
  3. Light pressure, 120 grit. Level the joints and screw spots, feathering the edges into the wall.
  4. Check with a raking light. Hold a work light flat against the wall. Ridges and dips cast shadows you can’t see head-on.
  5. Smooth with 150 grit. Go over everything you sanded with 120.
  6. Remove the dust and prime. Vacuum, then wipe with a barely damp cloth. Paint won’t stick well to a dusty wall.
  7. Light pass at 220 after primer, then paint.

The full walkthrough, with dust-control options, is in my guide on how to sand drywall. To keep dust off everything else, a shop vac with a fine filter on the sander’s port helps a lot: see my picks for the best shop vac for dust collection.

💡 Pro Tip

If the paper fuzzes up where you sanded through the compound, don’t sand it more: that makes it worse. Seal it with primer, then apply a thin skim coat of compound and sand that lightly at 150.

When Not to Sand Drywall

  • When the mud is still damp. It gums up the paper and tears out of the joint.
  • On the bare drywall paper. Sanding the paper face raises fuzz that shows through paint.
  • When a wet sponge will do. For small touch-ups in a furnished room, a damp sponge smooths compound with almost no dust.
  • In older homes, before testing. Joint compound in homes built before about 1980 may contain asbestos, and old paint may contain lead. Have it tested before you sand.

🏆 The Short Version

120 grit for the joint compound, 150 to smooth before primer, 220 for a light pass after primer. Use paper on a block or pole for walls, a dual-grit sponge for corners and patches, and a power drywall sander for whole rooms. Light pressure every time.

❓ Frequently Asked Questions

Is 220 grit good for drywall?+
Only for the last step. 220 grit is right for a light pass after primer or for tiny spackle touch-ups, but it’s too fine to level joint compound: it clogs quickly and can polish the mud, which makes the paint sheen look uneven. Do the leveling with 120 and smoothing with 150 first.
Is 120 grit sandpaper good for drywall?+
Yes. 120 grit is the main working grit for drywall: it levels taped joints, screw dimples and patches quickly without gouging the compound or tearing the paper. Follow it with 150 grit to remove the light scratches it leaves before you prime.
How do you sand drywall for a smooth finish?+
Let the compound dry completely, sand with light pressure at 120 grit, feather the edges well beyond each joint, check with a light held flat against the wall, smooth with 150 grit, then remove the dust and prime. A light pass at 220 grit after the primer gives the smoothest base for paint.
When should you not sand drywall?+
Don’t sand while the compound is still damp, don’t sand into the bare paper face, and don’t dry-sand in older homes before testing: joint compound in homes built before about 1980 may contain asbestos, and old paint may contain lead. For small touch-ups in a lived-in room, a damp sponge is often better than sandpaper.
What grit sandpaper for drywall before painting?+
Finish the compound at 150 grit before you prime. After the primer is dry, a very light pass with 220 grit or a fine sanding sponge removes raised fibers and specks. Then paint. Going finer than 220 on drywall doesn’t improve the finish.
Should I use a drywall sanding screen or sandpaper?+
Both work. Mesh screens let dust fall through, so they don’t clog, and you can flip them; they suit pole sanders on large areas. Paper on a flat block is easier to control for the final smoothing. Many finishers use a 120 or 150 screen on the pole and finish corners and patches with a sponge.

Working on a tricky wall or ceiling? Ask in the comments and I’ll help you pick the grit and the tool.

How to Remove Stain from Wood: Strip, Sand or Bleach

To remove stain from wood, strip off the clear topcoat first, then sand the stained wood back to bare fibers, and bleach whatever color is left. Stain isn’t a coating that sits on top like paint: it soaks into the wood. That’s why a chemical stripper alone usually leaves the color behind, and why the right order matters.

This guide covers the three methods (strip, sand and bleach), which one your piece needs, how to deal with dark stain that won’t budge, and how to lift the other kind of stain, the spots and rings on finished wood.

Wiping down a bare oak board with a cloth after removing the old finish

⚡ Quick Answer

Solid wood with a clear coat over the stain: strip the topcoat with a gel stripper such as Citristrip, then sand the stain out with a random orbital sander.

Veneer: strip and scrub only, then use wood bleach. Sanding goes through veneer fast.

Bare wood with no topcoat (decks, fences, raw furniture): sand it, or use a stain stripper made for decks.

What You’ll Need

The kit for a typical piece of furniture. The first three do most of the work; the sanders make the sanding part fast.

Tool What it does Price Buy
Citristrip Stripping Gel Softens the varnish, lacquer, poly or shellac over the stain $ Shop Now at Amazon
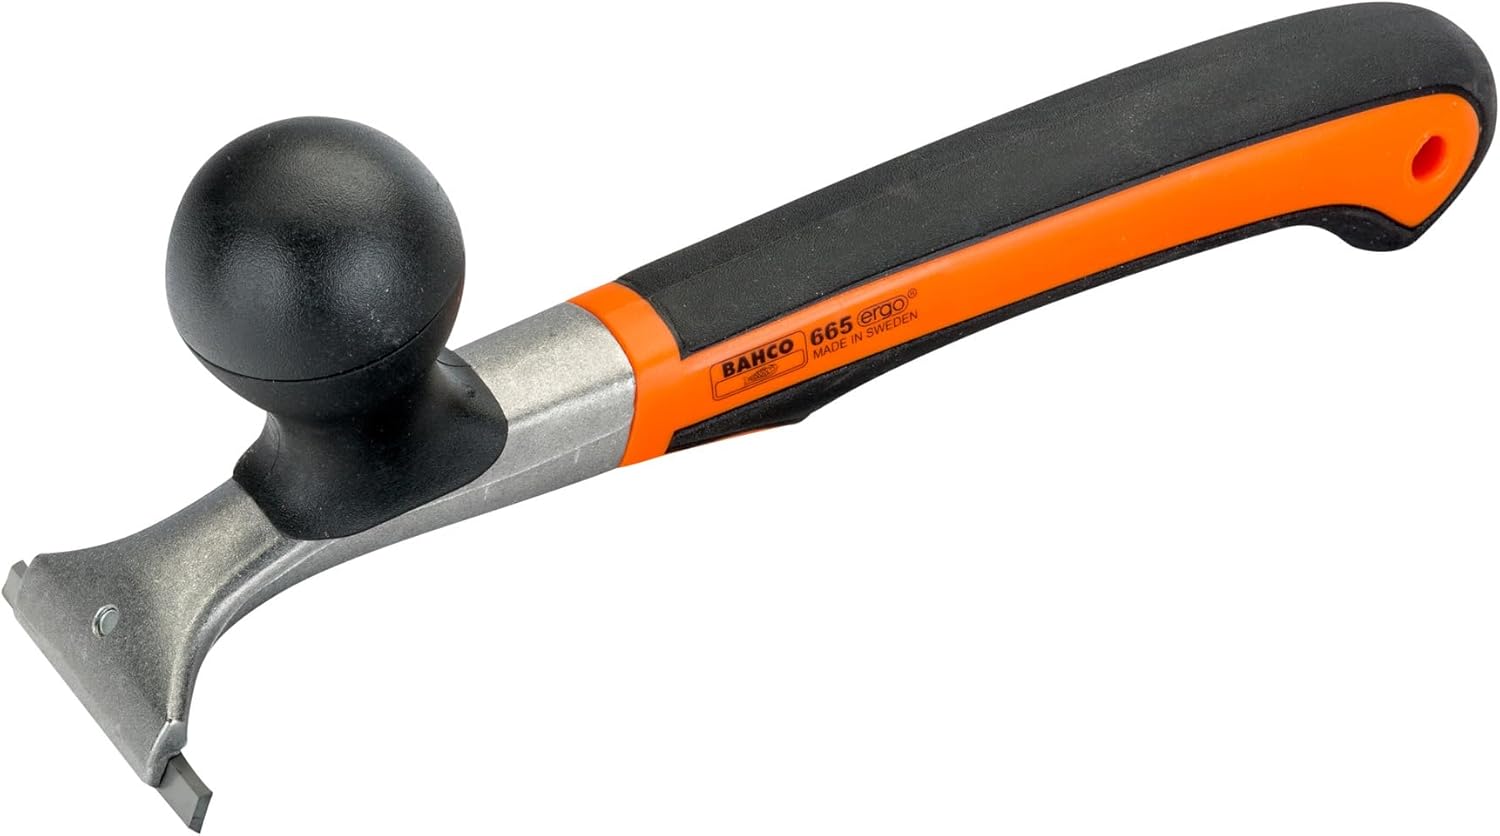
Bahco 665 Carbide Scraper Lifts the softened finish off flat surfaces $ Shop Now at Amazon
3M Fine Sanding Sponge Scrubs residue out of grain and profiles, wet or dry $ Shop Now at Amazon
Bosch ROS20VSC Random Orbital Sands the stain out of flat surfaces fast $$ Shop Now at Amazon
DEWALT DWE6411K Sheet Sander Gets into inside corners a round pad can’t reach $$ Shop Now at Amazon

Also: chemical-resistant gloves, eye protection, plastic sheeting, mineral spirits or the cleanup your stripper’s label calls for, and 80, 120, 150 and 180-grit abrasives.

First, Know What You’re Removing

Most stained furniture has two layers: the stain, which is color that has soaked into the wood fibers, and a clear topcoat over it, such as polyurethane, varnish, lacquer or shellac. Two quick checks tell you what you’re dealing with:

  • Is there a topcoat? Drop a little water on the surface. If it beads and sits there, there’s a finish on top. If it darkens the wood and soaks in, the stain is exposed, which is common on decks and fences.
  • Is it solid wood or veneer? Look at an edge or the end grain. If the grain on the top doesn’t continue down the edge, or you see a thin layer over plywood or particleboard, it’s veneer. Veneer can be sanded only very lightly.

Is It Better to Sand or Strip Stained Wood?

On most furniture the answer is both, in that order. A stripper is the fastest way to take off a clear topcoat, and sanding a thick poly finish is slow and clogs paper. But stripper won’t pull out much of the stain that has soaked into the fibers, so after stripping you sand to remove the color.

  • Strip first when there’s a thick film finish, carved details, turned legs, or veneer you can’t sand hard.
  • Sand only when the piece is solid wood with flat surfaces and a thin finish, or bare stained wood with no topcoat.
  • Add bleach when stain is still in the grain after stripping and you can’t sand any deeper.

Method 1: Strip the Topcoat

Citristrip Paint & Varnish Stripping Gel

Citristrip Paint and Varnish Stripping Gel, 1 quart

Citristrip removes varnish, lacquer, polyurethane and shellac from wood, according to the maker. It’s a gel, so it clings to legs and vertical panels, and it stays wet and active for up to 24 hours, which gives it time to work through several coats. It contains no methylene chloride and is sold for indoor use, but it still carries a California Prop 65 warning, so wear gloves and eye protection and keep the room ventilated. For other options, see my picks for the best paint stripper for wood.

Shop Now at Amazon


How to Strip the Finish Off Stained Wood

  1. Set up. Work outside or with good airflow, on plastic sheeting. Remove hardware and take off drawers and doors.
  2. Apply a thick coat. Brush the gel on generously in one direction. Don’t brush back and forth: let it sit undisturbed.
  3. Wait. Follow the label and check a small spot with the scraper. When the finish lifts and wrinkles down to the wood, it’s ready. Old, thick finishes take longer.
  4. Scrape with the grain. On flat surfaces use a scraper held low, going with the grain so you don’t gouge.
  5. Scrub the details. Use a fine sanding sponge or a stiff nylon brush on carvings, spindles and grooves.
  6. Clean the residue. Wipe down with the cleaner your stripper’s label specifies and let the wood dry fully before sanding.

Bahco 665 Carbide Scraper

Bahco 665 carbide scraper with 2-1/2 inch blade and two-hand grip

A plastic putty knife works, but a carbide scraper lifts softened finish faster and doesn’t dull. The Bahco 665 has a 2-1/2″ blade and a two-hand handle for steady pressure, and it takes four blade shapes for different profiles. Bahco says the carbide stays sharp up to 50 times longer than steel. Keep it flat and light on softwoods like pine: a carbide edge cuts wood as happily as finish.

Shop Now at Amazon


3M Fine Sanding Sponge

3M Sanding Sponge Block, single angle, fine grit, extra large

For stripper residue in the grain and on curved parts, a flexible sanding sponge does what a brush can’t. This 3M fine-grit block is extra large (2-7/8 x 8 in), can be used wet or dry, and rinses clean to reuse. It also handles the final hand-sanding on legs and spindles once the piece is dry.

Shop Now at Amazon


Method 2: Sand the Stain Out

Once the topcoat is gone, the stain left in the wood comes out with sanding. How deep it goes depends on the wood and the stain: on dense hardwoods like maple it’s often just below the surface, on open-pored oak and soft pine it goes deeper and hangs on in the pores.

The Grit Sequence

  • 80 grit to cut through the stained layer on solid wood. Skip it on veneer.
  • 120 grit to remove the 80-grit scratches and the last of the color.
  • 150 to 180 grit to finish, before you re-stain or clear-coat.

Move one step at a time and clean off the dust between grits. The full chart is in my what grit sandpaper for wood guide.

For Flat Surfaces: Bosch ROS20VSC Random Orbital Sander

Bosch ROS20VSC 5 inch variable speed random orbital sander

Tabletops, drawer fronts and door panels go much faster with a random orbital sander. The Bosch ROS20VSC has a speed dial from 7,500 to 12,000 OPM, so you can slow it down on veneer, and a pad dampening system Bosch designs to reduce swirl marks. Keep the pad flat and moving, and let the tool’s weight do the work. For bigger jobs, see my best sanders for furniture refinishing.

Shop Now at Amazon


For Corners: DEWALT DWE6411K Sheet Sander

DEWALT DWE6411K quarter sheet palm sander

A round pad can’t reach into the inside corner of a drawer box or a frame-and-panel door, and stain left in a corner shows. A 1/4-sheet sander like the DEWALT DWE6411K (2.3 A, 14,000 OPM) has a square pad that gets right in. It clamps ordinary sandpaper, so you can cut sheets in any grit. For tighter spots, a triangular detail sander is the next step.

Shop Now at Amazon


⚠️ Veneer Warning

Furniture veneer can be thinner than a sheet of paper. One pass with 80 grit and a power sander can burn through to the glue layer, and that can’t be fixed with filler. On veneer, strip, scrub, hand-sand lightly at 150 grit or finer, and use bleach for what’s left.

Method 3: Bleach What Won’t Come Out

When color is still trapped in the grain after stripping and you can’t sand deeper, wood bleach is the next step. There are three kinds, and each works on a different stain:

  • Two-part wood bleach (A/B, sodium hydroxide and hydrogen peroxide): lightens the wood itself and most pigment and dye stains. The strongest option, used for making dark wood lighter.
  • Oxalic acid: for black water marks and iron stains, the dark rings from a plant pot or a steel tool left on oak. It doesn’t lighten ordinary stain much.
  • Household chlorine bleach: can remove some dye stains without changing the wood’s natural color much.

Whichever you use, follow the label, neutralize and rinse as it directs, let the wood dry completely, and sand lightly afterward because bleach raises the grain. Then finish as normal.

How to Remove Dark Stain from Wood

Dark stains, especially on oak and pine, are the hardest to remove because pigment packs into the open pores and soft earlywood. Work in this order: strip the topcoat, scrub the pores with a fine sponge or a brass brush, sand to 120 grit on solid wood, then use a two-part bleach on what’s left. Accept that open-pored woods may keep a little color in the pores: going a shade darker on the new finish hides it far more easily than chasing the last bit out.

Removing Stain from Tables, Doors and Decks

Wood Table

Strip the top and sand it with a random orbital, then treat the legs and apron by hand. The step-by-step is in my guides to sanding and refinishing a table and how to sand a table.

Wood Door

Take it off the hinges and lay it flat so the stripper doesn’t run. Panel doors have inside corners a round pad can’t reach, so use a sheet or detail sander there. See my best sanders for doors.

Deck

Deck stain has no topcoat over it and is weathered, so use a deck stain stripper made for exterior wood, or sand it off. My guide on how to sand a deck covers the process.

Removing Stains ON Wood (Spots, Rings and Grease)

Sometimes “stain” means a mark on finished wood, not the color in it. Try the gentlest fix first:

  • White rings and cloudy spots are moisture trapped in the finish, not in the wood. They often fade with gentle heat (a hair dryer on low) or a light rub with a non-gel toothpaste on a soft cloth.
  • Grease and grime: a few drops of mild dish soap in warm water on a damp, well-wrung cloth, then dry immediately.
  • Black rings: the water has reached the wood and reacted with it. That needs the finish removed and oxalic acid, as above.
  • Ink and marker: if it’s in the finish, a light rub with mineral spirits may lift it; if it’s in the wood, it’s a strip-and-sand job.

After the Stain Is Gone

Clean the dust, fill any holes with a stainable filler (see my best wood filler picks), test your new stain on the underside, then apply the finish. If you’re using polyurethane, my guide to sanding between coats of polyurethane covers the part that decides how smooth it ends up. And if the piece is painted rather than stained, the process is different: see how to strip paint from wood.

🏆 The Short Version

Strip the topcoat with a gel like Citristrip and a carbide scraper, sand the stain out with a random orbital sander on flat surfaces and a sheet sander in the corners, and bleach whatever color is left. On veneer, skip the heavy sanding. On a deck, use a deck stripper or sand. And test the new finish on a hidden spot before you commit.

❓ Frequently Asked Questions

Is it better to sand or strip stained wood?+
On most furniture, do both: strip first to remove the clear topcoat quickly, then sand to remove the stain that has soaked into the wood. Sanding alone works on solid wood with flat surfaces and a thin finish. Stripping alone is best for veneer and carved pieces, followed by bleach if color remains.
Is Dawn dish soap a good stain remover?+
For grease and grime on finished wood, yes: a few drops of mild dish soap in warm water on a well-wrung cloth cleans the surface safely, as long as you dry it right away. It won’t remove wood stain, the color inside the wood, and it won’t fix white rings or black water marks.
Can you remove wood stain without sanding?+
Partly. A chemical stripper removes the topcoat and some surface stain, and scrubbing with a fine sanding sponge or brass brush while it’s wet lifts more. Wood bleach can lighten what remains. But stain that has soaked deep into the fibers usually needs at least a light sanding to come out completely.
Can you remove a stain after it’s been dried?+
Yes. While stain is still wet, you can often wipe most of it off with the solvent on the can’s label. Once it has dried into the wood, remove it the same way as old stain: strip any topcoat, then sand, and bleach what’s left. If there’s no topcoat yet, you can go straight to sanding.
How do you remove dark stain from wood?+
Strip the topcoat, scrub the pores while the stripper is wet, sand to 120 grit on solid wood, then use a two-part wood bleach on the remaining color. Dark stain in open-pored woods like oak may never come out of the pores completely, so choose a new color that is no lighter than you need.
How do you remove stain from wood without chemicals?+
Sand it. Scrape off any topcoat with a sharp carbide scraper, then sand with 80, 120 and 150 to 180 grit on solid wood. It’s slower than stripping on thick finishes and carvings, and a dust mask and vacuum are essential, but it uses no chemicals at all. It isn’t suitable for thin veneer.

Stuck on a piece that won’t give up its color? Tell me the wood and the finish in the comments and I’ll suggest the next step.

How to Strip Paint from Wood (Without Damaging the Wood)

The best way to strip paint from wood depends on the piece: a gel chemical stripper for furniture, carvings and anything with detail, a heat gun and scraper for thick layers on doors and trim, and a sander only for flat surfaces with a few thin coats. Whatever the method, if the paint could be from before 1978, test it for lead first.

Old door panel with cracked, peeling paint ready to be stripped

Stripping paint is slow, messy work, and the method you choose decides whether you end up with clean wood ready for stain or with gouges, scorch marks and paint still stuck in every corner. Below: how the four methods compare, step-by-step instructions for each, what to do for furniture, doors and cabinets, and the tools that make it easier.

The 4 Ways to Strip Paint from Wood, Compared

Method Best for Speed Dust Watch out for
Chemical stripper (gel) Furniture, carvings, spindles, many layers Slow to act, little effort None Fumes, skin contact, residue cleanup
Heat gun + scraper Thick paint on doors, trim, flat panels Fast None Scorching, fire, cracking nearby glass
Scraping only Loose, flaking paint Medium Chips Gouges from a tilted blade
Sanding Flat surfaces, thin coats, final cleanup Fast on flat wood A lot Clogged paper, lead dust, rounded details

⚡ Quick Pick by Project

Painted chair, dresser or anything carved: a gel stripper such as Citristrip, then a light sand.

Door, trim or baseboard with many coats: a heat gun like the Wagner HT1000 and a carbide scraper.

Flat tabletop or deck boards with one or two coats: a sander, starting at 60 or 80 grit.

Step 1: Test for Lead Before You Start

Peeling white paint on old wooden boards, the kind of paint to test for lead

This comes before any method. The EPA’s guidance for do-it-yourselfers says: “If your home was built before 1978, it may have lead-based paint; the older your home, the more likely it has lead-based paint.” The same applies to old furniture, doors and trim that came from an older house. Sanding, scraping and burning lead paint all release lead into dust or fumes.

  • Test it. The EPA recognizes two test kits for wood, LeadCheck and D-Lead, when they are used by a Certified Renovator. For the most reliable answer, the EPA points to a certified lead inspector or risk assessor.
  • If it is lead, or you can’t rule it out: the EPA’s DIY guidance recommends methods that keep dust down, including wet sanding with wet-dry sandpaper or a sanding sponge, a low-temperature heat gun under 1,100°F, and a chemical stripper, with the area sealed off and cleaned with a HEPA vacuum. Many people hire a lead-safe certified contractor at this point.
  • If it is not lead: still wear a respirator and eye protection. Old paint dust, stripper fumes and heat-gun fumes are all worth avoiding.

Step 2: Prepare the Piece and the Space

  • Remove hardware, hinges and knobs. Take doors off their hinges and lay them flat if you can; strippers and scrapers work far better on a horizontal surface.
  • Work outdoors or in a well-ventilated room, with plastic sheeting under the piece to catch paint and sludge.
  • Wear chemical-resistant gloves, eye protection and a respirator suited to what you are using.
  • Clean off grease and dirt with a mild detergent and let the surface dry.

Method 1: Chemical Paint Stripper

A chemical stripper softens the paint so it can be scraped or wiped off, and it is the only method that reaches into carvings, turnings and molding profiles without damaging them. Gel and paste strippers are easier than liquids because they cling to vertical surfaces and stay wet longer. I compare the gels, pastes and liquids worth buying in my guide to the best paint stripper for wood.

How to Strip Paint from Wood With a Chemical Stripper

  1. Test a small area to see how long the stripper needs on your paint.
  2. Brush on a thick coat with an old natural-bristle brush, in one direction. Don’t brush it back and forth; a thick, undisturbed layer works better.
  3. Keep it wet. Covering the stripper with plastic wrap slows evaporation, which matters on multiple layers.
  4. Wait for the time on the label, until the paint wrinkles and bubbles.
  5. Scrape with a plastic scraper on flat areas, following the grain, and use a stiff brush, a dental pick or a wooden skewer in details.
  6. Repeat on areas where paint remains.
  7. Clean the residue with the solvent the label specifies, then let the wood dry completely before sanding.

What Is the Most Effective Paint Remover for Wood?

For most DIY furniture work, a gel stripper that stays active for hours is the most effective, because it can soften many layers in one application. Citristrip, for example, says its gel stays wet and active for up to 24 hours. Faster, harsher strippers exist, but they give you less working time and are harder to use safely indoors. “Safer” labels don’t mean harmless: Citristrip contains no methylene chloride, yet its listing still carries a California warning for N-Methyl-2-pyrrolidone, so gloves and ventilation still apply.

Method 2: Heat Gun and Scraper

A heat gun softens paint in seconds so it lifts off in ribbons. On a door or a long run of trim with many coats, it is the fastest method there is, and it makes no dust. I compare models in my guide to the best heat gun for paint removal.

How to Strip Paint With a Heat Gun

  1. Start on the lower setting and hold the nozzle a couple of inches from the surface.
  2. Move it slowly over a small area until the paint blisters and bubbles. Don’t stop in one spot.
  3. Scrape the softened paint right away, with the grain, keeping the scraper at a low angle, while you heat the next section.
  4. Drop hot paint scrapings into a metal container, not onto plastic sheeting or the floor.

Safety: keep the heat away from window glass, which can crack, and from gaps in walls, where dust and old paper can smolder unseen. Keep a fire extinguisher nearby and check the area again after you finish. For old paint, stay under the EPA’s 1,100°F guideline. Check your heat gun’s maximum: some variable models go well past it, while the Wagner HT1000 below tops out at 1,000°F.

Method 3: Scraping

If the paint is already failing, like the flaking boards in the photo above, a sharp scraper removes most of it with no heat or chemicals. A carbide scraper stays sharp far longer than a steel one. Pull it toward you with the blade almost flat and let the edge do the work; digging in at a steep angle leaves gouges you then have to sand out.

Method 4: Sanding

Sanding is the quickest method on flat surfaces with a few thin coats, and it is always the last step after stripping or heat, to clean off what is left and prepare the wood for finish. It is also the method that makes the most dust, so it is the one to avoid entirely on paint that might contain lead.

  • Tool: a random orbital sander for furniture and curves, a belt sander for large flat stock like doors laid flat and deck boards. I compare the best models for this job in my guide to the best sanders to remove paint, and belt sanders on their own in my belt sander reviews.
  • Grit: start at 60 or 80, then 120, and finish at 150 or 180. My sandpaper grit chart has the full sequence.
  • Speed: a medium setting, so the paint doesn’t melt and glue itself to the disc. Change the disc as soon as it clogs.
  • Dust: connect a vacuum. A shop vac for dust collection makes a big difference with paint.

If you haven’t used one before, read how to use an orbital sander first. For the corners a round pad can’t reach, a detail sander finishes the job.

What Is the Quickest Way to Strip Paint?

On a flat door or trim with many coats, a heat gun and a sharp scraper is the quickest. On a flat surface with only one or two thin coats, a belt sander or a random orbital sander at 60 grit is quicker still. On anything with carvings, turnings or molded details, a gel chemical stripper is slower to act but quicker overall, because you are not fighting the shape. For most projects the fastest route is a combination: stripper or heat for the bulk, then a quick sand for the rest.

How to Strip Paint from Wood Without Sanding

Use a chemical stripper or a heat gun to remove the paint, then clean up with the stripper’s recommended solvent and fine steel wool or a stiff brush. On carved or delicate pieces, this is often the better route anyway, because sanding rounds over crisp details. You will probably still want a very light hand-sanding with 180 or 220 grit before finishing, to smooth grain the stripper has raised.

How to Remove Paint Without Damaging the Wood

  • Use a plastic scraper on softened paint, and keep metal scrapers at a low angle.
  • Scrape and sand with the grain.
  • With a heat gun, keep moving and stop as soon as the paint bubbles. Scorch marks go deep.
  • Let the stripper do the work: another coat and more waiting is better than scraping hard.
  • Avoid coarse grits and belt sanders on veneer, which can be thinner than a sheet of paper.

Stripping Paint by Project

How to Strip Paint from Wood Furniture

Chemical stripper is the default for furniture: it gets into joints, turnings and carvings without rounding them. Work one surface at a time, laid horizontal if possible. Then sand lightly and prepare for your new finish; my guide to sanding furniture to paint covers the next steps if you are repainting.

How to Strip Paint from a Wood Table

Strip the legs and apron with chemical stripper, and the top with stripper or, if it is solid wood with only a coat or two, with a random orbital sander. Check whether the top is veneer before sanding: look at the edge and end grain. Then follow my guide on how to sand and refinish a table.

How to Strip Paint from a Wood Door

Take the door off its hinges and lay it on sawhorses. A heat gun and scraper removes thick paint from the flat panels and stiles fastest; use stripper in the molded profiles around the panels. Finish with a sander on the flats; I recommend specific models in my best sanders for doors guide.

How to Strip Paint from Wood Cabinets

Remove the doors and drawer fronts and strip them flat on a bench. Use chemical stripper on raised-panel profiles, and protect the countertop and floor if you strip the cabinet boxes in place. Many cabinets are veneered plywood, so go gently with any sander. See my picks for the best sanders for cabinets.

Household Items for Stripping Paint: What Works and What Doesn’t

Home remedies get a lot of attention, but on painted wood their use is narrow:

  • Vinegar: hot white vinegar can soften small areas of water-based paint, for example on a small wooden item, left on for a while and then scraped. It does little to oil-based paint and is not practical for a whole door or dresser.
  • Baking soda and boiling water: a classic for stripping paint off metal hinges and knobs you have removed. Don’t boil wood.
  • Dish soap: good for cleaning the surface before and after stripping, not for removing dried paint.

For anything larger than a small item, a commercial gel stripper or a heat gun will save you hours.

Tools That Make Stripping Paint Easier

Citristrip Paint & Varnish Stripping Gel

Citristrip paint and varnish stripping gel, 1 quart

Best for Furniture and Detail

A gel that clings to vertical surfaces and, according to the maker, stays wet and active for up to 24 hours, long enough to soften several layers in one go. It has no methylene chloride and is non-caustic. Its listing still carries a California Prop 65 warning, so use gloves and good ventilation.

Shop Now at Amazon


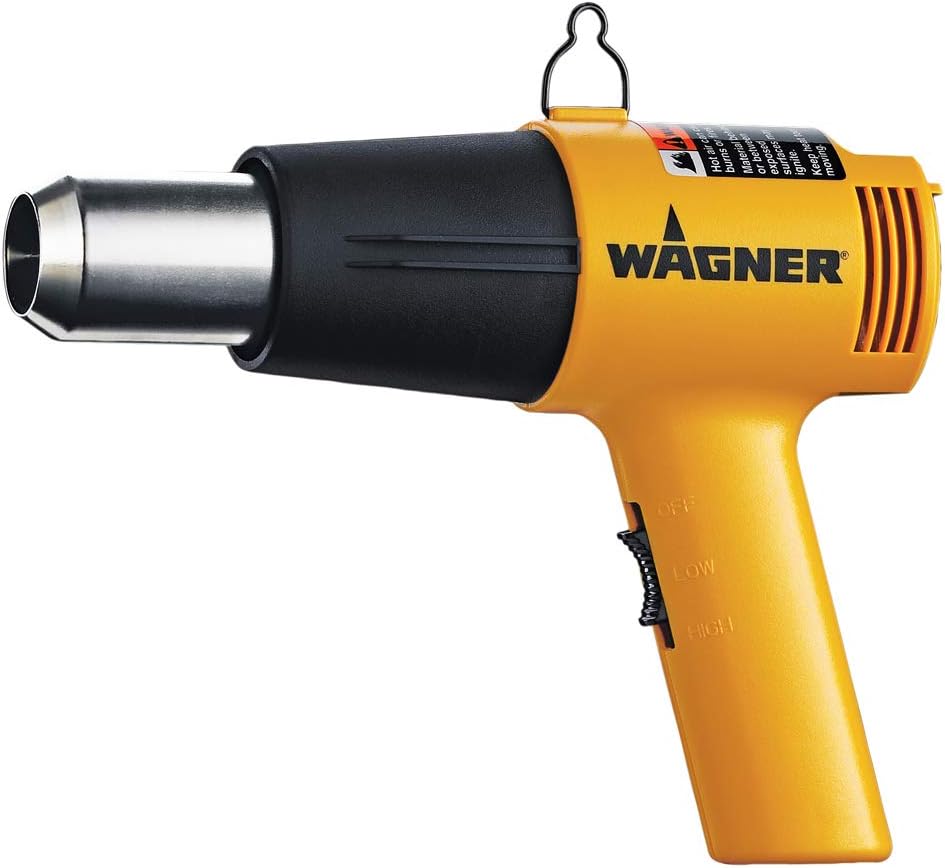
Wagner HT1000 Dual-Temperature Heat Gun

Wagner HT1000 dual temperature heat gun

Best Heat Gun for Doors and Trim

Two settings, 750°F and 1,000°F, both under the EPA’s 1,100°F guideline, with two fan speeds. The integrated stand lets you set it down hot without the nozzle touching the bench, and Wagner gives it a 2-year home-use warranty.

Shop Now at Amazon


Bahco 665 Carbide Scraper

Bahco 665 carbide scraper with 2-1/2 inch blade and ergonomic handle

Best Scraper

A 2-1/2″ carbide blade on a long two-handed grip, for scraping after the heat gun or on flaking paint. Bahco says the carbide edge stays sharp up to 50 times longer than steel, and the blades are interchangeable. Limited lifetime warranty.

Shop Now at Amazon


Wagner PaintEater Palm-Grip Disc Sander

Wagner PaintEater electric paint remover palm grip disc sander

Best for Siding and Rough Exterior Wood

A 3.2 A rotary tool with a 4-1/2″ open-web 3M disc at 2,600 RPM, made for paint rather than wood: the open disc resists clogging, and the flexible disc follows uneven boards. Use it on edge for stubborn chips and flat to feather the edges before repainting. I also cover it in my disc sander reviews.

Shop Now at Amazon


For Sanding: Bosch GET65-5N

For the sanding step, my first pick is the Bosch GET65-5N, a dual-mode random orbit sander whose Turbo mode strips aggressively and whose random-orbit mode finishes the surface. The full comparison, including belt sanders, is in my guide to the best sanders to remove paint.

Shop Now at Amazon


🏆 The Bottom Line

Test for lead first if the paint could predate 1978. Then match the method to the piece: gel stripper for furniture and detail, a heat gun and carbide scraper for thick paint on doors and trim, a scraper for paint that is already flaking, and a sander for flat surfaces and the final cleanup. Most projects use two of them. Work with the grain, keep the heat moving, and let the stripper do the work instead of your scraper.

❓ Frequently Asked Questions

Will Dawn dish soap remove paint?+
Not dried paint on wood. Dish soap and warm water can lift wet or very fresh latex paint and are useful for cleaning grease off a surface before you strip or repaint it, but they will not soften cured paint. For that you need a paint stripper, heat or sanding.
What is the most effective paint remover for wood?+
For most DIY projects, a gel chemical stripper that stays active for hours, such as Citristrip, is the most effective, because it softens several layers at once and reaches into carvings and profiles. On flat doors and trim with thick paint, a heat gun with a carbide scraper is faster.
What is the quickest way to strip paint?+
A heat gun and a sharp scraper on flat surfaces with many coats, or a belt or random orbital sander at 60 grit on flat surfaces with one or two thin coats. On detailed pieces, a gel stripper is quicker overall. Test for lead before any of these if the paint could be from before 1978.
What household items can I use to strip paint?+
Hot white vinegar can soften small areas of water-based paint, and baking soda in boiling water strips paint from removable metal hardware. Dish soap only cleans. None of them is practical for stripping a whole piece of furniture or a door; use a gel stripper or a heat gun for that.
How do you strip paint from wood without sanding?+
Use a gel chemical stripper or a heat gun to soften the paint, scrape it off with the grain, clean off the residue with the solvent named on the stripper’s label, and use a stiff brush or fine steel wool in the details. A very light hand-sanding at 180 to 220 grit afterwards smooths raised grain before finishing.
Can you remove paint from wood with vinegar?+
Only in small amounts and mostly on water-based paint. Heated white vinegar left on the paint for a while can soften it enough to scrape off a small item. It works poorly on oil-based paint and on large surfaces, where a commercial stripper is far more effective.

Stuck on a stubborn piece? Tell me what it is, what the paint looks like and what you have tried in the comments, and I’ll suggest the next step.

How to Use an Orbital Sander (Step by Step, Without Swirl Marks)

To use an orbital sander, attach a hook-and-loop disc with its holes lined up, connect a vacuum, set the pad flat on the wood before you switch it on, and move it slowly in overlapping passes, about an inch per second, with no more pressure than your hand resting on it. Step up through the grits, clean the surface between each one, and switch off before lifting the sander.

Woodworker in a dust mask sanding a board with a random orbital sander

That covers 90% of it. The other 10% is where swirl marks, gouged edges and burned-out pads come from, and it is what this guide is about. The steps below are written for a random orbital sander, the round-pad tool most people mean by “orbital sander”. If yours has a square pad, it is a sheet sander; I cover the differences at the end.

What You Need

  • A random orbital sander, 5″ or 6″. If you don’t have one yet, start with my random orbital sander reviews.
  • Hook-and-loop sanding discs in three or four grits, with a hole pattern that matches your pad (see my guide to the best sanding discs for random orbital sanders).
  • A shop vac or dust extractor with a hose that fits the sander’s port. The onboard bag or canister catches far less. See the best shop vacs for dust collection.
  • Safety glasses, hearing protection and a dust mask or respirator.
  • Clamps or a non-slip mat to hold the workpiece.

How to Use an Orbital Sander, Step by Step

Step 1: Attach the Sanding Disc

Lining up the holes of a hook-and-loop sanding disc with the sander pad

Unplug the sander or remove the battery first. Knock the old disc off and brush any dust out of the hooks on the pad. Hold the new disc by its edges, line up its dust holes with the holes in the pad, then press it on from the center outward. The holes matter: if they don’t line up, the vacuum pulls through fewer openings and dust stays under the disc, where it clogs the paper and scratches the wood.

If your pad has 8 holes and the disc has 5, or you own sanders with different patterns, buy multi-hole or mesh discs, which work on any pattern. The disc should sit flat with no edge lifting. If it keeps flying off, the hooks on the pad are worn and the pad needs replacing, not the discs. Here’s how to find a replacement pad that fits your sander.

Step 2: Choose the Starting Grit

Start with the finest grit that removes the worst mark on the surface: 80 for old finish or rough boards, 120 for new lumber. Plan your sequence before you begin, for example 80, 120, 150, 180. My sandpaper grit chart lists the right start and finish grit for every job.

Step 3: Connect Dust Collection and Put On Your Protection

Connect the vacuum hose to the dust port. Beyond keeping the room clean, extraction makes the sander cut better, because dust trapped under the disc makes it skate and clog. Put on safety glasses, hearing protection and a dust mask. Fine wood dust is the part of sanding you don’t see and shouldn’t breathe.

Step 4: Secure the Workpiece

A random orbital sander pulls sideways as it spins. Clamp small parts to the bench, or put them on a non-slip router mat. Large panels and tabletops usually stay put under their own weight.

Step 5: Set the Speed

If your sander has a speed dial, use the top setting for stock removal on bare wood, and turn it down for finish sanding, for veneer, for sanding between coats and for anything that heats up and gums the paper, like old paint or resinous pine. The Makita BO5041, for example, goes down to 4,000 OPM; the Bosch ROS20VSC and DEWALT DWE6423K start at 7,500 and 8,000.

Step 6: Start the Sander on the Wood

Place the pad flat on the surface, then switch on. Starting it in the air and bringing it down spinning is the quickest way to gouge the wood, because the disc hits the surface at full speed and at an angle. The same applies at the end: switch off with the pad on the wood, and lift only when the pad has stopped.

Step 7: Move Slowly in Overlapping Passes

Move the sander in straight rows, slowly, about an inch per second, overlapping each row with the previous one by about half the pad. Then do a second set of rows across the first. With a random orbital sander you don’t need to follow the grain, because the random pattern leaves no straight scratches. Speed of movement matters more than you’d expect: moving fast feels productive but the abrasive does less work and the scratch pattern is less even.

Step 8: Let the Weight of the Sander Do the Work

Rest your hand on top to guide it and add no more than light pressure. Pressing down slows or stops the free rotation of the pad, and a pad that isn’t spinning freely leaves the repeating loops people call swirl marks. If the sander is not cutting, the disc is worn or clogged: change it.

Step 9: Keep the Pad Flat, Especially at the Edges

Never tilt the sander onto the edge of the disc to “dig in” on a spot. It cuts a dish into the wood, and heat from the edge damages the hook-and-loop pad. At the edge of a board, let the pad overhang a little, but not more than about a third of it, or the sander tips and rounds over the edge.

Step 10: Clean Between Grits and Check Your Work

Before each new grit, vacuum or wipe the surface, and change the disc. Then check the surface with a light held low and to the side. When the scratches from the previous grit are gone and the new pattern is even, move up. After the final grit, wipe with a tack cloth or a damp rag before applying finish.

💡 Pro Tip

Draw light pencil lines across the whole surface before each grit. When all the pencil is gone, you have sanded every area at that grit, and you haven’t lingered in one spot.

Do You Push Down on an Orbital Sander?

No. Guide it, don’t press it. The weight of the sander plus your resting hand is enough. Extra pressure feels like it should cut faster, but it slows the pad’s rotation, heats the disc, clogs it faster and leaves swirls. Some sanders make this easy to feel: if the pad visibly slows when you lean on it, you are pressing too hard. Light pressure with a fresh disc is always faster than heavy pressure with a dull one.

The 5 Most Common Random Orbital Sander Mistakes

  1. Too much pressure. Stops the random rotation and creates swirl marks. Guide, don’t push.
  2. Starting or stopping off the surface. A spinning pad landing on wood at an angle gouges it. Pad down first, then switch on.
  3. Tilting onto the edge of the disc. Digs a dish into the surface and cooks the pad’s hooks.
  4. Skipping grits or not cleaning between them. The coarser scratches stay, or loose coarse grit gets dragged around by the finer disc.
  5. Using a worn or clogged disc. Once the disc stops cutting, pressing harder only makes things worse. Discs are cheap compared with a ruined finish.

How to Use an Orbital Sander on Specific Jobs

How to Use an Orbital Sander on Wood Furniture

Use the orbital sander on the flat, open surfaces: tops, sides, drawer fronts. Stop short of inside corners and carvings, where the round pad can’t reach; finish those with a detail sander or by hand. If a piece has lots of corners, see my guide to the best detail sanders.

How to Use an Orbital Sander to Remove Paint

Start at 60 or 80 grit and a medium speed, because high speed melts paint and loads the disc in seconds. Keep the sander moving and change discs as soon as they clog. If the house or furniture could be from before 1978, test for lead before sanding at all. For big flat areas, a belt sander is faster; I compare both in my guide to the best sanders to remove paint, and chemical and heat methods in how to strip paint from wood.

How to Use an Orbital Sander on Hardwood Floors

A handheld random orbital sander works for a small room, a single damaged area or a light scuff between coats, but it is slow on a whole floor. Work in sections, keep the pad flat and always keep moving so you don’t leave a dip. For a full floor, a large orbital floor sander is the tool; my step-by-step guide on sanding hardwood floors with an orbital sander covers both.

Sanding Between Coats of Finish

Use 320 grit or finer at the lowest speed, a fresh disc and almost no pressure. You are only knocking down dust nibs, not removing finish. Stay well away from edges, where the finish is thinnest and easy to cut through.

What Are the Downsides of an Orbital Sander?

  • It can’t reach inside corners. A round pad leaves an unsanded arc in every 90-degree corner.
  • It is slower than a belt sander for heavy stripping and leveling large flat surfaces.
  • Swirl marks if misused. Pressure, tilting and skipped grits all show up under stain.
  • Discs cost more than plain sandpaper sheets, and you need the right hole pattern.
  • Dust, unless you connect a vacuum. The onboard bag or canister is a compromise.

None of these are reasons not to own one; they are reasons to own a second tool for corners. My sheet sander vs random orbital sander comparison explains which pairs best with it.

Using a Sheet (Orbital Finishing) Sander Instead

Some tools sold as “orbital sanders” have a square pad that moves in a small fixed orbit and doesn’t spin. The technique is similar, with three differences: clamp a cut piece of ordinary sandpaper tight under both clamps so it doesn’t wrinkle; sand with the grain, because the fixed orbit leaves a more regular pattern; and use the square pad’s corners to get into inside corners, which a random orbital can’t do.

Random Orbital Sanders I’d Start With

All three are 5″ corded models with variable speed, which is what makes the speed advice above possible. My full comparison is in the best random orbital sanders guide, and cordless options are in my cordless sander reviews.

Bosch ROS20VSC 5″ Random Orbital Sander

Bosch ROS20VSC 5 inch variable speed random orbital sander

Easiest to Learn On

A 2.5 A motor with a speed dial from 7,500 to 12,000 OPM, and a pad dampening system Bosch designs to reduce swirl marks, which helps while you are still learning how much pressure is too much. The twist-off micro-filter canister shows you when it is full.

Shop Now at Amazon


DEWALT DWE6423K 5″ Random Orbital Sander

DEWALT DWE6423K 5 inch variable speed random orbital sander kit

Most Control

A 3 A motor at 8,000 to 12,000 OPM in a low body that puts your hand close to the work, which makes it easier to keep the pad flat. A separate counterweight reduces vibration, the switch is dust-sealed and DEWALT backs it for three years.

Shop Now at Amazon


Makita BO5041 5″ Random Orbit Sander

Makita BO5041 5 inch variable speed random orbit sander

Best for Finishing and Paint

The widest speed range here, 4,000 to 12,000 OPM, so you can slow right down for sanding between coats and for paint that would otherwise melt onto the disc. The adjustable front handle gives you a second grip on big panels.

Shop Now at Amazon


And the Discs: Mirka Gold Multifit 5″, 120 Grit

Mirka Gold Multifit 5 inch 120 grit hook and loop sanding discs, 50 pack

Mirka’s Multifit hole pattern is made to fit any 5″ dust-extraction pad, so it solves the hole-alignment problem from Step 1 whichever of the sanders above you choose. 120 is the grit you will go through fastest; buy the others as you need them.

Shop Now at Amazon


🏆 The Bottom Line

Line up the disc holes, connect a vacuum, start and stop with the pad on the wood, move slowly in overlapping rows and let the sander’s weight do the work. Keep it flat, step up one grit at a time and clean between grits. Get those right and a random orbital sander leaves a surface that is ready for stain, with no swirls. For the grits to use on your project, see my sandpaper grit chart, and for the full sanding process, how to sand wood.

❓ Frequently Asked Questions

What are the 5 most common mistakes people make with a random orbital sander?+
Pressing down too hard, switching it on or off away from the surface, tilting it onto the edge of the disc, skipping grits or not cleaning between them, and carrying on with a worn or clogged disc. All five either stop the pad rotating freely or leave coarse scratches, and the result is swirl marks under the finish.
Do you push down on an orbital sander?+
No. Rest your hand on it and guide it; the tool’s own weight provides enough pressure. Pushing down slows the pad’s rotation, heats and clogs the disc and causes swirl marks. If the sander stops cutting, change the disc instead of pressing harder.
How do I attach sandpaper to my orbital sander?+
On a random orbital sander, unplug it, clean the dust from the hook-and-loop pad, line up the holes of the disc with the holes in the pad and press the disc on from the center outward. On a square-pad sheet sander, cut the sheet to size, clamp one end, pull it tight over the pad and clamp the other end, then punch dust holes if the sander has a punch plate.
What are the downsides of using an orbital sander?+
A round pad can’t reach inside corners, it is slower than a belt sander for heavy stock removal, it leaves swirl marks if you press or tilt it, its discs cost more than plain sandpaper, and it makes a lot of fine dust unless it is connected to a vacuum.
How do you use an orbital sander to remove paint?+
Use 60 or 80 grit, a medium speed so the paint doesn’t melt onto the disc, a vacuum attached and light pressure, and change the disc as soon as it clogs. Finish with 120 and 150 grit before repainting. Test for lead first if the paint could be from before 1978.
Can you use an orbital sander on hardwood floors?+
A handheld random orbital sander is fine for a small area, a repair or a light scuff between coats, but it is very slow for a whole room. For a full refinish, rent or buy a large orbital floor sander, which is also far more forgiving than a drum sander.

Still getting swirl marks? Describe your sander, grit and finish in the comments and I’ll help you track down the cause.

What Grit Sandpaper for Wood? A Grit Chart for Every Job

For most bare wood, start sanding at 80 or 120 grit and finish at 150 to 180 grit before paint or stain, or 220 before a clear finish on smooth hardwoods. Go no coarser than you need to remove the marks you can see, and move up one grit at a time. Between coats of finish, switch to 320 grit or finer and barely touch the surface.

Rolls of sandpaper in different grits on a workshop rack

That is the short answer. The right grit still depends on three things: what state the wood is in, what finish goes on next, and whether the wood is open-grained like oak or closed-grained like maple. Below is a grit chart, a job-by-job table, the rules for stepping through grits, and the mistakes that show up only after the stain goes on.

Sandpaper Grit Chart

The grit number counts how fine the abrasive particles are: the higher the number, the smaller the particles and the finer the scratch they leave. Here is what each range is for on wood.

Grade Grit Use it on wood for
Extra coarse 24-36 Floor sanders and belt sanders on rough, cupped or heavily coated boards. Rarely needed on furniture.
Coarse 40-60 Stripping paint and varnish, leveling rough-sawn or weathered wood, shaping.
Medium 80-120 Removing planer and saw marks, the first grit on most bare wood, smoothing filler.
Fine 150-180 The last grit before paint and most stains.
Very fine 220-240 The last grit before a clear finish on closed-grain wood, light sanding of primer.
Extra fine 320-400 Scuff-sanding between coats of varnish, polyurethane or paint.
Super fine 600 and up Rubbing out the final coat of finish, usually wet. Not for bare wood.

⚡ Quick Answer by Finish

Paint: 120, then 150. Sand primer lightly with 220.

Stain: 120, then 150, then 180 on oak or ash. Stop at 180 on pine, maple or cherry with an oil-based stain.

Clear coat: up to 150 under an oil-based finish, 150 or 220 under a water-based one.

Between coats: 320 to 400, very light pressure.

CAMI vs “P” Grits: Why Two Sheets Marked Differently Can Be the Same

Most sandpaper sold in US hardware stores uses the CAMI scale. European brands use the FEPA scale, marked with a “P” in front of the number (P120, P220). Up to about 220 the two scales are close enough to treat as the same. Above that they drift apart, and a P-grade is finer than the same CAMI number: a CAMI 320 is roughly a P400. If you mix brands for fine work, check which scale each one uses.

What Grit Sandpaper for Each Wood Job

Job Start with Finish with
New, smooth lumber before paint 120 150
Bare wood before stain 120 150-180
Bare wood before varnish or polyurethane 120 150-220
Painted furniture you are repainting 120-150 (scuff only) 180-220
Stripping old paint or finish to bare wood 60-80 150-180
Table top refinish 80-120 180-220
Hardwood floor refinish 36-60 100-120
Dried wood filler 120 match the surrounding wood
Between coats of finish 320 400

What Grit Sandpaper for Wood Before Painting

Paint hides scratches that a stain would show, so you can stop earlier. On bare wood, 120 followed by 150 gives primer enough tooth to grip. On wood that is already painted and sound, you are not trying to reach bare wood at all: scuff the old paint with 120 to 150 until the gloss is gone, then clean off the dust. Sand the primer coat lightly with 220 before the topcoat. My guide on how to sand furniture to paint walks through the whole job.

What Grit Sandpaper for Wood Before Staining

Stain is where grit matters most, because the scratches you leave become the pattern the stain soaks into. General Finishes, a finish manufacturer, recommends 120, 150 and then 180 on open-grain woods like oak, ash and mahogany. For closed-grain woods such as pine, maple and cherry it recommends stopping at 180 under an oil-based stain, and 150 then 220 under a water-based stain. Sand end grain one grit finer than the faces, because it soaks up more stain and turns darker.

What Grit Sandpaper for Wood Before Varnish or Polyurethane

A clear finish shows every scratch, but it still needs something to hold on to. General Finishes suggests sanding up to 150 under an oil-based clear coat and to 150 or 220 under a water-based one. On a smooth hardwood with no stain, 180 or 220 is a good final grit.

What Grit Sandpaper for Wood Furniture and Tables

For a piece with an old finish, start at 80 to break through the finish, go to 120 to remove those scratches, and finish at 180 for stain or 220 for a clear coat. Use a random orbital sander on the flat top and hand-sand or use a detail sander on legs and edges. I cover the whole process in how to sand and refinish a table.

What Grit Sandpaper for Wood Floors

Floors are the exception to “start fine”. A drum or orbital floor sander usually begins at 36 or 40 on an old finish, then 60, then 80 or 100, and finishes at 100 to 120 so the floor finish can grip. The full sequence, including the edges, is in my guide to sanding hardwood floors with an orbital sander.

What Grit Sandpaper for Wood Filler

Let the filler dry completely first. Level it with 120 grit on a sanding block, keeping the block flat so you don’t dish the soft filler below the wood around it, then finish the repair with the same grit as the rest of the surface.

How to Step Through Grits

Start With the Finest Grit That Does the Job

The first grit has one task: to remove the worst defect on the surface, whether that is a planer ridge, old finish or a dent. Try a medium grit first. If it has not removed the defect after a minute or two of sanding, drop to the next coarser grit. Starting coarser than you need only creates deeper scratches you then have to remove.

Move Up One Step at a Time

A common sequence is 80, 120, 150, 180, 220. Each grit’s only job is to remove the scratches of the one before it. When the surface looks evenly scratched at the new grit, with no deeper lines left from the previous one, move on.

Clean the Surface Between Grits

Loose grit from a coarse sheet gets dragged around by the next, finer sheet and leaves stray scratches. Vacuum or wipe the surface every time you change grit. A dust port connected to a shop vac helps a lot.

Check Your Work Under Low Light

Hold a light low and to one side of the surface, or wipe it with mineral spirits. Scratches that are invisible under overhead light show up clearly, and it is much easier to fix them now than after the stain has made them permanent.

💡 Pro Tip

Before you start, draw light pencil squiggles across the whole surface. Sand until the pencil marks are gone, then draw new ones before the next grit. It is the simplest way to be sure you have sanded every part of the board evenly at each grit.

The Golden Rule of Sanding (and Other Rules That Matter)

There is no single official “golden rule”, but the one most woodworkers mean is this: don’t skip grits. Each finer grit is designed to remove the scratches of the previous one. Jump too far and the finer paper polishes the tops of the deep scratches instead of removing them, and they reappear under stain.

  • Sand with the grain when you hand-sand or use a belt or sheet sander. Cross-grain scratches are the hardest to hide.
  • Let the tool or the paper do the work. Pressing harder does not cut faster once the paper is dull; change the paper instead.
  • Don’t over-sand. General Finishes warns that sanding too fine creates a surface so smooth it will not accept a finish properly. For stain, that means blotchy or pale color.

Can You Go From 60 Grit to 120 Grit?

You can, but it is a big jump, and it only works well with patience. The 120 grit has to remove 60-grit scratches that are about twice as deep as its own, which takes much longer than going 60, 80, 120. On a painted surface you will probably get away with it. Under stain, you will usually see leftover 60-grit swirls. If you want to save a step, skip in the middle of the range, not at the coarse end: going from 120 straight to 180 is much safer than 60 straight to 120.

Is 80 Grit Too Rough for Wood?

For a final surface, yes: 80 grit leaves scratches that show through paint and especially stain. As a starting grit it is often the right choice, for stripping an old finish, leveling a glue-up or removing machine marks. On new, smooth lumber from the store, 80 is usually more than you need; start at 120.

Types of Sandpaper for Wood

Abrasive Minerals

  • Aluminum oxide: the standard for wood, used on most sheets and sander discs. Tough, and the grains break down to expose fresh edges.
  • Ceramic: the most aggressive and longest-lasting, good for coarse grits and heavy stock removal.
  • Silicon carbide: very sharp, usually on waterproof black paper for wet-sanding finishes between coats.
  • Garnet: a natural mineral that wears quickly and cuts gently, still liked for hand-sanding bare wood before finishing.

Sheets, Discs and Mesh

Hand sanding and sheet sanders use 9″ x 11″ sheets that you cut or fold. A random orbital sander uses round hook-and-loop discs with holes that must line up with the dust holes on the pad. Mesh abrasives, like Mirka Abranet, pull dust through the whole surface instead of a few holes, so they clog less. If you need help choosing the tool itself, see my comparison of random orbital sanders and sheet sanders.

Anti-Clog Coatings

Many sheets and discs have a stearate coating, a dry lubricant that stops paint, finish and resinous softwood from loading up the paper. It is worth paying for when you are sanding old finish or between coats.

The Sandpaper I’d Keep in the Shop

For hand sanding, two grits of sheets cover most finishing work, and one assortment of discs covers the random orbital sander from stripping to between-coat sanding. For a full comparison, see my guides to the best sandpaper for wood and the best sanding discs for random orbital sanders.

3M Pro Grade Precision Sanding Sheets, 150 Grit

3M Pro Grade Precision Faster Sanding Sheets, 150 grit, 9 x 11 inch, 20 pack

150 is the grit you will use most before paint and stain. These 9″ x 11″ sheets have 3M’s No-Slip Grip backing, which helps against tearing when you fold them, and 3M says they work wet or dry. Cut each sheet into quarters for a 1/4-sheet sander.

Shop Now at Amazon


3M Pro Grade Precision Sanding Sheets, 220 Grit

3M Pro Grade Precision Faster Sanding Sheets, 220 grit, 9 x 11 inch, 20 pack

The same line in 220 grit, for the last pass before a clear finish and for sanding primer. Keep it separate from your coarser sheets so stray grit doesn’t end up on your finish work.

Shop Now at Amazon


Mirka Abranet 5″ Mesh Disc Assortment

Mirka Abranet 5 inch assortment mesh sanding discs, hook and loop, 35 pack

For a 5″ random orbital sander, this pack of 35 mesh discs covers the whole grit sequence in one box: 80, 120, 180, 240, 320, 400 and 600. The open mesh fits any 5″ hook-and-loop pad regardless of hole pattern and pulls dust through its whole surface when a vacuum is attached.

Shop Now at Amazon


🏆 The Bottom Line

Start with the finest grit that removes the worst defect, usually 80 or 120, and step up one grit at a time. Stop at 150 for paint, 150 to 180 for stain, and 180 to 220 for a clear finish, then use 320 to 400 between coats. Don’t skip grits, clean the surface every time you change paper, and check under a low light before you open the can. For the full technique, read my guide on how to sand wood.

❓ Frequently Asked Questions

Can you go from 60 grit to 120 grit on wood?+
You can, but it takes longer and often leaves 60-grit scratches behind, because 120 grit has to remove scratches much deeper than its own. Under paint it is usually fine. Under stain, go 60, 80, 120 instead. If you want to save a step, skip in the finer range, for example 120 straight to 180.
Is 80 grit too rough for wood?+
As a final grit, yes: its scratches show through paint and stain. As a first grit, 80 is often right for removing old finish, leveling boards or taking out machine marks. On new, smooth lumber, start at 120 instead.
What is the golden rule of sanding?+
The rule most woodworkers mean is “don’t skip grits”: each finer grit should only have to remove the scratches of the previous one. Close behind it are sanding with the grain, letting the paper do the work instead of pressing harder, and cleaning the dust off between grits.
What grit should I sand wood to before painting?+
Sand bare wood to 150 grit before painting, usually 120 then 150. For wood that is already painted, scuff it with 120 to 150 until the gloss is gone. Sand the primer lightly with 220 before the topcoat.
What grit sandpaper should I use for wood before staining?+
Usually 120, then 150, finishing at 180. General Finishes recommends 120, 150 and 180 for open-grain woods like oak, and stopping at 180 on closed-grain woods like pine and maple under an oil-based stain. Sanding finer than that can stop the stain from penetrating evenly.
What grit sandpaper for wood filler?+
Level dried wood filler with 120 grit on a flat sanding block, then finish with the same grit as the surrounding wood, typically 150 to 180. Keep the block flat so you don’t sand the soft filler below the surface.

Not sure where to start on your project? Tell me what you’re sanding and what finish is going on in the comments, and I’ll suggest a grit sequence.