How to Stain Wood: Sanding, Conditioner and Application Step by Step

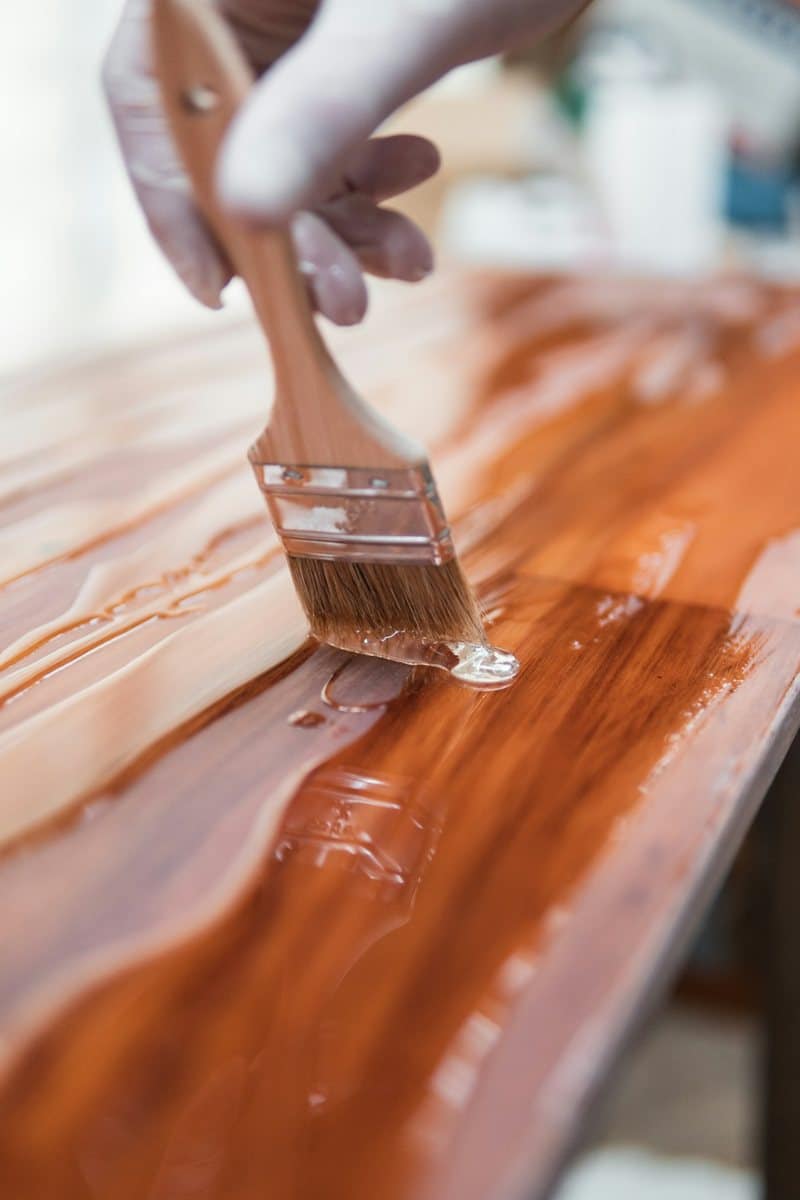
How to stain wood: brushing finish onto a sanded hardwood board on a workbench

How to stain wood in one line: sand bare wood with the grain to the right final grit for the species (usually 150 to 180, never much finer), remove every bit of dust, use a pre-stain conditioner on pine, maple, birch and cherry, wipe the stain on, wipe the excess off after a few minutes, and let it dry before a clear topcoat. The stain can only be as even as the surface under it, which is why most blotchy, streaky or too-light results start at the sanding stage, not with the can.

Below is the grit to finish at for each common wood, why sanding too fine makes stain lighter and patchier, how to use a conditioner, the application steps the stain makers give, and the short kit that makes the prep fast.

⚡ Quick Answer

Sand: start at 120, finish at 150 to 180 on oak, ash and maple and at 180 to 220 on pine, cherry, walnut and mahogany. A random orbital sander does the flat parts; a detail sander does corners.

Condition: on blotch-prone woods (pine, fir, alder, birch, maple), apply pre-stain conditioner, wipe it off after 5 to 15 minutes and stain within 2 hours.

Stain: brush or rag it on with the grain, wipe the excess after 2 to 15 minutes depending on the product, let it dry and seal it with polyurethane or another clear finish.

How to Stain Wood: The Short Version

Wood stain is a colorant in a carrier (oil, water or a gel) that soaks into the surface fibers and pores. Unlike paint, it doesn’t hide the wood; it shows the grain and every scratch, glue smear and rough patch. That’s the whole reason the preparation matters more than the brand. Here’s the full process at a glance:

  1. Remove any old finish, or start with bare, raw wood.
  2. Repair and fill dents and holes with a stainable filler, then let it dry.
  3. Sand in steps from 120 to the final grit for your wood, always with the grain.
  4. Remove the dust completely: vacuum, then wipe.
  5. Test the color on an offcut or the underside.
  6. Apply conditioner if the wood is prone to blotching.
  7. Apply the stain and wipe off the excess at the time the label gives.
  8. Let it dry, add a second coat only if you want it darker, and topcoat.

If the wood already has a finish on it, the stain can’t get in. Strip or sand the old coating off first: my guide on how to remove stain from wood covers both routes.

Step 1: Sanding Wood Before Staining

Sanding before staining does two jobs. It removes mill marks, planer ripples, pencil lines and glue, which stain would otherwise highlight. And it sets how much stain the surface will accept. General Finishes puts the rule plainly: the finer the sandpaper you finish with, the lighter the stain color will be; the coarser, the darker. Minwax says the same in its own FAQ: for a darker color, finish your last sanding at #150 to #180. The general method, from the first grit to the last pass by hand, is in my guide on how to sand wood.

What Grit to Sand Wood Before Staining

The makers don’t agree on one number, because it depends on the wood and the stain. Minwax and Varathane give a 220 finish in their stain directions (Varathane’s data sheet says start at #120 and work through 150 and 180 to 220). General Finishes is more specific, and more cautious: on hardwoods like maple and oak it says finish-sand no finer than 180 for water-based stains and 150 for oil-based stains, and on softwoods like pine and alder no finer than 220 for water-based and 180 for oil-based. Its own grit table per species, which I’ve reproduced below, is the most useful starting point I’ve found.

Wood First sanding Second Final Blotch risk
Oak 120 150 180 Low: open grain takes stain readily
Maple 120 120 180 High: use conditioner or gel stain
Birch 120 150 180 High: use conditioner
Pine 120 150 220 High: use conditioner
Fir 120 150 180 High: use conditioner
Cherry 120 150 220 Medium: test first
Walnut 150 180 220 Low, and often left unstained
Mahogany 150 180 220 Low

The grit columns are General Finishes’ sequences; the blotch column follows the woods Minwax lists as needing conditioner (pine, fir, alder, aspen, birch and maple). For every other material, the sandpaper grit chart has the full range, and what grit sandpaper for wood explains the CAMI and P scales.

Why Sanding Too Fine Ruins Stain

Fine paper doesn’t just smooth the surface, it closes it. Sanding oak to 320 burnishes the fibers so the stain has fewer scratches and open pores to settle into. General Finishes warns that over-sanding can seal the wood so much that it won’t take a finish, and for hard-to-stain woods it suggests finishing at 120. The practical rule: stop at the grit in the table, and if a test board comes out too light, sand the real piece one step coarser rather than adding coat after coat of stain.

Sand the Whole Surface to the Same Grit

Stain reads every difference in scratch pattern. General Finishes notes that if you miss a spot, the stain will be darker on the rougher area. Finish each surface with one grit all over, overlap your passes, and don’t spot-sand a single patch at a finer grit than the rest. End grain soaks up much more stain than face grain; the same maker suggests giving end grain an extra sanding to slow its absorption.

Use a Random Orbital Sander, Then Finish With the Grain

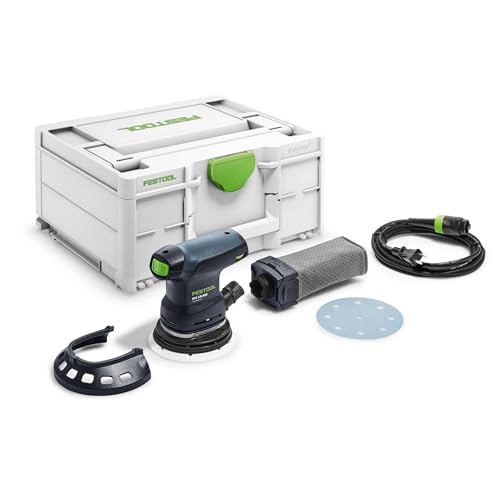
A random orbital sander is the fastest way to take a tabletop, door or shelf from 120 to 180 without cross-grain scratches, because the pad spins and orbits at the same time. Keep it flat, move it slowly, and let the weight of the sander do the work. Small swirl marks are the one thing it leaves behind that stain shows. To catch them, do a last light pass by hand with the grain at the final grit, using a block or a fine sanding sponge. Corners, inside edges and drawer fronts go faster with a detail sander that has a pointed pad.

💡 Pro Tip

Before staining, wipe the surface with a cloth dampened with mineral spirits (for oil-based stain) and look at it under a low, raking light. The wet surface shows exactly what the stain will: swirls, scratches, glue spots and filler. Fix them now with your final grit, while it’s still a two-minute job.

Raise the Grain Before Water-Based Stain

Water swells the surface fibers, so a water-based stain leaves bare wood feeling rough. General Finishes suggests pre-wetting oak and ash with a damp cloth before the final sanding, letting it dry for 30 minutes, and then sanding again with your final grit. The fibers that stand up get cut off, and the stain goes on a smoother surface. Minwax’s water-based conditioner does the same job: its directions call for a light sanding with fine paper 15 to 30 minutes after it goes on.

Remove Every Bit of Dust

Dust left in the pores mixes with the stain and turns into muddy specks. Vacuum the surface with a brush attachment, then wipe it with a clean cloth: dampened with mineral spirits under oil-based stain, or with water under water-based stain. General Finishes adds two warnings for water-based products: don’t use a tack cloth that contains linseed oil, and don’t use steel wool, because its particles can cause rust spots.

Step 2: Pre-Stain Wood Conditioner (Prevent Blotching)

Blotching is the dark and light patchwork you get on soft or porous woods because some areas drink stain and others don’t. Minwax’s FAQ lists pine, fir and spruce (soft) and maple, alder and aspen (porous) as the usual suspects. A pre-stain conditioner partially seals the thirsty areas so the stain soaks in more evenly.

How to Use Pre-Stain Conditioner

For Minwax’s oil-based Pre-Stain Wood Conditioner, the directions are: stir well, apply with a brush or cloth with the grain, let it penetrate for 5 to 15 minutes, wipe off the excess, and apply an oil-based stain within 2 hours. After that, Minwax says the resins begin to dry and can block the stain. The water-based version pairs with water-based stains: it needs only 1 to 5 minutes to penetrate and a light sanding once it has dried, 15 to 30 minutes later.

When to Skip It

On oak, ash, walnut and mahogany you usually don’t need conditioner. Expect the color to come out somewhat lighter when you do use one, because less stain gets in; that’s the point. On maple and birch, which can blotch even with conditioner, a gel stain is the other route: it sits more on the surface than in it. Minwax’s Gel Stain directions are to wipe off the excess after about 3 minutes and wait 24 hours before a clear topcoat.

Step 3: How to Apply Wood Stain

Test on an Offcut First

Minwax tells you to test any stain on an inconspicuous spot, because the final color is the stain plus the color of your wood. Prepare the test piece exactly like the project: same species, same final grit, same conditioner. A stain chip on a can is printed on a different wood than yours.

Brush or Rag?

Either works for a wiping stain. Minwax lists a bristle brush, a foam brush or a cloth; Varathane says a good quality brush or a clean, lint-free rag. A rag gives you more control on flat panels and is easiest for beginners. A brush gets stain into carvings, pores and inside corners. What changes the result is not the applicator but the wiping off.

Wipe On, Wait, Wipe Off

  1. Stir, don’t shake, and keep stirring as you go: the pigment settles.
  2. Apply a full, wet coat with the grain, one manageable section at a time (a table leg, a drawer front, half a top).
  3. Wait for the time on the label. Varathane Premium Fast Dry asks for 2 to 3 minutes. Minwax Wood Finish asks for 5 to 15 minutes, and Minwax says the longer you wait, the darker the color.
  4. Wipe off all the excess with a clean cloth, with the grain, blending into the previous section so you don’t get lap lines.
  5. Let it dry. Varathane’s data sheet gives 1 hour to touch and recoat and 24 hours for full cure; Minwax Wood Finish lists a 2 to 3 hour dry and recoat time.
  6. Add a second coat only to darken it. Minwax’s directions: to darken, recoat once the first coat is dry.

⚠️ Important

Rags soaked with oil-based stain can heat up and catch fire on their own as they dry. Lay them flat outside to dry, or put them in a sealed metal container filled with water, which is how General Finishes says to dispose of oil-finish rags.

Oil-Based vs Water-Based Stain

Oil-based stain (like Minwax Wood Finish or Varathane Premium Fast Dry) gives you more working time, penetrates deeply and doesn’t raise the grain. Water-based stain dries faster, cleans up with water and smells less, but raises the grain and dries quicker than you can wipe it on large surfaces. The topcoat matters too: General Finishes says that a water-based topcoat over a heavy oil-based stain can turn cloudy, and recommends letting an oil-based stain dry 72 hours before a water-based topcoat, or sealing it first with shellac.

Step 4: Topcoat the Stain

Stain colors wood; it doesn’t protect it. Minwax recommends finishing every stained project with a clear topcoat such as its Fast-Dry Polyurethane or Polycrylic. Brush or wipe on a thin first coat once the stain is dry, then sand lightly between coats. My guide to sanding between coats of polyurethane has the grits and timing, and the key warning: sand the topcoat, never the stain, or you’ll cut through the color and leave light spots.

Common Staining Mistakes (and the Fix)

Blotchy Color

The wood was blotch-prone and wasn’t conditioned, or the sanding was uneven. If it’s already stained, a gel stain over the top can even it out; otherwise strip or sand back to bare wood and start again with conditioner. Stain only wood that has dried and acclimated: a moisture meter for wood shows when indoor lumber is down around 6 to 10%.

Stain Too Light

Usually the wood was sanded too fine or a conditioner was used. Leave the stain on longer before wiping, apply a second coat, or re-sand one grit coarser on the next piece.

Sticky or Tacky Surface

Excess stain wasn’t wiped off. Varathane’s data sheet says removing all excess is essential for proper dry time and topcoat adhesion. Wipe the surface with a rag dampened with the stain itself or mineral spirits to lift the excess, then let it dry fully.

Swirl Marks Show Under the Stain

Those are sander marks from moving too fast, pressing too hard or skipping a grit. Re-sand the area with the last grit you used and finish by hand with the grain.

The Kit for Staining Wood

Most of the time a staining project is won or lost in the prep, so the tools that matter most are the ones that sand. The specs below are the makers’ own, from each product’s listing and data sheets.

Bosch ROS20VSC 5″ Random Orbital Sander

Bosch ROS20VSC 5 inch random orbital sander for sanding wood before staining

Best Sander for Stain Prep

For sanding tabletops, doors, shelves and cabinet sides to an even scratch pattern, a 5″ random orbital sander is the tool to own. Bosch’s ROS20VSC has a 2.5 amp motor with variable speed from 7,500 to 12,000 OPM, hook-and-loop discs and a microfilter canister plus a vacuum adapter, so less dust ends up in the pores you’re about to stain. Turn the speed down for the final grit to cut swirls. My Bosch ROS20VSC review goes through it in detail.

Check price on Amazon

  • ✅ Variable speed for a gentle final pass
  • ✅ Microfilter canister and vacuum port
  • ✅ Takes standard 5″ 8-hole discs
  • ❌ Round pad can’t reach inside corners

Best For: Flat surfaces on furniture, doors, trim boards and cabinets.


BLACK+DECKER BDEMS600 Mouse Detail Sander

BLACK+DECKER BDEMS600 mouse detail sander for corners before staining

Best for Corners, Spindles and Frames

Stain shows unsanded corners as dark, rough patches. The BDEMS600 has a pointed pad that reaches into the inside corners of frames, drawers and cabinet doors, a 1.2 amp motor at 16,000 orbits per minute, a detail finger attachment for tight spots and a dust collection canister. It’s the low-cost way to give corners the same final grit as the flat surfaces. More options are in my best detail sanders guide.

Check price on Amazon

  • ✅ Pointed pad for inside corners
  • ✅ Finger attachment for slats and spindles
  • ✅ Light and easy to control
  • ❌ Too small for whole tabletops

Best For: Corners, chair parts, raised panels and drawer fronts.


POWERTEC 5″ Sanding Disc Assortment, 80 to 220 Grit

POWERTEC 5 inch 8 hole sanding discs assortment 80 100 120 150 220 grit

Best Discs for the Grit Steps

Staining needs the middle grits, 120, 150 and 180 to 220, and an assortment saves buying five boxes. This pack has 10 discs each of 80, 100, 120, 150 and 220 grit (50 in total), aluminum oxide on a hook-and-loop backing with a stearate anti-clog coating and the 5″ 8-hole pattern that fits the Bosch and most other random orbital sanders. If you finish at 180 on oak or maple, add a box of 180. For premium options, see the best sanding discs for random orbital sanders.

Check price on Amazon

  • ✅ Five grits, ten discs each
  • ✅ Anti-clog coating
  • ✅ Standard 8-hole hook and loop
  • ❌ No 180 in the pack

Best For: Working through the grit sequence on a staining project.


Minwax Pre-Stain Wood Conditioner

Minwax Pre-Stain Wood Conditioner can for preventing blotchy stain

Best for Pine, Maple and Birch

This is the oil-based conditioner that goes under oil-based stains. Minwax says it evens out stain absorption and helps prevent streaks and blotches, and that it’s especially necessary on soft or porous woods like pine, fir, alder, aspen, birch and maple. The directions: let it penetrate 5 to 15 minutes, wipe off, and stain within 2 hours. A half pint covers a small piece of furniture.

Check price on Amazon

  • ✅ Prevents blotching on softwoods
  • ✅ Quick: stain the same session
  • ✅ Works under any oil-based stain
  • ❌ Not for water-based stain (use the water-based version)

Best For: Pine furniture, maple cabinets and any wood that has blotched before.


Minwax Wood Finish Oil-Based Stain

Minwax Wood Finish oil-based wood stain, Dark Walnut, 1 quart

Best Classic Wiping Stain

Minwax Wood Finish is the penetrating oil-based stain most people picture. Minwax says it penetrates within 5 minutes, you wipe it off after 5 to 15 minutes (longer for darker), it dries in about 2 to 3 hours, and a gallon covers 500 to 600 sq ft in one recommended coat. The long working time makes it forgiving on big surfaces. The link goes to Dark Walnut; the same listing family covers the other colors.

Check price on Amazon

  • ✅ Long, forgiving working time
  • ✅ Wait time controls the depth of color
  • ✅ Pairs with Minwax’s conditioner
  • ❌ Mineral spirits cleanup and odor

Best For: First staining projects, furniture, doors and trim.


Varathane Premium Fast Dry Wood Stain
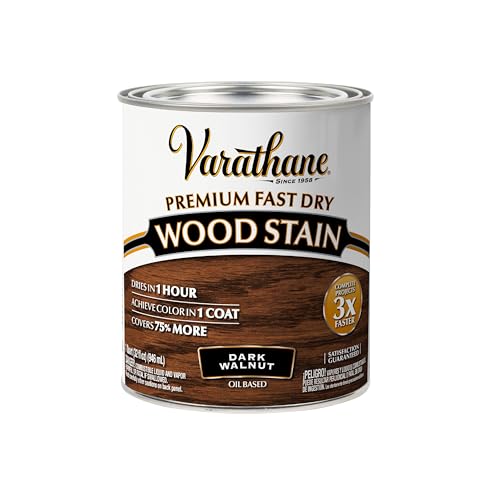
Varathane Premium Fast Dry wood stain, Dark Walnut

Best When You Want to Topcoat the Same Day

Rust-Oleum’s data sheet for Varathane Premium Fast Dry gives a 2 to 3 minute penetration time, 1 hour to touch and to recoat, 24 hours to full cure, and 225 to 275 sq ft per quart. It’s an oil-based, one-coat stain with nano pigments, and the same sheet says polyurethane can go on within an hour of staining. The short open time means smaller sections at a time.

Check price on Amazon

  • ✅ Recoat and topcoat in about an hour
  • ✅ One-coat color
  • ✅ Clear data sheet with prep grits
  • ❌ Short working time on big panels

Best For: Small pieces, shelves and trim you want finished in a day.


How I Put This Guide Together

The sanding grits, the per-species table, the grain-raising and dust advice come from General Finishes’ own preparation guide and FAQ. The conditioner and stain directions come from Minwax’s product pages and FAQ, and the Varathane figures from Rust-Oleum’s technical data sheet for Premium Fast Dry. The products are on sale on Amazon today, and their specs come from the makers; I don’t show customer ratings or prices, which change daily. More on how I choose the sanders I recommend.

🏆 The Verdict

Even stain starts with even sanding. Work from 120 to 150 to 180 on oak and maple or 180 to 220 on pine and cherry, sand every surface to the same grit, remove the dust, and condition blotch-prone woods before a wipe-on, wipe-off stain. A Bosch ROS20VSC with a disc assortment handles the prep on almost any project, and Minwax Pre-Stain Conditioner saves pine and maple from blotching.

❓ Frequently Asked Questions

Can I just stain wood without sanding?+
Only if it’s already bare, clean and smooth, and even then the result is a gamble. Factory-sanded boards often carry mill glaze and uneven scratches that stain magnifies, and any old finish blocks stain completely. A quick pass at 150 or 180 grit takes minutes and gives the stain an even surface.
Is it better to stain wood with a rag or a brush?+
For wiping stains, a lint-free rag is easier on flat panels and gives the most control over how much stays on. A brush is better for carvings, pores, corners and spindles. Many finishers use both: brush it into the details, then wipe everything off with a rag at the time the label gives.
How long do you leave wood stain on before wiping it off?+
It depends on the product, so read the can. Varathane Premium Fast Dry asks for 2 to 3 minutes, Minwax Wood Finish for 5 to 15 minutes, and Minwax Gel Stain for about 3 minutes. With penetrating stains, a longer wait gives a darker color, up to the label’s maximum.
What not to do when staining wood?+
Don’t skip the test board, don’t sand finer than the stain maker recommends, and don’t leave dust in the pores. Never let excess stain dry on the surface, don’t sand the stain itself between coats, and don’t bunch up oily rags in a trash can, where they can self-heat and ignite.
What is the best thing to clean wood with before staining?+
Vacuum first with a brush attachment, then wipe with a clean cloth lightly dampened with mineral spirits under oil-based stain, or with water under water-based stain. Avoid tack cloths that contain linseed oil and steel wool under water-based products, as General Finishes warns both can cause finish problems.
How long does stain take to dry before polyurethane?+
Anywhere from one hour to a day or more. Varathane Premium Fast Dry can take polyurethane within about an hour, Minwax Gel Stain needs 24 hours, and General Finishes advises 72 hours before a water-based topcoat over an oil-based stain. Cool, humid rooms slow every one of these.

Conclusion

Learning how to stain wood is mostly learning how to prepare it: the right final grit for the species, one even scratch pattern, no dust, and a conditioner where the wood needs it. Get that right and almost any good stain will look the way the sample did. If you’re starting from an old finish, read how to remove stain from wood first, and if you’re choosing a sander for the job, the best sanders for furniture list compares the palm, detail and orbital options.

Hardwood Floor Refinishing Cost Calculator: DIY vs Pro Prices

Professional hardwood floor refinishing costs $3 to $8 per square foot, according to HomeAdvisor and Fixr, and a screen and recoat costs $1 to $2.50. Doing it yourself costs a fraction of that: in our worked example a 312 sq ft floor comes to about $400 in rentals, sandpaper and finish, against $940 to $1,560 for a pro. The hardwood floor refinishing cost calculator below gives you both numbers for your own rooms, wood and finish, plus the sandpaper by grit, the gallons of finish to buy and how many days the job takes.

Freshly refinished oak hardwood floor in an empty living room, with the title Floor Refinishing Cost Calculator

Most cost calculators stop at a price per square foot. This one also writes the shopping list, because that is where a DIY budget goes wrong: too few sheets of the first grit, a gallon short on the third coat, or a second rental day nobody planned. Every pro price comes from a named cost guide, every coverage rate from the finish maker’s data sheet, and every price in the tool can be edited.

⚡ Quick Answers

500 sq ft: $1,500 to $4,000 with a pro at $3 to $8 a sq ft; about $520 DIY with a rented drum sander.

1,000 sq ft: $3,000 to $8,000 with a pro; about $1,020 DIY, or $940 with an orbital floor sander.

2,000 sq ft: $6,000 to $16,000 with a pro; about $2,030 DIY over four rental days.

Screen and recoat, 1,000 sq ft: $1,500 to $4,250 for a pro applying two coats; about $340 DIY.

Hardwood Floor Refinishing Cost Calculator

Add each room as a rectangle, or switch to Total square feet if you already know the area. Pick the state of the floor, the wood and the finish, and the estimate updates as you type. Open Edit the prices we use to put in your local rental and store prices.

Floor refinishing cost calculator

1. How big is the floor?
Room 1
Room 2
2. What state is the floor in?
3. Wood and finish

Finish

Coats of finish

Set to the maker’s count for your choice. Change it to match your can.

4. Do it yourself or hire a pro

If you sand it yourself, which rental machine?

Extras in the pro quote

Edit the prices we use
Pro $940 to $1,560 · DIY $400Details ↓

Your estimate

Hire a pro

$940 to $1,560

$3 to $5 per sq ft

Do it yourself

about $400

$1.29 per sq ft in rentals and supplies

Doing it yourself saves roughly $530 to $1,160, in exchange for about 3 days of your time.

Floor area
312 sq ft
Finish to buy
2 gallons + 1 quart
DIY time
1 day sanding + 2 finishing
Pro time
2 to 6 days

Your DIY shopping list

Item Qty Cost
Drum sander rental 1 day $75
Edger rental 1 day $50
40-grit drum sheets 7 $56
60-grit drum sheets 4 $32
100-grit drum sheets 4 $32
120-grit drum sheets 4 $32
60-grit edger discs 5 $6
100-grit edger discs 3 $4
120-grit edger discs 3 $4
Water-based polyurethane, 3 coats 2 gallons + 1 quart $113
DIY total $403

Also on the list, not priced: dust masks or a respirator, hearing protection, painter’s tape and plastic sheeting, a shop vacuum, a tack cloth or microfiber mop, and a synthetic pad applicator.

Show the math

Pro quote

  • Sand and refinish, oak, cherry or similar: $3 to $5 per sq ft
  • 312 sq ft × $3 to $5 = $936 to $1,560
  • Total, rounded to $10: $940 to $1,560

DIY

  • Rental days: 312 sq ft ÷ 500 sq ft a day, rounded up = 1
  • Sheets: one per 50 sq ft on the first grit, one per 100 sq ft after that
  • Edge length: 100 ft; edger discs: one per 20 ft on the first grit, one per 40 ft after
  • Finish: 312 sq ft × 3 coats ÷ 500 sq ft per gallon × 1.1 = 2.06 gal, bought as 2 gallons + 1 quart, priced pro rata
  • Finishing time: 2 × 2 h between coats + 24 h to light foot traffic = 28 h, about 2 days

Light foot traffic after about 24 hours; rugs and furniture after 7 days (Minwax).

Pro ranges are national figures from HomeAdvisor (June 2026), HomeGuide and Fixr; DIY prices are rental and supply-store rates checked October 1, 2026, and every price is editable. Quantities of sandpaper and rental days are our planning estimates, explained below the calculator. This is an estimate, not a quote.

How Much Does It Cost to Refinish Hardwood Floors?

The three big cost guides agree on the headline. HomeAdvisor (updated June 20, 2026) puts the cost to refinish hardwood floors at $3 to $8 per square foot, with an average project of $1,892 and most between $1,107 and $2,681. Fixr gives the same $3 to $8 per sq ft and a $1,200 average for a 200 sq ft oak floor. HomeGuide splits it by method: $2 to $7 per sq ft to sand and refinish, $3 to $8 if you also stain. Labor is most of the bill: HomeAdvisor says up to 80% of the price, and Fixr puts it at around 80%.

Cost per Square Foot by Job

What you pay depends first on how much work the floor needs. These are the per square foot figures the calculator uses, with where each one comes from.

Job or extra Cost per sq ft Source
Screen and recoat, one coat $1 to $2.50 HomeAdvisor (screening); Fixr ($1 to $2 recoat, $1 to $2.50 buffing). HomeGuide: $2 to $5
Sand and refinish, no stain $2 to $7 HomeGuide. Fixr: $3 to $5.50
Sand, stain and refinish $3 to $8 HomeGuide. HomeAdvisor and Fixr: staining adds $1 to $3
Dustless sanding add $2 to $4 HomeGuide. HomeAdvisor: about $2 more; Fixr: $6 to $8 in total
Each extra coat of finish add $0.50 to $1.75 HomeGuide
Replacing damaged boards $6 to $12 HomeAdvisor (per sq ft replaced)
Stairs $25 to $85 per step HomeGuide. Fixr: $25 to $45
Moving furniture $20 to $50 per room HomeAdvisor, HomeGuide
Carpet removal (not in the calculator) $0.25 to $1 HomeGuide. Fixr: $0.50 to $0.75

Screening (also called buffing) removes only the top of the old finish before a fresh coat, so it skips the sanding to bare wood that makes up most of a full refinish. HomeAdvisor and Fixr put it at $1 to $2.50 per sq ft; HomeGuide quotes $2 to $5 for “screen, buff and recoat”. The calculator starts from the lower figure for one coat and adds HomeGuide’s extra-coat price for each coat after the first, which lands a two-coat recoat at $1.50 to $4.25 per sq ft, between the two guides.

Cost by Wood Type

Common woods cost about the same to refinish; soft, hard or unusual ones cost more because they take more care. HomeAdvisor explains that pine dents and scratches easily, maple is hard to stain evenly, mahogany needs slow, careful sanding, and bamboo has to be sanded at an angle on the first pass to avoid splintering.

Wood HomeAdvisor Fixr HomeGuide
Oak $3 to $5 $3 to $5 $3 to $7
Cherry $3 to $5 $3 to $5 $3 to $7
Engineered hardwood $3 to $5 $3 to $5 $2 to $6
Parquet $3 to $5 $3.50 to $6 $3 to $6
Pine $4 to $7 $4 to $7 $3 to $7
Maple $6 to $8 $5 to $8 $4 to $8
Mahogany $6 to $8 $6 to $8 $4 to $8
Bamboo $2 to $6 $3 to $6 $2 to $6

The calculator uses the HomeAdvisor column, the most recent of the three. If you are staining, it adds $1 to $3 per sq ft on top, the staining cost HomeAdvisor and Fixr both give.

Cost by Floor Size

Size drives the total, and small jobs cost more per square foot. HomeAdvisor notes that one small room often runs higher per sq ft because the pro still has to cover travel, materials and equipment, and HomeGuide warns that some refinishers have a minimum charge. At the national $3 to $8 range:

  • One 12 x 12 bedroom (144 sq ft): $430 to $1,150, often more after a minimum charge
  • 500 sq ft: $1,500 to $4,000
  • 1,000 sq ft: $3,000 to $8,000
  • 2,000 sq ft: $6,000 to $16,000, which matches HomeGuide’s figure for a 2,000 sq ft house with stain

DIY Floor Refinishing Cost

A DIY refinish has four costs: the sander rental, the sandpaper, the finish and, if you change the color, the stain. In the calculator’s default example (two rooms, 312 sq ft, oak, water-based polyurethane, a drum sander and an edger) the split is $125 for one day of rentals, about $166 of sandpaper and $113 of finish. Sandpaper is the line people underestimate, because every grit needs fresh sheets.

Floor Sander Rental Cost

Rental prices are set store by store, so here is what four rental counters publish for a day. Bob Vila’s survey of The Home Depot, last updated June 3, 2024, gives Home Depot averages; the three independent stores were checked on October 1, 2026.

Rental store Drum sander Edger Square buff orbital Multi-disc orbital
The Home Depot, average (Bob Vila, 2024) $75 $51 $75 $75
Cal-West Rentals, California $75 $35 $65 $65 (EZ Sand)
Westville Grand Rental Station, New Hampshire $70 $48 $75 $95 (U-Sand Pro)
Sully’s Rental, Ohio not listed not listed $60 not listed

The calculator defaults to $75 a day for a drum sander, $50 for an edger and $75 for an orbital floor sander. A drum sander sands the main floor fast but leaves a strip along the walls for the edger. An orbital floor sander (a square buff or a multi-disc machine such as the U-Sand or EZ Sand) is slower and much more forgiving, which is why it is also the machine for screening a floor before a recoat. Both usually come without sandpaper: Westville’s listing, for one, says the pad and sandpaper are sold separately. Which machine to rent, the weekly rates and when buying beats renting are in our floor sander rental guide.

Sandpaper: Grits and How Many Sheets

Bona’s standard sequence for refinishing a wood floor is 50, 60, 100 and 120 grit, with 36 first on badly uneven floors; the edges go 60, 100 and 120. Minwax tells you to stop at 100 grit when you are going to stain and at 120 when you are not. Drum sheets sold in the US usually come in 36, 40, 60, 80, 100 and 120, so the calculator plans:

  • Light wear: 40, 60, 100 and 120 on the drum or orbital; 60, 100 and 120 on the edger
  • Deep scratches, stains or cupping, or board repairs: 36, 60, 100 and 120 everywhere
  • Staining: the same, without the 120
  • Screen and recoat: one pass with a 120-grit screen, the grit Minwax gives for scuffing a sound finish

The coarse first grit does most of the work and wears paper fastest, so the calculator allows one drum sheet or 12 x 18 sheet per 50 sq ft on the first grit and one per 100 sq ft on each grit after it, one edger disc per 20 feet of wall on the first grit and one per 40 feet after it, and one screen per 150 sq ft. These allowances are our planning figures, not a manufacturer’s, and an old floor with thick finish can eat more. Rental counters sell sheets one at a time: RC Engine Service lists 8-inch drum sheets at $7 to $9 each and 12 x 18 sheets at $6, and A Tool Shed lists 7-inch edger discs at $1 to $1.25 (October 1, 2026). The grit-by-grit reasoning is in our sandpaper grit chart for floors.

Finish: How Much Polyurethane or Oil to Buy

Divide the floor area by the coverage on the can for each coat, then add about 10% for the edges, the applicator pad and the last gallon you don’t want to run out of. These are the rates the makers publish:

Product Type Coverage Coats
Minwax Ultimate Floor Finish Water-based polyurethane About 500 sq ft per gallon 3 on bare wood; 2 over stain or on a screen and recoat
Minwax Super Fast-Drying Polyurethane for Floors Oil-based polyurethane 600 to 700 sq ft per gallon 3 on bare wood; 2 if stained or sealed
Bona Traffic HD Two-part water-based, pro 350 to 400 sq ft per gallon per coat See Bona’s data sheet
Osmo Polyx-Oil Hardwax oil About 260 sq ft per liter per coat 2 on bare wood; 1 to renovate an oiled floor
Rubio Monocoat Oil Plus 2C Two-part hardwax oil 300 to 500 sq ft per liter 1
Minwax Wood Finish Oil-based stain 400 to 500 sq ft per gallon 1; a second after 2 hours to darken

The calculator uses 500 sq ft per gallon for water-based polyurethane, 600 for oil-based and 258 per liter for hardwax oil, and it sets the number of coats to the maker’s instruction: three on bare wood for both Minwax polyurethanes, two over stain or on a screen and recoat, two coats of Osmo on bare wood and one when renovating an oiled floor. For price it uses $50 a gallon for water-based and $40 for oil-based polyurethane, inside the $25 to $55 and $20 to $45 ranges HomeAdvisor gives, and $68 a liter for hardwax oil ($169.99 for a 2.5 liter can of Osmo Polyx-Oil at Oak Tree Supply on October 1, 2026). Floor-grade professional finishes cost more: Panel Town lists Bona Traffic HD at $153.21 a gallon. To choose between water-based, oil-based and hardwax oil, see my comparison of the best wood floor finishes.

Stain

Staining adds a product, a day and a cost. Minwax lists 400 to 500 sq ft per gallon for its Wood Finish penetrating stain, and the calculator uses 400 for one coat, plus 10%. HomeAdvisor puts stain at $30 to $100 a gallon; the calculator starts at $40. Minwax’s sheet gives 6 hours before the stain is dry enough to use, and humid weather stretches that. If you want a new color, there is no shortcut: Minwax says changing the color means sanding to bare wood.

DIY vs Pro: Which Is the Better Deal?

On price alone DIY wins by a wide margin: a third of the pro quote or less on a typical 1,000 sq ft job. What you buy with the difference is skill, speed and the warranty on the work.

When Doing It Yourself Makes Sense

  • Solid oak or similar in fair condition, one color, rooms with straight walls.
  • You can live without the rooms for a few days and move the furniture yourself.
  • You choose an orbital floor sander if you have never run a drum. It is slower, but it is hard to gouge a floor with it.
  • The floor only needs a screen and recoat. It is the cheapest DIY job, about $340 for 1,000 sq ft in the calculator. Here’s how to screen and recoat hardwood floors, and the tests to run first.

When to Pay a Pro

  • Engineered flooring with a thin wear layer. HomeGuide says it needs at least 2 mm to sand, and most engineered floors take 1 to 3 refinishes in their life. A drum sander can go through that in seconds.
  • Maple, parquet or exotic woods. Maple is hard to stain evenly, and parquet grain runs in different directions, which HomeAdvisor and Fixr both flag as specialist work.
  • Stairs. HomeGuide puts them at $25 to $85 per step and Fixr at $25 to $45, and they are slow, detailed work by hand.
  • Allergies or a home you can’t empty. Dustless sanding costs $2 to $4 more per sq ft (HomeGuide), and HomeAdvisor reminds you it reduces dust rather than removing it.

How Long Does It Take to Refinish Hardwood Floors?

HomeGuide puts a professional refinish at 2 to 6 days, depending on the area, the number of coats and drying time. Most of that is waiting for finish to dry, and the finish you pick sets the pace (every stage of the job is in our guide on how to refinish hardwood floors):

Finish Between coats Light foot traffic Rugs and furniture
Water-based polyurethane (Minwax Ultimate Floor Finish) 2 hours; sand with 220 if you wait over 24 24 hours 7 days
Oil-based polyurethane (Minwax Super Fast-Drying for Floors) 3 to 4 hours 12 to 18 hours 7 days
Hardwax oil (Osmo Polyx-Oil) 8 to 10 hours Not listed Not listed
Hardwax oil (Rubio Monocoat Oil Plus 2C) One coat Dry in 24 hours 80% cured in 48 hours, fully in 5 days

The calculator counts DIY sanding days from the area (about 500 sq ft a day with a drum sander and edger, 250 with an orbital floor sander and 1,000 for screening, our estimates for someone doing it for the first time), then adds the stain drying time, the wait between coats and the time to light foot traffic. A 1,000 sq ft floor in water-based polyurethane works out to two days of sanding and two of finishing.

Refinish or Replace Hardwood Floors?

Refinishing is far cheaper whenever the boards are sound. HomeAdvisor says refinishing costs two to three times less than replacing, and the replacement figures show why: $5 to $15 per sq ft installed according to HomeAdvisor, $11 to $25 or more according to HomeGuide, and $14 to $32 to replace according to Fixr. Replace when the damage goes into the wood itself: severe water damage, warping, boards too thin to sand again, or, on engineered floors, a wear layer that is already gone. Isolated bad boards are a repair: HomeAdvisor prices board replacement at $6 to $12 per sq ft, and the calculator adds that to the refinish when you choose Some boards need replacing.

What to Buy Before Rental Day

Rental counters sell sandpaper sheet by sheet, which is the cheaper way for one or two rooms. For a whole floor, or if your rental shop is out of a grit, buying full packs ahead of time saves a second trip. Check the sheet size and the edger’s arbor hole against the machine you rent before you order. For the sanders themselves, see our guide to the best sanders for floors.

Virginia Abrasives Drum Sander Sheets, 36 Grit, 8 x 19-1/2 in.

Virginia Abrasives 36 grit sandpaper for hardwood floors, 8 x 19-1/2 inch drum sander sheets, 50-pack

Made for drum sanders that take 8 x 19-1/2 inch flat sheets with notches: the listing names the Clarke EZ-8, the Clarke DU-8 and the Hiretech HT8. 36 grit is the first grit on a floor with deep scratches, stains or a thick old finish. The 50-pack covers the first grit on about 2,500 sq ft at the calculator’s allowance, so it pays off on a whole house, or when the rental counter is out of the grit you need. The same sheets come in 80 grit and 100 grit. An Essex Silverline SL-8 takes a longer 8 x 20-1/8 inch sheet: 36 grit for the SL-8.

Check price on Amazon


Sungold Abrasives Edger Discs, 60 Grit, 7 in. x 7/8 in.

Sungold Abrasives 60 grit edger sanding discs, 7 inch with 7/8 inch hole, silicon carbide paper for floor edgers

Silicon carbide on heavyweight paper, with a 7/8-inch center hole slit for easy removal: the disc for the 7-inch edgers most rental stores carry. 60 grit is the edger’s first grit on a light-wear floor, and a 50-pack edges about 1,000 feet of wall at the calculator’s allowance. The same discs come in 40 grit and 100 grit. Check the edger’s arbor before you order, because 7-inch discs are also sold with a 5/16-inch hole.

Check price on Amazon


Mercer Industries 12 x 18 Floor Sanding Sheets, 60 Grit

Mercer Industries 12 x 18 inch silicon carbide floor sanding sheets, 60 grit, 20-pack for square buff floor sanders

Precut sheets for 12 x 18 inch square buff machines: the listing names Clarke, Deva and Silver Line. The silicon carbide grain sits on an extra heavyweight paper, and the back has enough grit to hold on the sanding pad. This is the paper for the orbital route in the calculator. Mercer sells the same 20-packs in 36 grit and 100 grit, and 12 x 18 screen sheets for screening a floor before a recoat.

Check price on Amazon


Mercer Industries 16-Inch Floor Sanding Screens, 120 Grit

Mercer Industries 16 inch floor sanding screen discs, 120 grit, 10-pack for floor buffers

If your rental store screens floors with a 16-inch buffer rather than a square buff, these are the discs: silicon carbide grit in an open mesh, made for floor buffers and rotary floor machines. Mercer lists them for taking off old finish and wax, sanding between coats and restoring worn areas. 120 grit is the grit Minwax gives for scuffing a sound finish before a recoat, and the 10-pack screens a large floor with spares.

Check price on Amazon


BOSCH GET75-6N 6-Inch Random Orbital Sander

BOSCH GET75-6N 6 inch electric random orbital sander and polisher, 7.5 amp, with turbo mode

Neither a drum sander nor an orbital floor machine gets into closets, around radiators or right into corners. A 6-inch, 7.5 amp random orbital sander with a turbo mode for faster removal handles those spots, and it is the tool you keep after the rental goes back: stair treads, thresholds, the odd repaired board. For the full comparison, see our best sanders for floors.

Check price on Amazon


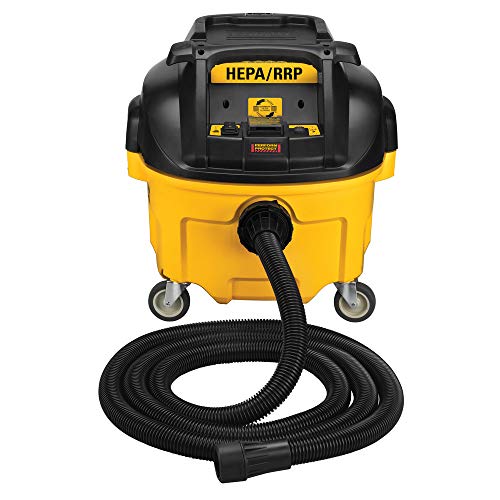
DEWALT DWV010 HEPA Dust Extractor, 8 Gallon

DEWALT DWV010 8 gallon HEPA dust extractor with automatic filter cleaning

Rental floor machines such as American Sanders’ EZ-8 drum sander and Super 7R edger have an on-board dust bag or a port to connect a vacuum. A HEPA extractor with automatic filter cleaning, like this 8-gallon DEWALT, keeps the fine dust out of the rest of the house and keeps pulling while the filter would otherwise clog. Check that its hose fits the machine’s port at the rental counter. More options in our best dust extractor guide.

Check price on Amazon


How the Calculator Works

The pro estimate multiplies your floor area by the per square foot range for the job and wood, then adds the extras you tick:

  • Sand and refinish: the HomeAdvisor range for your wood, plus $1 to $3 for stain, $2 to $4 for dustless sanding and $0.50 to $1.75 for each coat beyond three (HomeGuide)
  • Screen and recoat: $1 to $2.50 for one coat, plus HomeGuide’s extra-coat price for each coat after the first
  • Repairs: $6 to $12 per sq ft of replaced boards (HomeAdvisor)
  • Stairs: $25 to $85 per step (HomeGuide); moving furniture: $20 to $50 per room (HomeAdvisor and HomeGuide)

The DIY estimate adds the rental days, the sheets per grit, the finish and the stain at the prices in the price panel. When you enter rooms, the edge length for the edger is the sum of each room’s perimeter; with a total area it assumes square rooms. Finish is priced by the volume you buy, rounded up to gallons and quarts (or 2.5 and 0.75 liter cans for hardwax oil). Pro totals are rounded to the nearest $10.

There is no ZIP code box on purpose. None of the three cost guides publishes regional multipliers, only that metro areas and the Northeast charge more for labor (HomeAdvisor), and a made-up local factor would be less honest than a national range. If you have a local quote, compare its price per sq ft with the range above, and put your local rental prices in the price panel.

🏆 The Bottom Line

Budget $3 to $8 per sq ft for a professional sand and refinish, and $1 to $2.50 for a screen and recoat. Doing it yourself costs roughly $1 per sq ft in rentals, sandpaper and water-based polyurethane on a typical floor, less with oil-based finish or an orbital sander, more with hardwax oil. Measure each room, run your floor through the calculator above, and buy enough of the first grit: it is the one that runs out.

❓ Frequently Asked Questions

How much does it cost to refinish 1,000 sq ft of hardwood floors?
A professional sand and refinish of 1,000 sq ft costs about $3,000 to $8,000 at the national $3 to $8 per square foot, and oak usually lands between $3,000 and $5,000. Staining, dustless sanding, stairs and extra coats push it toward the top. A screen and recoat of the same floor runs $1,000 to $2,500 for one coat.
How much does it cost to refinish 1,000 square feet of hardwood floors DIY?
Around $900 to $1,300 if you rent the sander and buy everything new. For 1,000 sq ft our calculator gives about $1,020 with a drum sander, edger and water-based polyurethane, about $900 with oil-based polyurethane and about $1,300 with hardwax oil. Two days of rental and roughly 50 sheets of sandpaper are the biggest lines.
Is it cheaper to refinish hardwood floors or replace them?
Refinishing is much cheaper: HomeAdvisor puts it at two to three times less than replacing. Refinishing runs $3 to $8 per square foot, while new hardwood costs $5 to $15 installed by HomeAdvisor’s figures and $11 to $25 or more by HomeGuide’s. Replacement only pays off when the boards are warped, water damaged or too thin to sand.
How long does it take to refinish 1,000 square feet of hardwood floors?
Plan on 2 to 6 days with a pro, the range HomeGuide gives, and about four days doing it yourself with water-based polyurethane: two days of sanding and two of coats and drying. Oil-based finish needs longer between coats, and Minwax asks for 7 days before rugs go back on either of its floor polyurethanes.
How much does it cost to rent a floor sander?
Expect about $60 to $95 a day. Home Depot averaged $75 a day for its drum, square buff and orbital floor sanders and $51 for an edger in Bob Vila’s survey, and independent rental stores we checked charge $70 to $75 for a drum sander and $35 to $48 for an edger. Sandpaper is extra.
Can you restain hardwood floors without sanding?
No, not if you want a different color. Minwax’s floor finish instructions say a color change means sanding down to bare wood, because stain has to soak into the wood, not sit on the old finish. If the color is fine and the finish is only dull, a screen and recoat refreshes it without sanding to bare wood.
How often do hardwood floors need to be refinished?
Every 7 to 10 years for most homes, according to both HomeAdvisor and HomeGuide, sooner in high-traffic areas. Deep scratches, gray or worn-through spots and water stains are the signs it is due. A screen and recoat in between, while the finish is still intact, can push a full sanding back by years.
When can hardwood floors not be refinished?
When there is not enough wood left to sand. HomeGuide says engineered floors need a wear layer of at least 2 mm, and floors with very thin layers or acrylic finishes cannot be sanded at all. Solid boards sanded down to the tongue, or badly warped or water damaged boards, need replacing instead.
Is it hard to refinish your own hardwood floors?
It is hard work rather than hard skill, as long as you pick the right machine. A drum sander is fast but can gouge a floor in a moment if it stops moving; an orbital floor sander is slower and far more forgiving. The edges, the dust and keeping a wet edge while coating are where most first jobs struggle.

Sources

All pages and documents were read on October 1, 2026.

Rental days and sandpaper quantities are our own planning allowances, explained in How the Calculator Works. Got a quote you want to check against these numbers? Ask in the comments.

Popcorn Ceiling Removal Tools: Scrape, Vacuum or Sand?

Popcorn ceiling removal tools: a man sanding a ceiling with a long-reach drywall sander connected to a vacuum hose

The best popcorn ceiling removal tool for an unpainted ceiling is a wide ceiling texture scraper on an extension pole, used after you soak the texture with a pump sprayer. A scraper that connects to a shop vacuum keeps most of the mess off the floor. Painted popcorn won’t soak up water, so it needs a drywall sander with dust extraction, or a skim coat over the top. Test for asbestos before you disturb any of it.

Below you’ll find every popcorn ceiling removal tool worth considering, from a 12″ Homax scraper to vacuum attachments and long-reach drywall sanders, plus how to tell whether your ceiling should be scraped or sanded, what to do about asbestos and lead, and how to finish the ceiling afterward. Product details come from the makers’ listings; the asbestos and lead guidance comes from the EPA.

⚡ Quick Answer

Best popcorn ceiling scraper: the Homax 6104 – a 12″ blade that threads onto an extension pole and holds a bag to catch the texture.

Least mess: the POP EEZE vacuum scraper, which connects to your shop vac hose.

Best popcorn ceiling sander (painted texture): the DEWALT DCE800B, or the VEVOR 850W on a budget.

Don’t forget: a pump sprayer for soaking the texture.

Popcorn Ceiling Removal Tools Compared

Tool Type Painted popcorn? Mess control Best for
Homax 6104 12″ pole scraper No Bag attachment Unpainted ceilings, whole rooms
POP EEZE Vacuum scraper No Shop vac Furnished rooms, less cleanup
Chapin 20004 1-gallon pump sprayer – Wetting cuts dust Soaking texture before scraping
Hyde 09165 Vacuum hand sander Touch-ups Wet/dry vac Smoothing after scraping
DEWALT DCE800B Cordless drywall sander Yes Dust extractor (AirLock) Painted popcorn, finishing
VEVOR 850W Corded drywall sander Yes Hose and bag One-off jobs on a budget

Before You Start: Test for Asbestos and Lead

Asbestos in Popcorn Ceilings

Popcorn (acoustic) texture is sprayed on, and older spray-on textures can contain asbestos. The EPA lists “textured paint and patching compounds used on walls and ceilings” among the places asbestos may be found in a home, and says exposure happens mainly when the material is disturbed: exactly what scraping and sanding do. The EPA banned spray-applied asbestos surfacing for fireproofing and insulation in 1973 and for other purposes in 1978, but those bans don’t give you a reliable cutoff for a particular house.

If you don’t know when the ceiling was textured, or it went up before the 1980s, have it sampled before you touch it. The EPA recommends that a trained and accredited asbestos professional take the sample, because sampling done badly can release fibers. If it contains asbestos, the EPA’s advice is to leave it undisturbed or hire a trained professional; its guidance for removal includes wetting the material with a fine mist, not breaking it into small pieces, and cleaning up with HEPA vacuums, never a regular vacuum.

Lead Paint on Painted Popcorn

If the texture has been painted, the paint matters too. In 1978 the federal government banned lead-based paint for use in homes, and the EPA warns that renovation in a pre-1978 home with lead paint can create dangerous lead dust. Sanding painted popcorn in an older house is exactly that kind of job, so have the paint tested first. The EPA recognizes specific lead test kits for use by trained professionals, and a lead-safe certified renovator can test it and do the work.

⚠️ Test First, Then Pick the Tool

None of the tools on this page makes asbestos or lead safe to remove yourself. A negative test is what makes a DIY popcorn ceiling removal a reasonable weekend project.

Scrape or Sand a Popcorn Ceiling?

Is the Ceiling Painted? The Water Test

Spray a small patch with water and wait a few minutes. If the texture darkens, softens and comes off easily with a putty knife, it’s unpainted, and scraping will work. If the water beads up or the texture stays hard, it has been painted, and water won’t get through the paint film. Both POP EEZE listings say outright that the tool is not recommended for painted popcorn ceilings.

Why Scraping Wins on Unpainted Texture

Wet popcorn texture is soft. A wide blade lifts it off in strips with far less dust than sanding, and the water keeps fibers and particles down. Scraping is also quicker: Homax says its 6104 can clear a 10′ x 10′ ceiling in 30 minutes or less. The trade-off is mess, since wet texture falls in clumps unless you catch it with a bag or a vacuum attachment.

When Sanding Makes Sense

Sanding is the answer for painted popcorn, for leftover bumps after scraping, and for smoothing the joint compound you apply afterward. A long-reach drywall sander connected to a dust extractor is the right machine; a palm sander on a ladder is slow, tiring and dusty. Expect sanding painted texture to take much longer than scraping unpainted texture.

How to Remove a Popcorn Ceiling Step by Step

Step 1: Empty and Seal the Room

Move the furniture out, turn off the power to ceiling fixtures and remove them, and cover the floor with plastic sheeting taped up the walls a few inches. Heavy 6-mil plastic sheeting holds up better underfoot than thin drop cloths. Seal HVAC registers and doorways.

Step 2: Gear Up

Wear eye protection and a respirator with P100 filters, such as the 3M 6391 half facepiece kit, plus gloves. Work from a stable ladder or scaffold, not a chair.

Step 3: Soak a Section

Fill a pump sprayer with plain water and mist a section of about 4′ x 4′. Don’t flood it; you want the texture soft, not the drywall paper underneath soaked. Let it sit a few minutes and test with the scraper.

Step 4: Scrape

Hold the scraper at a low angle and push it across the ceiling in long, steady strokes. If the texture fights you, mist again and wait. Keep the corners of the blade from digging into the drywall paper; a rounded or slightly dulled blade corner gouges less.

Step 5: Clean Up

Roll the plastic sheeting inward and bag the debris while it’s still damp. Wipe or vacuum the walls and floor with a HEPA-filtered vacuum rather than sweeping dry dust.

Step 6: Repair, Skim and Sand

Expect some gouges, exposed joints and loose paper. Seal torn paper with a primer, fill and skim with joint compound, then sand smooth. My guide to what grit to sand drywall covers the grit for each coat.

Step 7: Prime and Paint

Prime the whole ceiling once the compound is dry and sanded. Raking light from a work lamp held close to the ceiling shows any ridges before the paint goes on.

The Best Popcorn Ceiling Removal Tools

Homax 6104 Ceiling Texture Scraper

Homax 6104 popcorn ceiling texture scraper with 12 inch blade

Best Popcorn Ceiling Scraper

The classic popcorn ceiling removal tool. Homax lists a 12″ blade, a threaded handle that takes a standard extension pole (sold separately) and an attachment for a plastic bag that catches texture as it falls. The head is shaped to avoid gouging the drywall, and Homax claims a 10′ x 10′ ceiling in 30 minutes or less. It’s simple, cheap and the right first tool for an unpainted ceiling.

Check price on Amazon

  • ✅ Wide blade covers a ceiling fast
  • ✅ Bag attachment catches debris
  • ✅ Budget price tier
  • ❌ Pole and bag not included
  • ❌ Doesn’t work on painted texture

Best For: Unpainted popcorn ceilings in empty rooms.


POP EEZE Popcorn Ceiling Scraper Vacuum Attachment

POP EEZE popcorn ceiling scraper vacuum attachment for a shop vac hose

Best Popcorn Ceiling Removal Tool With Vacuum

A scraper and funnel that connect to your shop vacuum hose and a pole, so the texture goes into the vacuum instead of onto the floor. POP EEZE includes the funnel, three blades and instructions, and says it saves the constant bag changes of a scraper-and-bag setup. The maker is clear that it is not recommended for painted ceilings. The Popeeze PRO version swaps in a metal blade.

Check price on Amazon

  • ✅ Much less debris on the floor
  • ✅ Uses the shop vac you already own
  • ❌ Not for painted popcorn
  • ❌ Wet texture is heavy on a small vacuum

Best For: Rooms you can’t fully empty, and anyone who hates cleanup.


Chapin 20004 1-Gallon Pump Sprayer

Chapin 20004 1 gallon pump sprayer for wetting popcorn ceiling texture

Best Sprayer for Soaking Popcorn Texture

Every scraping method starts with water, and a pump sprayer puts a fine, even mist on the ceiling without dripping all over you. Chapin’s SureSpray has a 1-gallon translucent tank with a funnel top, an adjustable cone nozzle for a stream or a broad spray, and a 34″ hose. Use it with plain water only, and keep it dedicated to indoor use.

Check price on Amazon

  • ✅ Even mist that soaks without flooding
  • ✅ See-through tank
  • ❌ You’ll pump often on a big ceiling

Best For: Wetting unpainted popcorn before you scrape.


Hyde 09165 Dust-Free Drywall Vacuum Hand Sander

Hyde 09165 dust-free drywall vacuum hand sander with 6 foot hose

Best Budget Popcorn Ceiling Sander

A manual sanding head that pulls dust through the screen into a wet/dry vacuum. Hyde includes a 6′ hose, a coupling adapter for 1-3/4″, 1-1/2″ and 2-1/2″ vacuum hoses and a reversible sanding screen, and its EasyClamp holds the screen for quick changes. It’s not fast enough to remove painted popcorn from a whole room, but it’s ideal for the bumps scraping leaves and for sanding the skim coat afterward.

Check price on Amazon

  • ✅ Captures dust at the head
  • ✅ Fits most shop vac hoses
  • ✅ Budget price tier
  • ❌ Manual, so slow on painted texture

Best For: Cleanup sanding after scraping and smoothing joint compound.


DEWALT 20V MAX Cordless Drywall Sander (DCE800B)

DEWALT DCE800B 20V MAX cordless drywall sander for sanding a popcorn ceiling

Best Popcorn Ceiling Sander

For painted popcorn, a long-reach sander does the work. DEWALT lists a brushless motor, a telescoping shaft for reach, a variable-speed dial, a tool-free AirLock connection to DEWALT dust extractors and Wireless Tool Control, which switches a compatible extractor on and off with the sander. Without a cord trailing behind you, moving around a ceiling is easier. It’s sold as a bare tool, so budget for a 20V battery and charger if you don’t own them.

Check price on Amazon

  • ✅ Cordless with extractor integration
  • ✅ Brushless motor
  • ✅ Telescoping reach
  • ❌ Tool only, battery extra
  • ❌ Needs an extractor for dust-free work

Best For: Painted popcorn and finishing the ceiling afterward.


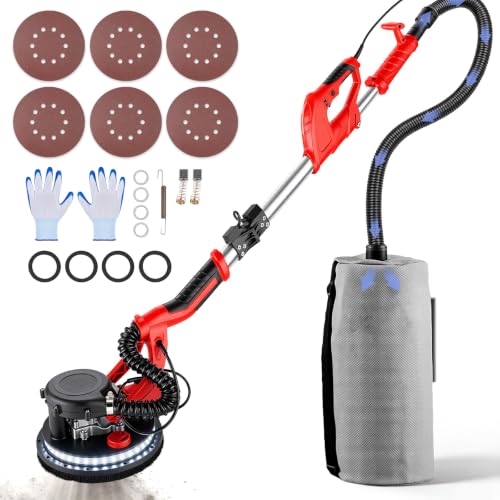
VEVOR 850W Electric Drywall Sander

VEVOR 850W electric drywall sander with telescoping handle and vacuum bag for popcorn ceilings

Best Budget Electric Popcorn Ceiling Sander

A corded long-reach sander for a one-off job. VEVOR lists an 850 W motor with 7 speeds from 800 to 1,750 RPM, 225 mm (8.86″) sanding discs, a handle that extends from 1.4 to 1.9 m and folds for storage, an LED strip around the head, and a dust hose with a collection bag. Spec sheets for budget sanders come from the seller rather than an independent test, but for one ceiling it costs far less than a premium sander. Connect the hose to a shop vac instead of the bag for better dust capture.

Check price on Amazon

  • ✅ Low price for a long-reach sander
  • ✅ Extending, folding handle
  • ❌ Heavy overhead for long sessions
  • ❌ Bag alone won’t catch fine dust

Best For: A single painted ceiling on a tight budget.


If you’ll sand ceilings regularly, the Bosch GTR55-85 has a ceiling-suction mode that takes some of the tool’s weight off your arms. I compare it with the Festool PLANEX and others in my best drywall sanders guide.

Can You Sand a Popcorn Ceiling?

Yes, and for painted popcorn it’s usually the only way short of covering it. Three things decide how it goes.

What Kind of Sander

Use a long-reach drywall sander with a round, flexible head and a vacuum port. Its large disc rides over the bumps instead of digging into them, and the pole keeps you off the ladder for most of the ceiling. A random orbital or palm sander is fine for a small patch but miserable for a room.

What Grit

Start coarse on painted texture, around 60-80 grit, to break through the paint and knock the peaks down, then move to 120-150 to smooth. Once you’ve skimmed the ceiling with joint compound, finish-sand with the grits in my drywall grit guide. Painted texture clogs discs quickly, so have plenty on hand.

Dust

Sanding a ceiling puts dust right above your face. Run the sander through a dust extractor or a shop vac with a fine filter, wear a P100 respirator and eye protection, and seal the room. My guides to the best dust extractors and dustless sanders cover the options.

Smoothing a Popcorn Ceiling Without Removing It

If the texture is painted, tested positive for asbestos, or you simply don’t want the mess, you can cover it instead.

  • Skim coat: knock the tallest peaks down with a scraper, prime, then apply thin coats of joint compound and sand between them. This hides the texture without removing it, but takes several coats.
  • New drywall over the top: thin ceiling drywall screwed through the old ceiling into the joists. More work up front, very little dust.
  • Ceiling planks or panels: a covering that leaves the original ceiling sealed in place.

If the texture contains asbestos, check the EPA’s guidance before you sand, scrape or screw into it, and use a trained professional where it calls for one.

🏆 The Verdict

Test for asbestos (and lead, if painted) first. For unpainted popcorn, soak it with a Chapin pump sprayer and scrape it with a Homax 6104, or use the POP EEZE on your shop vac to keep the mess off the floor. For painted popcorn, use a long-reach sander: the DEWALT DCE800B with an extractor, or the VEVOR 850W for a single job. Finish with a skim coat, a Hyde vacuum sander for touch-ups, primer and paint.

❓ Frequently Asked Questions

What is the best tool to remove popcorn ceilings?+
For unpainted popcorn, a wide ceiling texture scraper on an extension pole, used after wetting the texture with a pump sprayer. A vacuum scraper attachment cuts the cleanup. For painted popcorn, a long-reach drywall sander connected to a dust extractor works better, because water can’t soften painted texture.
Is it better to sand or scrape a popcorn ceiling?+
Scrape it if it’s unpainted: wet texture comes off quickly and with little dust. Sand it only if it’s painted, if scraping leaves bumps behind, or when you’re smoothing joint compound afterward. Sanding dry texture makes far more airborne dust, so use a sander with extraction and a P100 respirator.
Is there a vacuum that can remove popcorn ceilings?+
Not on its own, but vacuum scraper attachments such as the POP EEZE connect a scraping blade to your shop vac hose, so the texture is pulled into the vacuum as you scrape. They work on unpainted popcorn only. A drywall sander connected to a vacuum or extractor does the same job for painted texture.
Can I remove the popcorn ceiling myself?+
Usually, yes, if testing shows no asbestos and, for painted texture, no lead paint. It’s messy but simple: seal the room, soak the texture, scrape, then skim and paint. If the texture contains asbestos, the EPA recommends leaving it alone or hiring a trained professional rather than doing it yourself.
What year did popcorn ceilings stop having asbestos?+
There’s no safe cutoff year to rely on. The EPA banned spray-applied asbestos surfacing for fireproofing in 1973 and for other uses in 1978, but bans came in stages and older materials could still end up in homes. If the ceiling predates the 1980s or you don’t know its age, have it tested.
How do you smooth out a popcorn ceiling without removing it?+
Skim coat it. Knock down the tallest peaks, prime so the compound bonds, then apply thin coats of joint compound and sand between coats until the surface is flat. Alternatively, cover the ceiling with thin drywall or ceiling planks fastened through to the joists, which seals the old texture in place.

Still deciding whether your ceiling is painted or which sander fits your room? Describe it in the comments and I’ll help you choose.

Can You Sand Pressure-Treated Wood? When, What Grit and How

Can you sand pressure-treated wood: new pressure-treated deck boards and a framing nailer on a deck under construction

Yes, you can sand pressure-treated wood, as long as it is dry and you control the dust. Sand only once the boards pass a water sprinkle test (or read below 15% on a moisture meter), use 60 to 80 grit for decks and fences and stop at 120 before paint, and wear a dust mask and goggles, outdoors. The treated-wood industry’s own handling sheet says exactly that: wear a dust mask and goggles when cutting or sanding, wash your hands after, and never burn the sawdust or offcuts.

Below is what changed when arsenic-based treatment left the residential market, when wet lumber is ready, which grit to use for each job, a step-by-step method, and the few tools that make sanding pressure-treated wood quick and clean.

⚡ Quick Answer

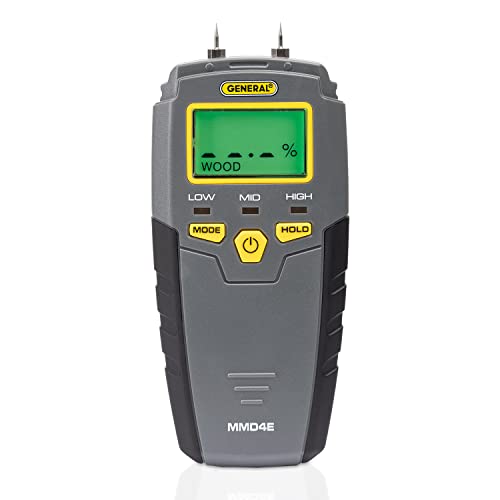
When: only when water soaks in instead of beading, or a moisture meter like the General Tools MMD4E reads below 15%. Kiln-dried after treatment (KDAT) lumber is ready right away.

Grit: 80 for fuzz, mill glaze and the grade stamp; 60 for rough, splintered boards; 100 to 120 before paint. Not finer than 80 to 120 before a penetrating stain.

Safety: dust mask (a P100 half mask is better) and goggles, sand outdoors, sweep up and bin the dust, wash your hands and wash work clothes separately. Never burn treated wood or its sawdust.

Can You Sand Pressure-Treated Wood Safely?

Pressure-treated lumber is wood that has had a liquid preservative forced deep into its cells in a pressure cylinder, so it resists rot and insects outdoors. Sanding it is normal practice: decks, fences, railings and raised beds made of treated pine are sanded to take off splinters, fuzz and old finish all the time. What makes it different from sanding untreated pine is the dust, which carries some of the preservative, and the moisture, because freshly treated boards are often still wet when you buy them.

Today’s Treated Lumber Is Not the Old Green Arsenic Wood

For decades, most outdoor residential lumber in the US was treated with chromated copper arsenate (CCA). The EPA says that effective December 31, 2003, the CCA manufacturers voluntarily cancelled virtually all residential uses, including decks and children’s playsets. The preservatives that replaced it are copper-based, such as ACQ (alkaline copper quaternary) and copper azole, and the EPA notes that ACQ is now the most widely used residential wood preservative and that these water-based treatments leave a dry, paintable surface.

That matters for sanding. Health Canada points out that decks, fences and playground structures built before 2004 are likely to be CCA-treated, and that coatings on them can chip or flake, so scraping or sanding them increases exposure to the arsenic in the wood. If your deck is older than that, keep sanding to a minimum, never sand it indoors, and dispose of the dust the way your local rules require. For new lumber from a home center, the same basic precautions apply, just with far less at stake.

What the Treated-Wood Industry and Regulators Say

The Western Wood Preservers Institute’s safe handling guidance, the National Pesticide Information Center at Oregon State University and Health Canada agree on the same short list:

  • Wear a dust mask and goggles when cutting or sanding (Health Canada adds gloves and long sleeves).
  • Work outdoors where you can, so the fine dust doesn’t settle inside.
  • Wash your hands with soap and water after handling treated wood, and before eating, drinking or smoking.
  • Wash work clothes separately from the household laundry.
  • Clean up sawdust and offcuts and dispose of them with household trash under local rules; don’t compost them or use them as mulch.
  • Never burn treated wood, sawdust included, in a fire pit, stove or fireplace.

A paper dust mask meets the letter of that advice. A half-mask respirator with P100 filters, like the GVS Elipse P100 below, seals much better around the face and is the better choice for a whole deck. My guide to the best respirators for woodworking explains the filter classes.

Does Sanding Ruin Pressure-Treated Wood?

No. A sanding pass takes off a thin surface layer, the same layer that weathering greys and erodes anyway, and the preservative is in the wood, not painted on top of it. The Western Wood Preservers Institute even recommends a light sanding to remove the grade stamp from visible boards. What does need attention is fresh, untreated-looking wood exposed by cutting: the same guidance says to treat all field-cut ends and drilled holes with a brush-on preservative such as copper naphthenate, which is sold at home centers. If you plane a board heavily or sand deep into a cut end, give it the same brush-on treatment.

⚠️ Important

Never burn pressure-treated wood or the sawdust from sanding it, not even a small amount in a fire pit. The EPA, Health Canada and the treated-wood industry all say the same thing: burning it releases the preservative chemicals in the smoke and ash. Bag the dust and put it in the trash.

When to Sand New Pressure-Treated Wood

The most common mistake isn’t sanding treated wood, it’s sanding it too soon. Lumber that’s still wet from treatment clogs sandpaper in seconds, tears instead of cutting and raises more fuzz than it removes. And whatever you plan to put on afterwards, stain or paint, won’t soak in or stick until the wood dries.

The Sprinkle Test

YellaWood, a treated-lumber brand, and Benjamin Moore both recommend the same quick check: sprinkle a few drops of water on the boards. If the water beads up, the wood is still too wet (or has a mill glaze) and isn’t ready; wait several days and test again. If it soaks in, the wood is dry enough to sand and finish. Test in sun and in shade, on more than one board, because they dry at different rates.

Use a Moisture Meter for a Real Number

A pin moisture meter takes the guesswork out. YellaWood says the wood’s moisture content should ideally be below 15% before staining, and Defy, a deck stain maker, asks for 12% to 15% or less. That’s also a good point to start sanding: the fibers cut cleanly instead of matting. Push the pins in along the grain and take several readings across the deck, then average them.

How Long to Wait Before Sanding Pressure-Treated Wood

There’s no fixed number of weeks, because it depends on your climate, the season and how wet the lumber was. YellaWood notes that the old rule of thumb was to wait six months or even a year, and that with today’s treatments you’ll ideally stain within six weeks after construction, as long as the wood is sufficiently dry. Let the sprinkle test or the meter decide, not the calendar, and if you can’t wait, buy KDAT lumber.

KDAT Lumber Is Ready Right Away

Kiln-dried after treatment (KDAT) boards go into a kiln after the preservative is applied, which brings them back to their original moisture content. YellaWood says KDAT products need to be stained, painted or sealed immediately after installation, so there’s no wait at all. It’s a step up from standard treated lumber and not every yard stocks it, but if you’re building furniture or a project you want to finish the same weekend, they’re the only treated lumber that lets you sand and finish straight away.

What Grit to Sand Pressure-Treated Wood

Treated pine is a softwood, and on a deck or fence the goal is a surface that’s smooth enough not to splinter but open enough for stain to soak in. That’s why the grits stay coarse. These ranges follow the deck prep guidance from Benjamin Moore (80 grit after cleaning) and TWP’s stain help desk (not finer than 60 to 80 grit before their stain).

Job Grit Notes
Rough, splintered or weathered boards 60 Follow with 80 if the sander leaves visible swirls
Raised grain, fuzz, mill glaze 80 One pass after the boards are dry
Grade stamp and pencil marks 80 A light pass usually takes it off
Before a penetrating deck or fence stain 60 to 80 Finer grits close the surface and the stain sits on top
Before exterior paint or solid stain 80, then 100 to 120 Smooth enough for an even film, still has tooth
Handrails, benches, outdoor furniture 80, then 120 Anything hands and legs touch; round over the edges

For deck boards specifically, my guide on how to sand a deck has the full grit table, and the sandpaper grit chart covers every other material in your project.

Why Not Sand Finer?

On bare wood that will get a penetrating stain, a finer grit isn’t a better finish, it’s a worse one. Sanding to 150 or 220 burnishes the surface, so a stain made to soak in stays on top and wears off unevenly. TWP’s help desk tells customers who sanded finer than 60 to 80 grit to let the wood weather for a month or two before staining. Paint and solid stains form a film, so they tolerate 120, but there’s still no reason to go finer outdoors.

How to Sand Pressure-Treated Wood, Step by Step

  1. Check that it’s dry. Sprinkle test or moisture meter, on several boards in sun and shade.
  2. Clean first if it’s an old deck. Wash off dirt, mildew and loose finish, then let it dry for at least 48 hours, the wait Benjamin Moore gives after cleaning. Sanding a dirty deck only grinds grit into the wood and kills the paper.
  3. Set nails and screws. Punch any proud nail heads below the surface and drive screws flush, or they’ll tear discs and belts.
  4. Put on your mask, goggles and gloves, and keep children and pets away from the work area.
  5. Connect dust collection. A shop vac or extractor on the sander catches most of the dust before it spreads; otherwise, the sander’s own canister or bag.
  6. Sand with the grain at 60 or 80 grit. Keep the sander flat and moving, with light pressure. On a deck, work one board at a time, end to end, so you don’t leave lap marks.
  7. Do the edges and spaces by hand. A folded sheet or a sanding sponge reaches between balusters and along board edges where a sander can’t.
  8. Step up only if you’ll paint. For paint or solid stain, go over the boards once more at 100 or 120.
  9. Clean up the dust. Vacuum or sweep the boards, the ground below and your clothes. Bag the dust and put it in the trash, never in compost or a fire.
  10. Treat any cut ends you exposed while building with a brush-on preservative, then finish within the window your stain or paint maker gives.

💡 Pro Tip

If an 80 grit disc turns into a gummy, shiny pad within a minute, stop. The wood is still too wet, and you’ll go through a box of discs and still get fuzz. Wait a few dry days and test again.

Sand or Power Wash a Deck?

They do different jobs, and most decks need both. Washing (with a deck cleaner and a garden hose or a pressure washer on a gentle setting) removes dirt, mildew and grey weathered fibers. Sanding takes off what washing leaves behind: the raised grain and fuzz that washing itself causes, splinters, mill glaze and the last of an old finish. So on an old deck the order is clean, dry, then sand. On a new deck of dry treated lumber, a light sanding to break the mill glaze and remove the grade stamps is usually all it takes before the first coat.

For a large deck, a sander built for decks saves hours over a 5″ palm sander. And once the boards are sanded, the deck stain calculator tells you how much stain to buy.

Should You Sand Pressure-Treated Wood Before Painting or Staining?

Before Staining

On new, dry lumber, sand lightly at 80 grit if the sprinkle test shows beading from mill glaze, if there’s fuzz, or to remove grade stamps; otherwise you can skip it. On older decks, sanding after cleaning gives the stain an even, open surface to soak into. Always follow the stain maker’s directions: they decide the grit, the wait after cleaning and the moisture limit.

Before Painting

Paint needs a clean, dry and slightly rough surface to grip. Sand at 80 and then 100 to 120, remove all the dust, prime with an exterior primer and paint. Painted treated wood is a film finish: it will peel if the wood was still wet underneath, so the moisture check matters even more than for stain.

What You Need

You don’t need special tools for treated wood, just the usual sanding kit plus the two things that keep this job safe and on schedule: a moisture meter and a proper mask. The specs below are the makers’ own, from each product’s listing.

Bosch ROS20VSC 5″ Random Orbital Sander

Bosch ROS20VSC 5 inch random orbital sander with dust canister

Best All-Round Sander for Treated Wood

A 5″ random orbital sander handles railings, steps, planters and furniture, and a small deck if you’re patient. Bosch’s ROS20VSC has a 2.5 amp motor with variable speed from 7,500 to 12,000 OPM, hook-and-loop discs, and a microfilter canister that Bosch says traps particles down to half a micron, plus a vacuum adapter for a shop vac, which is what you want with treated-wood dust. My full Bosch ROS20VSC review goes through it in detail, and the best random orbital sanders list has bigger and cordless options.

Check price on Amazon

  • ✅ Variable speed for softwood
  • ✅ Microfilter canister and vacuum adapter
  • ✅ Light enough for railings and steps
  • ❌ Slow on a whole deck: see the deck sanders

Best For: Railings, stairs, benches, planters and small decks.


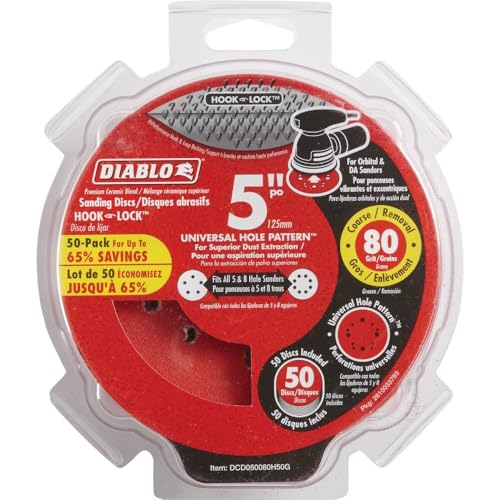
Diablo 5″ 80 Grit Hook and Lock Sanding Discs, 50-Pack

Diablo 5 inch 80 grit hook and lock sanding discs, 50 pack

Best Discs for Pressure-Treated Wood

80 grit is the grit you’ll use most on treated lumber, so buy it in a box. Diablo’s 5″, 80 grit discs come 50 to a pack, use a ceramic abrasive made for leveling and heavy stock removal, and have a universal hole pattern that fits 5- and 8-hole sanders. A coarse, aggressive disc is what you want on soft, resinous pine, which loads finer paper quickly. For the rest of the range, see the best sanding discs for random orbital sanders.

Check price on Amazon

  • ✅ 50 discs in the grit you need most
  • ✅ Fits 5- and 8-hole pads
  • ✅ Ceramic grain made for heavy removal
  • ❌ One grit only: buy 120 separately for paint prep

Best For: Fuzz, mill glaze, grade stamps and stain prep on decks and fences.


GVS Elipse P100 Half Mask Respirator

GVS Elipse P100 half mask respirator with replaceable filters

Best Mask for Sanding Treated Wood

The guidance asks for a dust mask; a sealed half mask does the job properly. The GVS Elipse P100 is a NIOSH-approved P100 respirator (approval TC-84A-6949) with replaceable filters, a soft latex- and silicone-free facepiece and a low profile that leaves room for goggles. It’s the editor’s choice in my best respirator for woodworking guide for the same reasons.

Check price on Amazon

  • ✅ P100, NIOSH approved
  • ✅ Compact, fits under goggles
  • ✅ Filters are replaceable
  • ❌ Particles only: not for solvent stain fumes

Best For: A full day of sanding a deck, fence or old CCA lumber you have to touch.


General Tools MMD4E Pin Moisture Meter

General Tools MMD4E digital pin moisture meter for wood

Best Way to Know When the Wood Is Ready

The sprinkle test tells you yes or no; a meter tells you how close you are. The MMD4E is a pin meter with a 5% to 50% range for wood, a backlit display, a hold button, low, medium and high moisture tones, and spare stainless steel pins. Its cap doubles as a calibration check. Take readings on several boards and wait until they’re under 15%.

Check price on Amazon

  • ✅ Reads 5% to 50% in wood
  • ✅ Spare pins and calibration cap
  • ✅ Useful for firewood, drywall and leaks too
  • ❌ Pins leave small holes: test on the underside

Best For: Deciding when new treated lumber is dry enough to sand, stain or paint.


How I Put This Guide Together

The safety advice comes from the EPA’s pages on wood preservatives and CCA, the Western Wood Preservers Institute’s handling and installation guidance, the National Pesticide Information Center and Health Canada. The drying, moisture and grit advice comes from treated-lumber and finish makers: YellaWood, Benjamin Moore, Defy and TWP. The products are on sale on Amazon today and their specs come from the makers’ listings; I don’t show customer ratings or prices, which change daily. More on how I choose the sanders I recommend.

🏆 The Verdict

You can sand pressure-treated wood whenever it needs it, as long as it’s dry (water soaks in, or under 15% on a meter), you use 60 to 80 grit for stain and up to 120 for paint, and you handle the dust properly: mask, goggles, outdoors, bag the dust, never burn it. A Bosch ROS20VSC with a box of 80 grit discs covers most projects, and a P100 half mask makes the job comfortable as well as safe.

❓ Frequently Asked Questions

Does sanding ruin pressure-treated wood?+
No. Sanding removes only a thin surface layer, and the preservative is driven into the wood rather than coated on it. The treated-wood industry even suggests light sanding to take off grade stamps. Brush a preservative such as copper naphthenate onto any cut ends or deeply planed areas you expose.
How do you make pressure-treated wood look good?+
Let it dry, sand off the fuzz, mill glaze and grade stamps with 80 grit, and finish it within the window the stain maker gives. A semi-transparent or solid stain hides the green-brown tint of fresh lumber, and rounding the edges of rails and steps makes it look and feel like furniture.
Is it better to sand or power wash a deck?+
Most decks need both, in that order. Washing removes dirt, mildew and grey fibers but raises the grain; sanding then flattens the fuzz and opens the surface for stain. Let the deck dry for at least 48 hours after washing before you sand, and keep a pressure washer on a gentle setting so it doesn’t gouge the wood.
Is it okay to leave pressure-treated wood unpainted?+
Yes. The preservative protects it from rot and insects without any finish. Left bare, it weathers to grey and checks or cracks faster as it wets and dries, so most builders apply a water-repellent sealer or stain once the wood is dry. Paint is optional and mostly a matter of looks.
How long should you wait before sanding pressure-treated wood?+
Until it’s dry, not a set number of weeks. Sprinkle water on a few boards: if it soaks in, you can sand; if it beads, wait several days and test again. A moisture meter reading below 15% is a reliable sign. Kiln-dried after treatment (KDAT) lumber can be sanded and finished right away.
Can you sand pressure-treated wood with an orbital sander?+
Yes, a random orbital sander is the best tool for most treated-wood projects: rails, steps, benches and small decks. Use 60 or 80 grit discs, connect a vacuum to catch the dust, keep the pad flat and move with the grain. For a large deck, a bigger deck or drum floor sander is faster.

Conclusion

Sanding pressure-treated wood is routine deck and fence work, not a hazard to avoid. Wait for dry wood, stay coarse, catch the dust and never burn it, and the boards will take stain or paint far better than they do straight off the lumber pile. If you’re refinishing a whole deck, start with how to sand a deck, and if you have questions about your own boards, ask in the comments.

Deck Stain Calculator: How Much Stain You Need for a Deck or Fence

Most deck stains cover 150 to 400 square feet per gallon per coat, depending on the type of stain and how thirsty the wood is. To work out how much you need, measure the deck boards (length times width), add the railings and stairs, divide by your stain’s coverage for each coat, and add about 10% for end grain, gaps and spills. The deck stain calculator below does all of that for one or more deck sections, railings, stairs or a fence, then turns it into cans to buy and a cost estimate.

Deck stain calculator chart: coverage per gallon for Cabot, Behr, Olympic, Thompson's and Ready Seal deck stains on smooth and rough wood

I built it because the calculators I found either ignore railings and stairs or use a single coverage number for every stain, and a gray, rough deck can drink twice what new boards take. Every coverage figure here comes from a stain maker’s technical data sheet, and you can override it with the number on your own can.

⚡ Quick Answers

12 x 12 deck (144 sq ft): about 1 gallon for one coat, 2 gallons for two coats of semi-transparent on weathered boards.

16 x 20 deck (320 sq ft): about 3 gallons for two coats, before railings and stairs.

100 ft privacy fence, 6 ft tall, both sides: about 7 gallons for one coat, 12 for two.

One gallon: roughly 150 to 400 sq ft per coat. Rough or weathered wood sits at the low end.

Deck Stain Calculator

Enter each part of the deck as a rectangle: add a section for an L-shape, a landing or a second level. The result updates as you type. Switch to A fence for the fence stain calculator.

Deck and fence stain calculator

What are you staining?
Deck size in feet
Section 1
Railings and stairs
Fence size in feet
Wood surface
Stain type
Coats
About 1.6 gal · $90Details ↓

Your estimate

You need about

1.6 gallons

Buy 2 × 1-gallon cans · about $90 at $45 a gallon

Area to stain
192 sq ft
Coverage used
225 sq ft/gal, then 338 on coat 2
Coats
2
Cost per sq ft
$0.47

Many oil-based semi-transparents (Olympic Maximum, SuperDeck oil-based, Behr’s penetrating oil) are one-coat products. If your label says one coat, switch to 1 coat.

Show the math
  • Deck boards: 192 sq ft
  • Coat 1: 192 ÷ 225 = 0.85 gal
  • Coat 2: 192 ÷ 338 = 0.57 gal
  • Plus 10% for end grain, gaps and spills: 1.42 × 1.1 = 1.56 gal
  • Rounded up to containers: 2 gal
  • Cost: 2 gal × $45 = $90

Coverage rates are typical figures from Behr, Cabot, Olympic, Thompson’s and Ready Seal data sheets (sources below the calculator). Your can’s label always wins: type its rate into the box above. Prices are editable estimates, not quotes.

How Much Deck Stain Do I Need?

Deck stain calculator: a stain pad applying brown stain to cedar deck boards, half of the deck stained

The answer depends on three things: the area you are staining, the coverage of your stain, and how many coats it needs. The area is the part you measure. Coverage and coats come from the can, and they vary more than most people expect, even between products sold side by side.

Deck Stain Coverage by Product

These are the coverage rates the makers publish in their technical data sheets, per gallon and per coat unless the note says otherwise.

Stain Type Coverage per gallon Coats
Cabot Australian Timber Oil Translucent, oil 400-600 smooth, 250-350 rough 1 only
Behr Premium Transparent Waterproofing Wood Finish Transparent, oil 350-400 1 only
Behr Premium Semi-Transparent Stain & Sealer No. 5077 Semi-transparent, water 300 first coat, 500 second coat 2 required
Olympic Maximum Semi-Transparent Semi-transparent, acrylic/oil 250-350, depending on texture 1
Thompson’s WaterSeal Waterproofing Stain Transparent, semi or solid, water 150-400 1 (second within 4 hours if needed)
Ready Seal Semi-transparent, oil 150 (treated pine deck) to 175 (cedar deck) for both coats 2 light coats
Cabot Solid Color Acrylic Stain + Sealer Solid, water 400-500 smooth, 200-300 rough 2 (1 on new wood)

The calculator’s default rates sit inside these ranges: 350, 275 and 200 sq ft per gallon for transparent and solid stains on smooth, weathered and rough wood, and 300, 225 and 175 for semi-transparent. A second coat of a transparent or semi-transparent stain goes further, so the calculator counts it at 1.5 times the first-coat rate, close to Behr’s 300 then 500. Solid stain keeps the same rate on both coats, as Cabot’s sheet gives one figure for both. If your can gives a single number, type it into Coverage on your label and the calculator uses it for every coat.

Smooth, Weathered or Rough Wood

Wood condition changes coverage more than anything except the stain type. Cabot’s rough-surface figures are about half to two thirds of its smooth ones. Ready Seal says older wood is more porous and tells you to add 20-25% to its figures, and Sherwin-Williams notes on SuperDeck that new wood normally takes less product than old, weathered wood. As a rule of thumb:

  • New or smooth boards: the top of the label range. New, dense boards may not take a second coat at all.
  • Weathered boards that have turned gray, or a deck you just sanded: the middle of the range.
  • Rough-sawn, very old or very dry wood: the bottom of the range, sometimes below it. Stain one board and time how far a quart goes before you buy for the whole deck.

One Coat or Two?

Follow the label, because the makers disagree. Cabot Australian Timber Oil, Behr Transparent, Olympic Maximum and Sikkens Cetol SRD are labeled for one coat, and a second coat on a horizontal surface can stay tacky or turn glossy. Behr’s water-based semi-transparent No. 5077 requires two coats, Cabot’s solid stain wants two on weathered wood, and Ready Seal is applied as two light coats with its coverage already counting both. Thompson’s allows a second coat only within four hours of the first. Pick 1 coat or 2 coats in the calculator to match your product.

How to Measure Your Deck for Stain

You need a tape measure and five minutes. Round each measurement up to the next half foot; the calculator adds 10% on top for end grain, the gaps between boards and the stain that ends up on your shoes.

Deck Boards: Length Times Width, Section by Section

Measure the floor as one or more rectangles. A plain rectangular deck is one section. An L-shaped deck is two: measure the long leg the full length, then the short leg from the inside corner out, so you don’t count the corner twice. A landing between levels or a second deck level is another section. The calculator takes up to six.

Railings and Balusters

Railings take more stain than people expect, because every baluster has four faces. Measure the total length of railing once along the top rail, not both sides. The calculator converts that length into area with these allowances, which are my own estimates from standard railing dimensions:

  • Wood balusters: 5 sq ft per foot of railing. A 36-inch railing with 2×2 balusters about 4 inches apart has a little over two balusters per foot, each with about 1.5 sq ft of surface on four faces, plus the top and bottom rails.
  • Horizontal wood boards: 5 sq ft per foot, both faces of the boards plus the posts.
  • Solid wood panels: 6 sq ft per foot, both faces of a 3-foot panel.
  • Metal or cable infill: 2 sq ft per foot, for the wood cap, bottom rail and posts only.

Some online calculators use 3 sq ft per foot (length times height), which undercounts baluster railings. If your railing is unusual, measure one section and divide its stained area by its length.

Stairs

Count the steps and measure the stair width. For each step the calculator counts a tread and a riser, about 1.6 sq ft per foot of width (an 11-inch tread plus a 7.5-inch riser), plus 1 sq ft for its share of the two outer stringers. Four steps 4 feet wide come to about 30 sq ft. Add a landing as its own deck section.

What the Calculator Leaves Out

Board edges inside the gaps are covered by the 10% allowance. Skirting, fascia boards, benches, planters and pergolas are not: measure them as extra deck sections or add them to the railing length. If you stain the underside of boards or joists, measure them separately; most people don’t.

Fence Stain Calculator: Measuring a Fence

For a fence, choose A fence at the top of the calculator, then enter the total length of the fence line and its height. The face area is length times height, doubled if you stain both sides.

Privacy, Board-on-Board and Picket Fences

  • Solid privacy fence: the full face area on each side.
  • Board-on-board or shadowbox: the face area plus 15%, for the overlapping board edges you can see and brush into.
  • Spaced pickets: 60% of the face area, which allows for the gaps between pickets and adds back the picket edges.

Both Sides, Posts and Rails

The back of most fences shows the posts and two or three horizontal rails, which add real area. With Include posts and rails ticked, the calculator adds 15% to the fence face area. A 100-foot, 6-foot privacy fence stained on both sides comes to 1,200 sq ft of face, about 1,380 sq ft with posts and rails. At a typical semi-transparent rate on weathered wood that is about 7 gallons for one coat.

Deck Stain Cost

The calculator multiplies the gallons you buy by a price per gallon you can change. The defaults are $50 a gallon for transparent stain, $45 for semi-transparent and $42 for solid, the middle of what I found in October 2026.

What a Gallon of Deck Stain Costs

Mass-market water-based stains from Thompson’s and Behr sell for roughly $35 to $48 a gallon at the big home centers. Penetrating oils and premium brands cost more: on the day I checked, Wood Defender Semi-Transparent was $58.25 a gallon on Wood Defender’s site, DEFY Extreme $60.59, Penofin Red Label $50.41 and Sikkens ProLuxe Cetol SRD $73.27 at The Paint Store. Prices move with color, region and season, so put in the number from your own store.

5-Gallon Pails vs Gallon Cans

A 5-gallon pail usually costs about four times the gallon price, so the fifth gallon is close to free: Wood Defender, for example, listed $235.53 for 5 gallons against $58.25 for one. The calculator prices a pail at 4.2 times your gallon price, and it switches to a pail once you would otherwise buy more than four single gallons. Buying all the stain at once has another advantage: Cabot tells you to mix every container together when a job needs more than one, so the color matches from board to board.

Before You Stain: Sand and Clean the Deck

Coverage figures assume clean, sound wood. Old, failing stain, gray fibers and mildew all change how much stain the boards take and how long it lasts. Wash the deck, let it dry for a day or two, and sand off loose fibers and failed finish. Stain makers warn against sanding a deck too fine, because a polished surface does not absorb penetrating stain: the grits that work are in what grit sandpaper to use on a deck, and the full grit scale is in my sandpaper grit chart. For the sanding itself, my best sanders for deck refinishing compares the belt and random orbital sanders that handle deck boards best. The full process from cleaner and brightener to the last coat is in how to stain a deck, and most of the stains whose coverage figures this calculator uses are compared in best deck stain.

What I’d Use for the Staining

Ready Seal Exterior Wood Stain and Sealer, 5 Gallon

Ready Seal exterior wood stain and sealer in a 5 gallon pail, natural cedar color, for decks and fences

An oil-based semi-transparent stain and sealer that Ready Seal says goes on without lap marks, so a large deck or a long fence doesn’t need perfect timing. It is applied as two light coats at least 45 minutes apart, and its published coverage already includes both coats: 150 sq ft per gallon on treated pine decks and 175 on cedar decks, plus 20-25% more on older wood. Ready Seal also says it should not go over previously painted or sealed surfaces, so strip or sand old finish first.

Check price on Amazon


Cabot 6-Inch Stain Applicator Pad

Cabot 6 inch stain applicator pad for smooth deck boards and fences

Behr’s technical data sheet recommends a pad applicator over large deck areas, and Cabot lists stain pads among its application methods. A 6-inch pad covers about one deck board at a time, which makes it easier to work end to end along a few boards and keep a wet edge, the way the makers tell you to avoid lap marks. This one is made for smooth surfaces such as deck boards and planed fence pickets.

Check price on Amazon


🏆 The Bottom Line

Measure the deck floor section by section, add 5 sq ft per foot of baluster railing and about 7.5 sq ft per step on a 4-foot stair, then divide by your stain’s coverage for each coat and add 10%. For most semi-transparent stains on a weathered deck that works out to roughly one gallon per 200 sq ft for two coats. Check your label for the coat count, buy it all at once, and sand and clean the deck before you open the can.

❓ Frequently Asked Questions

How many gallons of stain do I need for a 12×12 deck?
About 1 gallon for one coat and 2 gallons for two coats. A 12×12 deck floor is 144 square feet, and at 150 to 400 square feet per gallon per coat one coat takes roughly half a gallon to a gallon. Railings and stairs can add as much area as the floor itself, so count them too.
How many square feet does 1 gallon of deck stain cover?
Most deck stains cover 150 to 400 square feet per gallon per coat, according to the makers’ data sheets. Penetrating oils such as Cabot Australian Timber Oil reach 400 to 600 on smooth boards, while Ready Seal’s 150 to 175 already includes two coats. Rough or weathered wood sits at the bottom of every range.
How much does 1 quart of stain cover?
Roughly 40 to 100 square feet: a quart is a quarter of a gallon, so divide the gallon rate on the can by four. That is enough for a bench, a few steps or a test board, not a whole deck. Cabot and Olympic sell quarts, while Ready Seal comes only in 1 and 5 gallon containers.
How much will 5 gallons of stain cover on a fence?
Five gallons covers about 750 to 2,000 square feet per coat. On a 6-foot privacy fence stained on both sides, posts and rails included, that is roughly 70 feet of fence for one coat of a typical semi-transparent on weathered wood, or about 45 feet for two coats.
How do you calculate how much stain you need for a fence?
Multiply the fence length by its height, double it if you stain both sides, and add about 15% for posts and rails. Divide that area by the stain’s coverage per gallon for each coat and add 10% for waste. For spaced pickets, start from about 60% of the full face area.
Does a deck need two coats of stain?
Only if the label calls for it. Behr’s water-based semi-transparent No. 5077 requires two coats and Ready Seal goes on as two light coats, but Cabot Australian Timber Oil, Olympic Maximum and Behr Transparent are one-coat products. Cabot warns that overapplying can leave a glossy finish that dries poorly.
How much does it cost to stain a 12×12 deck yourself?
About $45 to $120 in stain: one or two gallons at $35 to $60 a gallon, depending on the brand and the number of coats. Add a deck cleaner, an applicator pad and sandpaper. Contractor prices depend on your region, the prep work and the railings, so ask two or three local pros.

Sources

Coverage, coats and container sizes are from the makers’ own documents, read in October 2026:

Railing, stair and fence allowances are my own estimates from standard lumber sizes, explained above. Planning a big deck or a tricky fence? Ask in the comments and I’ll help you check the numbers.

Sandpaper Grit Chart: Coarse to Ultra Fine, P Grades and a Grit Finder

Sandpaper grit chart: rolls of coarse to fine sandpaper grits on a workshop rack

A sandpaper grit chart sorts abrasives by the size of their particles: the higher the grit number, the finer the sandpaper. Coarse 40 to 60 grit strips paint and shapes wood, medium 80 to 120 removes machine marks, fine 150 to 180 is the last step before paint or stain, very fine 220 to 240 goes under clear finishes, and 320 and up is for sanding between coats and wet sanding before polishing.

Below is the full chart from 24 grit to P5000, a grit finder that gives you the sequence for 14 materials and jobs, and a converter between US grits, European P grades and microns. That last part matters more than most charts admit: above 220, a sheet marked P400 is a different grit from one marked 400, and mixing them up is the most common reason a “fine” sheet leaves scratches you didn’t expect.

Jump to: grit chart · grit finder · what each grit is for · CAMI vs P vs micron · by material · FAQ

Sandpaper Grit Chart: Coarse to Ultra Fine

Abrasive makers don’t agree on the names. Klingspor calls everything from 150 up “fine”, Family Handyman splits the same range into four grades, and Mirka’s own sanding pads put 220 in “super fine”. The grades below follow the names you will see most often on US packaging, with the CAMI grit (the plain number used by US brands) and the matching European P grade.

Top number: CAMI grit (US). Bottom: FEPA P grade. Coarsest first, finest last.

Grade CAMI grit P grade Average particle size Use it for
Extra coarse 24-36 P24-P36 535-715 µm Floor sanders on cupped or very uneven floors, stripping thick coatings, heavy shaping.
Coarse 40-60 P40-P60 268-428 µm Stripping paint and varnish, leveling rough or weathered wood, deck boards before stain.
Medium 80-120 P80-P120 116-192 µm Removing planer and saw marks, the first grit on most bare wood, shaping body filler.
Fine 150-180 P150-P180 78-93 µm The last grit before paint and most stains, drywall joint compound, feather-edging car paint.
Very fine 220-240 P220-P280 53-66 µm The last grit before a clear finish, sanding primer, scuffing between coats.
Extra fine 320-400 P320-P800 24-36 µm Between coats of varnish or paint, wet sanding car primer, acrylic and 3D prints.
Super fine 500-1000 P1000-P2000 9.5-20 µm Wet sanding clear coat defects, plastics and resin prints before polishing.
Ultra fine 1200 and up P2500 and up under 9 µm Final refining before polishing compound: clear coat, headlights, high-gloss resin.

Grit Finder: What Grit Sandpaper for Your Project

Pick what you are sanding, then the job. You get the grit sequence in order, the equivalent grade on the other scale, and the maker whose instructions the sequence comes from. Where no maker publishes a sequence, it says so.

Grit finder

What are you sanding?
What’s the job?

Your grit sequence

Bare wood: Before stain

  1. 120≈ P120Start
  2. 150≈ P150Smooth
  3. 180≈ P180Final

On closed-grain wood under an oil-based stain, stop at 150 to 180 so the stain can still soak in evenly.

Grits based on: General Finishes. Plain numbers are CAMI (US) grits; a P marks European FEPA grades.

3M Aluminum Oxide Sandpaper, 100-150-220 assortment

Hand-sanding sheets in the three grits most wood projects end with.

We earn from qualifying Amazon purchases. The grit sequence never depends on that: it comes from the abrasive, finish or material maker named under each result.

What Each Grit of Sandpaper Is Used For

These are the jobs each grit is usually sold for. Where a maker gives a figure, it is named; Klingspor, for example, measures how much a wide sanding belt removes per pass at each grit.

Grit Grade What it is used for
40 Coarse Heavy removal: stripping old finish, shaping, leveling rough boards. Mirka uses P24 to P80 when a lot of material has to go.
60 Coarse Stripping paint (3M rates 60 for heavy paint removal) and weathered deck boards before stain.
80 Medium Moderate paint removal, leveling, machine marks. The finest grit deck stain makers allow before a penetrating stain.
100 Medium Surface leveling on bare wood. On a wide-belt sander Klingspor puts 100 to 120 at about 1/32 to 1/64 inch per pass.
120 Medium The starting grit on most bare wood, scuffing sound paint, sanding wood filler.
150 Fine The last grit before paint. USG’s coarsest paper for drywall joint compound.
180 Fine The last grit before stain on open-grain wood. Mirka says ordinary paints cover P180 scratches.
220 Very fine The last grit before a clear finish; sanding between coats of polyurethane (Minwax).
320 Extra fine Scuffing between coats of finish (General Finishes uses 220 to 320 pads). In auto work, P320 is the last grit on filler before primer.
400 / P400 Extra fine Wet sanding primer, acrylic and 3D prints. Remember CAMI 400 is about P800.
600 / P600 Extra fine to super fine Final wet sanding of acrylic before buffing (ACRYLITE); the start of polishing on metal (Mirka).
P1000 Super fine Blending and Trizact wet sanding around a paint repair; the wet step on headlights (3M).
P1500 Super fine Leveling clear coat runs and dust nibs before polishing (3M).
P2000 Super fine Final wet grit on resin prints (Formlabs) and in sandpaper-only headlight kits (Sylvania).
P3000 to P5000 Ultra fine Refining sanding scratches before compound on clear coat and headlights (3M Trizact).

What Is 80 Grit Sandpaper Used For?

80 grit is the bridge between removal and smoothing. It strips a worn finish, levels a glue joint and takes out planer marks without the deep gouges of 40 or 60. Mirka puts it at the top of its heavy-removal range (P24 to P80), and it is the coarsest grit the deck stain makers allow before a penetrating stain. It is never a final grit: its scratches show through paint and stain.

What Is 120 Grit Sandpaper Used For?

120 grit is where most bare-wood projects start. General Finishes begins every one of its wood prep sequences at 120, and Minwax calls it a medium grade to start with before working up to 220. It also removes the scratches left by 80 grit, sands dried wood filler and scuffs sound paint before you repaint.

What Is 180 Grit Sandpaper Used For?

180 grit is a finishing grit for wood. It is the last step before stain on open-grain woods such as oak, and General Finishes’ limit for softwood under an oil-based stain. Mirka notes that ordinary paints and lacquers cover a surface sanded to P180, sometimes P150. Klingspor treats 150 and finer belts as finishing belts, not cutting belts.

What Is 220 Grit Sandpaper Used For?

220 grit is the finest grit most bare wood needs, used before a clear finish on smooth hardwoods and for a light pass on primer. Minwax sands between coats of polyurethane with 220. On drywall it is the finest paper most finishers use, for a light pass after primer.

What Is 400 Grit Sandpaper Used For?

Here the scale matters. CAMI 400 is roughly P800, while P400 is roughly CAMI 320. In either form, 400 is an extra fine grit for sanding between coats of paint or finish and for the first wet sanding steps on primer, plastic and 3D prints. Mirka uses P240 to P400 to even out a surface before the final coat.

CAMI vs P Grade vs Micron: Grit Conversion Chart

There are two grading systems for coated abrasives. US brands mostly use CAMI (ANSI B74.18) and print a plain number. European brands such as Mirka, Klingspor and Indasa use the FEPA P scale and print a P in front. Up to 220 the numbers match closely enough to swap. Above that they split, and the same number on the P scale is coarser than on the CAMI scale.

CAMI grit Average particle (CAMI) Nearest P grade Average particle (P)
24 715 µm P24 740 µm
30 638 µm P30 622 µm
36 535 µm P36 524 µm
40 428 µm P40 412 µm
50 351 µm P50 326 µm
60 268 µm P60 260 µm
80 192 µm P80 197 µm
100 141 µm P100 156 µm
120 116 µm P120 127 µm
150 93 µm P150 97 µm
180 78 µm P180 78 µm
220 66 µm P220 65 µm
240 53.5 µm P280 52.5 µm
320 36 µm P400 35 µm
360 28.8 µm P600 25.75 µm
400 23.6 µm P800 21.8 µm
500 19.7 µm P1000 18.3 µm
600 16 µm P1200 15.3 µm
800 12.3 µm P1500 12.3 µm
1000 9.5 µm P2000 9.5 µm
1200 (Mirka pairing) not listed P2500 8.4 µm (Mirka)
none in common use P3000 and P5000 not listed in these charts

Particle sizes are the average micron figures from Klingspor’s grit grading chart, which lists both scales side by side; the pairings above 220 follow Mirka’s comparison table. Use the converter to check any sheet:

Grit converter

CAMI 400 is about

P800 · Trizact A20

Extra fine. Between coats of varnish or paint, wet sanding car primer, acrylic and 3D prints.

Average particle: 23.6 µm (CAMI 400) vs 21.8 µm (P800)

Sandpaper grit chart from extra coarse to ultra fine with CAMI grits and FEPA P grades

Why P400 Is Not the Same as 400 Grit

P400 particles average about 35 microns. CAMI 400 particles average about 23.6 microns, close to P800 at 21.8. So a woodworker who follows a US guide that says “400” and buys a European P400 sheet ends up a full step coarser than intended. The gap grows at the fine end: CAMI 600 is about P1200 and CAMI 1000 about P2000. Mirka’s brochure puts it plainly: the standards are not directly comparable to each other.

Micron-Graded Abrasives: Trizact and Abralon

Some fine abrasives skip grit numbers and print the particle size instead. 3M’s Trizact uses A grades, where the number is the average particle size in microns: in 3M’s own table A45 pairs with P400, A20 with P800, A16 with P1200 and A5 with P3000. Mirka’s Abralon foam pads are sold as 180 to 4000, a silicon carbide range Mirka recommends for wet sanding glossy paint before polishing.

How to Tell Which Scale Your Sandpaper Uses

Look for the P. If the back of the sheet or the box says P180 or P1500, it is FEPA. A plain number is usually CAMI on US-made paper, but some imports print a plain number on FEPA grit, so check the brand’s own grade list when you are buying above 220. Below 220 you can ignore the difference.

What Grit Sandpaper for Each Material

Wood

Start at 120 on new lumber, or 80 if you need to remove marks or an old finish. Finish at 150 before paint, 150 to 180 before stain and up to 220 before a clear finish. General Finishes warns against sanding finer than that, because a surface that smooth won’t take a finish well. My full table, with softwood and hardwood rules, is in what grit sandpaper for wood.

Drywall

USG, which makes Sheetrock joint compound, says to dry-sand its compound with nothing coarser than 150-grit paper or 220-grit mesh cloth. Coarser paper digs into soft mud and roughs up the face paper. The stage-by-stage answer is in what grit sandpaper for drywall, and the power tools for whole rooms are in my best drywall sanders.

Deck

Before a penetrating deck stain, stop at 60 or 80 grit. Sikkens, Ready Seal, Wood Defender and SuperDeck all say finer sanding closes the pores and keeps the stain from soaking in. See what grit sandpaper for a deck, and the deck stain calculator for how much stain to buy afterwards.

Hardwood Floors

Bona’s standard refinishing sequence is 50, 60, 100 and 120, with 36 first on badly uneven floors. Floor sanders use their own large discs and belts, and the edges follow a separate 60, 100, 120 sequence with an edger and an orbital.

Metal

3M strips paint and rust to bare metal with P80 to P120 discs, feathers the edges at P180 to P320 and DA-sands primer at P400 to P800. For a polished finish, keep going wet with silicon carbide paper, then switch to compound: Mirka sands top coats from P600 up to P4000 before polishing.

Car Paint and Clear Coat

Automotive grits are almost always P grades. 3M’s repair sequence shapes body filler at P80 to P220, sands primer at P320 on a block and P400 to P800 with a DA, removes clear coat runs and dust nibs at P1500, and refines with P3000 and P5000 Trizact discs dampened with water before compounding.

Plastic and 3D Prints

Plastic heats up and smears, so sand it wet. ACRYLITE starts acrylic at 240 or 320 and goes to 400 and 600 with plenty of water before buffing. Formlabs suggests 150, 220, 400, 800, 1000 and 2000 for resin prints, wet with water or mineral oil, and says parts sanded to 3,000 turn glossy. Prusa says sanding PLA needs water cooling, so wet sand it too.

Concrete, Glass and Headlights

Concrete wears out sandpaper in minutes, so use diamond pads, which have their own grit scale. Glass edges are smoothed wet with silicon carbide paper, usually 120 up to 600, then polished with cerium oxide. For headlights, 3M’s professional kit sands at P800 dry, then P1000 and P3000 wet, adding P500 first on pitted lenses.

How to Step Through Grits

Start with the finest grit that removes the worst defect, then move up one step at a time. Klingspor’s rule is never to skip more than one grit, and Mirka gives the example that P80, P120, P180 works while P60, P120, P220 often causes problems. Each grit only has to remove the scratches of the one before it.

  • Test first. If a medium grit hasn’t removed the defect in a minute or two, go one step coarser.
  • Clean between grits. A stray coarse particle drags across the surface under the next, finer sheet.
  • Change worn paper. A dull sheet polishes instead of cutting, so pressing harder only heats the work.
  • Know where to stop. Finer is not always better: stain needs some tooth, and so does paint.

Types of Sandpaper Abrasive

  • Aluminum oxide: the standard mineral on sheets and sander discs for wood, paint and metal.
  • Silicon carbide: very sharp, usually on waterproof black paper for wet sanding finishes, plastics, glass and stone. ACRYLITE and the automotive makers wet sand with it.
  • Ceramic: the most aggressive and longest-lasting, for coarse grits on belts and floor sanders.
  • Mesh: an open net such as Mirka Abranet, which pulls dust through the whole disc and clogs less on a random orbital sander.

Zirconia, garnet, backings and open versus closed coat are covered in my guide to the types of sandpaper.

The Sandpaper I’d Keep in the Shop

Four packs cover almost every row of the chart above. For the sanders that use them, see types of sanders.

3M Aluminum Oxide Sandpaper, 100-150-220 Assortment

3M aluminum oxide sandpaper assortment, 100, 150 and 220 grit sheets, 9 x 11 inch

Five 9 x 11 inch aluminum oxide sheets in 100, 150 and 220 grit: the medium-to-very-fine steps most wood projects finish with, from leveling to the last pass before a clear coat. Cut them into quarters for a 1/4-sheet sander or wrap one around a block for hand sanding.

Check price on Amazon


Mirka Abranet 5-Inch Mesh Disc Assortment

Mirka Abranet 5 inch mesh sanding disc assortment, 35 pack, grits 80 to 600

35 hook-and-loop mesh discs for a 5-inch random orbital sander, in 80, 120, 180, 240, 320, 400 and 600. Mirka grades on the FEPA P scale, so the 400 and 600 discs here are about CAMI 320 and 360: worth knowing if you follow a US finishing schedule. The open mesh pulls dust through the whole disc and fits any hole pattern.

Check price on Amazon


3M Wetordry Sandpaper, 1000 to 2500 Assortment

3M Wetordry waterproof sandpaper assortment, 1000, 1500, 2000 and 2500 grit sheets for wet sanding

Waterproof sheets in 1000, 1500, 2000 and 2500 grit, 3-2/3 x 9 inches, for the wet steps at the fine end of the chart: clear coat nibs, plastics, resin prints and polishing metal before compound. Keep a bucket of water with a drop of soap next to you and rinse the sheet often.

Check price on Amazon


3M Headlight Lens Restoration System 39008

3M Headlight Lens Restoration System 39008 kit with drill sanding discs and compound

3M’s consumer kit for the headlight row of the grit finder: sanding discs that run on a household drill, working from coarse to a fine finishing disc, plus compound to bring back the clarity. It saves buying four separate grits for two headlights.

Check price on Amazon


🏆 The Bottom Line

Higher numbers are finer. Use 40 to 60 to strip and shape, 80 to 120 to remove marks, 150 to 180 before paint or stain, 220 before a clear finish, and 320 and up between coats and for wet sanding. Above 220, check for the P: P400 is about CAMI 320, and CAMI 400 is about P800. Step up one grit at a time and stop where the finish needs you to.

❓ Frequently Asked Questions

Which is rougher, 80 or 120 grit?
80 grit is rougher. Lower numbers mean bigger particles: on Klingspor’s chart 80-grit particles average about 192 microns against about 116 for 120 grit. Use 80 to remove material and 120 to take out the 80-grit scratches before you move on to the finish grits.
How do I know which grit sandpaper to use?
Begin with the finest grit that removes the worst defect, then step up one grade at a time until you reach the finish grit your material needs: about 150 before paint, 180 before stain and 220 before a clear coat on wood. The grit finder above gives the full sequence for 14 materials.
Is 220 or 320 grit sandpaper finer?
320 is finer than 220. On the CAMI scale, 220-grit particles average about 66 microns and 320-grit about 36, per Klingspor. Use 220 as the last grit on bare wood and save 320 for scuffing between coats of finish, where you only want to knock down dust nibs.
Is 600 grit sandpaper finer than 400 grit sandpaper?
Yes, on the same scale 600 is always finer than 400. Mixing scales is where it gets confusing: a P600 sheet averages about 26 microns, between CAMI 400 at about 24 and CAMI 600 at about 16. So a European P600 is slightly coarser than a US 400.
What does the P mean on sandpaper?
The P marks a FEPA grade, the European standard used by brands such as Mirka and Klingspor. Up to P220 it matches the plain US CAMI number closely. Above that a P grade is coarser than the same CAMI number: P400 is roughly CAMI 320, and P800 is roughly CAMI 400.
What grit sandpaper is used for metal?
For metal, strip rust and old paint at 80 to 120, feather the edges at 180 to 320 before primer, and wet sand from about P600 to P2000 if you want a polished surface before compound. Those ranges come from 3M’s automotive procedures and Mirka’s polishing guidance.

Sources

Grit sizes and sequences come from the makers’ own documents, read on October 1, 2026:

Spotted a grit on your own sheets that doesn’t match the chart? Tell me in the comments with the brand, and I’ll check it against the maker’s list.

Which Festool Sander Should You Buy? Every Model Compared

Festool sanders guide: four green sanders on a workbench, two random orbital sanders, a sheet sander and a detail sander

For most woodworkers, the Festool sander to buy is a brushless ETS EC 150: the 150/3 if you mostly finish, the 150/5 if you also remove stock. Add a ROTEX RO 150 only if you strip old finishes or flatten rough boards, a DTS 400 or RTS 400 for corners and edges, an ETSC 2 if you need cordless, and a PLANEX for drywall. The ETS 125 REQ is the cheapest way into Festool sanders, built for fine finish work rather than removal.

Festool sells more than a dozen sanders in the US, and the names (ETS, ETS EC, RO, RTS, DTS, ETSC) look like a parts catalog until you know the code. Below is every current Festool sander side by side, how to read the model names, 125 vs 150 and 3 mm vs 5 mm, each model’s job, and the extractor that should go with it. Every figure comes from Festool USA’s own product pages. Still choosing between brands? See my Festool vs Mirka comparison first.

⚡ Quick Answer

Best first Festool sander: the ETS EC 150/3, or the ETS EC 150/5 if you remove a lot of material.

Best for stripping and coarse work: the ROTEX RO 150 FEQ.

Best for corners, edges and profiles: the DTS 400 or the ROTEX RO 90 DX.

Cheapest way in: the ETS 125 REQ, a fine-finish 5″ sander.

Every Festool Sander at a Glance

Model Type Pad Stroke Speed (rpm) Power Best for
ETS 125 REQ Random orbital, brushed 5″ 2 mm 6,000-12,000 250 W Fine finishing, first Festool
ETS EC 125/3 Random orbital, brushless 5″ 3 mm 6,000-10,000 Not stated Small parts, one-hand work
ETS EC 150/3 Random orbital, brushless 6″ 3 mm 6,000-10,000 400 W Finishing, between coats
ETS EC 150/5 Random orbital, brushless 6″ 5 mm 6,000-10,000 400 W All-round sanding
ROTEX RO 150 FEQ Gear-driven + random orbital + polish 6″ 5 mm 320-660 rotary · 3,300-6,800 orbit 720 W Stripping, coarse removal
ROTEX RO 125 FEQ Gear-driven + random orbital 5″ 3.6 mm 300-600 rotary · 3,000-6,000 orbit 500 W Smaller ROTEX jobs
ROTEX RO 90 DX FEQ Gear-driven, round or delta pad 3.5″ / delta 3 mm 260-520 rotary · 3,500-7,000 orbit 400 W Windows, doors, profiles
RTS 400 REQ Orbital finish sander 80 x 133 mm 2 mm 6,000-12,000 250 W Square inside corners, edges
DTS 400 REQ Delta finish sander 100 x 150 mm 2 mm 6,000-12,000 250 W Corners, rails, small panels
ETSC 2 125 / 150 Cordless random orbital, brushless 5″ / 6″ 3.5 mm 6,000-10,000 18V Job sites, no cord
PLANEX LHS 2 225 Long-reach drywall sander 8-7/8″ abrasive 4 mm 5,000-8,500 400 W Walls and ceilings

How to Read Festool Sander Names

Once you know three rules, the names tell you what each sander does.

  • The letters are the type. ETS is a random orbital sander. RO is a ROTEX, which adds a gear-driven rotary mode. RTS is the rectangular orbital finish sander and DTS the delta (triangular) one. A C added after the type means cordless (ETSC), and EC means a brushless EC-TEC motor (ETS EC).
  • The first number is the pad diameter in millimeters. 125 is a 5″ pad, 150 a 6″ pad, 90 a 3-1/2″ pad. On the RTS and DTS, 400 is the model size, not a diameter.
  • The number after the slash is the stroke in millimeters, the diameter of the orbit: /3 is a 3 mm stroke and /5 a 5 mm stroke. A bigger stroke removes material faster; a smaller one leaves a finer scratch pattern.

So an ETS EC 150/5 is a brushless random orbital with a 6″ pad and a 5 mm stroke. The suffix letters (REQ, FEQ, EQ) identify the version, and the “Plus” kits linked on this page come in a Systainer case.

125 or 150: Which Pad Size?

A 150 mm (6″) pad covers about 44% more area than a 125 mm (5″) pad, because area grows with the square of the diameter. On tabletops, doors, cabinet sides and floors, that means fewer passes. A 125 is lighter in the hand and easier to control on narrow rails, small parts and vertical surfaces. If you only buy one, the 6″ ETS EC 150 is the more efficient sander; if most of your work is furniture parts and trim, a 5″ model is the more comfortable one. My random orbital sander reviews cover the same choice in other brands.

3 mm or 5 mm Stroke?

The stroke decides the balance between speed and finish. A 3 mm stroke leaves a finer scratch pattern and is the classic choice for sanding between coats of finish, veneers and final grits. A 5 mm stroke removes material faster and suits leveling glue-ups, taking off old finish and working through coarse grits, and with fine abrasive it still finishes well. Festool’s ETS 125 REQ goes even finer at 2 mm, like the RTS and DTS finish sanders. If you sand raw lumber from 80 grit up, choose 5 mm; if you mostly sand finished or nearly finished surfaces, choose 3 mm.

The Festool Sanders, Model by Model

Random Orbital Sanders (ETS and ETS EC)

These are the everyday sanders and the ones most people should start with. The brushless ETS EC models add a carbide-tipped pad brake, which keeps the pad from spinning up when you lift the sander off the work, and electronics that hold the speed under load.

Festool ETS EC 150/3 EQ-Plus 6″ Random Orbital Sander

Festool ETS EC 150/3 EQ-Plus 6 inch brushless random orbital sander, the best Festool sander for finishing

Best Festool Sander for Finishing

The finishing version of Festool’s brushless 6″ sander: 3 mm stroke, 6,000-10,000 rpm, 400 W. Festool states it is 4-1/2″ tall, holds its speed under load, and has a carbide-tipped pad brake and a vibration control system. The 3 mm stroke leaves the finer scratch pattern you want for final grits and sanding between coats, and the 6″ pad still covers big panels quickly.

Check price on Amazon

  • ✅ Fine scratch pattern
  • ✅ Brushless with pad brake
  • ✅ Low, palm-height body
  • ❌ Slower than the 150/5 on raw lumber
  • ❌ Premium price tier

Best For: Final sanding, veneers and sanding between coats of finish.


Festool ETS EC 150/5 EQ-Plus 6″ Random Orbital Sander

Festool ETS EC 150/5 EQ-Plus 6 inch brushless random orbital sander with 5 mm stroke

Best All-Round Festool Sander

The same brushless body with a 5 mm stroke, which removes material noticeably faster at coarse grits while still finishing well at fine ones. Speed is 6,000-10,000 rpm from a 400 W motor, and Festool ships it with its MULTI-JETSTREAM 2 pad and a Systainer case. If you only buy one Festool sander and you start from raw lumber, this is it.

Check price on Amazon

  • ✅ Removes and finishes
  • ✅ MULTI-JETSTREAM 2 pad included
  • ✅ Pad brake
  • ❌ Slightly coarser final finish than the 3 mm
  • ❌ Premium price tier

Best For: One sander for raw lumber, glue-ups and finishing.


Festool ETS EC 125/3 EQ-Plus 5″ Random Orbital Sander

Festool ETS EC 125/3 EQ-Plus 5 inch brushless random orbital sander

Best Compact Festool Sander

The brushless sander in the 5″ size: 3 mm stroke, 6,000-10,000 rpm, Jetstream extraction, electronic vibration stop and a carbide-tipped pad brake, listed at 3.31 lb in Festool’s spec table. It takes standard 5″ discs and is easier to balance on narrow edges, drawer parts and vertical surfaces than a 6″ sander.

Check price on Amazon

  • ✅ Easy to control on small parts
  • ✅ Brushless and pad brake
  • ✅ Common 5″ discs
  • ❌ Smaller pad means more passes on panels
  • ❌ Costs close to the 6″ model

Best For: Small furniture parts, boxes and one-handed work.


Festool ETS 125 REQ-Plus 5″ Random Orbital Sander

Festool ETS 125 REQ-Plus 5 inch random orbital sander, the entry Festool sander

Best Entry-Level Festool Sander

The cheapest Festool sander uses a brushed 250 W motor, a very fine 2 mm stroke and 6,000-12,000 rpm variable speed, with Festool’s vibration-stop balancing, a pad brake and Jetstream extraction through the pad. The 2 mm stroke makes it a finishing sander: excellent on final grits and between coats, slow if you ask it to level rough boards. It comes in a Systainer.

Check price on Amazon

  • ✅ Lowest price in the Festool range
  • ✅ Very fine finish
  • ✅ Pad brake and Jetstream
  • ❌ Slow at stock removal
  • ❌ Brushed motor

Best For: A dedicated finish sander alongside a faster sander.


ROTEX Gear-Driven Sanders (RO)

A ROTEX locks the pad into forced rotation for aggressive removal, then switches back to random orbit to finish. That makes it the Festool for refinishing work: old paint and varnish, glue squeeze-out, weathered boards. The 5″ and 6″ ROTEX models are heavier than an ETS and work best with two hands in rotary mode.

Festool ROTEX RO 150 FEQ-Plus 6″ Multi-Mode Sander

Festool ROTEX RO 150 FEQ-Plus 6 inch gear-driven multi-mode sander

Best Festool Sander for Stripping

Festool’s most versatile sander has three modes: gear-driven rotary at 320-660 rpm for coarse removal, random orbit at 3,300-6,800 rpm for finishing, and polishing. A 720 W motor, a 5 mm stroke, tool-free FastFix pad changes and a protector ring around the pad round it out. Festool lists 5.95 lb, so this is a two-handed sander for horizontal work more than a palm sander.

Check price on Amazon

  • ✅ Strips paint and varnish fast
  • ✅ Finishes and polishes too
  • ✅ Tool-free pad change
  • ❌ Heavy for vertical work
  • ❌ Top of the Festool price range

Best For: Refinishing furniture, doors and weathered decking.


Festool ROTEX RO 90 DX FEQ-Plus 3-1/2″ Multi-Mode Sander

Festool ROTEX RO 90 DX FEQ-Plus multi-mode sander with round and delta pads

Best Festool Sander for Profiles and Corners

A small ROTEX with a 3-1/2″ round pad that swaps for a delta pad without tools. It runs at 260-520 rpm gear-driven and 3,500-7,000 rpm random orbit, a 3 mm stroke, a 400 W motor and an edge protector, at 3.08 lb. The round pad strips small areas in rotary mode and the delta pad reaches into corners, which makes it the Festool for window sashes, doors, chairs and trim.

Check price on Amazon

  • ✅ Round and delta pads
  • ✅ Rotary mode in a small sander
  • ✅ Light at 3.08 lb
  • ❌ Small pad for flat panels
  • ❌ Costs as much as a full-size sander

Best For: Restoring windows, doors, chairs and profiled trim.


Between the two sits the ROTEX RO 125 FEQ: a 5″ ROTEX with a 3.6 mm stroke, 300-600 rpm in rotary mode, 3,000-6,000 rpm in random orbit mode and a 500 W motor, at 5.07 lb in Festool’s table. It suits smaller parts if you want gear-driven power without the 6″ pad.

Finish Sanders for Corners (RTS 400 and DTS 400)

Round pads can’t reach into a square inside corner. Festool’s two finish sanders are orbital rather than random orbital, with a fine 2 mm stroke, so they leave a smooth surface right into the corner.

Festool RTS 400 REQ-Plus Orbital Finish Sander

Festool RTS 400 REQ-Plus rectangular orbital finish sander

Best for Square Inside Corners

A rectangular 80 x 133 mm pad on an orbital (not random orbital) sander with a fine 2 mm stroke, 6,000-12,000 rpm variable speed, 250 W, MMC electronics and vibration-stop balancing. The straight edges of the pad reach right into inside corners and along face frames, and the orbital motion leaves a fine, even finish.

Check price on Amazon

  • ✅ Reaches square corners
  • ✅ Fine finish
  • ✅ Shares the 27 mm port
  • ❌ Slow for stock removal
  • ❌ Smaller area than a 6″ disc

Best For: Face frames, cabinet interiors and edges.


Festool DTS 400 REQ-Plus Delta Finish Sander

Festool DTS 400 REQ-Plus delta finish sander for corners

Best Festool Detail Sander

The delta version: a 100 x 150 mm triangular pad, 2 mm stroke, 6,000-12,000 rpm, 250 W, electronic speed control and vibration-stop balancing. The point of the triangle gets into corners and the narrow spaces between rails and stiles, where a round or rectangular pad can’t reach.

Check price on Amazon

  • ✅ Gets into tight corners
  • ✅ Fine finish
  • ✅ Light, one-handed
  • ❌ Small pad
  • ❌ Delta abrasives cost more per area

Best For: Corners of cabinet doors, stair treads and tight spots.


Cordless (ETSC 2)

Festool ETSC 2 125 Cordless Random Orbital Sander (Basic)

Festool ETSC 2 125 cordless 18V brushless random orbital sander

Best Cordless Festool Sander

Festool’s second-generation cordless random orbital: an 18V brushless 5″ sander with a 3.5 mm stroke and 6,000-10,000 rpm, an LED light ring with two modes that you can control from Festool’s app, vibration protection and a carbide-tipped pad brake. It weighs 2.65 lb as a bare tool. “Basic” means no battery or charger in the box, so it makes most sense if you already own Festool 18V packs.

Check price on Amazon

  • ✅ No cord to drag across the work
  • ✅ LED light ring shows scratches
  • ✅ Light bare tool
  • ❌ Battery and charger sold separately
  • ❌ Runtime limits long sanding jobs

Best For: Job sites and quick sanding where a cord is in the way.


The ETSC 2 150 is the same sander with a 6″ pad: 3.5 mm stroke, 6,000-10,000 rpm, LED light ring and pad brake, at 2.65 lb as a bare tool.

Drywall Sanders (PLANEX)

Festool’s PLANEX models are long-reach sanders for walls and ceilings. The PLANEX LHS 2 225 has a 220 mm pad that takes 225 mm (8-7/8″) abrasives, a 4 mm stroke, 5,000-8,500 rpm, a 400 W brushless motor, a full-circle LED light ring and adjustable suction, and it extends from 47-1/4″ to 65″ with up to two extensions. The PLANEX easy LHS-E 225 is the newer single-piece version: 1.6 m long, 8.82 lb, with a direct-drive brushless motor over the pad. I compare the PLANEX against cheaper options in my best drywall sanders guide.

Which Festool Sander Should You Buy?

Match the sander to the work you do most often.

  • Furniture and cabinets from new lumber: ETS EC 150/5 for the main surfaces, plus a DTS 400 for inside corners and rails.
  • Fine finishing and sanding between coats: ETS EC 150/3, or the ETS 125 REQ on a tighter budget.
  • Refinishing old furniture, doors and decks: ROTEX RO 150 FEQ. It strips in rotary mode and finishes in random orbit mode.
  • Windows, trim and profiles: ROTEX RO 90 DX with the delta pad.
  • Small parts, boxes and one-hand work: ETS EC 125/3.
  • Job sites without power: ETSC 2 125 or 150.
  • Drywall: a PLANEX, on a Festool extractor.

A two-sander kit covers almost everything: an ETS EC 150 for flat work plus either a DTS 400 (new work) or a ROTEX RO 90 DX (refinishing).

Do You Need a Festool Dust Extractor?

To get what you’re paying for, yes. Every sander above has the same 27 mm dust port, and Festool designs its pads, abrasives and hoses around a CT extractor with auto-start. The CT MIDI I is the one I’d pair with a sander: 130 CFM, 96″ of water lift, a HEPA filter, a 15-liter container, an outlet that starts the extractor with a corded tool, Bluetooth auto-start for cordless tools, and a T-LOC top that holds a Systainer. The CT 15 has the same airflow and HEPA filter in a simpler unit that Festool positions for cleaning. A good shop vacuum with an adapter will run a Festool sander, but you lose auto-start and much of the fine dust control. My Festool dust extractor comparison puts the CT 15, CT MIDI I, CT 26 and CT 36 side by side.

Is a Festool Sander Worth the Money?

It depends on how many hours you sand. Festool’s case is a system: brushless motors, pad brakes, matching extractors, Systainer storage, and a 3-year warranty that Festool USA says covers wear and tear, for tools bought from authorized US dealers. If you sand every week, or sand indoors where dust matters, that adds up. If you sand a few weekends a year, a good mid-priced random orbital does most of the same work, and my best random orbital sanders list has options at every price tier. For the closest premium alternative, read my Mirka DEROS review.

When you buy, check the seller. Festool’s warranty depends on an authorized dealer, and Festool publishes its list of authorized online dealers on its US site. When I checked, the Festool listings linked on this page were sold by Hartville Hardware, which is on that list.

🏆 The Verdict

Start with an ETS EC 150: the 150/5 if you sand raw lumber, the 150/3 if you mostly finish. Add a DTS 400 or RTS 400 for corners, and choose the ROTEX RO 150 instead of the ETS EC if stripping old finishes is your main job. Buy the ETS 125 REQ only as a fine-finish sander, not as your only sander, and plan for a CT extractor from day one.

❓ Frequently Asked Questions

Which Festool sander should I get?+
For a first Festool, get an ETS EC 150. It is brushless, has a pad brake and handles most flat work. Choose the 5 mm stroke for raw wood and the 3 mm stroke for finishing. Get a ROTEX instead if you mainly strip old finishes, and add a delta sander later for corners.
What is the difference between Festool sander 125 and 150?+
The number is the pad diameter in millimeters: 125 takes 5-inch discs and 150 takes 6-inch discs. The 150 sands large panels faster, while the 125 is lighter and easier to handle on small parts, rails and vertical work. Stroke and motor are separate choices within each size.
Is a Festool sander worth the money?+
For frequent use, usually yes, especially paired with a Festool extractor, because you get brushless motors, very good dust control and a 3-year warranty that includes wear. For occasional weekend projects, a mid-priced random orbital sander finishes wood well enough, and the savings are better spent on abrasives and dust collection.
Why are Festools so expensive?+
You pay for the system and the support. Festool designs its sanders, pads, abrasives, extractors and Systainer cases to work together, uses brushless motors in its ETS EC, cordless and PLANEX sanders, and sells through authorized dealers with a 3-year warranty that covers wear parts. Whether that premium pays off depends on how much you sand.
Which Festool sander is considered the best?+
There’s no single best one. The ETS EC 150 is the usual all-round recommendation because it suits most flat sanding. The ROTEX RO 150 is the most versatile, since it strips, sands and polishes. For corners, the DTS 400 or RO 90 DX are the specialists. The right pick depends on your main job.

Not sure which one fits your projects? Tell me what you build in the comments and I’ll point you to the right Festool.

What Grit Sandpaper for Car Paint, and How to Wet Sand a Car

What grit sandpaper for car paint: wet sanding a dark car panel with a sheet of fine sandpaper

For car paint, the grit depends on the step: 80 to 180 to take paint and filler down, 320 before primer, 400 to 600 on primer before color, and 1500 to 3000 wet to take defects out of cured clear coat before polishing. Each grit only has to remove the scratches of the one before it, so you never jump from 180 straight to 2000, and you never touch paint you want to keep with anything coarser than about 1000.

Below is a grit chart for every stage of a paint job, how to wet sand a car step by step (what liquid to use, by hand or with a DA sander, and what to expect before and after), the mistakes that burn through paint, and the few supplies worth buying. If you are shopping for a machine for the coarse stages, see my guide to the best sander for auto body work.

⚡ Quick Answer

Removing paint or shaping filler: 80 grit, then 180 to feather the edges.

Before primer: 320. Before base coat: 600 (400 only if your paint’s data sheet allows it).

Wet sanding clear coat: 1500, then 2000, then 3000, then compound and polish. A pack like the 3M Wetordry 03006 covers 1000 to 2500.

Car Paint Sandpaper Grit Chart

These ranges follow the auto body grit guides published by Summit Racing and by NAINC, which agree on the sequence and differ only by a step here and there. When your primer or paint comes with a technical data sheet, its grit wins over any chart, including this one.

Job Grit Wet or dry Notes
Stripping paint to metal 40 to 80 Dry Usually on a DA sander; 80 leaves less to fix
Shaping body filler 80 Dry 40 only for reinforced filler; block sand, don’t chase it with a DA
Feathering edges, removing chips 150 to 180 Dry Blends the old paint into bare metal or filler
Final sanding before primer 320 Dry Removes 180 scratches that primer won’t fill
Sanding primer before color 400 to 600 Dry or wet 600 is the safe default under base coat
Scuffing old paint for a blend 600 to 800 Wet Dulls the surface so new clear bonds
Removing runs, dust nibs, orange peel 1500 to 2000 Wet Clear coat only; 1000 for a heavy run
Refining before polish 2500 to 3000 Wet Makes compounding much faster

Why the Order Matters

Summit Racing puts the rule in one line: each grit in the sequence is chosen because it can completely remove the scratches left by the step before. That is why you can start later in the chart when the surface is already good (a small chip can start at 180, primer that needs no corrections can go straight to 600), but you can never skip ahead. Paint and primer shrink as they cure, and a 180 scratch that looks filled today shows through the color a week later.

What Grit to Wet Sand Car Paint

Wet sanding is almost always done on clear coat, to flatten orange peel or take out a run, dust nib or bug stuck in the finish. The usual sequence is 1500, then 2000, then 3000, followed by a cutting compound and a finishing polish. Start at 1000 or 1200 only for a heavy run, and only on fresh paint with plenty of clear on it.

3M sells its Wetordry assortment for exactly this job: its listing describes the 1000, 1500, 2000 and 2500 grit sheets as meant for clear coat sanding and paint defect removal, wet or dry. Base coat is a different story: in a base and clear system you normally leave the base coat alone once it is sprayed, and if it needs a fix, the paint’s data sheet tells you how.

⚠️ Important

Every pass removes clear coat, and a factory finish has no clear to spare. Don’t wet sand edges, body lines or the tops of creases, where the clear is thinnest and burns through first. If you can’t tell how much clear a panel has, test in a hidden spot or leave it to a body shop with a paint thickness gauge.

How to Wet Sand a Car, Step by Step

  1. Let the paint cure. Follow the clear coat’s data sheet. Sanding soft clear clogs the paper and leaves deep marks.
  2. Wash and dry the panel, so grit on the surface doesn’t get dragged under the paper.
  3. Mask edges and body lines with tape, so you can’t sand through them by accident.
  4. Soak the paper in a bucket of water with a drop of car wash soap for a few minutes. The soap helps the paper glide.
  5. Wrap the paper on a block or pad. Fingers alone press harder in some spots than others and leave grooves. A flexible foam block follows curved panels.
  6. Keep the surface wet with a spray bottle, and sand with light pressure in straight, overlapping strokes. Change direction by 90 degrees with each new grit, so you can see when the old scratches are gone.
  7. Squeegee and check often. Wipe the slurry off and look at the panel under light. When the surface is an even, flat haze with no shiny low spots, that grit is done.
  8. Step up through the grits: 1500, 2000, then 3000. Each one only needs to remove the previous scratch.
  9. Compound, then polish. A cutting compound on a machine polisher removes the 3000 haze, and a finishing polish brings back the gloss.

Wet Sanding vs Dry Sanding

Dry sanding is faster and is the normal way to work filler, bare metal and most primer, usually with a DA sander and dust extraction. Wet sanding keeps the paper from loading up, cuts more smoothly and leaves a finer scratch, which is what you want on clear coat and on primer just before color. Wet or dry paper made with a waterproof backing, like the 3M Wetordry line, works both ways.

What Liquid to Use for Wet Sanding

Plain water does the job: its only work is to float the sanding slurry away and keep the paper from loading. A few drops of car wash soap in the bucket or spray bottle make the paper glide more evenly, which is why it’s in step 4 above. Meguiar’s recommends its own M34 Final Inspection spray as the lubricant for its Unigrit sanding blocks, so if you use one of those, that’s the maker’s choice. Avoid anything with wax, silicone or solvent in it: you don’t want to leave anything on the paint that has to come off again before you compound.

Can You Wet Sand with Regular Sandpaper?

No. Wet sanding needs paper sold as wet or dry (or waterproof), usually silicon carbide on a waterproof backing, like the 3M Wetordry sheets below. Ordinary sandpaper for wood has a backing that isn’t made to be soaked, so it softens, tears and sheds grit into the slurry, and grit in the slurry is exactly what puts deep scratches in clear coat. Wood paper also isn’t usually sold in the 1500 to 3000 grits that clear coat needs.

Wet Sanding by Hand or with a DA Sander

By hand is the way to start: a run, a dust nib or a small patch of orange peel takes minutes with paper on a firm block, and you control exactly where the paper cuts. A small dedicated block like Meguiar’s Unigrit, which is shaped to sand runs and sags, keeps the cut confined to the defect.

A DA (random orbital) sander pays off on whole panels: it leaves a more even scratch and saves an afternoon of hand sanding. Use foam-backed finishing discs made for it, such as 3M’s Trizact P3000, on a soft interface pad. 3M says these discs should be used damp, not soaking: they get the anti-loading benefit of wet sanding without the hydroplaning that happens when you power sand an overly wet surface. Keep the sander flat, the speed low and the pressure light, and stay off edges and body lines.

Wet Sanding a Car: Before and After

Know what you’re looking at at each stage, or you’ll think you’ve ruined the paint. Before, orange peel looks like the skin of an orange in the reflection, and runs show as raised drips. After 1500 to 2000, the sanded area is an even, dull grey haze with no shiny low spots left; a shiny spot means it hasn’t been sanded flat yet. After 3000, the haze is finer and more satin. After compound and polish, the gloss comes back, and the result is judged by the reflection: straight lines, like a fluorescent tube or a roofline, look straight and crisp instead of wavy. Meguiar’s says its M105 compound removes sanding marks of 1200 grit or finer, so a 2000 or 3000 finish gives the compound an easy job.

How Much Does It Cost to Have a Car Wet Sanded?

There’s no standard price. Body and detail shops usually sell wet sanding as part of paint correction, quoted per panel or per car and together with the compounding and polishing that follow, so the price depends on how much of the car is sanded, how bad the orange peel or defects are, and the shop. When you compare quotes, ask whether the shop measures the paint with a thickness gauge before sanding, which is what keeps them from sanding through a factory finish. For one run or a few dust nibs, doing it yourself costs a sheet of paper, a block and a bottle of compound.

Common Mistakes

  • Skipping grits. Going from 180 to 600 on primer leaves scratches that show through the color.
  • Sanding the whole car at 1500 “to be safe”. Wet sanding removes clear; sand only where there is a defect or orange peel you need to flatten.
  • Using your fingertips. They leave grooves. Use a block.
  • Letting the surface dry out. Dry spots clog the paper and it starts to scratch.
  • Stopping at 2000 and polishing by hand. It works on a small spot, but a machine polisher and a finer last grit save hours on a whole panel.
  • Using woodworking paper on paint. Wood sheets are built for different jobs; for grit choices on wood, see what grit sandpaper for wood.

⚠️ Protect Your Lungs

Dry sanding filler, primer and old paint makes fine dust, and old finishes can contain lead. Wear a fitted respirator with particulate filters, and read the paint maker’s safety sheet before you spray anything. My guide to the best respirators covers the filter types.

What You Need

For the coarse stages, a 5″ or 6″ DA (random orbital) sander with hook-and-loop discs saves most of the work; I compare air and electric models in the best sander for auto body guide. For wet sanding, all you need is good paper and a block. For the whole process on a car, from rust to primer, see how to sand a car.

3M Wetordry Sandpaper 03006, Assorted 1000 to 2500

3M Wetordry sandpaper assorted grit pack 1000 to 2500

Best Paper for Wet Sanding Clear Coat

One sheet each of 1000, 1500 and 2500 and two of 2000 grit, 3-2/3″ x 9″, with a silicon carbide abrasive on a flexible waterproof backing. 3M lists the pack for clear coat sanding and paint defect removal, wet or dry. Five sheets are enough for spot repairs on a panel or two; for a whole car, buy the grits you use most in larger packs.

Check price on Amazon

  • ✅ The grits you need for clear coat
  • ✅ Wet or dry
  • ❌ Only five sheets
  • ❌ No 3000 in the pack

Best For: Runs, dust nibs and orange peel on a panel or two.


Dura-Block 6-Piece Auto Body Sanding Block Set

Dura-Block six piece flexible foam auto body sanding block set

Best Sanding Blocks for Car Panels

Six closed-cell EVA foam blocks that don’t soak up water, so they work the same wet or dry: an 11″ standard block for panels, a 2/3 and a 1/3 block, an 11″ round block for concave creases, and two scuff blocks. You stick PSA (sticky-back) sandpaper to the face, which isn’t included. A long, flat block is what levels filler and primer; fingers alone leave grooves.

Check price on Amazon

  • ✅ Sizes for panels, flares and creases
  • ✅ Won’t soak up water
  • ❌ Needs PSA paper, sold separately

Best For: Block sanding filler and primer, and wet sanding larger areas.


Meguiar’s Unigrit Sanding Block, 2000 Grit

Meguiar's Professional Unigrit sanding block, 2000 grit

Best for Wet Sanding Runs and Dust Nibs by Hand

A small block with 2000 grit paper already wrapped around it, made for removing runs, sags and small, isolated defects on top of any paint, clear coat included. The block can be shaped to reach angles and curves, and Meguiar’s says the uniform grit leaves an even pattern that’s easy to polish out. Meguiar’s recommends its M34 Final Inspection as the lubricant. The same block is sold in 1000 and 1500 grit.

Check price on Amazon

  • ✅ Paper and block in one, ready to use
  • ✅ Small enough to stay on the defect
  • ❌ One grit per block
  • ❌ Too small for whole panels

Best For: A run, a sag or a few dust nibs in fresh clear coat.


3M Trizact Hookit Foam Disc 02085, 6″, P3000

3M Trizact Hookit foam abrasive disc 02085, 6 inch, P3000

Best for Wet Sanding with a DA Sander

A disc made for the last sanding step before compound: a 6″, P3000 foam-backed disc, 15 to a box, with a hook-and-loop back, part of 3M’s Perfect-It paint finishing system. 3M sells it for refining sand scratches to cut down compounding time, says to use it damp on a DA sander, and says it can go on a soft interface pad for curved panels.

Check price on Amazon

  • ✅ Even P3000 finish over a whole panel
  • ✅ Less compounding afterwards
  • ❌ Needs a 6″ DA sander
  • ❌ Higher tier than sheet paper

Best For: Flattening orange peel on whole panels after 1500 or 2000.


Meguiar’s M105 Ultra Cut Compound

Meguiar's Professional M105 Ultra Cut Compound, 8 oz bottle

Best Compound After Wet Sanding

Wet sanding isn’t finished until the haze is compounded out. Meguiar’s says M105 removes 1200 grit or finer sanding marks along with scratches, swirls and oxidation, is safe on clear coats, and can be used by hand, with a DA polisher or with a rotary. By hand it’s fine for a spot repair; on a panel, a machine polisher saves hours. Follow it with a finishing polish to bring the gloss all the way back.

Check price on Amazon

  • ✅ Removes 1200 grit or finer marks (Meguiar’s)
  • ✅ Hand, DA or rotary
  • ❌ A compound, not a final polish

Best For: Taking out the 2000 to 3000 haze after wet sanding.


🏆 The Verdict

Work down the chart and don’t skip steps: 80 for paint and filler, 180 to feather, 320 before primer, 600 before color, and 1500 to 3000 wet on clear coat before you compound and polish. Keep a block under the paper, keep the surface wet, and stay away from edges and body lines. When a run is too deep for paper and a block, it is a job for a machine: start with the best sanders for auto body work.

❓ Frequently Asked Questions

Will 2000 grit sandpaper scratch car paint?+
Yes. 2000 grit leaves a fine, even haze of scratches, and that is the point: it flattens orange peel and defects in the clear coat, and the haze comes out with compound and polish afterwards. Don’t use it on paint you don’t plan to polish, and don’t use it on a base coat that has no clear over it.
Will 220 grit remove paint?+
Yes, quickly. 220 cuts through clear coat and color in a few passes, which is why grits in the 150 to 220 range are used to feather the edges of a repair and sand out chips. To strip a whole panel, 80 grit on a DA sander is much faster. Never use 220 on paint you want to keep.
Is 3000 grit safe for car paint?+
On cured clear coat, used wet with light pressure and followed by polish, yes: it is the last refining step before compound. It still removes a little clear with every pass, so use it only where you have sanded with 1500 or 2000 first, and keep away from edges and body lines.
Should I use 400 or 600 grit before paint?+
600 is the safer choice before a base coat: Summit Racing lists 600 as the final sanding before paint, and NAINC gives 600 to 800. Coarser 400 scratches can show through thin metallic colors. Some sealers and single-stage paints accept 400, but only use it when the paint’s technical data sheet says so.
What grit sandpaper is best for auto body work?+
There isn’t one grit; it’s a sequence. 80 for paint removal and shaping filler, 150 to 180 to feather edges, 320 before primer, 400 to 600 on primer before color, and 1500 to 3000 wet on clear coat. Buy the coarse grits as DA discs and the fine grits as wet or dry sheets.
Should you wet sand or dry sand a car?+
Both, at different stages. Dry sand filler, bare metal and most primer, usually with a DA sander and dust extraction. Wet sand cured clear coat, and primer right before color, because water stops fine paper from clogging and gives a finer, more even scratch that compound and polish can remove.
How long should you wait before wet sanding clear coat?+
Until it has fully cured, and the clear coat’s technical data sheet gives the time, which varies by product, hardener and temperature. If paper clogs or the clear feels soft under a fingernail in a hidden spot, wait longer. On factory paint, the clear is long cured; there the limit is how much clear is left.

Working on a repair right now? Tell me the stage you’re at and the problem you see in the comments, and I’ll suggest the grit to use next.

How to Use a Belt Sander: Step-by-Step Guide

How to use a belt sander: woodworker sanding a board with a handheld belt sander

To use a belt sander, start it off the wood, set it down flat, and move it steadily back and forth with the grain while you work across the board in overlapping passes, letting the sander’s weight do the cutting. Never stop in one spot and never press down: a belt sander removes wood so fast that a pause of a second or two leaves a dip you can see through the finish.

This guide covers choosing and fitting the belt, tracking, the right grit for each job, a step-by-step technique for flat surfaces, edges and paint, and the mistakes that cause gouges. If you don’t own one yet, my belt sander reviews compare the handheld models.

⚡ Quick Answer

Direction: always with the grain, moving the whole time.

Pressure: none. The weight of the sander is enough.

Grit: 40 to 60 for paint and heavy removal, 80 for leveling, 120 to finish the belt stage, then switch to a random orbital.

What You Need

  • A handheld belt sander. 3″ x 21″ and 3″ x 18″ are the common home-shop sizes; 4″ x 24″ machines remove more but are heavy.
  • Belts in three or four grits that match your sander’s size exactly.
  • Clamps or a bench stop, because a belt sander pulls the work toward you. A pair of one-handed bar clamps is enough.
  • Dust collection: the dust bag at minimum, a shop vacuum if your sander has a port.
  • Hearing and eye protection and a dust mask. Belt sanders are loud and throw more dust than any other handheld sander.
  • A belt cleaning stick, which makes belts last much longer on resinous wood and paint.

Which Grit to Use

Job Belt grit Next step
Stripping paint or varnish 40 to 60 80, then a random orbital
Leveling rough boards and glue-ups 60 to 80 120 on the belt sander
Trimming a door or scribing to a wall 80 Ease the edge by hand
Smoothing before a random orbital 100 to 120 Random orbital at 120 or 150, then 180 to 220

Most belt sanding stops at 120. Finer belts exist, but a random orbital removes the belt’s straight scratches better than a finer belt does. For the full sequence after the belt stage, see what grit sandpaper for wood.

How to Install and Track the Belt

  1. Unplug the sander or take the battery out.
  2. Release the tension lever, which pulls the front roller back.
  3. Check the arrow printed on the inside of the belt and match it to the rotation arrow on the sander. A belt run backwards can come apart at the splice.
  4. Slide the belt on, centered on both rollers, and close the tension lever.
  5. Adjust the tracking. Hold the sander upside down, clear of your body and anything else, switch it on for a moment, and turn the tracking knob until the belt runs centered without touching the housing. Many newer sanders track automatically and have no knob.

How to Use a Belt Sander, Step by Step

  1. Secure the workpiece. Clamp it, or butt it against a bench stop. The belt drives the work backwards toward you if it can move.
  2. Mark the surface. Light pencil squiggles across the board show you where you have sanded and where the high spots still are.
  3. Start the sander in the air, then lower it flat onto the wood, rear of the platen first, so the front edge doesn’t dig in.
  4. Move with the grain. Slide the sander forward and back along the grain in long, steady strokes, and shift sideways by about half the belt width on each pass.
  5. Keep it moving and keep it flat. Don’t tip it onto a side or let it sit still. At the ends of the board, keep at least two thirds of the platen on the wood so you don’t round the edge over.
  6. Let it work. No downward pressure; your hands only guide it. If it bogs down, the belt is dull or clogged.
  7. Check your progress. When all the pencil marks are gone at the same time, the surface is level. Re-mark and move to the next grit.
  8. Lift the sander off before you switch it off, so the coasting belt doesn’t leave a mark.
  9. Finish with a random orbital. Belt scratches are straight and deep; a random orbital at 120 or 150 erases them. See how to use an orbital sander.

⚠️ Important

Keep the cord behind you and over your shoulder, away from the belt. Wait until the belt stops completely before you set the sander down: a running belt sander can drive itself off the bench.

Belt Sander Techniques for Specific Jobs

Flattening a Tabletop or Glue-Up

Start at 80 and sand diagonally across the joints, about 45 degrees to the grain, in both directions, to knock down the high glue lines quickly. Then switch to passes with the grain to remove the diagonal scratches, and move to 120. The whole method, from glue-up to finish, is in how to sand and refinish a table.

Removing Paint

Use 40 or 60 grit and a light touch, and clean the belt often, because paint melts and clogs it. A belt sander only works on flat surfaces; for molding and detail, use a scraper or chemical stripper. My guide on how to strip paint from wood compares the three methods, and the best sanders to remove paint covers the machines.

⚠️ Lead Paint

In a home built before 1978, test the paint for lead before you sand it. A belt sander turns lead paint into fine dust faster than any other tool.

Edges and Ends

Clamp a scrap block flush with each end of a narrow edge so the platen has more surface to ride on, or clamp two boards together side by side. Both keep the sander from rocking and rounding the edge.

Trimming Doors and Scribing

For a small amount off a door, sand the edge with the grain at 80, working from each end toward the middle so the end grain on the stiles doesn’t splinter. For more than about a sixteenth of an inch, a power planer is faster and straighter: see belt sander vs planer.

Using It Upside Down

Some belt sanders can be clamped upside down in a stand to work as a small stationary sander for shaping. Only do this with a model and stand designed for it. For regular shaping, a benchtop machine is safer; see my benchtop belt sander and belt and disc sander guides.

Common Belt Sander Mistakes

  • Stopping in one place. The most common cause of dips and gouges.
  • Sanding across the grain in the final passes. Cross-grain belt scratches show under any stain.
  • Pressing down. It overheats the belt, slows the motor and digs in.
  • Tipping at the edges. Rounds over corners and ends.
  • Using it on veneer or plywood faces. It can cut through the veneer in seconds.
  • Running a clogged belt. A loaded belt burns the wood. Clean it or change it.

Not sure a belt sander is the right tool at all? Belt sander vs orbital sander explains where each one wins.

Belt Sanders and Belts I’d Start With

SKIL 7510-01 3″ x 18″ Belt Sander

SKIL 7510-01 3 x 18 inch belt sander with pressure control

Best Belt Sander for Learning the Technique

The SKIL 7510-01 is built around the most common beginner mistake: its pressure control technology warns you when you press too hard. The 6 A motor drives a 3″ x 18″ belt that tracks itself, the micro-filtration box catches fine dust, the port fits standard 1-1/4″ vacuum hoses, and the housing lets you sand flush to an edge. It sits in the lowest price tier.

Check price on Amazon

  • ✅ Warns you when you press too hard
  • ✅ Auto-tracking belt
  • ✅ Vacuum-ready
  • ❌ 3″ x 18″ belts are shorter and wear faster than 3″ x 21″

Best For: A first belt sander and occasional leveling or paint removal.


Makita 9903 3″ x 21″ Belt Sander

Makita 9903 3 x 21 inch variable speed belt sander

Best Belt Sander for Regular Use

The Makita 9903 gives you the control that makes belt sanding easier: a variable speed dial from 690 to 1,440 ft/min, so you can slow the belt down for paint and softwood, and an auto-tracking belt that stays centered without adjustment. Makita rates the 8.8 A motor at 85 dB, the nose and side sand flush to a wall, and it comes with a dust bag. It’s a premium-tier tool.

Check price on Amazon

  • ✅ Wide variable speed range
  • ✅ Tracks itself
  • ✅ Sands flush to walls
  • ❌ Premium price tier
  • ❌ 9.5 lb, heavier than the SKIL

Best For: Frequent furniture work, tabletops and finish carpentry.


POWERTEC 3″ x 21″ Sanding Belts, 18 Pack

POWERTEC 3 x 21 inch aluminum oxide sanding belts assortment

Belts for 3″ x 21″ Sanders

Three belts each of 60, 80, 120, 180, 240 and 400 grit, in aluminum oxide on a cloth backing. The listing names the Makita 9903, WEN 6321 and CRAFTSMAN CMEW213 among the compatible sanders. For most jobs you’ll use the 60, 80 and 120; the finer belts are for metal and for touch-ups. Check that your sander takes 3″ x 21″ belts before you order. For zirconia and ceramic belts and other sizes, see the best sanding belts.
Check price on Amazon

  • ✅ Covers every belt-sanding grit
  • ✅ Cloth backing
  • ❌ Fits 3″ x 21″ sanders only

Best For: Stocking up on the grits in the chart above.


POWERTEC 71002 Abrasive Cleaning Stick

POWERTEC natural rubber abrasive cleaning stick for sanding belts

Makes Every Belt Last Longer

An 8-1/2″ natural rubber stick that you hold against the running belt to pull out dust, pitch and dried residue. A clogged belt burns the wood and cuts slowly; cleaning it takes a few seconds. Keep your hands well back from the belt, and note that POWERTEC says it works best on cured or dry residue and isn’t meant for conveyor-feed sanders. My sanding belt cleaner guide compares the stick sizes and shows how to clean a belt step by step.

Check price on Amazon

  • ✅ Cleans belts in seconds
  • ✅ Lowest price tier
  • ❌ Less effective on wet or gummy finish

Best For: Paint removal and resinous woods like pine.


🏆 The Verdict

Using a belt sander well comes down to three habits: keep it moving, keep it flat, and let its weight do the work. Clamp the work, go with the grain, stop at 120 and hand over to a random orbital. For a first belt sander, the SKIL 7510-01 warns you when you press too hard; for heavy, regular use, the Makita 9903 adds variable speed and a belt that tracks itself.

❓ Frequently Asked Questions

Do you go back and forth with a belt sander?+
Yes. Move it forward and back along the grain in long, steady strokes, and shift sideways by about half the belt width with each pass so the passes overlap. What you must not do is hold it still or make short scrubbing strokes in one spot, which cut a hollow.
Do you press down on a belt sander?+
No. The weight of the sander is all the pressure it needs; your hands only guide it and keep it flat. Pressing down slows the belt, heats and clogs the abrasive and makes the sander dig in. Some sanders, like the SKIL 7510-01, have pressure control that warns you when you press too hard.
How to use a sander correctly?+
Pick the right sander for the job, start with the coarsest grit the surface needs, and move through the grits without skipping more than one. Start the sander before it touches the wood, keep it flat and moving, let its weight do the work, and wipe off the dust between grits. With a belt sander, always follow the grain.
How to use a belt sander to remove paint?+
Test for lead first if the house was built before 1978. Then use a 40 or 60 grit belt on flat surfaces only, with light pressure and the dust port connected to a vacuum. Keep moving with the grain, clean the belt with a cleaning stick as soon as it starts to clog, and switch to 80 once you reach bare wood before finishing with a random orbital.

Have a belt sander question I didn’t answer? Ask in the comments and I’ll reply.

Sanding Between Coats of Polyurethane: When, What Grit and How

Yes, sand between coats of polyurethane: a light scuff with 320-grit sandpaper once each coat is dry knocks off dust nibs and raised grain and gives the next coat a surface to grip. After the first coat, when the grain stands up most, 220 grit is fine. You’re not trying to remove the finish, just to dull the shine evenly, then wipe off every bit of dust before the next coat.

This guide covers when it’s really necessary and when you can skip it, the grit for each coat, sandpaper vs steel wool, by hand or with a sander, and what goes wrong when you don’t sand.

Brushing a coat of clear polyurethane onto a wooden tabletop

⚡ Quick Answer

After coat 1: 220 to 320 grit, to flatten raised grain.

Between later coats: 320 grit, light pressure, just until the surface looks evenly dull.

Before the final coat (optional): 400 grit for the smoothest base.

Then: vacuum, wipe with a tack cloth, and recoat within the time on your can.

What You’ll Use

Consumables are cheap, and the right ones make the difference between a smooth finish and scratches under the next coat.

Product ⭐ 3M Wetordry 320, 25 sheets 3M Fine Sanding Sponge Mirka Abranet 320, 5″ mesh discs S&F STEAD & FAST Tack Cloth DEWALT DWE6411K Sheet Sander
Image 3M Wetordry 320, 25 sheets 3M Fine Sanding Sponge Mirka Abranet 320, 5" mesh discs S&F STEAD & FAST Tack Cloth DEWALT DWE6411K Sheet Sander
Use it for Hand-sanding between coats on a block Edges, legs, spindles and profiles Large flat surfaces with a random orbital sander Lifting the last dust before you recoat Flat panels and tabletops with ordinary 320 paper
Price $ $ $ $ $$
Availability Check price on Amazon Check price on Amazon Check price on Amazon Check price on Amazon Check price on Amazon

Is It Absolutely Necessary to Sand Between Coats of Polyurethane?

Not always, but usually worth it. Sanding between coats does two jobs:

  • Smoothness. Every coat catches dust, the odd bug and raised wood fibers. If you don’t knock them off, the next coat builds on top of them and they’re there for good.
  • Adhesion. Once a coat has cured past the maker’s recoat window, the next coat bonds best to a surface that has been scuffed. Within the window, many polyurethanes bond chemically to the coat below, and the label will tell you whether sanding is then optional.

So the honest answer: read your can. If you recoat inside the window it gives, you can skip sanding for adhesion, and just remove any nibs. If you’ve missed the window, or you want a glass-smooth result, sand every coat but the last.

What Grit to Sand Polyurethane Between Coats

When Grit Why
After the first coat 220-320 The first coat raises the grain most, especially water-based poly. A slightly coarser grit levels it faster.
Between later coats ⭐ 320 Removes nibs and dulls the surface without cutting through.
Before the final coat 320-400 A finer scratch for the smoothest last coat.
After the final coat Don’t Leave it. Rubbing out a fully cured finish to a set sheen is a separate job.

Going coarser than 220 between coats leaves scratches the next coat won’t hide. Going much finer than 400 barely scuffs the surface, which defeats the purpose. The full grit chart for bare wood is in my what grit sandpaper for wood guide, and my picks for the rest of the sequence are in the best sandpaper for wood.

💡 Grit Scales

US sandpaper uses the CAMI scale; European brands like Mirka use FEPA “P” grades. Above about 220 they drift apart, and a P-grade is finer than the same CAMI number: a CAMI 320 is roughly a P400. Both of the 320s below are fine for between coats.

How to Sand Between Coats of Polyurethane

  1. Let the coat dry fully. Use the time on your can. If the sandpaper gums up and the dust clumps instead of turning to fine white powder, it isn’t ready.
  2. Sand lightly, with the grain. By hand, wrap the paper around a flat block or use a sponge. Barely any pressure: the weight of your hand is enough.
  3. Stop when it looks evenly dull. You’re aiming for a uniform haze. A few small shiny spots are low areas: leave them rather than sanding through the edges to reach them.
  4. Go easy on edges and corners. The finish is thinnest there and cuts through first. One pass is enough.
  5. Remove every bit of dust. Vacuum with a brush attachment, then wipe with a lightly unfolded tack cloth, no pressure. Then brush on the next coat as described in my guide on how to apply polyurethane.
  6. Recoat within the window on the can.

Wiping sanding dust off a board with a cloth before the next coat

The Abrasives I’d Use

3M Wetordry Sandpaper, 320 Grit

3M Wetordry Sandpaper, 320 grit, 25 sheets, 9 x 11 inch

Best Sandpaper Between Coats

3M sells this pack for exactly this job: its listing calls it sandpaper “for final or between coats sanding”. It’s silicon carbide, a sharp mineral that cuts cleanly at fine grits, on waterproof paper you can use dry or with water to reduce clogging. 25 full 9 x 11 in sheets cut into quarters for a block or a 1/4-sheet sander, which is enough for a lot of coats.

Check price on Amazon

  • ✅ Made for between-coats sanding
  • ✅ Wet or dry
  • ✅ 25 sheets, cut to any size
  • ❌ Needs a block for flat results

3M Sanding Sponge Block, Fine

3M Sanding Sponge Block, single angle, fine grit, extra large

Best for Edges and Curved Parts

Paper on a hard block digs into edges and can’t follow a turned leg. A fine sanding sponge flexes, spreads the pressure, and is much less likely to cut through the finish on an edge. This 3M block is extra large, 2-7/8 x 8 in, works wet or dry, and rinses clean to reuse.

Check price on Amazon

  • ✅ Gentle on edges and profiles
  • ✅ Wet or dry, reusable
  • ❌ 3M gives “fine”, not a grit number

Mirka Abranet 5″ Mesh Discs, 320

Mirka Abranet 5 inch 320 grit mesh sanding discs, hook and loop, 50 pack

Best for Big Flat Surfaces With a Sander

On a large tabletop or a set of cabinet doors, a random orbital sander with a mesh disc scuffs evenly and fast. Abranet’s open mesh lets a vacuum pull the dust through the whole disc, and Mirka says it resists clogging, which is the usual problem with fine paper on finish. The 50 discs are P320 (FEPA) and fit any 5″ hook-and-loop sander regardless of hole pattern. Run the sander at a low speed setting and keep it flat.

Check price on Amazon

  • ✅ Dust extraction through the whole disc
  • ✅ Resists clogging on finish
  • ✅ Fits any 5″ hook-and-loop pad
  • ❌ Only for flat surfaces

S&F STEAD & FAST Tack Cloth

S&F STEAD & FAST tack cloth, 6 pack, 18 x 36 inch

Best for the Last of the Dust

A vacuum gets most of the dust; a tack cloth gets the rest. These are 18 x 36 in cotton cheesecloth, individually wrapped, and wax and silicone free, which matters because wax or silicone left on the surface can cause the next coat to fisheye. Unfold one loosely and drag it over the surface with no pressure. With water-based poly, some finishers prefer a cloth barely dampened with water instead: check what your finish’s maker recommends.

Check price on Amazon


By Hand or With a Sander?

By hand is safest and all you need for furniture, doors and small projects: paper on a block for flat parts, a sponge for edges and curves. A sander saves time on big flat surfaces, as long as you use a fine grit, a low speed and no pressure.

Sheet Sander: DEWALT DWE6411K

DEWALT DWE6411K quarter sheet palm sander

A 1/4-sheet sander is the classic tool for sanding between coats: its small fixed orbit scuffs evenly without cutting in, and it clamps ordinary sandpaper, so a quarter of a 3M 320 sheet fits straight on. The DEWALT DWE6411K (2.3 A, 14,000 OPM) has a paper clamp that holds the sheet tight and a punch for dust holes. For why a square pad suits this job, see sheet sander vs random orbital sander; for a random orbital with a low speed setting, see my best random orbital sanders.

Check price on Amazon


Sandpaper or Steel Wool Between Coats?

Sandpaper, in most cases. Paper on a block cuts flat and levels nibs; steel wool follows the surface, so it dulls the shine but doesn’t flatten much. Steel wool also sheds tiny fibers. Under oil-based poly that’s a nuisance; under water-based poly, any fiber left behind can rust and leave dark specks in the finish. If you like the feel of wool on curved parts, use a synthetic abrasive pad instead: it does the same job without metal fibers.

Oil-Based vs Water-Based Polyurethane

  • Water-based dries fast and raises the grain noticeably on the first coat, so the first sanding matters most. Avoid steel wool.
  • Oil-based dries slowly and needs longer before it sands to a powder rather than gumming. Give it the full time on the can, more in cool or humid weather.

Thinking of a faster-sanding first coat? Read what sanding sealer is and when to use it first: some sealers weaken the bond of polyurethane. Still choosing the finish itself? My picks, oil-based and water-based, are in the best wood finish for furniture.

Floors

On a floor, the same idea applies at a different scale: a light “screening” between coats with a floor buffer and a fine screen or pad, then a thorough vacuum and tack. A handheld sander is too slow for a whole room. My guides on sanding wood floors yourself and the best sanders for floors cover the equipment.

Common Mistakes

  • Sanding too soon. Gummy paper and dust balls mean the coat isn’t dry.
  • Sanding through on edges. One light pass on edges, never more.
  • Chasing shiny spots. Low spots stay shiny. Leave them; the next coat fills them.
  • Leaving dust. Every speck you miss is sealed in the next coat.
  • Using a coarse grit. Scratches from 150 or 180 show through clear finish.

🏆 The Short Version

Let each coat dry, scuff it with 320 grit (220 to 320 after the first coat) on a block or a fine sponge for edges, stop when it’s evenly dull, remove the dust with a vacuum and a tack cloth, and recoat within the time on your can. Use a sheet sander or mesh discs on big flat surfaces. Skip steel wool under water-based poly. Starting from an old finish? See how to remove stain from wood and how to sand and refinish a table.

❓ Frequently Asked Questions

Is it absolutely necessary to sand between coats of polyurethane?+
Not always. If you recoat within the window printed on the can, many polyurethanes bond to the coat below without sanding. But a light sanding still removes dust nibs and raised grain, so the finish ends up smoother. If you’ve missed the recoat window, sanding is needed so the next coat grips.
What grit do I use to sand between coats of polyurethane?+
Use 320 grit between coats, with light pressure. After the first coat, when the grain is raised, 220 to 320 is fine. Before the final coat you can go to 400 for the smoothest base. Coarser than 220 leaves scratches that show through a clear finish.
Is it better to use sandpaper or steel wool between coats of polyurethane?+
Sandpaper is usually better: on a block it levels dust nibs, while steel wool only dulls the surface. Steel wool also sheds fibers that can rust under water-based polyurethane and leave dark specks. If you prefer a pad for curved parts, use a synthetic abrasive pad instead of steel wool.
Can I apply a second coat of polyurethane without sanding?+
Yes, if you’re within the recoat time on the can and the first coat is free of dust and raised grain. The coats will bond. Any nibs or specks in the first coat will stay under the second, though, so a quick scuff with 320 grit is still the better habit.
What happens if you don’t sand between coats of polyurethane?+
Within the recoat window, usually nothing bad for adhesion, but dust nibs and raised grain get sealed in and the finish feels rough. Outside the window, the next coat may not bond well and can peel or scratch off more easily. Sanding fixes both problems.
Can you wet sand between coats of polyurethane?+
You can, with waterproof wet/dry paper such as 3M Wetordry, and it reduces clogging and dust. Use very little water, wipe the slurry off completely and let the surface dry before recoating. Wet sanding is more often used to rub out the final, fully cured coat; between coats, dry sanding is simpler for most people.

Have a finish that isn’t coming out smooth? Tell me what you’re using in the comments and I’ll help you track down the problem.