How to Remove Paint With a Heat Gun (Without Scorching the Wood)

How to remove paint with a heat gun: old paint peeling off weathered wood boards

To remove paint with a heat gun, set it to its lower setting, hold the nozzle 2 to 3 inches from the surface and keep it moving over a patch about the size of your hand until the paint wrinkles and lifts, then push a sharp scraper under it right away, with the grain, while you heat the next patch. On paint that could be older than 1978, test for lead first and keep the gun below 1,100°F.

Heat gun paint removal is the fastest way to take thick, many-layered paint off doors, trim, window casings and siding, and it makes almost no dust while the paint is still soft. It is also the method most likely to scorch the wood, crack a window or start a fire inside a wall if you rush it. Below: when a heat gun is the right tool, what temperature to use, the step-by-step method, how to handle windows, furniture, metal and plaster, and the short kit that makes it work.

⚡ Quick Answer

Heat: low setting first, nozzle 2 to 3 inches away and always moving; turn it up only if the paint won’t soften in several seconds. Stay below 1,100°F on old paint.

Scrape: as soon as the paint bubbles, with a carbide scraper on flat boards and a contour scraper on moldings.

Kit: a dual-temperature gun like the Wagner HT1000, a metal bucket for scrapings, a fire extinguisher, gloves and eye protection.

Is a Heat Gun a Good Way to Remove Paint?

Yes, on the right surface. A heat gun is a hair-dryer-shaped tool that blows air hot enough to soften paint so it lets go of the wood. Unlike a chemical stripper, there’s no waiting for a gel to work and nothing to neutralize afterwards; unlike a sander, it doesn’t clog paper or throw paint dust into the air while you work.

Where a Heat Gun Works Best

  • Thick, layered paint on doors, baseboards, casings and window sashes, where many coats come off together in one pass.
  • Exterior clapboards and trim with failing oil-based paint, as long as you keep the heat out of gaps and seams.
  • Solid wood furniture with flat panels and simple profiles.
  • Varnish and old finishes that soften with heat, as well as paint.

Where to Use Something Else

  • Thin paint on flat surfaces. One or two coats on a tabletop or shelf come off faster with a sander.
  • Carvings, spindles and turned legs. A gel stripper reaches into the detail without scorching the high points.
  • Veneer. Heat can soften the glue under thin veneer and lift it along with the paint.
  • Anything near hidden cavities, such as the inside of a wall or a window weight pocket, where dust and old debris can smolder unseen.

My step-by-step for the other methods, and how to choose between them, is in how to strip paint from wood.

What You Need to Strip Paint With a Heat Gun

The list is short: a heat gun with temperature control, the right scraper for the surface, a metal can for hot scrapings, and protection. The scraper matters as much as the gun, because heat only softens the paint; the blade is what removes it. These three are the tools I’d buy for the job. The specs come from each maker’s product page and Amazon listing.

Wagner Spraytech HT1000 Dual-Temperature Heat Gun
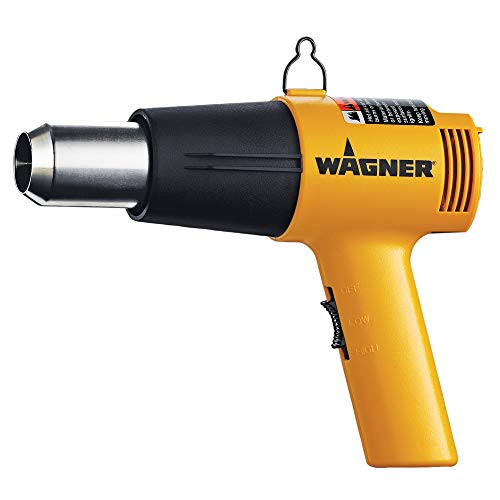
Wagner Spraytech HT1000 dual-temperature heat gun

The Heat Gun for This Job

For a first paint-stripping job, the HT1000 is the gun I’d point you to. It has two settings, 750°F and 1,000°F, so it can’t go past the EPA’s 1,100°F limit for painted surfaces, and Wagner builds in a stand so you can set it down with the hot nozzle up and away from the bench. The basic version comes with no nozzles; Wagner also sells it as a kit with an edge protector, a flare nozzle and a concentrator. If you’d rather have a digital gun with 12 settings, or a cordless one, my full comparison is the best heat gun for paint removal.

Check price on Amazon

  • ✅ Both settings under 1,100°F
  • ✅ Integrated stand for hands-free rests
  • ✅ Lowest price tier of the guns I recommend
  • ❌ Only two heat settings
  • ❌ No nozzles in the basic version

Best For: anyone stripping paint for the first time, and older homes where staying under 1,100°F matters.


Hyde Contour Paint Removal Scraper for Heat Gun Use

Hyde contour paint removal scraper with six blade profiles for heat gun use

For Moldings, Trim and Profiles

A flat scraper can’t follow a molding. Hyde’s contour scraper is made for working alongside a heat gun: a 10-inch metal shaft keeps your hand farther from the hot air, and six blade profiles match coves, beads, corners and casings. A quick-release lever swaps blades without tools, so you can change shape as the profile changes.

Check price on Amazon

  • ✅ Six profiles for trim and moldings
  • ✅ Long shaft keeps your hand away from the heat
  • ✅ Tool-free blade changes
  • ❌ Slower than a wide blade on flat boards

Best For: window casings, baseboards, door trim and any profiled woodwork.


Bahco 665 Carbide Scraper

Bahco 665 carbide scraper with 2-1/2 inch blade and two-hand grip

For Flat Boards, Doors and Siding

On flat work, a sharp, wide blade is what makes heat stripping fast. The Bahco 665 has a 2-1/2″ carbide blade and a two-hand grip, so you can pull with steady pressure right behind the heat. Bahco says the carbide edge stays sharp up to 50 times longer than steel, and the head takes four blade shapes.

Check price on Amazon

  • ✅ Wide carbide blade for flat surfaces
  • ✅ Two-hand grip for steady pressure
  • ✅ Four interchangeable blade shapes
  • ❌ Too wide for tight profiles
  • ❌ Carbide edge can gouge if you dig in

Best For: doors, flat panels, clapboards and tabletops.


Also have ready: a metal bucket or old paint can for hot scrapings, a fire extinguisher, heat-resistant gloves and eye protection, a drop cloth that isn’t plastic under the work area, and a fine sanding sponge for cleanup. If you’re sanding the residue, a respirator rated for the dust is worth having too: see my best respirator for woodworking.

Before You Start: Test Old Paint for Lead

Paint containing lead was banned for homes in the US in 1978, but houses built before then often still have it in the lower layers, even under modern paint. Heating that paint is the risk: lead paint gives off fumes at high temperature, and the scrapings and dust that follow are hazardous.

Why 1,100°F Is the Line

The EPA’s lead-safe work practices for renovators (40 CFR 745.85) allow a heat gun on painted surfaces only below 1,100°F, and they ban open-flame burning or torching of painted surfaces outright. That’s why I recommend guns that either can’t pass that number, like the Wagner HT1000 (top setting 1,000°F), or that let you set the temperature precisely and stay under it.

How to Check

Test the paint before you heat it, down to the bare wood, since the newest coat tells you nothing about the ones underneath. Home test kits give a quick answer; a certified lab or a certified risk assessor gives a definitive one. If the paint does contain lead, work below 1,100°F, contain the area with sheeting, keep children and anyone pregnant away, clean up with a HEPA vacuum and wet wiping, and consider hiring an EPA-certified renovator for anything larger than a door or a window.

⚠️ Fire Risk

Most heat gun fires start out of sight: the hot air goes through a gap in siding, a window frame or a wall, and the dust, paper or insulation inside smolders for an hour before anyone notices. Never point the nozzle into cracks or cavities, keep a fire extinguisher within reach, and check the area again an hour after you stop.

What Temperature to Set a Heat Gun to Remove Paint

Lower than most people expect. Paint softens well below the maximum of any gun made for home use, and the hotter you go, the faster you burn the paint instead of lifting it.

Start at the Low Setting

Master Appliance, which makes heat guns, advises using the lower setting on a dual-temperature gun for paint removal. On the Wagner HT1000 that’s 750°F. Wagner’s own furniture-stripping project sets its FURNO 700 to 1,000°F, held a few inches from the paint. A good rule: start low, and turn up only if the paint doesn’t wrinkle within several seconds.

Signs You’re Too Hot

  • The paint smokes, blackens or catches instead of bubbling.
  • The wood underneath darkens or chars: that’s scorching, and it has to be sanded out.
  • Softened paint turns stringy and gummy and smears instead of lifting in sheets.
  • You smell burning rather than warm paint.

Distance and Movement

Distance is your second temperature control. Two to three inches is a good starting point. Closer concentrates the heat; farther spreads it. Keep the gun moving in small circles or side to side: parked in one spot for even a few seconds, any gun will scorch the wood.

How to Remove Paint With a Heat Gun, Step by Step

Step 1: Set Up the Space

Take down curtains and move anything flammable away from the work. Lay a canvas or paper drop cloth, not plastic sheeting, which melts under hot scrapings. Open windows or work outdoors, and put the metal can and the fire extinguisher where you can reach them without moving.

Step 2: Heat a Small Section

Work on an area about the size of your hand. Hold the nozzle at the distance above and move it slowly back and forth. Within a few seconds the paint should wrinkle, bubble or turn glossy. Some paints bubble and some just go soft, so if nothing visible happens after several seconds, try the scraper anyway.

Step 3: Scrape Right Behind the Heat

As soon as the paint softens, push or pull the scraper under it with the grain, the blade held at a low angle. Soft paint should come away in strips. Keep the heat moving onto the next patch as you scrape the last one, so you work in a steady rhythm. If the paint has cooled and stiffened, reheat it rather than forcing the blade.

Step 4: Work the Profiles

On moldings and casings, heat a shorter length and use a contour blade that matches the shape. Go easy on sharp edges and the high points of a profile: they heat up first and scorch first.

Step 5: Collect the Scrapings

Hot paint can stay hot enough to scorch a floor. Drop the scrapings into the metal can as you go. On old paint, treat them as lead waste and keep them contained.

Step 6: Check for Smoldering

When you finish, switch the gun to cool-down mode if it has one, or stand it on its stand to cool. Then look and feel along joints, gaps and the back of anything you heated. Check again later.

Step 7: Clean Up the Residue

Heat rarely leaves bare wood. Thin paint in the grain and the hollows comes off with a fine sanding sponge, a little mineral spirits on a pad, or a sander on flat parts. Start at 80 to 100 grit on residue and move to 120 and 150. On paint that could contain lead, don’t dry-sand: use a stripper or wet methods for the last of it. For flat panels, my picks are in best sanders for paint removal.

Step 8: Prepare for the New Finish

Fill any gouges and scorch marks you’ve sanded out, sand the whole piece to an even grit, remove the dust, and then paint, stain or clear-coat. If you’re keeping the wood visible, my guide to the best wood finish for furniture covers which clear finish to use.

💡 Pro Tip

Keep the scraper sharp. A carbide edge stays sharp far longer than steel, but once it starts to skate over soft paint instead of biting under it, turn or replace the blade. A dull blade makes you add heat, and more heat is how wood gets scorched.

Heat Gun Paint Removal by Surface

Wood Doors and Trim

The ideal heat gun job. Take doors off their hinges and lay them flat, remove the hardware, and strip one panel at a time, working the flat field with a wide scraper and the panel moldings with a contour blade.

Windows

Glass cracks when one part heats faster than the rest. Use a glass-protector nozzle, which directs the air away from the pane, or shield the glass with a strip of metal flashing, and keep the gun moving along the muntins. The old putty around the glass also softens with heat, so plan to reglaze.

Furniture

A heat gun suits solid wood dressers, chests and tables with flat surfaces. Test an inconspicuous spot first to see how the finish reacts, and switch to a stripper on veneer and carved detail. Once the paint is off, my guide on how to refinish wood furniture takes you through sanding and finishing.

Metal

A heat gun will soften paint on metal too, but metal spreads the heat away from the spot you’re aiming at, so it takes longer, and the part stays hot well after you stop. Wear gloves and give it time to cool before handling.

Walls and Plaster

Possible, but rarely worth it. Plaster holds heat and can crack, and the paper face of drywall scorches before the paint lets go. For walls, a scraper on loose paint and a sanding pass on the edges is usually enough.

Exterior Siding

Work on a calm day, never into the joints between boards, and never toward the eaves, vents or a soffit where birds’ nests and debris collect. Check the wall again later in the day.

Heat Gun, Chemical Stripper or Sander?

Most stripping jobs use two of the three. A heat gun is fastest on thick paint over flat and gently shaped wood. A chemical stripper is better on carvings, spindles and near glass, and it makes no heat at all: my picks are in best paint stripper for wood. A sander finishes the job on flat surfaces and is the fastest choice when there are only one or two thin coats.

Common Mistakes

  • Too much heat. Turning the gun all the way up scorches wood and burns paint into a gummy smear.
  • Holding still. A parked nozzle chars wood in seconds.
  • Waiting too long to scrape. Paint re-hardens as it cools.
  • Digging in with the blade. A steep angle leaves gouges you then have to fill and sand.
  • Setting the gun down on its side. The nozzle stays hot for minutes after you switch off.
  • Skipping the lead test on paint from before 1978.

How I Put This Guide Together

The 1,100°F limit and the ban on open flames come from the EPA’s lead-safe work practice rule for renovators (40 CFR 745.85). The temperature advice comes from heat gun makers: Master Appliance’s guidance to use the lower setting, and Wagner’s furniture-stripping project. Product specs come from Wagner, Hyde and Bahco. I don’t show prices or star ratings; the Amazon buttons show the live price.

🏆 The Verdict

Removing paint with a heat gun comes down to three habits: low heat, a moving nozzle, and a sharp scraper right behind it. Test old paint for lead and stay below 1,100°F, keep the heat out of gaps, and finish with a light sanding. For most people a dual-temperature gun like the Wagner HT1000 plus a carbide scraper and a contour scraper is the whole kit.

❓ Frequently Asked Questions

Is it safe to use a heat gun to remove paint?+
It is safe when you control the two real risks: fire and lead. Keep the air out of gaps and cavities, work with an extinguisher nearby, and check for smoldering after you stop. On paint from before 1978, test for lead and keep the gun under 1,100°F, the EPA’s limit for painted surfaces.
Can I use a heat gun to remove old paint?+
Yes, and thick old paint is where a heat gun shines, because many layers soften and lift together. The catch is lead: old coats under newer paint often contain it. Test first, use a gun that stays below 1,100°F, contain the scrapings, and never torch the paint with an open flame.
What is the quickest way to remove old paint?+
On thick layers over doors, trim and siding, a heat gun with a sharp carbide scraper is usually quickest. On one or two thin coats over a flat surface, a random orbital or belt sander is faster. On carved or detailed pieces, a gel stripper wins, because it reaches where blades and sandpaper can’t.
What temperature should I set a heat gun to for removing paint?+
Use the lowest setting that makes the paint wrinkle within several seconds. On a two-setting gun, that usually means the low one, around 750°F on the Wagner HT1000. Turn up only if nothing happens, and stay below 1,100°F on any paint that might contain lead.
Will a heat gun remove paint from metal?+
Yes, though more slowly than from wood, because metal conducts the heat away from the spot you’re working. Expect to hold the heat on each area a little longer, and remember the metal stays hot after the paint lifts. Wear gloves, and let parts cool before you handle or sand them.
Can you use a heat gun to remove paint from walls or plaster?+
You can, but it is seldom the best choice. Plaster stores heat and may crack, and drywall paper scorches before the paint releases. On walls, scrape off what is loose, feather the edges with a sanding pad, and prime. Save the heat gun for woodwork, where it is far faster.

Stripping something awkward, like a window sash or a staircase? Tell me in the comments what you’re working on and I’ll suggest the approach.
How to Use a Hand Planer: Electric Planer Technique, Setup and Safety

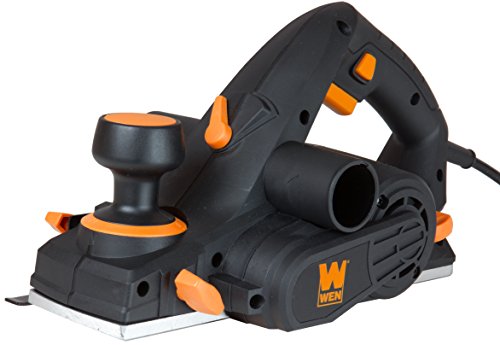
How to use a hand planer: planing a board on a workbench with shavings around it

To use an electric hand planer, clamp the workpiece, set a shallow depth, rest the front shoe flat on the wood with the blades clear, switch on and wait for full speed, then push the planer forward along the grain with pressure on the front handle at the start of the pass and on the rear handle at the end. Carry the planer past the end of the board without tipping it, and wait for the cutter to stop before you set it down.

This guide shows how to use a hand planer step by step, based on the instruction manuals for the Makita KP0800 and the WEN 6530: safety, depth of cut, blades, technique for doors, chamfers, rabbets and flattening, and a short section on manual hand planes, since many people searching for a “hand planer” own one of those. If you need a planer first, see my best hand planer picks.

⚡ Quick Answer

Depth: WEN suggests passes of 1/64″ or less for a good finish; deeper only for rough removal.

Pressure: front handle at the start, rear handle at the end, even feed in between.

Direction: along the grain, never against it, and never on end grain with the WEN.

Always: clamp the work, use both hands, and let the cutter stop before you put the planer down.

Electric Hand Planer or Manual Hand Plane?

“Hand planer” usually means a power planer: a handheld electric tool with a spinning drum that carries two blades, typically 3-1/4″ wide. It removes wood fast and is the tool carpenters use to trim doors, flatten framing, scribe and chamfer. A hand plane is the traditional, non-powered tool with one blade set in a sole: slower, quieter and better for fine finishing. Most of this guide is about the electric planer; the manual plane is covered at the end.

Neither one is a thickness planer. A handheld planer follows the surface it rides on, so it can level and trim, but it can’t make a board an even thickness from end to end. For that, see how to use a thickness planer.

Hand Planer Safety: What the Manuals Say

Makita and WEN print almost the same list. The points that matter most:

  • Secure the workpiece with clamps or another stable method. Both manuals say never to hold the work in your hand; Makita adds against your body, and WEN across your legs.
  • Hold the planer with both hands, by the insulated grips.
  • Make sure the blades aren’t touching the wood when you switch on, and wait until they reach full speed before cutting. WEN warns the planer can vibrate and kick back if the cutting speed is too low.
  • Wait for the cutter to stop before setting the tool down. Both manuals put this first: a spinning cutter can catch the surface and throw the tool.
  • Check for nails and remove them or set them well below the surface.
  • Never put your fingers into the chip chute. It can jam when cutting damp wood; Makita says to clear it with a stick, and WEN says to unplug the planer before you remove chips.
  • Never pull the planer backwards over the work (WEN).
  • Unplug before changing blades or adjusting, and handle the blades carefully: they are very sharp.
  • Wear safety glasses, hearing protection and a dust mask.

Set Up the Planer

Set the Depth of Cut

The knob on the front of the planer raises or lowers the front shoe, and the difference between the shoe and the blade is the depth of cut. The Makita KP0800 cuts up to 3/32″ per pass and the WEN 6530 up to 1/8″. Maximum depth is for rough stock only: WEN’s manual says the optimum is 1/64″ or less per pass, building up to the final depth with several passes, and to test the setting on scrap of the same material. When you finish, set the knob back to zero.

Check the Blades

Dull or chipped blades leave a rough, torn surface and make the motor work harder. Most planers use reversible, double-edged blades: unplug the tool, flip the blades to the fresh edge or replace them, and tighten every installation bolt. Makita says to change both blades at the same time, because an unbalanced drum vibrates and shortens tool life, and to run the planer for a moment before use to check for vibration.

Chips and Dust

Choose the side you want the chips to come out, if your planer lets you, and fit the dust bag or a vacuum hose. A clogged chute is the most common reason a planer stops cutting cleanly.

Use the Kickstand

Most current planers have a spring-loaded stand or kickstand at the rear that keeps the blades off the bench when you set the tool down. Check it swings freely before you start.

How to Use an Electric Hand Planer, Step by Step

  1. Clamp the work to a bench, with the surface you’ll plane facing up and nothing under the planer’s path.
  2. Mark the line you’re planing to, on both faces for an edge.
  3. Set a shallow depth and check the grain direction: plane with the grain so the fibers are cut, not lifted.
  4. Rest the front shoe flat on the end of the board, blades clear of the wood.
  5. Switch on and wait for full speed.
  6. Push forward at an even rate, pressing on the front handle at the start of the pass. Makita and WEN both describe it this way.
  7. Move the pressure to the rear handle as the front shoe leaves the far end, so the planer doesn’t dip and gouge the end.
  8. Carry it off the end without tilting it down, switch off and wait for the cutter to stop.
  9. Check against your line and repeat. Lower the depth for the last passes to get a cleaner finish.

Feed rate matters as much as depth. WEN explains that moving too fast gives a poor cut and strains the blades and motor, while moving too slowly can burn or mar the surface. If the motor labors, reduce the depth or the feed.

Hand Planer Techniques

Trimming a Door

The long edges of a door are long grain and plane easily: clamp the door on edge in a door jack or against a bench leg, mark the line on both faces, and plane in long, even passes from one end to the other. Plane a slight back-bevel on the latch side if the door binds as it closes. The top and bottom are trickier, because the stiles there are end grain, and WEN’s manual says not to plane end grain at all. Follow your planer’s manual: where end grain is ruled out, cut the top or bottom with a circular saw and a straightedge guide, then ease the edge with a sanding block.

Chamfering an Edge

The V-groove in the front shoe guides the planer along a corner. Set the groove on the edge, keep the base pressed flat against the edge, and push along the grain. Makita’s KP0800 has one groove; the Makita XPK02Z has three for different chamfer sizes.

Cutting a Rabbet

Attach the edge fence to set the rabbet width and, if your planer has one, the depth guide to set the rabbet depth, then take repeated passes until the guide touches. The Makita KP0800 rabbets up to 11/32″ deep. Draw a cutting line first and line the blade edge up with it.

Flattening and Leveling

To level a high spot or a slightly uneven surface, take passes diagonally across it in two directions with a shallow setting, then finish with passes along the grain. Check with a straightedge often: a power planer removes material much faster than a belt sander. If the surface is wider than a board or two, a belt sander is easier to control; see belt sander vs planer.

Planing Framing and Rough Stock

For crowned joists or studs, plane the high spots in short passes and keep the planer moving. Makita’s manual notes that planing is easier if you set the workpiece at a slight incline so you can plane somewhat downhill.

⚠️ Old Paint and Hidden Nails

On old doors and trim, check for nails, screws and staples before planing: anything the blades hit can be thrown out of the chute. If the paint may contain lead (homes built before 1978), test it first. Planing lead paint produces chips and dust you don’t want in the house.

How to Use a Manual Hand Plane

If your “hand planer” has no cord, the principles are the same, only slower and quieter:

  • Sharpen first. A manual plane only works with a sharp blade; most problems come from a dull iron.
  • Set a thin shaving. Advance the blade until it just takes a shaving, and keep the edge parallel to the sole with the lateral lever.
  • Plane with the grain, pressing on the front knob at the start, evenly in the middle and on the rear handle at the end, the same pattern as with a power planer.
  • Skew the plane slightly in difficult grain to take a slicing cut.
  • Block planes are for end grain, chamfers and small parts; bench planes (No. 4 smoother, No. 5 jack) are for faces and edges.

Common Hand Planer Mistakes

  • Taking the full depth on every pass. The surface comes out rough and the motor strains.
  • Dipping at the ends. Keep pressure on the front shoe at the start and the rear shoe at the end.
  • Starting with the blades touching the wood. The tool can jump.
  • Setting it down while the cutter spins.
  • Planing against the grain. Flip the board or plane from the other end.
  • Holding small parts by hand. Clamp them, or use a different tool.

Hand Planers I’d Start With

Both are covered in more detail in my electric hand planer reviews, chosen from the makers’ specifications rather than shop testing.

Makita KP0800K 3-1/4″ Planer

Makita KP0800K 3-1/4 inch corded electric hand planer with tool case

Light, Balanced and Easy to Control

The KP0800K is the planer whose manual this guide quotes. Makita lists a 6.5 A motor, a two-blade drum at 17,000 RPM, 3-1/4″ width and up to 3/32″ per pass, with a click-stop depth knob in 0.1 mm steps. It weighs 5.7 lb, has a spring-loaded stand that keeps the blades off the bench and comes with double-edged carbide blades, an edge fence and a case. Rabbets go up to 11/32″ deep.

Check price on Amazon

  • ✅ Light for a corded planer
  • ✅ Fine click-stop depth adjustment
  • ✅ Carbide blades and case included
  • ❌ 1-year warranty
  • ❌ 3/32″ maximum depth

Best For: Doors, trim and finish carpentry where control matters more than speed.


WEN 6530 6-Amp 3-1/4″ Electric Hand Planer

WEN 6530 6 amp 3-1/4 inch electric hand planer

Budget Planer for Occasional Jobs

WEN’s 6530 has a 6 A motor at 17,000 RPM, a 3-1/4″ cut up to 1/8″ deep in 1/128″ steps, a safety kickstand, a parallel fence, a rabbeting depth stop and a dust bag, with chips ejected to either side. It weighs 6.8 lb. It sits in the lowest price tier, which makes it a sensible first planer for the odd sticking door or deck board.

Check price on Amazon

  • ✅ Lowest price tier
  • ✅ Kickstand, fence and rabbet guide included
  • ✅ Chips eject left or right
  • ❌ Heavier than the Makita
  • ❌ Carbide blades are an extra (6530B-TCT)

Best For: Homeowners who need a planer a few times a year.


🏆 The Verdict

A hand planer is easy to control once you get the rhythm: work clamped down, a shallow cut, front pressure at the start and rear pressure at the end, and the cutter stopped before the tool touches the bench. Take several light passes rather than one heavy one, and keep end grain for the saw.

❓ Frequently Asked Questions

How do you use a hand planer as a beginner?+
Practice on scrap with a very shallow setting. Clamp the board, rest the front shoe on it with the blades clear, switch on, and push steadily along the grain, leaning on the front handle first and the back handle last. Check your progress after every pass and only increase the depth once the rhythm feels natural.
Is hand planing difficult?+
An electric planer takes an afternoon of practice; the main skill is shifting pressure from front to back so the ends don’t dip. A manual hand plane takes longer to learn, because the results depend on a sharp blade and a correct setup. In both cases, light cuts and reading the grain solve most problems.
How much will a hand planer take off?+
It depends on the model. The Makita KP0800 takes up to 3/32″ and the WEN 6530 up to 1/8″ in a single pass, both 3-1/4″ wide. For a clean finish, WEN recommends 1/64″ or less per pass, so plan several passes to reach your line instead of one deep cut.
What do you use a hand planer for?+
Trimming doors that stick, leveling framing and joists, fitting boards and countertops to uneven walls, cutting chamfers and rabbets, and removing wood fast before final sanding. It works on surfaces and edges up to the blade width, usually 3-1/4″, and is not a replacement for a thickness planer.
How do you adjust a hand planer?+
On an electric planer, turn the depth knob on the front to raise or lower the front shoe; the scale shows the cut. Set it back to zero when you finish. On a manual plane, advance the blade with the depth wheel until it takes a thin shaving, and center it with the lateral lever.
Can you flatten a board with a hand planer?+
You can level high spots and take out a slight cup or twist by planing diagonally in both directions, then along the grain, checking with a straightedge as you go. It takes patience on anything wide. For many boards, a jointer and thickness planer, or a planer sled, give a flatter result much faster.

Have a planer question I didn’t answer? Ask in the comments and I’ll reply.

How to Use a Thickness Planer: Setup, Passes and Snipe

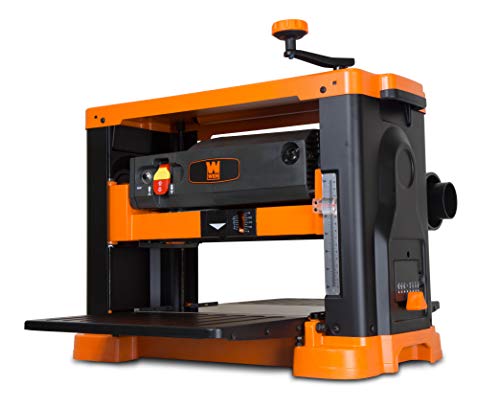
How to use a thickness planer: feeding a board into a benchtop planer

To use a thickness planer, start with one flat face, set the planer to take no more than 1/16″ from a board that size, switch it on, and feed the board flat-face down with the grain until it comes out the other side; then lower the head a little and repeat, flipping the board between passes, until it reaches the thickness you want. Support long boards at both ends to avoid snipe, and keep your hands out of the feed path.

Below is how to use a thickness planer the way the manuals describe it, using DeWalt’s manual for the DW735 as the main reference: setup, depth of cut, the step-by-step process, how to plane cupped, bowed and twisted boards, how to stop snipe, and when to sand afterwards. If you’re shopping, see my best thickness planer picks and the DeWalt DW735 vs DW734 vs Makita 2012NB comparison.

⚡ Quick Answer

First: one flat face, from a jointer, a planer sled or a hand plane.

Depth per pass: 1/32″ to 1/16″; the DW735’s maximum is 1/8″, and only on boards 6″ wide or less.

Minimum length: DeWalt says never plane material shorter than 12″.

Snipe: keep the board level going in and coming out, and support long boards.

What a Thickness Planer Does

A thickness planer makes the top face of a board parallel to the bottom face and brings the board to a set thickness. Rubber feed rollers pull the board under a cutterhead, the head shaves the top, and a second roller pushes it out. The bed is the reference, so the planer copies whatever is underneath: a warped board comes out the same shape, only thinner. That’s why the first face needs to be flat before the planer sees it, and why the jointer and the planer work as a pair. My jointer vs planer guide explains the division of labor, and how to use a jointer covers the face-jointing step.

Planer Safety: What the Manuals Say

From DeWalt’s DW735 instruction manual, plus the points every benchtop planer manual shares:

  • Never plane material shorter than 12 inches. Short pieces can tip into the cutterhead or shoot back out.
  • Keep hands away from the underside of the cutterhead carriage and out of the infeed opening.
  • Don’t switch the planer on with a board already under the carriage. Wait until the rollers and head are up to full speed, then feed.
  • Don’t stand between the back of the planer and a wall or other fixed object while a board is feeding, and leave clearance on the outfeed side.
  • Plane only clean wood: no nails, grit or loose knots, and as few tight knots as possible. DeWalt says not to plane wood that is severely warped, twisted, knotted or bowed.
  • Clear chips only with the power off and the cutterhead stopped, with a brush or vacuum.
  • Wear hearing protection. DeWalt’s manual calls for ANSI S12.6 hearing protection, and safety glasses at all times.
  • Mount the planer firmly. DeWalt suggests bolting it to 1/2″ or thicker plywood that you clamp to the bench, so it doesn’t walk.

⚠️ Chips Come Out Fast

On a planer with fan-assisted chip ejection like the DW735, chips leave the port at high speed. DeWalt warns not to operate it without the chute locked in place and to keep your face and hands clear of the port.

Set Up Before You Plane

Check the Thickness Scale

Plane a scrap, measure it with calipers and compare the reading with the scale. DeWalt’s manual explains how to recalibrate the DW735 scale if the two disagree. On the DW735, one full turn of the crank moves the head 1/16″ and a half turn moves it 1/32″, which is an easy way to count passes.

Set the Infeed and Outfeed Tables

The tables, or roller stands, should be level with the bed or a hair above it at the far ends. This is the single most effective snipe fix, covered in detail below. On the DW735X, the infeed and outfeed tables come in the kit.

Choose the Feed Speed

Two-speed planers trade speed for finish. On the DW735, speed 2 gives 96 cuts per inch for dimensioning, and speed 1 gives 179 cuts per inch for the final pass and for figured wood, where the slower feed reduces tear-out and knife wear. DeWalt says to change speeds only while the planer is running.

Connect Dust Collection

Planers make more chips than any other benchtop tool. DeWalt says a shop vac isn’t recommended on the DW735, because most can’t handle the volume and the hose clogs; use a dust collector with a 4″ hose. My guide to dust collection for woodworking tools covers the setup, and the best dust collector for a small shop lists collectors that run on 120V.

How to Use a Thickness Planer, Step by Step

  1. Flatten one face first on the jointer, or with a sled (see below). Mark the flat face with an X.
  2. Read the grain. Feed so the knives cut with the grain, not into it. If you see tear-out, flip the board end for end.
  3. Set the first pass. Raise the head above the board’s thickness, slide a few inches of the board under the middle of the carriage, and lower the head until it just touches. On the DW735, the material removal gauge shows how much the head will take at that height. Pull the board out, then lower the head about 1/32″ to 1/16″.
  4. Start the planer and wait for full speed.
  5. Feed the board flat-face down, square to the bed, and let the rollers take it. Don’t push or pull once the rollers grab it.
  6. Catch the board at the outfeed side and keep it level as it leaves.
  7. Flip and repeat. DeWalt recommends taking equal amounts from both faces: to remove 1/8″, take 1/16″ from each side. That keeps the moisture in the board balanced and gives finer cuts.
  8. Take the last pass light, at the slow feed speed if you have one, to reach the final thickness with the cleanest surface.

How Much to Take per Pass

The DW735 can take up to 1/8″ in one pass, but only on boards 6″ wide or less; DeWalt’s table scales the depth down for wider boards. Lighter cuts are the safer habit: 1/32″ to 1/16″ keeps the motor from bogging, reduces tear-out and makes snipe smaller. A board that comes out with a rough, fuzzy surface usually needs a lighter cut or sharper knives, not a heavier one.

Narrow and Thin Stock

DeWalt doesn’t recommend planing material less than 3/4″ wide. If you must, plane several narrow pieces side by side as one wide board. The DW735’s minimum planing thickness is 1/8″; for thinner parts, plane on a carrier board so the head never gets close to the bed.

Planing Cupped, Bowed and Twisted Boards

A planer works best when the board already has one flat face. DeWalt’s manual gives these workarounds when it doesn’t:

Cupped Boards

Rip the board down the middle and plane the two pieces separately: the cup is smaller on each narrower piece. If you can’t rip it, plane one face until it is flat, then plane the other face. In this case DeWalt says not to flip the board between every pass.

Bowed Boards

The feed rollers press a bow flat while the board passes, so the board comes out smooth but springs back to its bowed shape. Flatten it on the jointer, crown up, or cut it into shorter pieces first.

Twisted Boards

For a slight twist, alternate faces until you reach thickness. A heavily twisted board can jam the planer: if it does, turn the power off, unplug it and raise the carriage to free the board.

No Jointer? Use a Planer Sled

A planer sled is a flat board, usually melamine or MDF, longer than the workpiece. Shim the board on the sled so it can’t rock, hot-glue or wedge the shims in place, and run the sled and board through together. The sled becomes the flat reference, so the top face comes out flat. Flip the board, remove the sled, and plane the second face directly. It’s slower than a jointer, but it also handles boards wider than a jointer could.

How to Avoid Planer Snipe

Snipe is a deeper cut at the start or end of a board. DeWalt’s manual explains it: the unsupported end of the board drops, which lifts the other end into the cutterhead. The fixes:

  • Keep the board level going in and coming out. Lift the trailing end slightly as it enters and the leading end slightly as it leaves.
  • Support long boards with the planer’s tables or roller stands set level with the bed.
  • Feed boards end to end, butted together, so the rollers never release a board until the next one has taken its place.
  • Leave the board long and cut the sniped ends off after planing.
  • Lock the head if your planer has a manual carriage lock. The DW735 has an automatic one built into its four posts.

Do You Need to Sand After Planing?

Usually, yes. A planer leaves faint ripples, called knife marks or mill marks, one per cut, and they show under stain and gloss finishes. A higher cuts-per-inch setting makes them smaller, and a spiral head leaves a different, scalloped pattern. Start with a random orbital at 120 grit and work up to 150 or 180 for most finishes; see what grit sandpaper for wood and how to use an orbital sander. If you’d rather sand to thickness than plane highly figured wood, read drum sander vs planer.

Common Planer Mistakes

  • Planing a warped board with no flat face. The planer copies the warp.
  • Taking the full 1/8″ on wide boards. It overloads the motor and tears grain.
  • Planing against the grain. Flip the board and try again.
  • Short pieces. Respect the manual’s minimum length.
  • Letting long boards hang. The fastest route to snipe.
  • Running dull knives. On a straight-knife planer, flip or replace the knives as soon as the surface goes fuzzy or lines appear.

Planers I’d Start With

Chosen from the makers’ specifications, not shop testing. The full list is in my thickness planer reviews.

DeWalt DW735X 13″ Two-Speed Thickness Planer

DeWalt DW735X 13 inch two-speed thickness planer with infeed and outfeed tables

The Planer This Guide Follows

Most of the numbers in this guide come from the DW735 manual, and the DW735X is the same planer with infeed and outfeed tables and a spare set of knives in the box. It has a 15 A motor, a three-knife head at 10,000 RPM, 13″ width and 6″ thickness capacity, and two feed speeds for 96 or 179 cuts per inch. The automatic carriage lock reduces snipe without you engaging anything, and fan-assisted chip ejection clears the head. It is heavy and loud, like every straight-knife planer.

Check price on Amazon

  • ✅ Two feed speeds for dimensioning and finishing
  • ✅ Automatic carriage lock against snipe
  • ✅ Tables included in the X kit
  • ❌ Heavy to move
  • ❌ Straight knives are loud

Best For: A first planer that will last through years of rough lumber.


WEN PL1326 13″ Spiral Benchtop Thickness Planer

WEN PL1326 13 inch spiral cutterhead benchtop thickness planer

A Spiral Head in a Mid-Range Planer

The PL1326 uses a spiral cutterhead with 26 staggered, rotatable HSS inserts that take a shearing cut, which helps on figured and interlocked grain, and you rotate a chipped insert instead of replacing a whole knife. It planes boards up to 13″ wide and 6″ thick, turns the head at 10,000 RPM on a 15 A motor and feeds at 26 ft/min. A material removal gauge and depth stop are built in. It has one feed speed, so there’s no slow finishing pass.

Check price on Amazon

  • ✅ Spiral head with rotatable inserts
  • ✅ Quieter cut than straight knives
  • ✅ Depth stop and removal gauge
  • ❌ Single feed speed
  • ❌ HSS inserts, not carbide

Best For: Figured, reclaimed or interlocked-grain lumber.


🏆 The Verdict

Using a thickness planer well comes down to one flat face first, light passes from both sides, and boards supported level on the way in and out. Respect the 12″ minimum length, keep your hands out of the infeed, and finish with a light, slow pass before you sand.

❓ Frequently Asked Questions

How long does a board have to be to go through a planer?+
Check your manual, but 12 inches is a common minimum: DeWalt’s DW735 manual says never to plane material shorter than that. Short pieces can tip into the cutterhead between the rollers. If you need short parts, plane a longer board to thickness first and cut the pieces from it afterwards.
How do I use a wood planer correctly?+
Give the board one flat face first, set a light cut of 1/32″ to 1/16″, start the planer before the board goes in, and feed it flat-face down with the grain. Support it as it comes out, flip it between passes so both faces lose the same amount, and finish with a light pass.
How thin can a thickness planer cut?+
It depends on the model; the DeWalt DW735 lists a minimum planing thickness of 1/8″. To go thinner, or to plane delicate stock safely, run it on a flat carrier board so the cutterhead stays well above the bed. Very thin parts are often easier to bring to final size with a drum sander.
Do I need to sand if I use a planer?+
For a finished surface, yes. Even a sharp planer leaves small ripples from each knife cut that become visible under stain or gloss. Sand with a random orbital starting at about 120 grit and stop at 150 or 180 for most finishes. Rough framing or parts that will be painted can skip it.
How do you stop planer snipe?+
Support the board so it stays level as it enters and leaves, using the planer’s tables or roller stands. Lift the free end slightly at the start and end of the pass, feed boards end to end, and take light cuts. Leaving boards a few inches long lets you cut any snipe off.
Can you use a thickness planer without a jointer?+
Yes, with a planer sled. Shim the board on a flat sled so it can’t rock and run both through together until the top face is flat, then flip the board and plane it directly. Boards bought surfaced on two sides already have flat faces, so they can go straight into the planer.

Have a planer question I didn’t answer? Ask in the comments and I’ll reply.

How to Use a Jointer: Face and Edge Jointing Step by Step

How to use a jointer: feeding a board over the cutterhead with two push blocks

To use a jointer, set a light cut of about 1/32″, lay the board on the infeed table with any crown facing up, and push it across the cutterhead with steady pressure that moves from the infeed to the outfeed table, repeating until the whole face is flat; then hold that flat face against the fence and joint one edge square to it. Push blocks do the pushing whenever the board is thin or narrow, and the guard stays on.

This guide covers how to use a jointer from setup to the last pass: the safety limits printed in the jointer manuals, how to check the tables and fence, face and edge jointing step by step, straightening a bowed or crooked board, and the mistakes that leave a snipe or a taper. If you’re still choosing a machine, my best benchtop jointer picks compare the 6″ and 8″ models.

⚡ Quick Answer

Order: flatten one face first, then joint one edge square to that face.

Depth of cut: 1/32″ per pass; 1/8″ is the usual maximum on a benchtop jointer.

Pressure: on the infeed table at the start, on the outfeed table once a few inches have passed the cutterhead.

Never: joint end grain, stock shorter than the manual allows, or anything thin or narrow without push blocks.

What a Jointer Does (and What It Doesn’t)

A jointer has two flat tables with a rotating cutterhead between them. The infeed table sits slightly lower than the outfeed table, and the difference is your depth of cut. As you push a board across, the cutterhead removes the high spots, and the outfeed table, set level with the top of the knives, supports the freshly cut surface. After enough passes, the face or edge is flat and straight.

Face Jointing

Face jointing flattens one wide face of a board: it takes the cup, bow and twist out of rough lumber. It is the first operation in milling, and the jointer’s width limits it. A 6″ jointer can only flatten a board up to 6″ wide.

Edge Jointing

Edge jointing straightens one edge and makes it square to the face you just flattened. That gives you a reference edge for the table saw and a glue-ready edge for panels.

What a Jointer Can’t Do

A jointer makes one face flat and one edge square. It does not make the opposite face parallel, so it can’t bring a board to a consistent thickness. That’s the thickness planer’s job, and my jointer vs planer guide explains why you need both for rough lumber.

Jointer Safety: What the Manuals Say

Every jointer manual repeats the same short list, and almost every jointer injury breaks one of them. These are taken from WEN’s manual for the JT630H and JT833H benchtop jointers; other makers print the same limits with small differences, so check yours.

  • Mount the jointer on a flat, stable surface or stand before you use it.
  • Minimum stock size: WEN says not to joint material shorter than 8-1/8″, narrower than 3/4″ or thinner than 1/4″.
  • Use a push block or push stick for anything narrower or thinner than 3″.
  • Never cut deeper than 1/8″ in one pass. WEN recommends 1/32″.
  • Keep the cutterhead guard in place. On a jointer it covers the knives the moment the board passes.
  • Don’t stand in line with the cutterhead’s rotation, and keep others out of that line: kickback and thrown debris travel that way.
  • Don’t wear gloves, loose sleeves or jewelry while the machine runs. Wear eye and hearing protection and a dust mask.
  • Check the board for nails, staples, splits and loose knots before it touches the knives.
  • Never back the board toward the infeed table while the cutterhead is turning.
  • Let the jointer reach full speed before feeding, and unplug it before any adjustment.

⚠️ Hands Never Pass Over the Cutterhead

Your hands move over the guard, not past an exposed cutterhead, and they always stay on top of the board. When a board is too short or thin to keep your fingers well clear, it is too small for the jointer: plane it by hand or use a sled on a planer instead.

Set Up the Jointer Before the First Board

Check the Outfeed Table Height

The outfeed table must sit exactly level with the top of the knives at their highest point. Unplug the machine, rotate the cutterhead with the wrench until a knife or insert is at top dead center, and lay a straightedge on the outfeed table so it reaches over the head. The knife should just brush the straightedge. WEN’s manual has you check both ends of the cutterhead and adjust in tiny steps, about 1/20 of a turn of the adjustment screw at a time. If the outfeed table is too high, the board hits its edge and the cut tapers off; if it’s too low, the knives take a bite at the end of the board, called snipe.

Square the Fence

Set the fence to 90° with an accurate square resting on the outfeed table, then lock it. Joint an edge on a scrap, check it with the square, and adjust if needed. Recheck it with the square after you tilt the fence for a bevel and bring it back, and before every glue-up.

Set the Depth of Cut

Lower the infeed table to 1/32″ on the scale for normal work. That light cut gives a smoother surface, puts less load on a 10 A benchtop motor and wears the knives more slowly. Go up to 1/16″ for the first passes on a rough board, never past the manual’s maximum. On wider jointers the maximum drops with width: WEN’s manual for the 8″ JT833H says to reduce the depth by 1/32″ for each inch of width over 6″.

Connect Dust Collection

A jointer throws a lot of chips for its size, and a clogged chute stalls the cut. Benchtop jointers have a 2-1/2″ port; some 8″ models add a 4″ adapter. WEN recommends running the collector on a separate circuit from the jointer. A shop vacuum works on a 6″ benchtop jointer for light jointing, but a dust collector keeps up better: see my guide to dust collection for woodworking tools.

How to Use a Jointer, Step by Step

Read the Board First

Sight down each face and edge to find the cup, bow and crook. Place a cupped board cup-side down so it rests on its two edges and doesn’t rock. Place a bowed board crown up, so it rests on both ends and the jointer removes the ends first. Then look at the grain on the edge: feed so the knives cut “downhill” with the grain, the same way you’d stroke a cat. Feeding against the grain tears out fibers, and WEN’s manual says to take extremely light cuts and feed slowly if you have no choice.

Face Jointing

  1. Mark the face with a few pencil squiggles. They disappear where the knives have cut, so you can see progress.
  2. Start the jointer and wait for full speed, with the board clear of the cutterhead.
  3. Place two push blocks on the board, one near the front and one near the back.
  4. Feed at an even rate. Keep the board down on the infeed table at the start. WEN warns that any pause cuts a step into the board.
  5. Shift pressure to the outfeed side once a few inches of board have passed the cutterhead. The outfeed table now references the flat surface you just made. Keep moving your hands forward one at a time, never over an exposed cutterhead.
  6. Feed all the way through and lift the board away from the outfeed table.
  7. Repeat until the pencil marks are gone from the whole face. Check the face with a straightedge across, along and diagonally.

Edge Jointing

  1. Hold the jointed face against the fence, with the edge down on the infeed table.
  2. Keep your hands high on the board, pressing it into the fence and down onto the table at the same time. On a narrow board, use a push stick at the back end.
  3. Feed steadily, again moving pressure to the outfeed side once the cut is under way.
  4. Stop when the edge is straight end to end and check it against the face with a square.

Jointer Techniques for Real Boards

How to Straighten a Bowed or Crooked Board

Put the board crown up, so it rocks on its ends. Take a few short passes on each end, without feeding the whole length, until the middle almost touches the knives, then run full-length passes. For a crooked edge, joint the concave side with the hollow down, so the board sits on its ends. On a long, badly crooked board, it is faster to snap a line and rip close to it on the band saw or table saw, and then joint the edge. If the band saw is new to you, my guide on how to use a band saw covers setup and straight rips.

Boards Longer Than the Tables

A benchtop jointer has tables around 30″ to 34″ long, and the WEN JT833H extends to 51″. When a board hangs well past either end, set a roller stand level with the outfeed table so the board doesn’t tip at the end of the pass. WEN’s manual also says to support long workpieces at both ends. Cut long boards to rough length before you joint them when the project allows it: shorter boards come out straighter with less waste.

Boards Wider Than the Jointer

If a board is wider than the cutterhead, you have three choices: rip it into two pieces, joint them and glue them back up; flatten the face on the thickness planer with a sled; or hand-plane the face. Don’t remove the guard to take a partial-width cut.

Bevels and Chamfers

Tilt the fence to the angle you need and lock it, then joint the edge with the board pressed firmly into the fence. A chamfer usually takes one light pass; a full bevel takes several.

Common Jointing Mistakes

  • Pressing on the infeed side for the whole pass. It copies the bow instead of removing it. Move your pressure to the outfeed table.
  • Taking heavy cuts. A deep cut on a 6″ benchtop jointer bogs the motor, tears grain and wears the knives faster.
  • Jointing both faces. A jointer can make both faces flat, but not parallel. The second face belongs to the planer.
  • Outfeed table out of adjustment. Too high gives a tapered cut that stalls; too low gives snipe at the end of each board.
  • Feeding against the grain. It tears out chunks, especially in figured wood. Flip the board end for end.
  • Pausing mid-pass. Every stop leaves a step.
  • Fingers on the end of the board or close to the guard. Use push blocks.

What Comes After the Jointer

The standard milling sequence is: joint one face, joint one edge, plane the opposite face to thickness, rip the second edge parallel on the table saw, then crosscut to length. The planer step is covered in how to use a thickness planer, and if you need a planer, the best thickness planer picks and the DeWalt DW735 vs DW734 comparison cover the benchtop models. After milling, the jointer and planer marks come off with a random orbital sander, starting around 120 grit.

Jointers and Push Blocks I’d Start With

These are chosen from the makers’ specifications and the way each machine fits a home shop, not from shop testing. For the full comparison, see my benchtop jointer reviews.

WEN JT630H 6″ Spiral Benchtop Jointer

WEN JT630H 6 inch spiral benchtop jointer

A Good First Jointer

The JT630H is the jointer whose manual this guide quotes most. WEN lists a 10 A motor, 12,000 RPM, a spiral head with 12 inserts, a maximum cut of 1/8″ with 1/32″ recommended, a 30″ x 6-3/16″ table and a 2-1/2″ dust port. Two push blocks come in the box. The inserts are high-speed steel, and you rotate one to a fresh edge when it chips instead of resetting a full knife.

Check price on Amazon

  • ✅ Spiral head in a low price tier
  • ✅ Push blocks included
  • ✅ Light enough to store on a shelf
  • ❌ 6″ width limit
  • ❌ HSS inserts dull faster than carbide

Best For: Learning to face and edge joint on narrow stock.


Cutech 40160HB 6″ Spiral Cutterhead Benchtop Jointer

Cutech 40160HB 6 inch spiral cutterhead benchtop jointer

Carbide Inserts for Less Maintenance

Cutech’s 6″ jointer pairs a spiral head of 12 two-sided carbide inserts with 30″ x 6-1/4″ aluminum tables that Cutech coats to reduce friction, which helps when you’re feeding long boards by hand. It runs at 11,000 RPM on a 10 A motor, takes up to 1/8″ per pass and carries a 3-year limited warranty. Carbide holds an edge longer than steel in hardwoods and figured grain.

Check price on Amazon

  • ✅ Two-sided carbide inserts
  • ✅ Coated tables
  • ✅ 3-year limited warranty
  • ❌ 6″ width limit
  • ❌ Aluminum tables, not cast iron

Best For: Regular jointing of hardwood and figured boards.


POWERTEC 5-Piece Push Block and Push Stick Set (71009V)

POWERTEC five piece push block and push stick set for jointers and table saws

Spare Push Blocks Worth Having

Push blocks wear out and go missing, and face jointing takes two. This POWERTEC set has one long and two short hold-down push blocks, a V-notch push stick and a straight push stick. POWERTEC lists push blocks for face jointing and the sticks for jointers, table saws, router tables and shapers. The blocks keep steady downward pressure on the board as it crosses the cutterhead, and the narrow sticks handle edge jointing on thin stock near the fence. Keep a set at every machine so you never feed a short board by hand.

Check price on Amazon

  • ✅ Three push blocks and two push sticks
  • ✅ Works on the jointer, table saw and router table
  • ❌ The blocks’ grip wears and needs checking

Best For: Replacing or adding to the push blocks that came with your jointer.


🏆 The Verdict

Using a jointer well is about a correctly set outfeed table, light 1/32″ passes, and pressure that moves to the outfeed side as the board goes through. Flatten one face, joint one edge square to it, and let the planer and table saw do the rest. Keep the guard on and the push blocks in your hands for anything thin or narrow.

❓ Frequently Asked Questions

How do you properly use a jointer?+
Set the outfeed table level with the knives, square the fence and set a cut of about 1/32″. Flatten one face first with push blocks, moving your pressure from the infeed to the outfeed table as the board passes the cutterhead. Then hold that face against the fence and joint one edge square to it.
What are common jointing mistakes?+
The usual ones are keeping all the pressure on the infeed table, which copies a bow instead of removing it, taking cuts that are too deep, pausing mid-pass, feeding against the grain, and an outfeed table set too high or too low. Each one leaves a taper, a step, tear-out or snipe on the board.
Do I need a jointer if I have a planer?+
For rough or warped lumber, usually yes. A planer makes the second face parallel to the first, so a cupped or twisted board comes out thinner but still cupped or twisted. A planer sled can stand in for face jointing, and a table saw jig can straighten edges, but both are slower than a jointer.
What do you use a jointer for?+
A jointer flattens one face of a board and straightens one edge square to it. That gives you the two reference surfaces a planer and table saw need to finish milling, and it produces tight, glue-ready edges for tabletops and panels. It can also cut bevels and chamfers with the fence tilted.
How do you straighten a bowed board on a jointer?+
Lay it crown up so it rests on both ends. Take a few short passes off each end until the middle is close to the knives, then make full-length passes with light cuts until the face is flat. For a long board with a lot of bow, cut it to rough length first so less wood has to come off.
How much should a jointer take off per pass?+
About 1/32″ for most work. WEN, for example, allows up to 1/8″ on its benchtop jointers but recommends 1/32″ for a smoother surface and longer knife life. Take 1/16″ passes only on very rough boards, and reduce the depth on wide stock, especially on an 8″ jointer.

Have a jointer question I didn’t answer? Ask in the comments and I’ll reply.

Types of Sandpaper: Aluminum Oxide, Silicon Carbide, Garnet, Ceramic and Zirconia

Types of sandpaper: rolls of red, yellow and green abrasive paper in a workshop rack

The types of sandpaper differ in four ways: the abrasive mineral (aluminum oxide, silicon carbide, zirconia alumina, ceramic, or natural garnet and emery), the backing (paper, cloth, film, mesh or fiber), how densely the grains are spread (open or closed coat), and coatings such as stearate. Grit is a fifth choice, but it’s the same scale on every type. In short: aluminum oxide for most wood and metal sanding, silicon carbide for finishes and wet sanding, zirconia and ceramic for heavy removal with a machine, and garnet for hand-sanding bare wood.

Below is what each abrasive mineral is, how they compare, what the backing and coating letters on a sheet mean, and which type to buy for wood, finishes, metal and floors, with one example of each. The facts come from the abrasive makers: Klingspor, Mirka and 3M.

⚡ Quick Answer

Bare wood, paint, steel: aluminum oxide, open coat on resinous softwood.

Between coats, plastics, wet sanding: silicon carbide on waterproof paper.

Heavy removal with a belt or disc sander: zirconia or ceramic in the coarse grits.

Types of Sandpaper by Abrasive Mineral

The mineral is the part that cuts, so it decides what the paper is good at. Klingspor splits them into natural grains (flint, garnet and emery), which it says are barely used any more in abrasive production, and synthetic grains (aluminum oxide, zirconia alumina, silicon carbide and ceramic aluminum oxide), which offer more hardness, toughness and consistency.

Mineral Hardness / toughness How it wears Use it for
Aluminum oxide Hard / tough Even wear, cuts finer as it dulls Bare wood, paint, most metals: the all-rounder
Silicon carbide Very hard / less tough Sharp, friable, keeps a sharp edge Finishes, sealers, plastic, glass, wet sanding
Zirconia alumina Hard / very tough Self-sharpening under machine pressure Coarse belts and flap discs, 24 to 60 grit
Ceramic aluminum oxide Hard / very tough Micro-wear, self-sharpening Fast removal on hardwood, floors and metal
Garnet (natural) Softer, wears fast Dulls quickly Hand-sanding bare wood
Emery (natural) Moderate Slow, polishing cut Cleaning and polishing metal by hand

The first four rows follow Klingspor’s own grain table (bond and toughness, structure, wear). Garnet and emery are natural minerals Klingspor no longer makes abrasives with, so their rows summarize how 3M and abrasive sellers describe them.

Aluminum Oxide Sandpaper

Aluminum oxide is the default. Klingspor says it’s made by firing bauxite and other materials in an electric furnace, then crushing the mass into naturally pyramid-shaped grains that are very durable. It calls it a “tremendous general-purpose grain” for bare wood, most metals (especially steel) and leather, and probably the most common grain in use. Mirka agrees: aluminium oxide grains are sharp and tough enough for most applications.

One useful detail from Klingspor: aluminum oxide wears down rather than shattering, so it sands finer as it’s used. A sheet that starts at 80 grit ends up cutting more like 100 or 120. That’s why a worn disc still polishes but no longer removes much.

Silicon Carbide Sandpaper

Silicon carbide is the black paper on most wet/dry sheets. Klingspor explains that it’s made from silica sand and coke melted in an electric furnace, that its grains are icicle-shaped with very sharp points, and that it’s second only to diamond in hardness but very brittle. It fractures under light pressure, which keeps a fresh sharp edge on the work and gives a consistent finish, but it wears out sooner. Klingspor lists glass, plastic, rubber, paint, varnish, lacquer and sealers as typical materials.

Mirka describes the grain differently, saying silicon carbide is more regular in shape and not as brittle as aluminum oxide, and that it gives a better surface finish, which suits intermediate sanding. The makers disagree on the physics but land on the same job: silicon carbide is for finishing, not for heavy removal.

Aluminum Oxide vs Silicon Carbide

Use aluminum oxide when you’re removing material from wood or steel with real pressure: it’s tougher and lasts longer. Use silicon carbide for light, fine work: sanding between coats of finish, wet sanding paint and plastics, and glass or stone. On soft, resinous wood like pine, Klingspor says it occasionally sees silicon carbide used but recommends open-coat aluminum oxide instead for better life. On metal, my guide to the best sandpaper for metal covers the split for steel, aluminum and brass.

Zirconia Alumina Sandpaper

Zirconia alumina is usually blue. Klingspor says it combines the toughness of aluminum oxide with the friability of silicon carbide, but with a catch: it needs machine pressure to fracture and stay sharp. Without enough pressure the grain glazes and its life drops. That’s why you find it on belts, flap discs and planing or dimensioning machines, not on hand sheets. Klingspor adds that the grain costs 15 to 40% more to produce, so it’s best value in the removal grits, 24 to 60.

Ceramic Sandpaper

Ceramic aluminum oxide is the most aggressive common grain. Klingspor says it’s made from bauxite with other materials in a chemical bonding process that gives a porous, coral-like grain, and that it was developed for rough grinding on metal before spreading to other sanding. Mirka says special ceramic grains form new edges as they wear, so they keep cutting longer, and that they’re designed for hard materials and coatings such as hardwood and solid surface. Both makers point the same way: use ceramic for the coarse, removal grits, then switch to regular aluminum oxide or silicon carbide for the finer steps.

Ceramic vs Zirconia vs Aluminum Oxide

For a belt sander on a rough board or a floor sander on an old finish, ceramic and zirconia outlast aluminum oxide in coarse grits, as long as the machine applies steady pressure. For hand sanding, light pressure and finer grits, plain aluminum oxide does the same job for less, because neither premium grain gets the pressure it needs to self-sharpen.

Garnet Sandpaper

Garnet is a natural mineral and the traditional woodworker’s paper, usually orange-red. 3M sells it for bare and unfinished wood, describing sharp, clean cutting power designed for quality smooth finishes. It wears faster than the synthetics and dulls almost at once on metal. Some finishers still like it for the last hand-sanding step before stain, but there’s no maker data to say it produces a better finish than fine aluminum oxide.

Emery and Flint

Emery is a natural, dark grain usually sold on cloth for metal: cleaning copper pipe before soldering, polishing rods and bolts. Flint is the third natural grain. Klingspor groups both with garnet as natural grains that are barely used in modern abrasives.

💡 Pro Tip

Don’t buy by color. Klingspor lists the natural colors (aluminum oxide brown, pink or white; silicon carbide black; zirconia blue or blue-gray; ceramic white), but says manufacturers can dye the coating any color, and stearate hides it too. Read the mineral on the back of the sheet or in the listing.

Types of Sandpaper by Backing

Paper (Weights A to F)

Klingspor’s backing guide grades paper by weight from A (lightest) to F (heaviest). A to C are the flexible papers used for hand sanding and for power sanding with sheets or discs; D to F are stiffer, and only E and F are heavy enough for belts. The letter is often printed next to the grit, as in “80D” or “100C”.

Cloth (J, X, Y)

Cloth backings are tougher and last longer on belts. Klingspor names three weights: J (light, flexible cotton), X (heavier, general-purpose cotton, the usual portable-belt backing) and Y (polyester, for heavy-duty and wet work). Cotton isn’t waterproof unless treated and marked W/D or WP; polyester is waterproof by nature.

Film, Mesh, Foam and Fiber

  • Film: a plastic backing that stays flat and doesn’t tear on edges, common on premium sander discs for paint and metal.
  • Mesh: an open net, such as Mirka Abranet, that lets a vacuum pull dust through the whole disc.
  • Foam: sanding sponges and soft pads that follow curves; see the best sanding blocks and sponges.
  • Fiber: vulcanized layers of heavy paper, used for grinder discs.

Open Coat vs Closed Coat Sandpaper

The coat is how densely the grains cover the backing. Klingspor distinguishes closed, semi-open and open coating. Open coat leaves space between grains so dust clears and the paper doesn’t clog on long-chipping materials such as wood; closed coat, with more grains, gives good stock removal and a smooth finish, Mirka says, but loads up faster. Choose open coat for softwood, paint and finishes, and closed coat for hardwood and metal.

Stearate (Anti-Clog) Coatings

Mirka explains that some abrasives get a zinc or calcium stearate layer, small flakes on top of the grains that wear off during use and stop the paper clogging. Stearate slightly reduces the initial cut, which makes the finish more consistent over the life of the sheet. Mirka says stearated products work best on paint, lacquer and similar surfaces, and give no advantage in coarse sanding with high pressure, where the coating wears off at once.

Glue or Resin Bond

Every sheet has two adhesive layers: a maker coat that holds the grain and a size coat over it. Klingspor says most abrasives today are resin bonded, which protects the grain from heat and extends life; glue bonds soften when hot, giving a softer scratch but less cut, and are now mostly on finishing papers.

Which Type of Sandpaper for Which Job

Job Mineral Backing / coat More detail
Bare hardwood Aluminum oxide Paper or film disc, closed or semi-open Best sandpaper for wood
Pine and resinous softwood Aluminum oxide Open coat, stearated Grit for wood
Between coats of finish Silicon carbide Waterproof paper or mesh, 320+ Sanding between coats
Old paint and varnish Aluminum oxide or ceramic Stearated, open coat Strip paint from wood
Steel and rust Aluminum oxide, zirconia, ceramic Cloth, film or flap disc Sandpaper for metal
Car paint, plastic, glass Silicon carbide Waterproof, used wet Grit for car paint
Floors and belt sanding Zirconia or ceramic (coarse) Cloth belt or heavy paper Refinish hardwood floors

Grit works the same way across every mineral: the sandpaper grit chart converts CAMI, P-grade and micron numbers and gives the grit for each job.

Sandpaper Formats: Sheets, Discs, Belts and Rolls

The same minerals come in many shapes. 9 x 11 in sheets are cut for hand blocks and 1/4-sheet sanders. Hook-and-loop discs fit random orbital sanders, and their holes must line up with the pad unless you use mesh. Belts are sized by the sander (3 x 21 in is the common portable size). PSA discs and rolls stick on with adhesive. Match the format to the tool first, then pick the mineral; my guide to types of sanders shows which tool takes which.
One Example of Each Type

These are examples of each mineral from brands that publish what’s in the box. Specs come from the makers or, where I say so, the Amazon listing. I don’t show customer ratings or prices.

3M Aluminum Oxide Sandpaper, 100-150-220 Assortment

3M aluminum oxide sandpaper sheets, assorted 100 150 220 grit

Aluminum Oxide: the All-Rounder

A simple way to try the standard mineral: aluminum oxide sheets in 100, 150 and 220 grit, full 9 x 11 in, the three grits most wood and paint projects go through. Cut them in quarters for a block or a 1/4-sheet sander. For premium aluminum oxide sheets and discs, see the best sandpaper for wood.

Check price on Amazon

  • ✅ The general-purpose mineral
  • ✅ Three useful grits in one pack
  • ❌ Only five sheets

Best For: Hand sanding wood and scuffing paint.


3M Wetordry Sandpaper, 320 Grit

3M Wetordry silicon carbide sandpaper, 320 grit sheets

Silicon Carbide: for Finishes and Wet Sanding

The classic black wet/dry sheet. It’s silicon carbide on waterproof paper, used dry or with water to stop clogging, and the listing sells it for final and between-coats sanding. The pack has 25 sheets of 9 x 11 in at 320 grit. For the fine automotive range, 3M sells the same Wetordry line up to 2500.

Check price on Amazon

  • ✅ Wet or dry
  • ✅ Fine, even scratch on finishes
  • ❌ Wears quickly under heavy pressure

Best For: Between coats of finish, sealer, plastic and paint.


Mercer Garnet Paper Sheets, 80D

Mercer garnet sandpaper sheets 9 x 11 inch, 80 grit D weight

Garnet: Traditional Paper for Bare Wood

If you want to try garnet, this is a bulk pack: 50 sheets, 9 x 11 in, 80 grit, on a D-weight, latex-backed paper, which is the letter system described above. The listing calls it garnet grain for general-purpose sanding on wood, cut to fit a block or a sander, and says the same sheets come in 36 to 240 grit.

Check price on Amazon

  • ✅ Classic wood-only abrasive
  • ✅ Heavy D-weight paper
  • ❌ Wears faster than aluminum oxide

Best For: Hand sanding bare wood.


ABRTEN 3 x 21 Zirconia Sanding Belts, 10-Pack

ABRTEN 3 x 21 inch zirconia sanding belts, 40 60 80 120 grit

Zirconia: for a Belt Sander

Zirconia belongs on a machine, and the 3 x 21 in belt sander is the one most people own. These are zirconia alumina belts in 40, 60, 80 and 120 grit, ten in the pack, sold for hardwood leveling and metal work. That’s the 24 to 60 removal range where Klingspor says zirconia pays off, plus 80 and 120 to clean up. My best belt sander guide covers the machines.

Check price on Amazon

  • ✅ Coarse grits for fast removal
  • ✅ Fits standard 3 x 21 belt sanders
  • ❌ Needs machine pressure; not for light work

Best For: Leveling boards and glue-ups with a belt sander.


Dura-Gold 5″ Ceramic Film Discs, 50-Disc Variety Pack

Dura-Gold 5 inch purple film ceramic sanding discs variety pack, 8 hole

Ceramic: for a Random Orbital Sander

A ceramic disc in every grit from coarse to fine: five discs each of 60, 80, 120, 180, 220, 320, 400, 600, 800 and 1000 grit, with ceramic grain fused with zirconia alumina on a film backing, 5″ with an 8-hole hook-and-loop back. Dura-Gold says they resist clogging and run cooler. Use the coarse ones where ceramic shines and the fine ones to finish.

Check price on Amazon

  • ✅ Ceramic and zirconia on tear-resistant film
  • ✅ Ten grits in one box
  • ❌ Only five discs per grit

Best For: Hardwood, paint and metal on a 5″ random orbital sander.


Mirka Abranet 5″ Mesh Disc Assortment

Mirka Abranet 5 inch mesh sanding discs assortment

Mesh: the Dust-Free Backing

Abranet shows what a backing can change. The abrasive sits on an open mesh, so a vacuum pulls dust through the whole disc and it fits any 5″ hook-and-loop pad, whatever the hole pattern. The box has 35 discs in 80, 120, 180, 240, 320, 400 and 600 grit, and Mirka lists it for wood, putty, paint, plastic and metal. Without a vacuum, most of the benefit is gone.

Check price on Amazon

  • ✅ Dust extraction through the whole disc
  • ✅ Clogs far less on paint and filler
  • ❌ Needs a vacuum or dust extractor

Best For: Random orbital sanding with a shop vac or extractor attached.


Bates Emery Cloth Rolls, 1″ x 20 ft, 6 Grits

Bates emery cloth rolls, 1 inch by 20 feet, six grits

Emery: for Pipe and Small Metal Parts

Emery on a cloth backing is the abrasive you wrap around a pipe and pull back and forth. This set has six 1″ x 20 ft rolls in 80, 150, 240, 320, 400 and 600 grit in a dispenser box. It cuts slowly, so it’s for cleaning and finishing copper, rods and bolts, not for heavy rust.

Check price on Amazon

  • ✅ Cloth wraps round stock
  • ✅ Six grits, tear to length
  • ❌ Slow on heavy rust

Best For: Copper pipe, rods, bolts and small parts.


How I Put This Guide Together

The descriptions of each mineral, backing and bond come from Klingspor’s coated abrasives basics and its grain-type reference, Mirka’s guide to how abrasives are made, and 3M’s product page for its garnet sheets. Where the makers disagree, as on how brittle silicon carbide is, I’ve said so. Norton’s abrasive guides could not be loaded for this article, so I haven’t quoted them. Product specs come from the makers or the Amazon listing, and I don’t show customer ratings or prices. More on how I choose the products I recommend.

🏆 The Verdict

Most of the time you need two types of sandpaper: aluminum oxide for wood, paint and steel, and silicon carbide for finishes and wet sanding. Add zirconia or ceramic only for coarse grits on a belt, disc or floor sander, where machine pressure keeps them sharp. Choose open coat and stearate when the paper clogs, and match the format to your sander before anything else.

❓ Frequently Asked Questions

Is aluminum oxide better than silicon carbide?+
Neither is better overall; they do different jobs. Aluminum oxide is tougher and lasts longer under pressure, so it wins for sanding bare wood and steel. Silicon carbide is harder and sharper but breaks down faster, so it wins for light finishing work, wet sanding and materials like glass, plastic and cured finish.
Is aluminium oxide sandpaper any good?+
Yes, it’s the standard abrasive for good reason. Klingspor calls it a tremendous general-purpose grain for bare wood, most metals and leather, and Mirka says its grains are sharp and tough enough for most applications. Quality varies by brand, backing and coating more than by the mineral itself.
What is garnet sandpaper used for?+
Garnet sandpaper is used for hand-sanding bare, unfinished wood. 3M sells its garnet sheets for exactly that, citing a sharp, clean cut and a smooth finish. It wears out faster than synthetic minerals and is a poor choice for metal, paint or power sanding, where aluminum oxide lasts much longer.
What is the most aggressive sandpaper?+
By mineral, ceramic is the most aggressive common abrasive, with zirconia alumina close behind; both are designed for heavy removal under machine pressure. By grit, the lowest numbers cut hardest: 24 to 40 grit on floor and belt sanders. Combine a coarse grit with ceramic for the fastest stock removal.
What type of sandpaper is best for metal?+
Aluminum oxide for general sanding and paint prep on steel, zirconia or ceramic for heavy rust and weld cleanup on a grinder or sander, and silicon carbide for wet sanding, polishing and softer non-ferrous metals like aluminum and brass. Cloth or film backings hold up better than paper on sharp metal edges.
What’s the difference between open coat and closed coat sandpaper?+
Open coat sandpaper has gaps between the grains, so sawdust and finish clear out and the paper doesn’t clog as fast, which suits softwood, paint and finishes. Closed coat is fully covered with grain, cuts faster and leaves a finer scratch on hardwood and metal, but loads up sooner on gummy material.

Conclusion

The types of sandpaper come down to the mineral, the backing, the coat and the coating, and once you know what each one is for, the shelf gets simple. Aluminum oxide and silicon carbide cover most work; zirconia and ceramic earn their price on machines in coarse grits; garnet and emery are specialist papers. Pick the grit next with the sandpaper grit chart, and if you’re sanding wood, my guide to what grit sandpaper for wood gives the full sequence.

How to Remove Polyurethane from Wood (With or Without Sanding)

How to remove polyurethane from wood: a woodworker holding a scraper over an old finished workbench

To remove polyurethane from wood, soften it with a paint and varnish stripper, scrape it off with the grain, clean off the residue, then sand the bare wood from 120 to 180 or 220. On flat, solid wood you can skip the chemicals and sand it off from 80 grit, and on a floor sanding is the normal route. Cured polyurethane doesn’t dissolve in mineral spirits, vinegar or water, so household tricks won’t shift it.

This guide covers how to confirm the finish really is polyurethane, the stripper method step by step, how to sand poly off without clogging a pack of discs, what to do on veneer, carvings and floors, whether you can keep the stain underneath, and the strippers, scrapers and sanders that make it faster.

⚡ Quick Answer

Furniture, carvings, veneer: brush on a thick coat of Citristrip gel, wait from 30 minutes up to 24 hours, then lift it with a plastic or contour scraper.

Flat solid wood: sand it off with a random orbital sander, 80 then 120 then 180, on fresh discs.

Floors: a floor sander, starting at 36 or 40 grit. See my guide on refinishing hardwood floors.

How to Remove Polyurethane from Wood: Pick the Method

Method Best for Avoid on Main drawback
Chemical stripper Furniture, carvings, chairs, veneer Plastic, fiberglass Messy, slow on thick poly
Sanding Flat solid-wood tops, doors, floors Veneer, carvings, lead paint Clogs discs; removes some wood
Scraping Softened finish, thin coats on flat wood Soft woods with a heavy hand Can gouge; slow on hard poly
Heat gun Thick finish on trim and doors Veneer, near glass, lead paint Scorch marks; fire risk

Most real projects mix them: stripper on the legs and carvings, a scraper to lift the softened finish, and a sander to clean up the flat top. The same choices apply to paint, which my guide on how to strip paint from wood compares in more detail.

Step 1: Make Sure It’s Polyurethane

Old furniture is just as likely to wear shellac or lacquer, which come off far more easily. Fine Woodworking describes a simple solvent test. Clean a hidden spot with mineral spirits to remove wax, then put a drop of denatured alcohol on it, wait a few minutes and rub: if finish comes off, it’s shellac. If not, try lacquer thinner: if the surface turns sticky, it’s lacquer or a water-based finish. If neither affects it, you have a reactive finish such as varnish or oil-based polyurethane, and that’s the one that needs a stripper or sandpaper.

Oil-Based vs Water-Based Polyurethane

Oil-based poly ambers with age and passes both solvent tests untouched. Water-based poly stays clear and, by the same test, softens under lacquer thinner. Both come off with a paint and varnish stripper; lacquer thinner on a rag can help clean up a water-based coat on a small piece.

⚠️ Important

If there’s paint under the clear coat, or the piece was painted at some point, and the home was built before 1978, test for lead before you sand or use heat. Use a stripper and wet scraping instead of dry sanding, and keep children and pets away from the work.

Step 2: Strip Polyurethane with a Chemical Stripper

This is the method for anything that isn’t a flat slab of solid wood. Since November 2019, the EPA has banned the sale of methylene chloride paint removers to consumers, after deaths linked to its fumes, so the strippers sold today work more slowly. Plan on a longer wait, not a weaker result.

How to Use a Stripper on Polyurethane

These steps follow the Citristrip Paint & Varnish Stripping Gel label, which lists polyurethane among the finishes it removes:

  1. Protect yourself and the room. Chemical-resistant gloves, splash goggles, cross-ventilation and a heavy plastic drop cloth. The label gives 65 to 85°F as the best range, away from strong breeze and hot sun.
  2. Apply a heavy coat, about 1/16 in thick, with a paint brush. Don’t brush back and forth: lay it on and leave it.
  3. Wait. After 30 minutes, scrape a small test area. If the finish isn’t ready, wait longer: the gel stays active up to 24 hours as long as it stays wet. For overnight stripping, cover it with plastic.
  4. Scrape with the grain using a plastic stripping tool. For stubborn spots, use an abrasive stripping pad dipped in the stripper; for carvings and grooves, a toothbrush, toothpick or stripping brush.
  5. Clean off the residue with a clean abrasive pad dipped in After Wash or odorless mineral spirits. The wood must be clean and dry before you refinish.
  6. Repeat on any areas where finish remains. Several coats of poly may need a second round.

How Long Does It Take?

That depends on how many coats are on the piece and how old they are. One thin coat can lift at the 30-minute check; a table with four or five coats of oil-based poly is often an overnight job under plastic. Trust the test scrape, not the clock, and keep the stripper wet: once it dries, it stops working.

Scraping Without Gouging

Use plastic on soft woods and veneer, a contour scraper on moldings, and a carbide scraper only on hard, solid wood with light pressure. Always pull with the grain. Scraper marks and gouges show up again as dark lines when you re-stain.

Step 3: Sand Polyurethane Off

On a flat tabletop or door of solid wood, sanding alone is often faster than stripping, and on a floor it’s the standard method. Polyurethane is hard and turns gummy under heat, so the technique matters.

What Grit to Sand Polyurethane Off

  • 80 grit to break through the finish on furniture and doors.
  • 120 grit to remove the 80-grit scratches and the last of the finish.
  • 180 grit to finish before stain, or 220 before a clear coat.
  • Floors: 36 or 40 to start, then 60 and 80 or 100.

The wood grit guide explains why you shouldn’t skip more than one grit, and the sandpaper grit chart has every step.

Stop the Discs from Clogging

Finish loads up sandpaper fast. Mirka says stearate coatings give the best results when sanding paint, lacquer and similar surfaces, and that open-coat abrasives, with fewer grains, resist clogging. Use stearated or open-coat discs, keep the sander moving, connect a vacuum, and change discs as soon as they stop cutting: a loaded disc just heats the finish and smears it. Mesh discs are another answer, because the dust goes through the whole disc.

Which Sander to Use

A 5″ or 6″ random orbital sander does tops, doors and panels. A sander with an aggressive mode, like the Bosch GET65-5N in its turbo setting, removes finish noticeably faster. A detail sander reaches inside corners. For floors, see my guide on how to refinish hardwood floors.

Careful on Veneer

Many tabletops and cabinet doors are veneer: a layer of wood that can be thinner than a sheet of card. Check the edges and the underside for a different grain or a line of plywood. On veneer, use a stripper, skip 80 grit, and finish with 150 to 180 by hand or with very light pressure.

Other Ways to Remove Polyurethane

Heat Gun

Heat softens a thick film finish so a scraper can lift it. Keep the gun moving, hold the scraper right behind it, and stop before the wood darkens. It’s best on trim and doors with thick coats; skip it on veneer, near glass and on anything that may contain lead paint. My best heat gun for paint removal guide has the details.

Acetone, Lacquer Thinner and Mineral Spirits

Solvents behave differently on different finishes, which is the whole point of the solvent test above. Mineral spirits removes wax and cleans up stripper residue, but it doesn’t dissolve cured polyurethane. Lacquer thinner can soften lacquer and water-based finishes. Acetone, a strong and fast-evaporating solvent, may soften some water-based coatings but evaporates too fast to strip a thick oil-based film. For cured oil-based poly, a stripper is the reliable chemical route.

Vinegar, Baking Soda and Other Household Tricks

Household vinegar is a dilute acid sold as a cleaner. I haven’t found any finish maker that recommends it, or any household product, for removing cured polyurethane, so I wouldn’t spend an afternoon on it.

Can You Remove Polyurethane Without Removing the Stain?

Rarely, completely. Stain sits in the top fibers of the wood, right under the finish. A stripper lifts the poly and usually some of the color with it, and sanding that’s deep enough to remove the poly cuts into the stained layer. If the color is what you like, the realistic plan is to remove the topcoat as gently as possible (stripper and plastic scraper, no coarse grits), then touch up or re-stain the lighter areas before the new topcoat. If you want to remove the stain too, my guide on how to remove stain from wood covers sanding it out and bleaching.

Removing Polyurethane by Project

Table or Dresser

Strip the legs, aprons and carved parts; sand the top if it’s solid wood, strip it if it’s veneer. Clean all residue, then sand 120 to 180 before stain. My guide on refinishing wood furniture walks through the rest.

Cabinets

Take the doors off and work flat. Many cabinet doors are veneer over plywood or MDF, so use a stripper and gentle sanding. If you’re painting instead of re-staining, you don’t need the poly off at all: clean, scuff or degloss, and prime. My guide to liquid sandpaper explains that route.

Wood Floors

Floors are sanded, not stripped: there’s too much area for a gel. A drum or orbital floor sander starts at 36 or 40 to cut through the finish. See how to refinish hardwood floors, or, if the finish is only worn and not damaged, refinishing without sanding may be enough.

After the Polyurethane Is Off

Let the wood dry fully after any stripper or water. Sand the whole surface to one even grit so stain takes evenly, remove every bit of dust and check under a low light for leftover finish: it shows as shiny patches that won’t take stain. Then follow how to stain wood and seal it again.

Tools That Make Removing Polyurethane Easier

The specs below are from the makers’ labels and pages, or the Amazon listing where I say so. I don’t show customer ratings or prices.

Citristrip Paint & Varnish Stripping Gel

Citristrip paint and varnish stripping gel for removing polyurethane from wood

Best Stripper for Polyurethane on Furniture

Citristrip’s label lists polyurethane, varnish, lacquer, shellac and paint among what it removes from wood, metal and masonry. It’s a gel that stays wet and active for up to 24 hours, so it can lift several coats in one go, and the label says it’s suitable for indoor use with cross-ventilation. It contains no methylene chloride or NMP; wear gloves and goggles. Citristrip doesn’t recommend it on plastic or fiberglass.

Check price on Amazon

  • ✅ Rated for polyurethane on the label
  • ✅ Up to 24 hours of working time
  • ✅ Gel clings to legs and carvings
  • ❌ Slow: plan on a long wait for thick poly

Best For: Chairs, tables, dressers and anything with carvings.


Dumond Smart Strip PRO

Dumond Smart Strip PRO water-based paint and varnish remover, 1 quart

Best for Many Layers at Once

When there’s paint and varnish on top of each other, Smart Strip PRO is the heavier option. The listing says it removes up to 20 layers of oil, latex and acrylic paints, varnishes and stains in one application, with a wait of up to 24 hours, and that the water-based formula contains no methylene chloride or NMP. It also says it works best on coatings from after the 1980s.

Check price on Amazon

  • ✅ Many layers in one application
  • ✅ Water-based, no methylene chloride or NMP
  • ✅ Works on wood, metal and masonry
  • ❌ Long dwell time

Best For: Painted and varnished trim, doors and older furniture.


ALLWAY CS6 Contour Scraper Set

ALLWAY CS6 contour scraper set with six blades for stripping finish from moldings

Best for Moldings, Spindles and Grooves

Softened poly in a cove or bead won’t come out with a flat blade. This set has a soft-grip handle with six interchangeable blade shapes, curved and pointed, plus a blade file to keep them sharp. Use it on the profiles and finish with a toothbrush and a pad, as the Citristrip label suggests.

Check price on Amazon

  • ✅ Six profiles for curves and grooves
  • ✅ File included to resharpen
  • ✅ Light, controllable
  • ❌ Too small for flat tops

Best For: Chair spindles, moldings and carved details.


Bosch GET65-5N Dual-Mode Random Orbit Sander

Bosch GET65-5N dual-mode random orbit sander for sanding off polyurethane

Best Sander for Removing Finish

A regular palm sander will get poly off a tabletop, slowly. The GET65-5N is built for removal: it’s a dual-mode sander with a Turbo mode for aggressive stock removal and a random orbit mode for finishing, on a 5″ hook-and-loop pad. Use turbo with 80 grit to cut through the finish, then switch modes for 120 and 180. More options are in my best random orbital sanders.

Check price on Amazon

  • ✅ Turbo mode for fast finish removal
  • ✅ Random orbit mode for the final grits
  • ✅ Standard 5″ discs
  • ❌ Heavier than a palm sander

Best For: Sanding poly off solid-wood tables, doors and benches.


POWERTEC 5″ Sanding Disc Assortment, 80 to 220 Grit

POWERTEC 5 inch 8 hole sanding discs assortment 80 to 220 grit

Best Discs for the Grit Steps

Removing poly eats discs, so buy a bulk assortment. This pack has 10 discs each of 80, 100, 120, 150 and 220 grit, aluminum oxide with a stearate anti-clog coating, in the 5″ 8-hole hook-and-loop pattern that fits the Bosch and most other random orbital sanders. Add a box of 180 if you’ll stain. For premium options, see the best sanding discs for random orbital sanders.

Check price on Amazon

  • ✅ 50 discs across five grits
  • ✅ Anti-clog coating
  • ✅ Standard 8-hole pattern
  • ❌ No 180 in the pack

Best For: Working through 80, 120 and 220 on a refinishing project.


How I Put This Guide Together

The stripping steps come from the Citristrip Paint & Varnish Stripping Gel label (W.M. Barr), the solvent test from Fine Woodworking‘s guide to identifying finishes, the methylene chloride rule from the EPA’s 2019 announcement, and the anti-clog advice from Mirka’s guide to abrasives. The grit sequence matches my wood grit guide. Product specs come from the makers or, where I say so, the Amazon listing. More on how I choose the products I recommend.

🏆 The Verdict

Confirm it’s polyurethane with the solvent test, then match the method to the piece. Stripper and a plastic or contour scraper for furniture, carvings and veneer; 80, 120 and 180 grit on a random orbital sander for flat solid wood; a floor sander for floors. Citristrip handles most furniture if you give it time, and a Bosch GET65-5N with plenty of fresh discs does the flat work fastest.

❓ Frequently Asked Questions

What is the best polyurethane remover?+
For most furniture, a gel paint and varnish stripper that lists polyurethane on its label, such as Citristrip, is the best all-round choice because it clings to vertical parts and stays active for hours. For many layers of paint and varnish together, a heavier water-based remover like Smart Strip PRO is worth the longer wait.
Does vinegar remove polyurethane from wood?+
No reliable source says it does. Household vinegar is a weak acid sold for cleaning, and cured polyurethane is made to resist exactly that kind of exposure. You may clean the surface, but the film stays. A stripper or sandpaper is what actually takes polyurethane off.
Will mineral spirits remove polyurethane?+
Not once it has cured. Mineral spirits thins and cleans up wet oil-based poly and removes wax from a finished surface, but a dried polyurethane film resists it. It is useful after stripping: the Citristrip label uses odorless mineral spirits on an abrasive pad to clean off the last residue.
How can I remove polyurethane from wood without sanding it?+
Use a paint and varnish stripper. Brush on a thick coat, keep it wet under plastic if it needs hours, scrape the softened finish off with a plastic or contour scraper, and clean the residue with an abrasive pad and mineral spirits. You will still want a light sanding at 150 to 180 before refinishing.
What will dissolve polyurethane?+
Cured oil-based polyurethane doesn’t really dissolve in common solvents; strippers soften and lift it so it can be scraped off. Water-based polyurethane is softer and can turn sticky under lacquer thinner. Denatured alcohol, mineral spirits and household cleaners have little effect on either once cured.
How do you remove polyurethane from wood with heat?+
Warm a small area with a heat gun until the finish softens and starts to bubble, then push it off with a scraper held just behind the gun, moving with the grain. Don’t stay in one spot or the wood scorches. Avoid heat on veneer, near glass and on old paint that might contain lead.

Conclusion

Knowing how to remove polyurethane from wood is mostly knowing which piece you’re looking at. Strip anything with curves, carvings or veneer, sand flat solid wood, and treat floors as a floor-sanding job. Give the stripper time, change discs often, and finish at the grit your new stain or topcoat needs. If you’re comparing removers, my best paint stripper for wood roundup compares five strippers and what their labels promise.

Sanding Sealer: What It Is, When to Use It and How to Sand It

What is sanding sealer: brushing a clear first coat onto a bare wood board

Sanding sealer is a first coat for bare wood that’s made to dry fast and sand easily, so you can lock down raised grain and fill the surface before the real finish goes on. It saves time and sandpaper on big projects and under lacquer, but it’s softer and less durable than a topcoat, and some kinds weaken the bond of polyurethane. Use the right type for your finish, sand it lightly with 320 grit, and never use it as the final coat.

Here is what sanding sealer is made of, the four main types and which finish each one goes under, when it’s worth using and when to skip it, how to apply and sand it, and the products and abrasives that make the job easy.

⚡ Quick Answer

Under any clear finish, including polyurethane: a dewaxed shellac sealer such as Zinsser SealCoat, or the sealer your topcoat brand makes for it.

Under Minwax polyurethane on floors, furniture and cabinets: Minwax Sanding Sealer, dry 1 hour, sand with 320.

Sanding it: 320 grit, light pressure, by hand with 3M Wetordry 320 or on a random orbital sander on its lowest speed.

What Is Sanding Sealer?

Sanding sealer is a finish formulated to be the first coat on raw wood. The first coat of any finish soaks into the fibers, makes them stand up and dries rough, so it always needs sanding. Sanding sealer is built for that step: it dries fast, builds a film quickly and powders when you sand it, instead of gumming up the paper.

General Finishes, which makes a water-based sanding sealer, lists four benefits: it’s a softer finish designed for faster sanding and faster drying, it costs less than topcoat, the film builds faster because the particle size is larger, and it has strong adhesion. The same FAQ adds a limit: it does not stop tannin or dye bleeding through, and it only makes sense if the project is large enough to justify buying a third product.

What Sanding Sealer Is Made Of

Traditional lacquer and varnish sanding sealers are the finish itself with zinc stearate added. Finishing writer Bob Flexner, in Popular Woodworking, describes zinc stearate as a type of soap: it makes the film slick so it sands to powder, but it also makes the coating less moisture resistant, softer, more likely to crack and less able to bond the coats above it. Dewaxed shellac and water-based sealers are the alternatives, and their makers sell them as “universal” sealers that go under several kinds of finish.

Is Sanding Sealer the Same as Varnish or Polyurethane?

No. A lacquer or varnish sanding sealer is related to the finish, but it’s deliberately softer so it sands quickly. That’s exactly what you don’t want in the final coat, which has to resist scratches, water and heat. Flexner’s point about polyurethane is blunt: it dries hard and sands easily, so it doesn’t need a special sealer, and using anything other than the polyurethane itself as the first coat weakens the total film.

The Four Types of Sanding Sealer (and What Goes on Top)

Type Goes under Example Watch out for
Lacquer sanding sealer Nitrocellulose lacquer Deft, Sherwin-Williams Sher-Wood Contains stearate; not for polyurethane
Dewaxed shellac Any clear finish Zinsser Bulls Eye SealCoat Must be dewaxed if poly goes on top
Water-based Water- or oil-based poly (check label) Minwax, Varathane, General Finishes Enduro Minwax says not under lacquer
Thinned topcoat The same topcoat First coat of your polyurethane Slower to dry and to sand

Lacquer Sanding Sealer

This is the original, built for furniture factories and cabinet shops that spray nitrocellulose lacquer. In a home shop, a turbine HVLP spray system does the same job on a smaller scale. Lacquer gums up sandpaper, and on a production line the time saved by a sealer that sands to powder is worth the trade-off. Keep it under lacquer: Flexner notes that manufacturers began warning against putting polyurethane over stearated sealers because the bond is weak.

Dewaxed Shellac (SealCoat)

Zinsser’s Bulls Eye SealCoat is sold as a universal sanding sealer. Rust-Oleum’s page says it’s compatible with all clear wood finishes, can be sanded and recoated in minutes, doesn’t darken or yellow with age, works as a pre-stain conditioner for pine and softwoods and as a bond coat over existing finishes. The key word is dewaxed: according to Flexner, polyurethane doesn’t bond well to ordinary shellac because of its natural wax, and SealCoat was created to solve that.

Water-Based Sanding Sealer

Water-based sealers are made to go under water-based and, in some cases, oil-based finishes. Minwax’s Professional Formula Sanding Sealer is for bare wood floors, furniture, doors and cabinets, dries in 1 hour and can be topcoated with any Minwax oil- or water-based polyurethane, but Minwax says not to use it under lacquer. Rust-Oleum calls Varathane Sanding Sealer universal, for oil and water-based finishes. General Finishes says its sealer works with all its water- and oil-based finishes.

Thinned First Coat of the Finish

The no-extra-product option: brush or wipe on a first coat of the same polyurethane, let it dry fully and sand it. It’s slower than a dedicated sealer, but it gives the strongest film, and on a small piece it’s what I’d do.

When to Use Sanding Sealer (and When to Skip It)

Use It When

  • The project is big. Cabinets, a floor, a set of doors: General Finishes and Flexner both say the savings in time and sandpaper are what justify it.
  • You’re spraying lacquer. Lacquer sanding sealer exists for exactly this.
  • You need a barrier coat. A dewaxed shellac seals in old finish residue, and Zinsser markets SealCoat as a bond coat under new finishes.
  • Pine or another blotch-prone softwood will be stained. Zinsser says SealCoat can be used as a pre-stain conditioner on pine and softwoods, and Crystalac says the same of its sealer.
  • You want water-based poly to look warmer. Zinsser says SealCoat gives extra warmth to water-based polyurethanes, which on their own can look cold on some woods.

Skip It When

  • Your finish is oil-based polyurethane on a small project. The first coat of poly is the best sealer.
  • You’d be using a stearated lacquer or varnish sealer under polyurethane. That’s the combination that peels.
  • You were going to use it as the finish. It’s softer and less water resistant than a topcoat.
  • The sealer and topcoat brands disagree. If the topcoat can doesn’t approve the sealer, test on scrap or use the topcoat as its own sealer.

What Can You Use Instead of Sanding Sealer?

A thinned first coat of your topcoat, or dewaxed shellac, cover almost every situation. On blotch-prone wood that you’re staining, a pre-stain wood conditioner does the conditioning half of the job; my guide on how to stain wood explains when that matters.

How to Apply Sanding Sealer

  1. Sand the bare wood to your final grit. Crystalac’s tutorial says 220; Minwax’s floor sealer goes on bare wood after normal floor sanding. The wood grit guide has the sequence.
  2. Remove all dust with a vacuum and a clean cloth.
  3. Apply one thin coat with the grain. Minwax lists a synthetic bristle brush, foam applicator or synthetic pad. Rust-Oleum says thin, even coats in smooth, level strokes.
  4. Let it dry. Minwax: at least 1 hour. General Finishes: tack-free in 10 to 20 minutes, dry in 1 to 2 hours at 70°F and 50% humidity. SealCoat: minutes.
  5. Sand it smooth (next section), then remove every bit of dust.
  6. Apply the topcoat. Minwax recommends two or three coats of polyurethane; General Finishes suggests one or two sealer coats at most, then one or two topcoats.

Sanding Sealer Before or After Stain?

Both are used, for different reasons. Before stain, a thin coat acts as a conditioner: Crystalac’s method is one coat of sealer, then sand back to bare wood so sealer stays only in the grain and pores, then stain. After stain, it’s the first clear coat: General Finishes lists stained wood as a surface to seal before topcoat, and Crystalac recommends one or two coats over dried stain to lock the color in. Check that the stain is fully dry first; Crystalac warns oil-based stains can take up to a week.

How to Sand Sanding Sealer

Minwax’s instruction is to abrade the dried sealer with new 320-grit sandpaper or screen, or a maroon floor pad, then remove all dust. The goal is only to knock off the raised grain and dust nibs until the surface feels smooth and looks evenly dull. You are not trying to sand through the sealer.

By Hand or With a Sander

On flat panels, a random orbital sander with a 320 disc on its lowest speed is fast and even. On edges and profiles, sand by hand with a fine sponge: edges are where you cut through first. The whole technique, including when to sand wet, is in my guide to sanding between coats of polyurethane.

Don’t Cut Through Over Stain

If the sealer is over stain, sanding through it sands the color off and leaves a light spot that shows under every coat after. Use light pressure, fewer passes on edges and corners, and stop as soon as the surface is smooth.

💡 Pro Tip

A properly dry sanding sealer turns to fine white powder under 320 grit. If it rolls into little gummy balls on the paper, it isn’t dry yet: stop, wait another hour and try again on a hidden spot.

Sanding Sealer vs Wood Conditioner vs Primer

Wood conditioner goes on before stain to even out absorption, and it’s wiped off. Sanding sealer builds a sandable film under a clear finish. Primer is pigmented and goes under paint. Dewaxed shellac blurs the lines, because it can do the first two jobs, and Zinsser also makes a shellac-based primer, but in general use the product that matches your topcoat: clear finish, sealer; paint, primer.

The Sealers and Abrasives I’d Use

The specs below come from the makers’ product pages, and from the Amazon listing where I say so. I don’t show customer ratings or prices.

Zinsser Bulls Eye SealCoat Universal Sanding Sealer

Zinsser Bulls Eye SealCoat universal sanding sealer, dewaxed shellac

Best Universal Sanding Sealer

If you buy one sealer, make it this. SealCoat is a dewaxed shellac that Rust-Oleum says is compatible with all clear wood finishes, including polyurethane, and it sands and recoats in minutes. It doesn’t darken or yellow with age, cleans up with alcohol or ammonia and water, works as a pre-stain conditioner on pine and as a bond coat over existing finishes. For more film build, the maker suggests two coats.

Check price on Amazon

  • ✅ Works under any clear finish
  • ✅ Dries in minutes
  • ✅ Doubles as conditioner and bond coat
  • ❌ Alcohol-based: strong smell, ventilate

Best For: Any project, especially under polyurethane or over an old finish.


Minwax Professional Formula Sanding Sealer (Water-Based)

Minwax water-based sanding sealer, 1 quart

Best Under Minwax Polyurethane

Minwax designs this one for bare wood floors, furniture, doors and cabinets, and says any Minwax oil- or water-based polyurethane can go over it. It dries and recoats in 1 hour, so you can seal and topcoat in one day; Minwax recommends one coat, sanded with new 320-grit paper or a maroon pad, then two or three coats of poly. The listing says it cleans up with water. Don’t use it under lacquer.

Check price on Amazon

  • ✅ Seal and topcoat the same day
  • ✅ Approved under Minwax oil and water poly
  • ✅ Water cleanup
  • ❌ Not for lacquer finishes

Best For: Floors, cabinets and furniture finished with Minwax polyurethane.


Varathane Sanding Sealer

Varathane sanding sealer, 1 quart can

Best for Porous Woods Under Varathane Finishes

Rust-Oleum pitches Varathane’s sealer at porous woods: a high-building coat that dries clear, sands easily and is universal, for oil- and water-based finishes. Apply thin, even coats with the grain. The Amazon listing adds that it’s for furniture, doors, cabinets and trim, dries to the touch in 1 hour, covers 60 to 90 sq ft per quart and cleans up with soap and water.

Check price on Amazon

  • ✅ Builds fast on open-grained wood
  • ✅ Oil or water-based topcoats
  • ✅ Soap and water cleanup
  • ❌ Lower coverage per quart than Minwax quotes

Best For: Oak, ash and other open-grained furniture and trim.


3M Wetordry Sandpaper, 320 Grit

3M Wetordry 320 grit sandpaper sheets for sanding sealer

Best Paper for Sanding the Sealer

320 is the grit Minwax names for its sealer, and this 3M pack is sold for final or between-coats sanding. It’s silicon carbide on waterproof paper, so you can use it dry or with water to stop it clogging, and the 25 full 9 x 11 in sheets cut into quarters for a block or a 1/4-sheet sander. Why silicon carbide suits finishes is explained in my guide to types of sandpaper.

Check price on Amazon

  • ✅ The grit sealer makers ask for
  • ✅ Wet or dry
  • ✅ 25 sheets go a long way
  • ❌ Needs a block for flat surfaces

Best For: Sanding sealer and between coats by hand.


Bosch ROS20VSC Random Orbital Sander + Mirka Abranet 320

Bosch ROS20VSC 5 inch random orbital sander for sanding sealer coats

Best Sander for Big Flat Surfaces

On tabletops, cabinet sides and doors, a 5″ random orbital sander sands sealer evenly and fast. The ROS20VSC has a 2.5 amp motor with variable speed from 7,500 to 12,000 OPM, so you can drop it to the bottom of the dial for a finish coat, plus a microfilter canister and a vacuum adapter. Pair it with Mirka Abranet 320 mesh discs, which pull dust through the whole disc and fit any 5″ hook-and-loop pad. My Bosch ROS20VSC review has the details.

Check price on Amazon

  • ✅ Low speed setting for finish coats
  • ✅ Dust canister and vacuum port
  • ✅ Standard 5″ hook-and-loop discs
  • ❌ Round pad misses inside corners

Best For: Tabletops, doors and cabinet panels.


How I Put This Guide Together

The product facts come from the makers: Minwax’s product page and directions for its sanding sealer, Rust-Oleum’s pages for Zinsser SealCoat and Varathane Sanding Sealer, General Finishes’ FAQ on sanding sealer, and Crystalac’s sanding sealer tutorial. The explanation of stearates and polyurethane adhesion comes from Bob Flexner’s column on sealers in Popular Woodworking. Anything from an Amazon listing is marked. More on how I choose the products I recommend.

🏆 The Verdict

Sanding sealer is a time saver for big jobs and lacquer finishes, not a step every project needs. Match it to the topcoat: lacquer sealer under lacquer, dewaxed shellac or the topcoat maker’s own sealer under polyurethane, and never a stearated sealer under poly. Sand it lightly at 320 and don’t use it as the final coat. Zinsser SealCoat is the safe pick under anything, and 3M Wetordry 320 is the paper to sand it with.

❓ Frequently Asked Questions

What is sanding sealer used for?+
It’s used as the first coat on bare wood under a clear finish. It seals the fibers, locks down raised grain and builds a film that sands to a smooth powder quickly, so the topcoats go on a flat surface. Shops use it mostly to save time and sandpaper on large jobs and under lacquer.
What can I use instead of sanding sealer?+
The simplest substitute is a first coat of the finish you’re already using, thinned if the label allows, then sanded once dry. Dewaxed shellac such as Zinsser SealCoat is the other common choice, because it goes under any clear finish. Under stain on blotchy softwoods, a pre-stain conditioner covers that part of the job.
Do I need to use sanding sealer?+
Usually not. Polyurethane seals wood well on its own, and General Finishes says a separate sealer only pays off on projects big enough to justify a third product. It’s worth it for large jobs, sprayed lacquer, sealing in old residue, and pine that you want to stain evenly.
Is sanding sealer the same as varnish?+
No. A varnish sanding sealer starts from varnish but adds an ingredient, traditionally zinc stearate, that makes it soft and quick to sand. That softness makes it a poor final coat: it resists water, heat and scratches less than real varnish, so it always needs a durable topcoat over it.
Is sanding sealer the same as polyurethane?+
No. Polyurethane is a durable topcoat; sanding sealer is a soft base coat. They can work together if the sealer is compatible, such as dewaxed shellac or a water-based sealer approved by the poly maker. Avoid putting polyurethane over stearated lacquer or varnish sealers, which give a weak bond.
Can I use sanding sealer as a finish?+
It isn’t a good idea. Sanding sealers are formulated to be soft and easy to sand, which means less resistance to moisture, heat and wear than a topcoat. Even on a decorative piece, put at least one or two coats of polyurethane, lacquer or varnish over it.

Conclusion

Sanding sealer is a fast, sandable first coat, and the whole decision comes down to the topcoat you’ll put over it and the size of the job. For polyurethane, the first coat of poly or a dewaxed shellac does the job; for lacquer, a lacquer sealer saves real time. Whatever you use, sand it with 320 and keep your pressure light. Then follow my guide to sanding between coats of polyurethane for the coats that come after.

Best Paint for Cabinets: Cabinet Enamels and Primers Compared

Open paint cans, brushes and a foam roller in a tray on a drop cloth, with the title Best Paint for Cabinets

The best paint for cabinets is a cabinet enamel, not wall paint: a water-based urethane-modified alkyd such as Sherwin-Williams Emerald Urethane Trim Enamel, a waterborne alkyd such as Benjamin Moore Advance, or a urethane acrylic such as INSL-X Cabinet Coat, in a satin sheen, over the right primer. These flow out smooth, harden enough to take daily handling and wipe clean, which ordinary latex wall paint doesn’t.

Below are the five cabinet paints worth buying, compared on the numbers from their makers’ data sheets (coverage, recoat time and cure), the best primer for cabinets for each kind of surface, and how much paint a kitchen actually needs. Two of the best enamels aren’t sold on Amazon, so I say where each one is sold.

⚡ Quick Picks

Best on Amazon: the INSL-X Cabinet Coat – a urethane acrylic that recoats in 6 hours and needs no primer over sound paint.

Best overall: Sherwin-Williams Emerald Urethane – oil-like hardness, 4-hour recoat, sold in SW stores.

Smoothest brushed finish: Benjamin Moore Advance – long open time, but 16 hours between coats.

Best primer: Zinsser Cover Stain for varnished wood, INSL-X Stix for laminate.

Best Paint for Cabinets at a Glance

Paint Type Coverage per gallon Recoat Where to buy
Sherwin-Williams Emerald Urethane Trim Enamel Urethane-modified alkyd, water-based 350 to 400 sq ft 4 hours Sherwin-Williams stores
Benjamin Moore Advance Waterborne alkyd 400 to 500 sq ft 16 hours Benjamin Moore retailers
INSL-X Cabinet Coat Urethane acrylic 350 to 450 sq ft 6 hours Amazon, paint stores
Valspar Cabinet, Door & Trim Oil-enriched enamel 400 sq ft 4 hours Amazon (third-party sellers), Lowe’s
Rust-Oleum Cabinet Transformations Basics Water-based acrylic Up to 200 sq ft for two coats 2 hours at 70°F Amazon, home centers

Coverage and recoat times are the makers’ figures at about 77°F and 50% humidity (Rust-Oleum’s at 70°F). Cool, damp weather stretches every one of them.

What Makes a Good Cabinet Paint

Enamel, Not Wall Paint

Cabinet doors get grabbed, wiped and bumped every day, and they close against each other. A cabinet enamel is formulated to level out brush and roller marks as it dries and to cure to a hard film that doesn’t stay tacky. Benjamin Moore, for example, describes Advance as block-resistant, the property that stops a painted door from sticking to a painted frame. Ordinary wall paint is softer and can stay slightly sticky on surfaces that touch.

Waterborne Alkyd, Urethane Alkyd or Urethane Acrylic

  • Waterborne alkyd (Benjamin Moore Advance): alkyd resin carried in water. It brushes and levels like an oil paint and cleans up with water, but it dries slowly: 16 hours between coats.
  • Urethane-modified alkyd (Sherwin-Williams Emerald Urethane): an alkyd toughened with urethane, still water-based, with a 4-hour recoat.
  • Urethane acrylic (INSL-X Cabinet Coat): an acrylic reinforced with urethane. It dries quickly, which is good for your schedule and less good if you overwork it.
  • Acrylic and oil-enriched enamels (Rust-Oleum Cabinet Transformations Basics, Valspar Cabinet, Door & Trim): easier to find at home centers and online, and fine for vanities, laundry rooms and smaller kitchens.

Oil-Based or Water-Based?

Traditional solvent-based oil paint is the hardest finish of all; Fixr calls it the most durable and the easiest to clean, but also the one with the highest VOCs, and HomeAdvisor doesn’t recommend oil-based paint in homes for that reason. The water-based alkyd and urethane enamels above were developed to close that gap, and for a kitchen you live in while you paint it, they are the better trade.

Which Sheen

HomeGuide reports that professional painters recommend a satin finish on cabinets because it hides imperfections; semi-gloss and gloss resist stains and wipe clean easily but highlight every dent and brush mark. HomeAdvisor warns against matte, which is less durable and harder to clean. If your doors are flat slab or MDF and perfectly smooth, semi-gloss is an option; on older wood doors, stay with satin.

The Best Cabinet Paints

Sherwin-Williams Emerald Urethane Trim Enamel

Best Overall Cabinet Paint (Sherwin-Williams Stores)

Sherwin-Williams describes Emerald Urethane Trim Enamel as a water-based enamel with a urethane-modified alkyd resin that delivers the look, feel and durability of an oil-based enamel with water cleanup. The March 2026 data sheet lists 350 to 400 sq ft per gallon, dry to the touch in 1 hour and a recoat time of 4 hours, which means two coats a day on each side of the doors. For bare wood, SW specifies one coat of Premium Wall & Wood Primer and two coats of Emerald Urethane, and the sheet gives settings for brush, roller, airless and HVLP. It is sold in Sherwin-Williams stores rather than on Amazon.

  • ✅ Oil-like hardness with water cleanup
  • ✅ Recoat in 4 hours
  • ✅ Satin and semi-gloss
  • ❌ Only at Sherwin-Williams stores
  • ❌ Premium price

Best For: The best all-round finish if you can buy it locally.


Benjamin Moore Advance Waterborne Alkyd

Smoothest Brushed Finish (Benjamin Moore Retailers)

Advance is a waterborne alkyd enamel that Benjamin Moore says has the flow and leveling of a conventional alkyd, with extended open time, minimal yellowing and a block-resistant film, so doors don’t stick to frames. The data sheet (satin, 792) lists 400 to 500 sq ft per gallon, dry to the touch in 4 to 6 hours and a 16-hour recoat. For cabinetry, BM says to sand every surface with 220 grit or coarser before priming, keep shelves and tops out of heavy use for 5 to 7 days, and allow up to 30 days for full hardness. It is sold through Benjamin Moore retailers.

  • ✅ Levels like oil, cleans up with water
  • ✅ Long open time hides brush marks
  • ✅ Minimal yellowing in whites
  • ❌ 16 hours between coats
  • ❌ Slow to cure

Best For: Brushing and rolling for a near-sprayed look, when you have time.


INSL-X Cabinet Coat Urethane Acrylic Enamel

INSL-X Cabinet Coat urethane acrylic satin enamel cabinet paint white 1 gallon

Best Cabinet Paint You Can Buy on Amazon

Made by Benjamin Moore under its INSL-X brand, Cabinet Coat is a urethane-reinforced acrylic built for cabinets. The data sheet says it resists chipping, scuffing, food stains, grease and water, covers 350 to 450 sq ft per gallon, is tack-free in 1 hour, recoats in 6 hours and reaches full cure in 14 days. Over previously painted cabinets in good condition, INSL-X says no primer is needed; bare wood gets a primer first.

Check price on Amazon

  • ✅ Primerless over sound paint
  • ✅ Recoat in 6 hours
  • ✅ Sold on Amazon in quarts and gallons
  • ❌ Dries fast: overworking leaves brush marks

Best For: Repainting already painted cabinets, or a first-time cabinet painter.


Valspar Cabinet, Door & Trim Oil Enriched Enamel

Valspar Cabinet Door and Trim oil enriched enamel satin white base quart for painting kitchen cabinets

Best Oil-Enriched Enamel for a Hard Finish

Valspar’s cabinet enamel is oil-enriched, sold in satin and semi-gloss, and rated for interior and exterior doors, trim and cabinets. Valspar says it has exceptional flow and leveling, resists brush marks and dries to a hard, durable finish. Its data sheet lists 400 sq ft per gallon, dry to the touch in 2 to 4 hours and a recoat time of 4 hours, with one or two coats, and it cleans up with warm soapy water. Valspar’s prep is the usual: clean, scrape loose paint and sand glossy surfaces dull.

Check price on Amazon

  • ✅ Levels out brush marks
  • ✅ Recoat in 4 hours
  • ✅ Soap and water cleanup
  • ❌ Sold on Amazon by third-party sellers
  • ❌ No cure time on the data sheet

Best For: Brush-and-roll painters who want a hard, smooth satin finish.


Rust-Oleum Cabinet Transformations Basics Cabinet & Trim Paint

Rust-Oleum Cabinet Transformations cabinet and trim paint pure white semi-gloss quart

Fastest Turnaround

Rust-Oleum’s water-based styrene acrylic cabinet paint is the quickest here: its data sheet says it is dry to the touch in 30 minutes and ready to recoat in 2 hours at 70°F, doors can go back up after 12 hours, the kitchen is in normal use after 24 hours, and full hardness takes 7 days. It comes pre-tinted in a semi-gloss sheen. Rust-Oleum still says to degrease and prime first, with Zinsser Bulls Eye 1-2-3 or B-I-N, especially over bare wood or dark colors. Coverage is modest: up to 200 sq ft per gallon for two coats.

Check price on Amazon

  • ✅ Recoat in 2 hours, rehang in 12
  • ✅ Clear step-by-step instructions
  • ✅ Sold by Amazon in quarts
  • ❌ Lower coverage than the pro enamels
  • ❌ Semi-gloss only shows flaws

Best For: Bathroom vanities, laundry rooms and small kitchens on a tight schedule.


Best Primer for Cabinets

The primer does the bonding and the stain-blocking; the paint only has to look good and wear well. Choose it by the surface you are covering, not by the paint brand:

Primer Type Coverage per gallon Recoat Use it on
Zinsser B-I-N Shellac About 500 sq ft 45 minutes Oak, knots, water and smoke stains, glossy finishes
Zinsser Cover Stain Oil-based 400 to 450 sq ft 1 hour Varnished and stained wood, laminate, tannin-rich woods
INSL-X Stix Urethane-modified acrylic bonding primer 300 to 400 sq ft 3 to 4 hours Laminate, melamine, glossy enamel
Benjamin Moore Fresh Start (046) All-purpose primer See BM data sheet See BM data sheet Under Advance on wood, MDF, Thermofoil and laminate
Sherwin-Williams Premium Wall & Wood Primer Wood primer See SW data sheet See SW data sheet Under Emerald Urethane on bare wood

On solid oak, knotty pine or any cabinet with water marks or smoke stains, use shellac or oil: water-based primers can let tannins and stains bleed through a white topcoat. On laminate and glossy enamel, a bonding primer like Stix sticks where others peel. And if the cabinets are already painted and the paint is sound, INSL-X says Cabinet Coat goes straight on after cleaning and sanding, with bare spots spot-primed.

Zinsser B-I-N Shellac-Base Primer (Spray Can)

Zinsser B-I-N shellac base primer sealer 13 oz spray can for sealing knots on cabinets

Best for Knots, Stains and Spot Priming

Shellac primer is the strongest stain and tannin blocker you can put under cabinet paint. Zinsser’s data sheet for the brushing version says B-I-N dries to the touch in 20 minutes, recoats in 45 minutes, covers about 500 sq ft per gallon, seals knots and sap streaks and has excellent adhesion to glossy surfaces without scuff sanding. This 13 oz spray can is the easy way to seal knots, water marks and filled spots before the main primer; for whole kitchens, buy B-I-N in quarts or gallons at a paint store.

Check price on Amazon

  • ✅ Seals knots, tannin and water stains
  • ✅ Recoat in 45 minutes
  • ✅ Sticks to glossy finishes
  • ❌ Strong alcohol odor
  • ❌ Spray can is for spot priming, not whole kitchens

Best For: Knotty pine, oak tannin bleed and spot-priming repairs.


Zinsser Cover Stain Oil-Based Primer

Zinsser Cover Stain oil-based stain blocking primer quart for kitchen cabinets

Best Primer for Glossy and Stained Cabinets

Zinsser says Cover Stain has excellent adhesion to dense, glossy surfaces such as enamel paints, varnishes, paneling and laminates without sanding or deglossing, and that it is an excellent tannin blocker, which matters on oak, where tannins can bleed through white paint. It dries to the touch in about 30 minutes and can be recoated after 1 hour, covering 400 to 450 sq ft per gallon (Zinsser data sheet CVS-03). It sands to a smooth base for the topcoat.

Check price on Amazon

  • ✅ Bonds to varnish and laminate
  • ✅ Blocks tannin and stains
  • ✅ Recoat in 1 hour
  • ❌ Oil-based: strong odor, mineral spirits cleanup

Best For: Varnished oak, stained cabinets and laminate before paint.


INSL-X Stix Waterborne Bonding Primer

INSL-X Stix waterborne bonding primer 1 gallon white for laminate and glossy cabinets

Best Bonding Primer for Laminate and Glossy Surfaces

Stix is a urethane-modified acrylic primer made for surfaces paint won’t normally stick to. INSL-X lists plastic, glass, tile, glazed block and glossy paints, and says it can be topcoated with almost any coating, including alkyd, acrylic latex, urethane, epoxy and lacquer. It covers 300 to 400 sq ft per gallon, is dry to the touch in 30 minutes and recoats in 3 to 4 hours, but it needs about 3 to 4 days of cure to reach maximum adhesion, so don’t stress-test it the next morning. INSL-X still says glossy painted surfaces should be properly deglossed first.

Check price on Amazon

  • ✅ Bonds to laminate and glossy enamel
  • ✅ Water-based, low odor
  • ✅ Takes almost any topcoat
  • ❌ 3 to 4 days to full adhesion
  • ❌ Doesn’t block tannin like shellac

Best For: Laminate, melamine and glossy painted cabinets.


Sherwin-Williams or Benjamin Moore for Cabinets?

Emerald Urethane vs Advance on the Data Sheets

Both are premium water-based enamels built on alkyd chemistry, and both list similar coverage: 350 to 400 sq ft per gallon for Emerald Urethane, 400 to 500 for Advance. The difference is drying. Emerald Urethane is dry to the touch in 1 hour and recoats in 4; Advance takes 4 to 6 hours to the touch and 16 to recoat. On a kitchen where every door needs two coats on each side, that is the difference between finishing the doors in two days and spreading them over most of a week.

Which One to Choose

Choose Emerald Urethane if you want to finish quickly or are spraying. For the sprayer itself, see my picks for the best paint sprayer for cabinets and furniture. Choose Advance if you are brushing and rolling and value its long open time, which gives brush marks more time to level out, and if you can leave the doors alone for a week. Either way, buy from the store you can get to: tinting, returns and advice on the primer are all easier in person, and neither is sold on Amazon. If neither store is near you, INSL-X Cabinet Coat is made by Benjamin Moore and sold on Amazon.

Best Paint for Cabinets Without Sanding

No cabinet paint should go onto a dirty, glossy surface, but some products reduce the sanding. INSL-X says Cabinet Coat’s adhesion lets it paint “difficult surfaces, even polyurethane and varnish, without using a primer”, while still recommending proper surface preparation. Zinsser says B-I-N and Cover Stain both grip glossy surfaces without scuff sanding, and a liquid deglosser chemically dulls the old finish. General Finishes’ warning is worth repeating: there is no such thing as a “no prep” paint, and grease left on the doors is the first reason cabinet paint fails. The honest minimum is a thorough degrease and a light pass with a fine sanding sponge, which my guide to how to refinish kitchen cabinets walks through step by step.

How Much Paint Do Cabinets Need?

Less than most people expect. HomeAdvisor says about two gallons covers an average kitchen’s cabinets with two coats. To size your own: count both sides of every door, the drawer fronts and the face frames and end panels, multiply by the number of coats and divide by the coverage on the can. A kitchen with 22 doors, 10 drawers and 30 linear feet of cabinets is roughly 210 sq ft of surface, so two coats of Emerald Urethane at 350 sq ft per gallon come to about 1.3 gallons with a 10% allowance. The cabinet painting cost calculator does this for your kitchen, primer included, and compares the DIY cost with a pro quote.

Prep Matters More Than the Brand

Every paint on this page will fail on a greasy, glossy door, and every one will look professional on a clean, evenly sanded one. Degrease, sand the old finish dull with 220 grit, vacuum and tack, prime, and sand lightly between coats. A square-pad palm sander handles face frames and inside corners, and a random orbital the flat doors; my best sanders for cabinets comparison has the models. If you plan to stain instead of paint, see how to stain wood.

How I Chose These Paints and Primers

I started from the cabinet enamels and primers that the paint makers themselves specify for cabinets, then compared them only on what their technical data sheets state: resin type, coverage, dry and recoat times, cure and the primer each maker calls for. The sources are Sherwin-Williams’ Emerald Urethane Trim Enamel data sheet (March 2026), Benjamin Moore’s Advance (792) and INSL-X Cabinet Coat (CC-55XX) and Stix (SXA-110) data sheets, Rust-Oleum’s CAB-11, Zinsser’s BIN-03 and CVS-03, and Valspar’s product data. Sheen and cost guidance comes from HomeGuide, HomeAdvisor and Fixr. Products linked to Amazon are sold there today; I don’t show customer ratings or prices, which change daily. More on how I choose the products I recommend.

🏆 The Verdict

If there is a Sherwin-Williams store near you, Emerald Urethane Trim Enamel is the best paint for cabinets: hard, smooth and fast to recoat. Benjamin Moore Advance gives the best brushed finish if you can wait 16 hours between coats. To order online, INSL-X Cabinet Coat is the pick, and it needs no primer over sound paint. Under any of them, use Zinsser Cover Stain on varnished wood and INSL-X Stix on laminate.

❓ Frequently Asked Questions

What do professional painters use to paint kitchen cabinets?+
Pros use a cabinet or trim enamel, not wall paint, over a stain-blocking or bonding primer, and many spray it. Water-based alkyd and urethane-modified enamels such as Benjamin Moore Advance and Sherwin-Williams Emerald Urethane are the usual choices, because they level smoothly and cure harder than ordinary latex.
What type of paint is best for kitchen cabinets?+
A cabinet enamel: a waterborne alkyd, a urethane-modified alkyd or a urethane acrylic, in satin or semi-gloss. These flow out to a smooth film and harden enough for daily handling, unlike wall paint, which stays soft and can stick. Oil-based paint is hard but slow to dry, strong-smelling and prone to yellowing.
Is Sherwin Williams or Benjamin Moore better for kitchen cabinets?+
Both make an excellent cabinet enamel, and the difference is mostly time. Sherwin-Williams Emerald Urethane recoats in 4 hours, so a kitchen moves fast. Benjamin Moore Advance needs 16 hours between coats but has a longer open time, which helps brushed work level out. Pick by your schedule and the nearest store.
What is the best paint to paint cabinets without sanding?+
INSL-X Cabinet Coat comes closest: INSL-X says it bonds to hard surfaces, even polyurethane and varnish, without a primer, though it still recommends proper preparation. Over glossy or stained cabinets, a primer such as Zinsser Cover Stain or B-I-N grips without scuff sanding. You still need to degrease thoroughly first.
What type of primer is best for kitchen cabinets?+
It depends on the surface. Shellac primer such as Zinsser B-I-N is best over oak, knots and stains; an oil-based primer such as Cover Stain bonds to varnish and blocks tannin; a bonding primer such as INSL-X Stix is made for laminate and glossy enamel. Previously painted cabinets in good shape may need none.
What primer does Sherwin-Williams recommend for cabinets?+
On the Emerald Urethane Trim Enamel data sheet, Sherwin-Williams specifies one coat of its Premium Wall & Wood Primer under two coats of Emerald Urethane on interior wood. For knots and stains on interior wood it suggests spot priming with ProBlock Quick Dry Oil-Based Primer, and for metal, All Surface Enamel Latex Primer.
What is the best paint finish for kitchen cabinets?+
Satin is the safest choice. HomeGuide says professional painters recommend satin because it hides imperfections, while semi-gloss and gloss are easier to wipe clean but highlight every flaw. HomeAdvisor advises against matte, which is less durable and harder to clean, and lists eggshell, satin, semi-gloss and gloss as suitable.
Is oil-based or water-based paint better for kitchen cabinets?+
Water-based cabinet enamels are the better choice for most kitchens today. Waterborne alkyds and urethane alkyds get close to oil’s hardness and leveling, clean up with water and yellow less. Fixr notes oil-based paint is the most durable but has the highest VOCs, and HomeAdvisor doesn’t recommend it for homes.

Conclusion

The best paint for cabinets is the cabinet enamel you can buy and apply well: Emerald Urethane or Advance from their brands’ stores, Cabinet Coat online, with Valspar and Rust-Oleum as easier-to-find alternatives for smaller jobs. Match the primer to the surface, size the paint with the cabinet refinishing cost calculator, and follow the prep in how to refinish kitchen cabinets. The paint gets the credit, but the sanding and degreasing decide how long it lasts.

Cabinet Refinishing Cost Calculator: Cost to Paint Kitchen Cabinets

Professional cabinet painting costs $30 to $70 per linear foot of cabinets or $70 to $125 per door, according to HomeGuide and Fixr, and restaining costs $4 to $15 per square foot of cabinet surface. Doing it yourself costs a fraction of that: in our worked example, a kitchen with 22 doors, 10 drawer fronts and 30 linear feet of cabinets comes to about $220 in paint, primer and supplies, against $900 to $3,850 for a pro. The cabinet refinishing cost calculator below gives you both numbers for your own kitchen, plus how much paint and primer to buy and how long the job takes.

White painted raised-panel kitchen cabinets with dark wood floors, with the title Cabinet Refinishing Cost Calculator

The four big cost guides disagree more on cabinets than on almost any other painting job, because painters price them three different ways: by the linear foot, by the door and drawer, or by the square foot of surface. The calculator shows both main pricing methods side by side, so a quote that lands in the range is a fair one. Every pro price comes from a named cost guide with its date, every coverage and drying time from the paint maker’s data sheet, and every price in the tool can be edited.

⚡ Quick Answers

Paint an average kitchen (22 doors, 10 drawer fronts, 30 linear feet): $900 to $3,850 with a pro; about $220 DIY.

Restain the same kitchen: $850 to $3,170 with a pro at $4 to $15 per sq ft; about $300 DIY.

Per door: $70 to $125, plus $30 to $110 per drawer front (HomeGuide, Fixr).

Average professional refinishing job: $3,116, with most between $1,992 and $4,494 (HomeAdvisor, Angi).

Cabinet Refinishing Cost Calculator

Count the doors and drawer fronts, and measure the linear feet of cabinets: run a tape along the base cabinets and the wall cabinets separately and add the two. Pick paint or restain, the paint and primer, and the estimate updates as you type. Open Edit the prices and sizes we use to put in your store’s prices or your real door sizes.

Cabinet refinishing cost calculator

1. What are you doing to the cabinets?
2. How many cabinets?
3. Paint and primer

Coats of paint

4.3. The pro quote

How the painter applies it

Edit the prices and sizes we use
Pro $900 to $3,850 · DIY $220Details ↓

Your estimate

Hire a pro

$900 to $3,850

Linear foot quote $900 to $2,100; per door and drawer $1,840 to $3,850

Do it yourself

about $220

in paint, primer and supplies

Doing it yourself saves roughly $680 to $3,630, in exchange for about 32 to 63 hours of your time.

Surface to finish
212 sq ft
Paint to buy
1 gallon + 2 quarts paint, 2 quarts primer
DIY labor
32 to 63 hours
Drying between coats
at least 4.75 h per side

Your DIY shopping list

Item Qty Cost
Urethane-modified alkyd enamel, 2 coats 1 gallon + 2 quarts $105
Shellac primer, 1 coat 2 quarts $23
220-grit sanding sponges or sheets 9 $32
Brush for profiles and edges 1 $13
Mini roller kit for flat panels 1 $14
Painter’s tape 2 rolls $15
Wood filler or patch 1 $8
Drop cloths 2 $13
DIY total $222

Also on the list, not priced: a degreaser, tack cloths, a screwdriver and bags to label the hinges, a dust mask, and a sander if you don’t own one (see the best sanders for cabinets). If you degloss instead of scuff-sanding every surface, budget about 3 to 5 32 oz bottles of liquid deglosser.

Show the math

Surface

  • 22 doors × 3.5 sq ft × 2 sides + 10 drawer fronts × 1.25 sq ft + 30 ft × 1.5 sq ft of frames and ends = 211.5 sq ft

Pro quote

  • By the linear foot: 30 ft × $30 to $70 = $900 to $2,100
  • By the piece: 22 doors × $70 to $125 + 10 drawer fronts × $30 to $110 = $1,840 to $3,850
  • Range covering both pricing methods: $900 to $3,850
  • Total, rounded to $10: $900 to $3,850

DIY

  • Paint: 212 sq ft × 2 coats ÷ 350 sq ft per gallon × 1.1 = 1.33 gal, bought as 1 gallon + 2 quarts, priced pro rata
  • Primer: 212 × 1 ÷ 500 × 1.1 = 0.47 gal, bought as 2 quarts
  • Sanding: one 220-grit sponge or sheet per 25 sq ft for the scuff and the light sand between coats = 9
  • Drying between coats, per side: 1 × 0.75 h primer + 1 × 4 h paint = 4.75 h
  • Labor: 212 sq ft × 0.15 to 0.3 h per sq ft = 32 to 63 h

Pro ranges are national figures from HomeGuide, Fixr, HomeAdvisor and Angi; DIY supply prices are the midpoints of HomeGuide’s cabinet painting supply list, and every price can be edited. Coverage and recoat times come from each maker’s data sheet. Surface area and sandpaper counts are our planning estimates, explained below the calculator. This is an estimate, not a quote.

How Much Does It Cost to Paint Kitchen Cabinets?

Cabinet painters quote in one of three ways, and the four best-known cost guides publish ranges for each. These are the figures the calculator uses, with the date each guide was last updated:

Cost guide (updated) Per linear foot Per door Per drawer front Typical kitchen
HomeGuide (Feb 21, 2025) $30 to $70; sprayed $40 to $100 $70 to $125 $30 to $110 $2,000 to $6,500
Fixr (Jan 27, 2026) $30 to $70 $70 to $125 $30 to $110 $2,500 to $6,500, average $4,000
HomeAdvisor (Jun 20, 2026) $30 to $60 Not given Not given $425 to $1,466, average $942
Angi (Sep 8, 2026) $30 to $60 $100 to $250 Not given $425 to $1,466

Why the Guides Disagree

HomeAdvisor and Angi report a much lower typical total, $425 to $1,466, than HomeGuide ($2,000 to $6,500) or Fixr ($2,500 to $6,500). The guides don’t say which jobs sit inside each average. HomeAdvisor’s comes from the costs reported by more than 10,000 of its customers, and its own example of a 10 by 10 foot kitchen is $300 to $1,000; HomeGuide and Fixr describe an average kitchen with full prep, primer and two coats. The per-unit prices agree far better: every guide puts the linear foot at $30 to $60 or $70. That is why the calculator works from your counts, not from a “typical kitchen”.

Linear Foot or Per Door?

The two methods can give quite different totals for the same kitchen. A kitchen with many small doors costs more per door than per foot; a long run of cabinets with few, wide doors costs more per foot. The calculator shows both and uses the full spread as the pro range. When you get quotes, ask each painter how they price and whether the face frames, cabinet boxes and the inside of the doors are included.

Brushed or Sprayed

HomeGuide prices spray-painted cabinets at $40 to $100 per linear foot, against $30 to $70 for brushing and rolling, because spraying needs more masking and prep; Fixr, on the other hand, says spraying is often cheaper because application is faster. Choose Spray in the calculator to see HomeGuide’s range. Spraying gives the smoothest finish, which is why HomeAdvisor calls it the best method for cabinets. If you’d rather spray them yourself, here’s how HVLP, airless and LVLP sprayers compare.

Labor Is Most of the Bill

Labor is 80% to 85% of a professional cabinet painting job according to HomeGuide, about 85% according to Fixr and HomeAdvisor, and 70% to 80% according to Angi. Cabinet painters charge $25 to $75 an hour (HomeGuide), more than wall painters, because of the prep: removing doors, degreasing, sanding and priming. That is also why the DIY savings are so large.

What Pushes the Price Up

  • Tall cabinets: HomeGuide says painters charge up to 10% more for cabinets taller than 8 feet.
  • Repairs: $120 to $600 extra to fix damage before painting (HomeGuide); HomeAdvisor gives $140 to $500.
  • New hardware: $6 to $60 per knob or pull, installed (HomeGuide).
  • Detail and color: raised panels and carvings take longer, and going from dark to white usually needs an extra coat of primer or paint (HomeGuide, Fixr).

How Much Does It Cost to Refinish Cabinets?

Refinishing in the strict sense means stripping the old finish and restaining the wood. HomeGuide puts it at $1,500 to $4,500 for an average kitchen; HomeAdvisor (updated June 17, 2026) and Angi (August 31, 2026) give an average of $3,116, with most projects between $1,992 and $4,494. Per square foot of cabinet surface, the guides price it by method:

Refinishing method HomeGuide (per sq ft) HomeAdvisor (per sq ft) Angi (per sq ft)
Restaining $4 to $15 $4 to $10 $4 to $15
Painting $3 to $15 $6 to $14 $3 to $10
Glazing over paint $10 to $25 $10 to $25 $9 to $25
Varnishing Not given $6 to $16 $6 to $16

HomeGuide counts cabinet surface as the cabinet exteriors, both sides of the doors and the drawer fronts: 150 to 250 sq ft for a small kitchen, 250 to 400 for an average one and 400 to 600 for a large one. The calculator estimates your surface from your counts, and you can replace the door and drawer sizes with your own. Only solid wood and wood veneer can be restained; MDF, laminate and Thermofoil can only be painted.

Paint, Refinish, Reface or Replace?

Option What it involves Cost (HomeGuide) Other guides
Paint Clean, sand, prime and paint the existing cabinets $2,000 to $6,500 HomeAdvisor $425 to $1,466; Fixr average $4,000
Refinish (restain) Strip, sand, stain and clear-coat $1,500 to $4,500 HomeAdvisor and Angi $1,992 to $4,494, average $3,116
Replace doors only New doors and drawer fronts on the old boxes $2,200 to $6,600 Not given
Reface Veneer over the boxes plus new doors and drawer fronts $5,000 to $13,000 HomeAdvisor $4,300 to $10,000; Fixr average $8,250
Replace New cabinet boxes, doors and drawers $4,500 to $15,000 Fixr average $8,000

Painting and refinishing keep your cabinet boxes and doors, so they only make sense when those are solid and you like the layout. Refacing keeps the boxes but gives you new doors; replacing changes everything. My guide to how to refinish kitchen cabinets explains how to tell whether yours are worth refinishing.

DIY Cost: What You Buy and How Much

The Supply List

HomeGuide puts the DIY cost of painting kitchen cabinets at $200 to $600 for paint and supplies, and Angi and HomeAdvisor give the same range. The calculator prices each item at the midpoint of HomeGuide’s supply list:

Item HomeGuide price range Calculator default
Paint $20 to $70 per gallon (latex $20 to $60, alkyd $25 to $70) $70 per gallon
Primer $35 to $50 per gallon $45 per gallon
Brushes $10 to $15 $12.50
Paint roller kit $8 to $20 $14
Patching compound $6 to $10 $8
Painter’s tape $5 to $10 $7.50 a roll
Sandpaper $2 to $5 $3.50 a sponge or sheet
Drop cloth $3 to $10 $6.50

Cabinet enamels from paint stores often cost more than HomeGuide’s $70 top; put your store’s price in the calculator. HomeGuide also lists a paint sprayer rental at $40 to $100 a day as an option; the calculator assumes brush and roller.

How Much Paint and Primer

Paint is the easy part to estimate once you know the surface. The calculator multiplies the surface by the number of coats, divides by the maker’s coverage and adds 10% for waste, then rounds up to gallons and quarts. It uses the low end of each maker’s range, because cabinets have edges and profiles that eat paint:

Product Coverage (maker) Calculator uses
Sherwin-Williams Emerald Urethane Trim Enamel 350 to 400 sq ft per gallon 350
Benjamin Moore Advance 400 to 500 sq ft per gallon 400
INSL-X Cabinet Coat 350 to 450 sq ft per gallon 350
Zinsser B-I-N shellac primer About 500 sq ft per gallon 500
Zinsser Cover Stain oil primer 400 to 450 sq ft per gallon 400
INSL-X Stix bonding primer 300 to 400 sq ft per gallon 300
Oil-based wood stain (Minwax Wood Finish) 400 to 500 sq ft per gallon 400
General Finishes High Performance topcoat 500 to 600 sq ft per gallon 500

For the average kitchen in our example (about 212 sq ft of surface), two coats of a 350 sq ft-per-gallon enamel need 1 gallon and 2 quarts, and one coat of shellac primer needs 2 quarts. HomeAdvisor’s rule of thumb, about two gallons for an average kitchen with two coats, is in the same range. My best paint for cabinets guide compares the paints and primers themselves.

How Long It Takes

HomeGuide estimates 30 to 60 hours to paint 200 sq ft of cabinets yourself, including prep, priming and two coats, and the calculator scales that to your surface. Angi gives 20 to 40 hours or more. Drying time comes on top: the calculator adds up the makers’ recoat times for each coat on one side of the doors, and you need roughly double that because doors have two sides. A professional crew takes three to five days (HomeGuide).

How the Calculator Works

  • Pro quote, paint: linear feet × $30 to $70 ($40 to $100 sprayed), and doors × $70 to $125 plus drawer fronts × $30 to $110. With both counts entered, the range runs from the lower minimum to the higher maximum.
  • Pro quote, restain: cabinet surface × $4 to $15 per sq ft.
  • Extras: up to 10% for cabinets over 8 feet, $120 to $600 for repairs, $6 to $60 per new knob or pull. Totals are rounded to $10.
  • Surface (our estimate): 3.5 sq ft per side of a door (about 15 by 34 inches), 1.25 sq ft per drawer front and 1.5 sq ft of face frame and end panel per linear foot of cabinets. Edit all three if your doors are bigger or smaller.
  • Sandpaper (our estimate): one 220-grit sponge or sheet per 25 sq ft for a paint job; for a restain, one sheet per 15 sq ft at 120 grit and one per 25 sq ft at 150, 180 and 320.
  • Drying: recoat times from each maker’s data sheet; for a restain, General Finishes’ 72 hours between an oil stain and a water-based topcoat.

The calculator has no ZIP code field on purpose: none of the four guides publishes regional multipliers, and a national range with your own counts is more honest than a made-up local adjustment.

Ways to Cut the Cost

  • Do the prep yourself. Fixr and Angi both suggest removing the doors and hardware, cleaning and sanding before the painters arrive to cut labor hours. Agree on it with the painter first.
  • Get three quotes and ask each painter how they price: per foot, per door or per project.
  • Keep the hardware if it still works: new pulls add $6 to $60 each.
  • Paint, don’t replace, when the boxes are sound: painting costs a fraction of new cabinets.
  • Buy the right sander once. A square-pad palm sander does most cabinet prep; see the best sanders for cabinets.

Supplies That Make the DIY Job Go Faster

The products behind the calculator’s shopping list, all sold on Amazon. Specs are from the makers’ data sheets and listings.

Krud Kutter Original Cleaner Degreaser

Krud Kutter Original cleaner degreaser 32 oz spray bottle for cleaning kitchen cabinets before painting

Best Degreaser for Step One

Every paint and primer data sheet in this guide starts with the same line: the surface must be free of grease. Rust-Oleum’s own cabinet paint instructions name Krud Kutter Cleaner/Degreaser for that step. It is a ready-to-use spray that breaks down grease, oil, grime and wax on washable surfaces. Spray, scrub with a non-scratch pad around the pulls, then rinse with clean water and let the doors dry before you sand.

Check price on Amazon

  • ✅ Named in Rust-Oleum’s cabinet paint instructions
  • ✅ Ready to use, no mixing
  • ✅ Cuts kitchen grease and wax
  • ❌ Rinse it off before priming

Best For: The first step on every cabinet job, painted or stained.


Krud Kutter Gloss-Off Prepaint Surface Preparation

Krud Kutter Gloss-Off liquid deglosser 32 oz for preparing glossy cabinets for paint

Best Liquid Deglosser

Gloss-Off is a no-rinse liquid that cleans and dulls glossy finishes so new paint bonds. Rust-Oleum’s data sheet says to wipe it on full strength with a coarse lint-free cloth and wipe it off with a clean one, and that you can paint once it is dry to the touch, usually about 10 minutes, or up to a week later. It rates the 32 oz bottle at 50 to 75 sq ft, so a kitchen usually needs three or four. Use it on the profiles and inside corners you can’t reach with a sander, not instead of sanding everywhere.

Check price on Amazon

  • ✅ No rinsing
  • ✅ Reaches profiles and grooves
  • ✅ Paint after about 10 minutes
  • ❌ Covers less than you’d think: 50 to 75 sq ft a bottle

Best For: Raised-panel doors, moldings and anyone short on sanding time.


3M Angled Sanding Sponges, Fine Grit (6-Pack)

3M angled sanding sponges fine grit 6 pack for scuff sanding cabinet doors and profiles

Best for Scuff-Sanding Profiles

A sander does the flat panels; a sponge does everything else. These 4-7/8 x 2-7/8 x 1 inch sponges have an angled edge for corners and detail work, can be used wet or dry, and wash out so one sponge lasts several doors. Fine grit is right for scuffing a sound finish before primer and for the light sand between coats, and the foam follows a shaker rail or raised-panel profile without flattening it.

Check price on Amazon

  • ✅ Angled edge reaches inside corners
  • ✅ Washable and reusable
  • ✅ Follows profiles a hard block flattens
  • ❌ Too fine to strip an old finish

Best For: Shaker rails, raised panels, edges and sanding between coats.


DEWALT DWE6411K 1/4 Sheet Palm Sander

DEWALT DWE6411K quarter sheet palm sander for sanding cabinet face frames and inside corners

Best Sander for Face Frames and Boxes

Cabinets are full of 90-degree inside corners: inside every box, where rails meet stiles, around every shaker panel. A round pad can’t reach them; the square pad of the DWE6411K can. DEWALT lists a 2.3 amp motor at 14,000 OPM, a foam pad for a flat sanding plane, a paper clamp that takes cut-down 1/4 sheets of any grit and a locking dust port for a vacuum hose. It is the editor’s choice in our best sanders for cabinets comparison.

Check price on Amazon

  • ✅ Square pad reaches inside corners
  • ✅ Takes cheap sheet paper in any grit
  • ✅ Locking vacuum port
  • ❌ Slower than an orbital on big slab doors

Best For: Face frames, cabinet boxes, frame-and-panel doors.


INSL-X Cabinet Coat Urethane Acrylic Enamel

INSL-X Cabinet Coat urethane acrylic satin enamel cabinet paint white 1 gallon

Best Cabinet Paint You Can Buy on Amazon

Made by Benjamin Moore under its INSL-X brand, Cabinet Coat is a urethane-reinforced acrylic built for cabinets. The data sheet says it resists chipping, scuffing, food stains, grease and water, covers 350 to 450 sq ft per gallon, is tack-free in 1 hour, recoats in 6 hours and reaches full cure in 14 days. Over previously painted cabinets in good condition, INSL-X says no primer is needed; bare wood gets a primer first.

Check price on Amazon

  • ✅ Primerless over sound paint
  • ✅ Recoat in 6 hours
  • ✅ Sold on Amazon in quarts and gallons
  • ❌ Dries fast: overworking leaves brush marks

Best For: Repainting already painted cabinets, or a first-time cabinet painter.


Whizz Premium Foam Mini Rollers, 4″ (10-Pack)

Whizz premium black foam 4 inch mini roller covers 10 pack for smooth cabinet paint

Best Roller for Flat Cabinet Panels

A 4-inch foam mini roller lays enamel flat on slab doors, drawer fronts and the flat centers of shaker panels, which leaves a brush only the profiles and edges. These are black foam covers with a concave edge, sold in a 10-pack so you can use a fresh one for the primer and each coat. Roll a section, then lightly tip it off in one direction and leave it: cabinet enamels level as they dry, and going back over a coat that has started to set is what leaves marks.

Check price on Amazon

  • ✅ Smooth, stipple-free finish on flat panels
  • ✅ 10 covers: a fresh one per coat
  • ✅ Cheap insurance against lint
  • ❌ Needs a 4″ mini frame

Best For: Slab doors, drawer fronts and cabinet sides.


Where These Numbers Come From

Pro prices are from HomeGuide’s cabinet painting guide (updated February 21, 2025) and cabinet refinishing guide (April 5, 2023), Fixr’s kitchen cabinet painting guide (January 27, 2026), HomeAdvisor’s cabinet painting (June 20, 2026) and refinishing (June 17, 2026) guides, and Angi’s cabinet painting (September 8, 2026) and refinishing (August 31, 2026) guides, all read on October 1 and 2, 2026. Coverage and drying times are from the makers’ data sheets: Sherwin-Williams, Benjamin Moore, INSL-X, Zinsser, Krud Kutter and General Finishes. The surface and sandpaper allowances are our own planning estimates, stated above. I don’t show customer ratings or Amazon prices, which change daily. More on how I choose the products I recommend.

❓ Frequently Asked Questions

What is the average cost to refinish cabinets?+
HomeAdvisor and Angi put the average at $3,116, with most homeowners paying between $1,992 and $4,494 for professional refinishing. HomeGuide’s range for an average kitchen is $1,500 to $4,500. Painting the same cabinets is quoted differently, usually by the linear foot or per door, and ranges more widely between guides.
Is it cheaper to paint cabinets or get new ones?+
Painting is much cheaper. Fixr puts the average cost of painting kitchen cabinets at $4,000 against $8,000 to replace them, and HomeGuide lists replacement at $4,500 to $15,000. Doing the painting yourself drops the bill to a few hundred dollars in supplies, as long as the boxes and doors are sound.
Is it worth it to have kitchen cabinets professionally painted?+
Often, yes. Labor is 80% to 85% of a pro cabinet painting bill according to HomeGuide, which also estimates 30 to 60 hours to paint 200 sq ft of cabinets yourself. If your time is limited, the doors are detailed or you want a sprayed finish, the pro quote buys a smoother, faster result.
How long does it take a professional to paint kitchen cabinets?+
HomeGuide says three to five days on average, depending on the size of the kitchen, the number of doors and drawers, the painting method and the size of the crew. Fixr gives four to five days for an average kitchen. Expect the kitchen to be partly out of use while the doors are away.
Can I paint cabinets myself?+
Yes, and it is where the savings are. The work is not difficult, only slow: plan on a long weekend at least, more for a big kitchen, because each coat on each side of the doors has to dry before the next. Careful degreasing, sanding and priming matter more than painting skill.
How much does it cost to paint kitchen cabinets per door?+
HomeGuide and Fixr both put it at $70 to $125 per door, plus $30 to $110 per drawer front, including paint and labor. Angi’s range is higher, at $100 to $250 per door. Some painters price the face frames and boxes separately, so ask exactly what each quote includes before you compare them.
Does Home Depot refinish kitchen cabinets?+
According to HomeGuide, no: Home Depot offers cabinet installation, replacement and refacing, but not refinishing. Refacing, which puts new veneer and new doors on the old boxes, costs $4,300 to $10,000 according to HomeAdvisor, so for a finish that is simply worn, a local cabinet painter or refinisher costs far less.

Conclusion

The cost to paint kitchen cabinets is mostly labor: $30 to $70 a linear foot or $70 to $125 a door with a pro, a few hundred dollars in paint and supplies if you do it yourself. Restaining runs $4 to $15 per square foot of cabinet surface. Use the cabinet refinishing cost calculator to compare quotes against your own counts, then follow how to refinish kitchen cabinets if you take the job on, with the paint chosen from the best paint for cabinets.

How to Refinish Kitchen Cabinets: Clean, Sand, Prime and Paint or Stain

Painted green shaker kitchen cabinets with a white quartz island, with the title How to Refinish Kitchen Cabinets

How to refinish kitchen cabinets, in order: take off the doors and drawers, degrease every surface, scuff-sand the old finish with 220 grit (or sand to bare wood if you’re restaining), fill and sand any damage, prime, then brush and roll two thin coats of cabinet enamel, or stain and clear-coat the wood. The cleaning and sanding take most of the time and decide whether the new finish lasts years or starts peeling at the handles, so this guide spends the most time there.

Below is how to choose between painting and restaining, what each cabinet material will accept, the grits and sanders for doors, frames and profiles, which primer goes over which surface, and the drying times the paint makers give, because rushing them is the other big reason cabinet jobs fail.

⚡ Quick Answer

Clean with a degreaser, rinse and dry. Grease left on the doors is the number one reason cabinet paint fails.

Sand the old finish dull with 220 grit: a square-pad palm sander on frames, an orbital on slab doors, a sanding sponge on profiles.

Prime and paint with a stain-blocking primer and two coats of a cabinet enamel such as INSL-X Cabinet Coat, waiting the full recoat time between coats.

Refinish, Paint, Restain or Reface?

“Refinishing” kitchen cabinets means keeping the boxes and doors you have and changing their finish. There are two ways to do it, painting and restaining, and a third option, refacing, that is a different job altogether.

Paint or Restain: Which Suits Your Cabinets

Paint Restain
Changes the color Any color, including white Darker only, unless stripped to bare wood
Cabinet materials Wood, veneer, MDF, laminate, Thermofoil Solid wood and wood veneer only
Hides dents and repairs Yes, after filling No: filler and patches show
Prep Degrease, scuff-sand, prime Degrease, strip or sand to bare wood (gel stain: scuff only)
Pro cost (HomeGuide) $30 to $70 per linear foot $4 to $15 per sq ft of cabinet surface

Painting is the more common choice and the more forgiving one: paint hides the grain, small repairs and the old color. Restaining keeps the wood visible, which means every scratch, glue spot and patch of old finish shows through, so the sanding has to be thorough. A stain can only make wood darker, never lighter, so going lighter means stripping to bare wood first; my guide to how to stain wood explains why.

What Your Cabinets Are Made Of Decides the Options

Look at the back of a door and the edge of a shelf. HomeGuide’s refinishing guide sorts cabinet materials like this:

Cabinet surface Stain or paint Paint only
Solid wood (oak, cherry, maple, hickory, pine, walnut) ✅
Plywood ✅
Wood veneer ✅
MDF ✅
Laminate or melamine ✅ (or gel stain as a faux wood finish)
Thermofoil ✅ (or gel stain as a faux wood finish)

Many cabinets are a mix: solid wood face frames and doors, with plywood or particleboard boxes covered in a printed laminate inside. That is fine for paint, as long as each surface gets the primer it needs.

Refacing Is a Different Job

Refacing, also sold as “resurfacing”, covers the boxes with new veneer and replaces the doors and drawer fronts. HomeAdvisor puts it at $4,300 to $10,000, against an average of $3,116 to have cabinets professionally refinished. It makes sense when the doors are damaged or you hate their style, not when the finish is simply worn. To price both options for your own kitchen, use the cabinet refinishing cost calculator.

Tools and Supplies

  • Prep: screwdriver or drill, painter’s tape, sandwich bags for hinges, drop cloths, a degreaser and non-scratch scrub pads.
  • Sanding: a 1/4-sheet palm sander, a random orbital sander if you have many slab doors or are restaining, 120, 180 and 220 grit paper, and fine sanding sponges.
  • Repair: wood filler, a putty knife, tack cloths and a vacuum.
  • Finish: primer and cabinet enamel, or stain and a clear topcoat, a 2-inch synthetic brush and 4-inch foam mini rollers.
  • Safety: a dust mask or respirator for sanding, gloves and ventilation for primers and stains.

Step 1: Empty the Cabinets and Remove Doors and Drawers

  1. Number everything. Put a strip of tape inside each opening and on the matching door’s hinge hole with the same number. Cabinet doors are rarely interchangeable once the hinges have been adjusted.
  2. Take off doors, drawer fronts and hardware. Bag the hinges and screws for each door together. If you are keeping the pulls, clean them now; if you are replacing them with a different hole spacing, fill the old holes in Step 4.
  3. Set up a finishing area. Doors dry flat on painter’s pyramids, scrap strips or a drying rack in a garage or spare room. You need room to lay out every door twice: once for the backs and once for the fronts.
  4. Mask the kitchen. Tape off walls, countertops, the floor and the inside of the boxes if you are not painting them.

Step 2: Degrease Every Surface

Kitchen cabinets carry years of cooking grease and hand oil, worst around the pulls and above the stove. General Finishes, which makes finishes for professional cabinet shops as well as DIYers, says dirt, oil from hands, wax and silicone dusting sprays are the number one reason refinished cabinets chip and peel, and that there is no such thing as a “no prep” paint. Every primer and paint data sheet I used for this guide starts with the same requirement: a clean, dry, grease-free surface.

How to Clean Cabinets Before Painting

  1. Scrub with a degreasing cleaner or dish detergent and a non-scratch pad, working one door at a time.
  2. Rinse with clean water. Residue left by the cleaner can stop primer from bonding as surely as grease.
  3. General Finishes then wipes with a 50:50 mix of denatured alcohol and water, which needs no rinsing.
  4. Let everything dry completely before sanding. Sanding a greasy door just pushes the grease into the scratches.

⚠️ Important

Skip TSP if you will use a Zinsser shellac or oil primer: both of Zinsser’s data sheets say not to use TSP as a cleaner. And if the cabinets have been polished with a silicone dusting spray for years, test one door through primer and paint before doing the kitchen. General Finishes says silicone is almost impossible to remove.

Step 3: Sand or Degloss the Old Finish

This is the step that decides adhesion. How far you sand depends on what you are putting on next.

Scuff-Sanding for Paint: Dull, Don’t Strip

To paint over a sound finish, you don’t need bare wood. You need every glossy surface dulled so the primer has scratches to grip. Benjamin Moore’s data sheet for its Advance cabinet paint says cabinetry should be roughened by sanding with 220 grit or coarser before priming, and INSL-X and Sherwin-Williams both say glossy surfaces should be sanded dull. Go over every face, edge and profile until there is no shine left when you look across it toward a light. Sand through to bare wood only where the old finish is peeling, chipped or crazed, and feather those edges smooth.

Sanding to Bare Wood for a Restain

A new stain needs bare wood. Strip thick or multi-layer finishes first; my guide to how to strip paint from wood covers the gels and how to use them. Then sand every surface with 120 grit and finish with 150, which is the sequence General Finishes gives before its stains; sanding much finer closes the grain and the stain takes lighter and less evenly. Many cabinet doors are veneer over plywood or MDF, so check the edges and stay off coarse paper near them. The full grit sequence by species is in how to refinish wood furniture.

Which Sander for Which Part of the Cabinet

Cabinet part Tool Grit to paint Grit to restain
Slab doors, drawer fronts, end panels 5″ random orbital sander 220 scuff 120, then 150
Face frames, inside the boxes, frame-and-panel doors 1/4-sheet palm sander (square pad) 220 scuff 120, then 150
Shaker rails, raised panels, moldings Sanding sponge or detail sander Fine sponge Medium, then fine sponge
Between coats of primer and paint Fine sanding sponge by hand Light pass, 220 or finer Fine sponge between topcoats

If you buy one sander for cabinets, make it the square-pad palm sander: cabinets are full of inside corners a round pad can’t reach. Add a random orbital when you have a kitchen full of slab doors or a full restain. My best sanders for cabinets comparison covers the models, and its section on how to sand kitchen cabinets has the surface-by-surface routine.

Liquid Deglosser: Where It Replaces Sandpaper

A liquid deglosser such as Krud Kutter Gloss-Off cleans and dulls a glossy finish chemically. Its data sheet says you wipe it on, wipe it off, and can paint once it is dry to the touch, usually about 10 minutes later. It is useful on deep profiles and in grooves where a sponge struggles, and on the inside of boxes. It does not flatten old drips or brush marks the way sandpaper does, so treat it as a partner to scuff-sanding, not a way to skip it.

Laminate, Thermofoil and Melamine

Smooth plastic surfaces can be painted but not stained. INSL-X says melamine and Formica need only a light sand with fine paper before Cabinet Coat; Benjamin Moore specifies its Fresh Start High-Hiding All Purpose Primer under Advance on MDF, Thermofoil and laminate. Don’t sand laminate hard: the decorative layer is thin, and the particleboard or MDF under it is a poor surface for paint. Peeling or bubbled Thermofoil is not a paint job; HomeGuide suggests refacing for Thermofoil cabinets instead.

💡 Pro Tip

Lay each door on a pair of strips of scrap wood while you sand. The door sits flat, the pad can run right off the edge without catching, and the dust falls away instead of being ground into the next door. Vacuum each door and wipe it with a tack cloth before it goes to the priming area.

Step 4: Repair, Fill and Sand Smooth

Fill dents, gouges and any hardware holes you won’t reuse with wood filler, slightly proud of the surface. Once it is hard, sand it flush with the same 220 grit, and check under a raking light: paint makes every bump more visible, not less. Sherwin-Williams’ data sheet adds that patched areas must be primed. If you are restaining, use a stainable filler, which the best wood filler guide sorts out.

Step 5: Prime

Primer does three jobs on cabinets: it bonds to the old finish, it blocks stains and wood tannins from bleeding through light paint, and it gives the enamel an even surface to level on. Which one you need depends on the surface:

Surface Primer type Example and maker’s notes
Varnished or stained wood, especially oak Shellac or oil-based stain blocker Zinsser B-I-N: recoat in 45 minutes, seals knots and tannin bleed. Zinsser Cover Stain: recoat in 1 hour, bonds to varnish without sanding or deglossing
Laminate, melamine, glossy old enamel Bonding primer INSL-X Stix: recoat in 3 to 4 hours, maximum adhesion after 3 to 4 days of cure; glossy paint should still be deglossed
MDF, Thermofoil, laminate under Advance Maker’s all-purpose primer Benjamin Moore Fresh Start High-Hiding All Purpose Primer (046)
Bare wood under Emerald Urethane Wood primer Sherwin-Williams lists one coat of Premium Wall & Wood Primer
Sound, previously painted cabinets Often none INSL-X says Cabinet Coat needs no primer over paint in good condition; spot-prime bare spots

Brush and roll the primer thin, let it dry for the time on the can, then sand it lightly with a fine sponge or 220 grit to knock off dust nibs. Benjamin Moore’s cabinet instructions call for light sanding between coats with all dust cleaned off. Oak deserves a special mention: its open grain shows through paint, and its tannins can stain white paint yellow, which is why a shellac or oil primer is the safe choice there. My best paint for cabinets guide compares the primers in more detail.

Step 6: Paint the Cabinets

Choose a Cabinet Enamel

Wall paint stays soft and sticky on cabinet doors. Use an enamel made for cabinets and trim: a waterborne alkyd such as Benjamin Moore Advance, a urethane-modified alkyd such as Sherwin-Williams Emerald Urethane Trim Enamel, or a urethane acrylic such as INSL-X Cabinet Coat. HomeGuide notes professional painters usually pick a satin sheen for cabinets because it hides imperfections better than semi-gloss. The best paint for cabinets guide compares them side by side.

Brush and Roll the Backs First

  1. Do the backs of the doors first. Rust-Oleum’s cabinet paint instructions do the frames, rails and door backs with two coats, and only then flip the doors to do the fronts. Any small mistake ends up on the inside.
  2. Brush the profiles, roll the flats. Use a synthetic brush on the edges and the grooves of shaker or raised panels, then a 4-inch foam roller on the flat areas, rolling with the grain.
  3. Keep coats thin and leave them alone. INSL-X warns that overworking Cabinet Coat leaves brush and roller marks because it dries quickly. Lay it on, tip it off in one direction and move on.
  4. Paint the face frames and boxes in the kitchen while the doors dry, in the same order: profiles first, flats second.

Spraying Is an Option

Spraying gives the smoothest finish: HomeAdvisor calls it the best method for cabinets because it leaves no brush strokes, and HomeGuide prices sprayed cabinets at $40 to $100 per linear foot, against $30 to $70 brushed and rolled. Every paint here can be sprayed; the data sheets give the settings. For a DIY kitchen, though, the masking, overspray and learning curve are a project of their own, and a good foam roller gets close on flat doors. If you do spray, practice on the inside of a door first. My guides to the best paint sprayer for cabinets and how to use a paint sprayer cover the equipment and the technique.

Respect the Recoat Time

The second coat goes on only when the first can take it. These are the makers’ recoat times at about 77°F and 50% humidity; cool or humid weather makes all of them longer:

Paint Type Recoat Back in use
Sherwin-Williams Emerald Urethane Trim Enamel Urethane-modified alkyd, water-based 4 hours Not listed on the data sheet
INSL-X Cabinet Coat Urethane acrylic 6 hours Full cure in 14 days
Benjamin Moore Advance Waterborne alkyd 16 hours No heavy use for 5 to 7 days; full hardness up to 30 days
Rust-Oleum Cabinet Transformations Basics Water-based acrylic 2 hours at 70°F Rehang after 12 hours, normal use after 24, full hardness in 7 days
Valspar Cabinet, Door & Trim Oil Enriched Enamel Oil-enriched enamel 4 hours Not listed

Sand lightly between coats with a fine sponge to remove dust nibs, vacuum and tack, then apply the second coat. Two coats over primer is the norm; a big color change, especially dark to white, can need a third.

Restaining Instead of Painting

Strip, Sand and Stain

For a true restain you work on bare wood, exactly as on furniture: stripper for the old finish, sanding through 120 and 150, a pre-stain conditioner on blotch-prone maple, birch and pine, then stain wiped on and off. My guide to how to stain wood walks through each step. On veneered doors, strip rather than sand the old finish off, and sand by hand or at low speed so you don’t cut through the veneer.

Gel Stain Over the Old Finish

If you only want to go darker, gel stain can go over the existing finish without stripping. General Finishes’ instructions: scuff clean with a synthetic pad and a 50:50 mix of denatured alcohol and water, sand lightly with a 220 to 320 grit sponge, then wipe on the gel stain and wipe off the excess. Over an existing finish it can take 72 hours or more to dry, GF limits it to two coats, and if it is still tacky after five days it may never dry and has to be stripped. Test the whole process on the back of one door first.

Seal With a Clear Topcoat

Stained cabinets need a clear topcoat. General Finishes recommends three coats of its topcoats over gel stain, and says to let oil-based products dry at least 72 hours before applying a water-based one. Sand between coats with a fine sponge and remove the dust. My guide to sanding between coats of polyurethane covers the grits.

Step 7: Let It Cure, Then Rehang

Dry to the touch is not hard enough to handle. Rust-Oleum says to wait at least 12 hours before reinstalling doors painted with its cabinet paint and 24 hours before normal use, with full hardness in seven days. Benjamin Moore says Advance shouldn’t see heavy use for five to seven days and can take up to 30 days to reach full hardness. INSL-X lists a 14-day full cure for Cabinet Coat. Rehang the doors by their numbers, adjust the hinges, add clear bumpers so painted doors don’t stick to painted frames, and be gentle with the pulls for the first few weeks.

Common Cabinet Refinishing Mistakes

  • Not degreasing, which shows up months later as peeling around the pulls.
  • Leaving gloss on the old finish, especially on edges and profiles.
  • Using wall paint instead of a cabinet enamel.
  • No stain-blocking primer on oak, so tannins turn white paint yellow.
  • Thick coats and overbrushing, which leave drips and brush marks.
  • Recoating too soon or rehanging doors before the paint has hardened.
  • Sanding through veneer or laminate with coarse paper.

The Tools and Products I’d Use

These are the products for the steps above, all on sale on Amazon. Specs and instructions are from the makers’ data sheets and listings.

Krud Kutter Original Cleaner Degreaser

Krud Kutter Original cleaner degreaser 32 oz spray bottle for cleaning kitchen cabinets before painting

Best Degreaser for Step One

Every paint and primer data sheet in this guide starts with the same line: the surface must be free of grease. Rust-Oleum’s own cabinet paint instructions name Krud Kutter Cleaner/Degreaser for that step. It is a ready-to-use spray that breaks down grease, oil, grime and wax on washable surfaces. Spray, scrub with a non-scratch pad around the pulls, then rinse with clean water and let the doors dry before you sand.

Check price on Amazon

  • ✅ Named in Rust-Oleum’s cabinet paint instructions
  • ✅ Ready to use, no mixing
  • ✅ Cuts kitchen grease and wax
  • ❌ Rinse it off before priming

Best For: The first step on every cabinet job, painted or stained.


Krud Kutter Gloss-Off Prepaint Surface Preparation

Krud Kutter Gloss-Off liquid deglosser 32 oz for preparing glossy cabinets for paint

Best Liquid Deglosser

Gloss-Off is a no-rinse liquid that cleans and dulls glossy finishes so new paint bonds. Rust-Oleum’s data sheet says to wipe it on full strength with a coarse lint-free cloth and wipe it off with a clean one, and that you can paint once it is dry to the touch, usually about 10 minutes, or up to a week later. It rates the 32 oz bottle at 50 to 75 sq ft, so a kitchen usually needs three or four. Use it on the profiles and inside corners you can’t reach with a sander, not instead of sanding everywhere.

Check price on Amazon

  • ✅ No rinsing
  • ✅ Reaches profiles and grooves
  • ✅ Paint after about 10 minutes
  • ❌ Covers less than you’d think: 50 to 75 sq ft a bottle

Best For: Raised-panel doors, moldings and anyone short on sanding time.


DEWALT DWE6411K 1/4 Sheet Palm Sander

DEWALT DWE6411K quarter sheet palm sander for sanding cabinet face frames and inside corners

Best Sander for Face Frames and Boxes

Cabinets are full of 90-degree inside corners: inside every box, where rails meet stiles, around every shaker panel. A round pad can’t reach them; the square pad of the DWE6411K can. DEWALT lists a 2.3 amp motor at 14,000 OPM, a foam pad for a flat sanding plane, a paper clamp that takes cut-down 1/4 sheets of any grit and a locking dust port for a vacuum hose. It is the editor’s choice in our best sanders for cabinets comparison.

Check price on Amazon

  • ✅ Square pad reaches inside corners
  • ✅ Takes cheap sheet paper in any grit
  • ✅ Locking vacuum port
  • ❌ Slower than an orbital on big slab doors

Best For: Face frames, cabinet boxes, frame-and-panel doors.


DEWALT DWE6423K 5″ Random Orbital Sander

DEWALT DWE6423K 5 inch random orbital sander for sanding kitchen cabinet doors

Best Sander for a Kitchen Full of Doors

When you are sanding 20 or 30 doors to bare wood for a restain, a random orbital does the hours. DEWALT specs the DWE6423K at 3.0 amps and 8,000 to 12,000 OPM on a 5-inch hook-and-loop pad, so you can slow it down to scuff a finish and speed it up to cut one. A separate counterweight cuts vibration over a long day, and the dust port connects straight to DEWALT extractors. Pair it with a palm sander for the corners its round pad can’t reach.

Check price on Amazon

  • ✅ Variable speed for scuffing or stripping
  • ✅ Counterweight for long sessions
  • ✅ Swirl-free on slab doors
  • ❌ Round pad misses inside corners

Best For: Slab doors, drawer fronts and end panels, especially for a restain.


3M Angled Sanding Sponges, Fine Grit (6-Pack)

3M angled sanding sponges fine grit 6 pack for scuff sanding cabinet doors and profiles

Best for Scuff-Sanding Profiles

A sander does the flat panels; a sponge does everything else. These 4-7/8 x 2-7/8 x 1 inch sponges have an angled edge for corners and detail work, can be used wet or dry, and wash out so one sponge lasts several doors. Fine grit is right for scuffing a sound finish before primer and for the light sand between coats, and the foam follows a shaker rail or raised-panel profile without flattening it.

Check price on Amazon

  • ✅ Angled edge reaches inside corners
  • ✅ Washable and reusable
  • ✅ Follows profiles a hard block flattens
  • ❌ Too fine to strip an old finish

Best For: Shaker rails, raised panels, edges and sanding between coats.


Zinsser Cover Stain Oil-Based Primer

Zinsser Cover Stain oil-based stain blocking primer quart for kitchen cabinets

Best Primer for Glossy and Stained Cabinets

Zinsser says Cover Stain has excellent adhesion to dense, glossy surfaces such as enamel paints, varnishes, paneling and laminates without sanding or deglossing, and that it is an excellent tannin blocker, which matters on oak, where tannins can bleed through white paint. It dries to the touch in about 30 minutes and can be recoated after 1 hour, covering 400 to 450 sq ft per gallon (Zinsser data sheet CVS-03). It sands to a smooth base for the topcoat.

Check price on Amazon

  • ✅ Bonds to varnish and laminate
  • ✅ Blocks tannin and stains
  • ✅ Recoat in 1 hour
  • ❌ Oil-based: strong odor, mineral spirits cleanup

Best For: Varnished oak, stained cabinets and laminate before paint.


INSL-X Cabinet Coat Urethane Acrylic Enamel

INSL-X Cabinet Coat urethane acrylic satin enamel cabinet paint white 1 gallon

Best Cabinet Paint You Can Buy on Amazon

Made by Benjamin Moore under its INSL-X brand, Cabinet Coat is a urethane-reinforced acrylic built for cabinets. The data sheet says it resists chipping, scuffing, food stains, grease and water, covers 350 to 450 sq ft per gallon, is tack-free in 1 hour, recoats in 6 hours and reaches full cure in 14 days. Over previously painted cabinets in good condition, INSL-X says no primer is needed; bare wood gets a primer first.

Check price on Amazon

  • ✅ Primerless over sound paint
  • ✅ Recoat in 6 hours
  • ✅ Sold on Amazon in quarts and gallons
  • ❌ Dries fast: overworking leaves brush marks

Best For: Repainting already painted cabinets, or a first-time cabinet painter.


Whizz Premium Foam Mini Rollers, 4″ (10-Pack)

Whizz premium black foam 4 inch mini roller covers 10 pack for smooth cabinet paint

Best Roller for Flat Cabinet Panels

A 4-inch foam mini roller lays enamel flat on slab doors, drawer fronts and the flat centers of shaker panels, which leaves a brush only the profiles and edges. These are black foam covers with a concave edge, sold in a 10-pack so you can use a fresh one for the primer and each coat. Roll a section, then lightly tip it off in one direction and leave it: cabinet enamels level as they dry, and going back over a coat that has started to set is what leaves marks.

Check price on Amazon

  • ✅ Smooth, stipple-free finish on flat panels
  • ✅ 10 covers: a fresh one per coat
  • ✅ Cheap insurance against lint
  • ❌ Needs a 4″ mini frame

Best For: Slab doors, drawer fronts and cabinet sides.


General Finishes Oil Base Gel Stain (Java)

General Finishes oil base gel stain Java quart for restaining kitchen cabinets

Best Stain to Darken Cabinets Without Stripping

Gel stain is heavy-bodied, so it doesn’t soak in as deeply as a liquid stain, and General Finishes says its Java color is the one featured across social media for redone furniture and cabinets. GF’s instructions allow it over a sealed surface after a scuff clean and a light sand with a 220 to 320 grit sponge, but warn that over an existing finish the dry time grows to 72 hours or more, and that you should apply no more than 2 coats. A quart covers 150 to 200 sq ft.

Check price on Amazon

  • ✅ Darkens without stripping
  • ✅ Even color on blotchy woods
  • ✅ Wipe on, wipe off
  • ❌ Can only go darker
  • ❌ Long dry time over an old finish

Best For: Taking oak or maple cabinets darker without sanding to bare wood.


General Finishes High Performance Water Based Topcoat

General Finishes High Performance water based polyurethane topcoat satin quart for stained cabinets

Best Clear Coat Over Stained Cabinets

Stained cabinets need a clear coat that stands up to hands and steam. GF says High Performance was voted the hardest, most durable consumer polyurethane topcoat, and lists a recoat time of 2 hours or more, light use after 7 to 10 days and a full cure in 21 days. It covers 125 to 150 sq ft per quart. GF’s own warning: don’t put a clear coat over bright white paint, because it can yellow; painted cabinets don’t need one.

Check price on Amazon

  • ✅ Very hard water-based poly
  • ✅ Recoat in about 2 hours
  • ✅ Low odor indoors
  • ❌ Not for white painted cabinets
  • ❌ Wait 72 hours over oil stain

Best For: Sealing restained or gel-stained wood cabinets.


How I Put This Guide Together

The cleaning, primer, recoat and cure instructions come from the makers’ own data sheets: Benjamin Moore Advance (792), INSL-X Cabinet Coat (CC-55XX), Sherwin-Williams Emerald Urethane Trim Enamel (March 2026), Rust-Oleum Cabinet Transformations Basics (CAB-11), Zinsser B-I-N (BIN-03) and Cover Stain (CVS-03), INSL-X Stix (SXA-110), Krud Kutter Gloss-Off (KRK-09) and General Finishes’ gel stain and topcoat instructions. The cost figures are from HomeGuide and HomeAdvisor’s cost guides, and the material table from HomeGuide. The sanding advice follows the same grit logic as my furniture guides. I don’t show customer ratings or prices, which change daily. More on how I choose the products I recommend.

🏆 The Verdict

Refinishing kitchen cabinets succeeds or fails before the paint can is opened. Degrease with Krud Kutter, dull every surface with 220 grit using a palm sander and sanding sponges, prime with a stain-blocking primer such as Cover Stain, and roll two thin coats of a cabinet enamel such as Cabinet Coat, waiting the full recoat time between coats. To go darker without stripping, use gel stain and a clear topcoat instead.

❓ Frequently Asked Questions

Can I refinish my kitchen cabinets myself?+
Yes. Painting or restaining cabinets needs no special skills, only patience: HomeGuide estimates 30 to 60 hours for 200 sq ft of cabinet surface. Resurfacing in the trade sense, refacing with new veneer and new doors, is different and is usually hired out, because the veneer has to be cut and glued precisely.
Is it cheaper to refinish cabinets or buy new ones?+
Refinishing is far cheaper. HomeGuide puts professional refinishing at $1,500 to $4,500 for an average kitchen, against $4,500 to $15,000 to replace the cabinets, and a DIY paint job costs a few hundred dollars in supplies. Replacing only makes sense when the boxes are water-damaged, sagging or in the wrong layout.
Can I just paint over my kitchen cabinets without sanding?+
Only with the right primer, and never without cleaning. Zinsser says its shellac and oil primers grip glossy finishes without scuff sanding, but General Finishes warns there is no such thing as a no-prep paint. A light 220-grit scuff takes minutes per door and is the cheapest insurance against peeling.
Is it better to paint or restain kitchen cabinets?+
Paint if you want a new color, have laminate or MDF, or the wood has damage to hide. Restain if the cabinets are solid wood or veneer in good shape and you like the grain. Restaining to a lighter color means stripping to bare wood; going darker can be done with gel stain over the old finish.
What is the difference between refinishing and resurfacing cabinets?+
Refinishing changes the finish on the cabinets you have: clean, sand, then paint or stain. Resurfacing, also called refacing, covers the boxes with new veneer and replaces the doors and drawer fronts. HomeAdvisor puts refacing at $4,300 to $10,000, several times the cost of a refinish.
How difficult is it to refinish kitchen cabinets?+
It is easy to do and slow to do well. No single step is hard, but a kitchen has dozens of doors with two sides each, and every coat has to dry before the next. Most failures come from skipping the degreasing and scuff sanding, or from rehanging doors before the paint has hardened.

Conclusion

Learning how to refinish kitchen cabinets is mostly learning the order: label, degrease, sand dull, fill, prime, then thin coats of a real cabinet enamel with the full drying time in between. Do the backs first, give the paint days rather than hours before the doors go back up, and the finish will hold up to hands and steam for years. Before you start, price the job with the cabinet refinishing cost calculator, and if the cabinets have company, the same steps work on a dresser or table in how to refinish wood furniture.