Liquid Sandpaper (Deglosser): What It Does and When It Replaces Sanding

Liquid sandpaper and deglosser: a used paintbrush lying on a wood floor ready for repainting

Liquid sandpaper is a wipe-on deglosser: a cleaner that dulls a glossy painted or varnished surface so new paint can grip it, without the dust of sanding. It works on sound finishes that are clean and intact, like cabinets, doors and trim you want to repaint. It doesn’t level drips, smooth rough patches, remove peeling paint or prepare bare wood, and no maker gives it a grit number, because it doesn’t scratch the surface the way sandpaper does.

Below is what liquid sandpaper actually does, what the makers say on the label, the jobs where it really can replace sanding and the ones where it can’t, how to use it step by step, and the products and sanding tools worth having on hand.

⚡ Quick Answer

Use it: on sound, glossy paint or varnish you’re recoating, especially on moldings, spindles and raised panels that are slow to sand. Krud Kutter Gloss-Off and Klean-Strip Liquid Sandpaper are the two common ones.

Sand instead: when paint is peeling, rough, dripped or damaged, or the wood is bare. A fine sanding sponge or a 1/4-sheet sander does it quickly.

Equivalent grit: none. No maker publishes one, so treat any number you read online as a guess.

What Is Liquid Sandpaper?

“Liquid sandpaper” is a marketing name for a liquid deglosser: a solution you wipe onto an existing finish to clean it and take the shine off, so the next coat bonds instead of sliding around on a slick surface. The names are used interchangeably on store shelves. Klean-Strip calls its product Liquid Sandpaper and prints “Degreases and Deglosses” and “Use instead of sandpaper” on the can; Krud Kutter calls its version Gloss-Off Prepaint Surface Preparation; Sherwin-Williams sells M-1 Paint Deglosser and Pre-Paint Cleaner.

What It Does, According to the Makers

  • Klean-Strip Liquid Sandpaper (QKLS285): the current label describes it as a no-mess degreaser and deglosser, in the product category “General Purpose Degreaser” with a maximum VOC of 0.5%. It contains dibasic esters and a glycol ether, and the label warns it is an eye irritant.
  • Krud Kutter Gloss-Off: Rust-Oleum, which owns Krud Kutter, lists it as a no-rinse, one-step formula that “cleans and deglosses without sanding”, for use on all paints, varnish, lacquer and polyurethane, and says it may be coated over anytime after 10 minutes. It carries the EPA Safer Choice label.
  • Sherwin-Williams M-1: a water-based deglosser that the company says eliminates the need for sanding before recoating, deglosses latex or oil-based painted surfaces, and has a 10-day open time.

What It Doesn’t Do

A deglosser works on the very top of the old finish. It doesn’t remove material the way an abrasive does, so it can’t flatten a drip, feather the edge of a chip, knock down brush marks or take off flaking paint. It also does nothing useful on bare wood, which has no gloss to remove. And it isn’t a stripper: if you want the old finish off, you need a paint stripper, a heat gun or a sander, which my guide on how to strip paint from wood compares.

What Grit Is Liquid Sandpaper Equivalent To?

There isn’t an equivalent grit, and none of the makers above claims one. Grit numbers describe the size of the abrasive particles on a sheet (see the sandpaper grit chart for how the CAMI and P scales work). A deglosser has no particles: it dulls and cleans the surface chemically, so the “scratch” it leaves isn’t comparable to 120, 180 or 220 grit. When you see a grit equivalence on a forum or blog, it’s someone’s impression, not a measurement.

What you can compare is the result. If a scuff-sanded surface and a deglossed surface both look evenly dull and the new coat passes an adhesion test (more on that below), both did the job. If you prefer to sand, our grit guide for wood recommends scuffing sound paint with 120 to 150 grit until the gloss is gone.

Liquid Sandpaper vs Sanding: When Each One Wins

Surface or job Liquid sandpaper Sanding Why
Sound, glossy paint on trim and moldings Yes Slow Profiles are hard to sand evenly; a rag reaches every groove
Kitchen cabinets in good shape Yes, after degreasing Yes Grease must go first; many pros do both
Peeling, chipped or flaking paint No Yes Loose paint has to be removed and the edges feathered
Drips, runs, brush marks, dust nibs No Yes Only an abrasive levels a surface
Bare wood No Yes There’s no gloss to remove; wood needs smoothing
Old paint that may contain lead Preferred Only lead-safe Sanding lead paint makes hazardous dust
Car paint No Yes Klean-Strip’s label says not for automotive paint

When Liquid Sandpaper Can Replace Sanding

The best case is a finish that’s sound, clean and simply too shiny to paint over: semi-gloss trim, enameled doors, varnished cabinets, a painted dresser with carved details. The paint is stuck to the wood; you only need the new coat to stick to it. Here a deglosser saves the slowest part of the job, which is sanding into every bead, cove and panel edge, and it makes no dust in a lived-in room.

When You Still Need to Sand

Any time the surface has to change shape. Peeling or chipped paint, old drips, deep scratches, a patched area and filler all need an abrasive to level and feather them. If you’re still choosing the filler, here is the best wood filler for each repair. Raw wood needs sanding to smooth it. And a deglosser can’t fix poor adhesion underneath: if the old paint lifts with a fingernail, a new coat on top will lift with it. For flat areas, a sheet sander or a random orbital sander does the scuffing fastest.

The Middle Road Most Painters Take

On cabinets and trim, many painters combine both: degrease, scuff the flat areas lightly with a fine sponge or a sander, use the deglosser on the profiles the sponge can’t follow, and then prime with a bonding primer. It costs a little more time than wiping alone, but it removes the guesswork on a slick or unknown finish.

⚠️ Important

In homes built before 1978, painted woodwork may contain lead. Test it before you sand: dry sanding lead paint creates dust that’s dangerous to breathe, especially for children. A deglosser doesn’t make dust, which is one more reason to reach for it on old trim that is still sound. The first step of my guide to stripping paint from wood covers lead testing.

How to Use Liquid Sandpaper, Step by Step

These steps follow Klean-Strip’s label, which is the most detailed of the three; check the can of whatever you buy, because wait times differ.

  1. Protect yourself. Klean-Strip’s first instruction is to wear chemical splash goggles. Wear chemical-resistant gloves too, and ventilate the room.
  2. Degrease first if needed. The Klean-Strip label says kitchens and areas with heavy grease or wax build-up may need cleaning with TSP or a TSP substitute before the deglosser.
  3. Saturate a coarse, lint-free cloth with the product at full strength. Krud Kutter also says not to dilute Gloss-Off.
  4. Rub with pressure in a circular motion. Fold the cloth and re-wet it often so you aren’t wiping dirt back on, and change cloths as they load up.
  5. Let it dry. Klean-Strip says to apply the new coating anytime after the surface is dry; Krud Kutter says Gloss-Off can be coated over after 10 minutes. Sherwin-Williams gives M-1 a 10-day open time.
  6. Prime or paint. Don’t let dust and hand oils build up on the prepared surface before you coat it.

Do You Rinse It Off?

Not with these three. Krud Kutter calls Gloss-Off a no-rinse formula, and the Klean-Strip label says the product leaves a slight residue that can be painted over. Rinsing with water would add moisture to the wood for no reason. If your can says otherwise, follow your can.

How to Check It Worked

Look at the surface under a raking light: it should be evenly dull, with no shiny patches. After your first coat of primer has dried for the time on its label, do a small tape test somewhere hidden: score a small cross through the coating with a utility knife, press painter’s tape firmly over it and pull it off fast. A few flecks on the tape are a warning; sheets of paint on the tape mean the prep failed, and that area needs sanding. ASTM D3359 is the standard version of this tape test.

Mistakes That Make Liquid Sandpaper “Not Work”

  • Wiping instead of scrubbing. Klean-Strip says to apply pressure. A light wipe leaves gloss behind.
  • Using it on fresh paint. The Klean-Strip label says not to use it on freshly finished surfaces.
  • Skipping the degreaser in a kitchen. Grease under paint is an adhesion problem no deglosser fixes.
  • Using it on the wrong material. Klean-Strip’s listing excludes rubber or asphalt tile, synthetics, plastic, fiberglass and other solvent-sensitive surfaces.
  • Expecting it to fix a bad surface. It removes gloss, not defects.

Liquid Sandpaper on Walls, Cabinets and Furniture

Walls

For semi-gloss or gloss wall paint in good condition, a deglosser is an easy way to take the shine off before repainting, and it cleans the wall at the same time. Patch and spackle first, sand the patches smooth, then degloss the whole wall so the new paint meets one even surface.

Kitchen Cabinets

Cabinets are the classic use: lots of profiles, lots of grease, and no wish to fill the kitchen with dust. Degrease, degloss, scuff the flat door panels lightly if you can, and use a bonding primer. If the cabinets have a factory catalyzed finish or a thermofoil (vinyl) skin, check the primer maker’s instructions: those are among the hardest surfaces to paint, and a plastic skin falls under the solvent-sensitive warning.

Furniture

On a painted piece that’s in good shape, a deglosser works the same way. If you plan to stain or show the wood, it’s the wrong product: you need the finish off, and my guide on how to refinish wood furniture covers stripping and sanding.

The Kit: Deglossers and the Sanding Tools That Back Them Up

The specs below are the makers’ own, from the product pages, labels and listings. I don’t show customer ratings or prices, which change daily.

Krud Kutter Gloss-Off Prepaint Surface Preparation

Krud Kutter Gloss-Off liquid deglosser, 32 oz bottle

Best Liquid Deglosser for Most Jobs

Gloss-Off is the one I’d pick up first because the maker is clear about what it’s for. Rust-Oleum says it’s a no-rinse, one-step product that cleans and deglosses without sanding, works on paints, varnish, lacquer and polyurethane, and can be coated over after 10 minutes. It also removes dirt, grease and wax, and it’s EPA Safer Choice certified. Use it at full strength.

Check price on Amazon

  • ✅ No rinse, recoat after 10 minutes
  • ✅ Rated for paint, varnish, lacquer and polyurethane
  • ✅ Also cleans grease and wax
  • ❌ No grit equivalent or “sanding level” given

Best For: Trim, doors and furniture with sound, glossy paint or varnish.


Krud Kutter Degreaser and Gloss-Off Bundle

Krud Kutter Original Cleaner Degreaser and Gloss-Off deglosser bundle

Best for Kitchen Cabinets

Cabinet doors near a stove carry grease that a deglosser alone may not cut, and both Klean-Strip and Krud Kutter tell you to degrease heavy build-up first. This bundle pairs Krud Kutter Original Cleaner Degreaser, a water-based degreaser, with Gloss-Off, so the two steps use one brand’s system: clean, let dry, then degloss.

Check price on Amazon

  • ✅ Degreaser and deglosser in one order
  • ✅ Water-based degreaser
  • ✅ Right sequence for kitchens
  • ❌ More product than a small trim job needs

Best For: Repainting kitchen and bathroom cabinets.


Klean-Strip Easy Liquid Sander Deglosser, 2-Pack
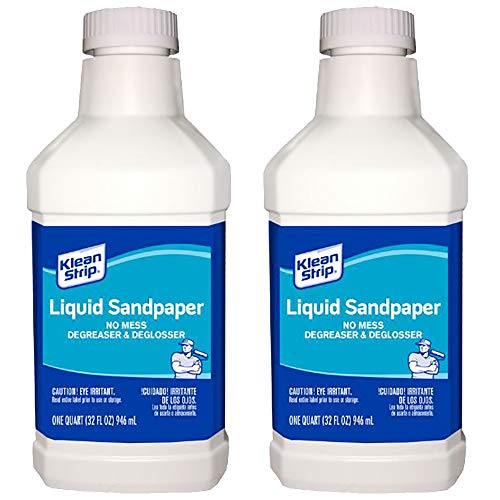
Klean-Strip Easy Liquid Sander Deglosser quart cans, 2-pack

The Original “Liquid Sandpaper”

Klean-Strip’s product is the one most people mean when they say liquid sandpaper. The label directions are specific: scrub with a saturated, lint-free cloth in a circular motion, refold often, and apply the new coating once it’s dry. The listing says there’s no need to rinse before painting and that it helps new paint bond to old finishes, and the label adds that it’s not for automotive paint or freshly finished surfaces. This listing is a pack of two quarts.

Check price on Amazon

  • ✅ Clear, step-by-step label directions
  • ✅ No rinse before painting
  • ✅ Low VOC (0.5% maximum on the label)
  • ❌ Not for car paint, plastics or fiberglass

Best For: Painted walls, trim and doors before repainting.


3M Sanding Sponge Block, Fine

3M fine sanding sponge block for scuffing paint before repainting

Best for Scuffing by Hand

When the deglosser leaves a stubborn shiny patch, or you want to knock down a few dust nibs, a sponge does it without cutting through edges. This 3M block is extra large, 2-7/8 x 8 in, works wet or dry and rinses clean to reuse. It flexes around rounded edges and turned parts where folded paper would dig in. For more options, see my best sanding blocks and sponges.

Check price on Amazon

  • ✅ Follows edges and profiles
  • ✅ Wet or dry, reusable
  • ✅ No dust cloud when used wet
  • ❌ 3M grades it “fine”, not by grit number

Best For: Touching up spots the deglosser missed and scuffing small parts.


DEWALT DWE6411K 1/4-Sheet Palm Sander

DEWALT DWE6411K quarter sheet palm sander for scuff sanding cabinets

Best Sander When the Surface Needs Real Sanding

For flat cabinet doors, drawer fronts and panels that need more than a wipe, a 1/4-sheet sander scuffs evenly and reaches into square corners that a round pad can’t. The DWE6411K has a 2.3 amp motor at 14,000 OPM, a paper clamp that takes ordinary sheets cut into quarters, and a punch for dust holes. Load it with 120 or 150 to take the gloss off sound paint.

Check price on Amazon

  • ✅ Square pad reaches corners
  • ✅ Uses cheap, standard sheets
  • ✅ Light, gentle cut for scuffing
  • ❌ Slow for removing paint completely

Best For: Cabinet doors, panels and furniture tops before repainting.


How I Put This Guide Together

The product facts come from the makers: Klean-Strip’s current label and safety data sheet for Liquid Sandpaper (QKLS285), Rust-Oleum’s product page for Krud Kutter Gloss-Off, and Sherwin-Williams’ page for M-1 Deglosser. Where a claim comes from an Amazon listing instead, I say so. The grit advice for sanding sound paint matches my wood grit guide. The products are on sale on Amazon today; I don’t show customer ratings or prices. More on how I choose the products I recommend.

🏆 The Verdict

Liquid sandpaper is a good shortcut on one kind of job: sound, glossy paint or varnish that you want to recoat, especially on detailed trim and cabinets. Scrub it on with pressure, let it dry and prime. It has no grit equivalent and it doesn’t level anything, so peeling paint, drips and bare wood still need an abrasive. Keep Krud Kutter Gloss-Off for the profiles and a fine sanding sponge for whatever it can’t fix.

❓ Frequently Asked Questions

Does liquid sandpaper really work?+
Yes, for what it is designed to do: clean and dull a sound, glossy finish so the next coat bonds. It works best when you scrub with pressure and degrease kitchens first. It fails when people expect it to remove peeling paint, smooth a rough surface or replace sanding on bare wood.
Is liquid sandpaper better than sanding?+
It’s faster and dust-free on detailed trim and cabinets in good condition, which makes it the better choice there. Sanding is better whenever the surface needs leveling or repair, and it gives a scratch pattern you can see and feel. On slick or unknown finishes, doing both with a bonding primer is the safest route.
Do I need to rinse off liquid sandpaper?+
Not with Klean-Strip or Krud Kutter Gloss-Off: both are sold as no-rinse products, and Klean-Strip says the light residue it leaves can be painted over. Let the surface dry, then prime or paint. Other brands differ, so read the directions on your own can before you skip a water wipe.
What are the disadvantages of liquid sander?+
It can’t level drips, fill scratches or remove loose paint, and it does nothing on bare wood. It needs goggles, gloves and ventilation, it isn’t meant for car paint, plastics or fresh finishes, and results depend on scrubbing hard enough. There’s also no visible scratch to tell you that every spot was covered.
Is deglosser the same as liquid sandpaper?+
Yes. Liquid sandpaper is a trade name for a liquid deglosser, and the shelf labels mix the terms freely: Klean-Strip sells “Liquid Sandpaper” and “Easy Liquid Sander Deglosser”, while Krud Kutter and Sherwin-Williams use “deglosser”. Formulas differ between brands, so follow the directions of the one you buy.
Do you have to wipe off deglosser before painting?+
With the common brands, no: you wipe it on, scrub, and let it dry. Krud Kutter says Gloss-Off can be painted after 10 minutes. What you should wipe off is the dirt it loosens, by refolding and changing the cloth as you go so the grime isn’t left behind on the surface.

Conclusion

Liquid sandpaper earns its place when the old finish is sound and the only problem is shine, and it’s at its best on profiles and cabinets where sanding is slow and dusty. It isn’t sandpaper in a bottle: there’s no grit, no leveling and no help on bare or damaged surfaces. When the job calls for real sanding, the grit chart tells you where to start, and my guide to types of sandpaper explains which abrasive to buy.
How to Stain a Deck: Prep, Weather and Application Step by Step

How to stain a deck: an open can of stain with a natural-bristle brush on bare deck boards

How to stain a deck in one line: strip or sand off any failing finish (stop at 60 to 80 grit), wash the boards with a deck cleaner and a brightener, let them dry until they absorb water within seconds, then apply the stain two or three boards at a time along their full length, in mild, dry, shaded weather, and wipe or brush out anything that hasn’t soaked in. The stain itself is the quick part. A deck stain fails early for the same few reasons every time: dirty or damp wood, boards sanded too smooth, the wrong weather, or too much product left on the surface.

Below is the full process the stain makers give in their data sheets, step by step: when to stain, how to prepare old and new wood, the cleaner and brightener, the moisture check, how to apply each type of stain, and the mistakes that make it peel. If you haven’t picked a product yet, start with my best deck stain comparison. Staining furniture or indoor wood is a different job, with finer grits and wipe-on stains: that’s in how to stain wood.

⚡ Quick Answer

Prep: remove old finish with a stripper or a 60 to 80 grit sanding, then scrub with a deck cleaner and neutralize with a wood brightener.

Wait: until water drops soak in within seconds, or a moisture meter reads 12% or less for oil-based stain.

Stain: in the shade, typically between 50 and 90°F with no rain due, railings first, then 2 or 3 boards at a time end to end with a stain brush or pad.

How to Stain a Deck: The Short Version

Whatever stain you buy, the job follows the same order. The makers disagree on details like coats and dry times, so the label always has the last word, but none of them skips a step here:

  1. Pick your weather window: mild, dry, no rain forecast, and shade on the boards.
  2. Clear and repair the deck: furniture off, loose boards fixed, nails set.
  3. Remove old, failing finish with a stripper or by sanding at 60 to 80 grit.
  4. Clean the wood with a deck cleaner and a stiff brush, then rinse.
  5. Brighten with an oxalic acid wood brightener to neutralize the cleaner and open the pores.
  6. Let it dry until it passes the water test or reads dry on a moisture meter.
  7. Protect the surroundings: plants, siding, concrete.
  8. Stain railings and stairs first, then the deck boards, a few at a time along their full length.
  9. Remove what doesn’t soak in, apply a second coat only if the label calls for it, and keep off the deck until it’s dry.

When to Stain a Deck: Weather and Timing

The weather decides more about how long a deck stain lasts than the brand does. Every data sheet sets limits on temperature, sun and rain, and they vary enough between products that it’s worth reading yours before you plan the weekend.

Best Time of Year to Stain a Deck

Spring and fall are the easiest seasons: DEFY says so directly, and puts the ideal below 80°F. Summer works if you stain early in the morning or in the evening, which is what TWP recommends in very hot, sunny weather, and in the afternoon after a heavy dew. Late fall gets tricky with water-based and slow-drying oil stains, because the nights fall below the minimum temperatures the makers set for the 24 to 48 hours after you apply.

Temperature, Sun and Rain by Product

These are the application limits from each maker’s data sheet or product page:

Stain Temperature Rain and sun
Cabot Australian Timber Oil 50°F or above, and staying above for 48 hours Not in direct sun, not on hot surfaces, not when rain is imminent
Sikkens ProLuxe SRD 50 to 90°F No rain, snow, heavy dew or below 40°F for 48 hours; not in direct sun
Thompson’s WaterSeal Above 50°F during and for 48 hours after No rain forecast within 24 hours
DEFY Extreme 45 to 95°F No rain expected within 12 hours; avoid direct sun
TWP 1500 No cold on the day and the day after No rain or cold for 2 to 3 days after
Olympic Maximum Solid 35°F to below 90°F, above 35°F for 24 hours Rain-ready in 12 hours; avoid direct sun
Ready Seal No restrictions Can go on in direct sun; rain within hours is fine on dry, bare wood

Direct sun is the limit most people break. A hot board dries the stain before it soaks in, which leaves lap marks and a surface film that wears off early. Work the shaded side of the deck first and follow the shade around, or start early.

What If It Rains After You Stain?

It depends on how far the stain has soaked in and dried. A water-based stain that has had its 12 to 24 hours is usually safe; one hit by rain within the first few hours can spot or wash off the surface and need a touch-up once dry. Ready Seal is the exception: as long as the wood was clean, bare and at 12% moisture or less and the stain wasn’t over-applied, Ready Seal says rain within hours won’t wash it away. If the forecast is uncertain, wait a day.

How Long to Wait Before Staining a New Deck

New lumber, and pressure-treated lumber above all, is wet and often has a glazed surface from the mill that stops stain from getting in. The makers’ waits differ a lot: Thompson’s asks for 30 days on new pressure-treated wood, DEFY for 3 to 6 months on new wood (kiln-dried lumber can be stained right away), and TWP for 6 to 12 months on pressure-treated and hardwoods and 4 to 6 on cedar and redwood. Ready Seal and PPG rely on a moisture reading instead of a date. Whichever you use, remove the mill glaze with a cleaner before the first coat.

Step 1: Clear and Repair the Deck

Move everything off the deck, including planters, which leave rings. Set any nails that have popped, replace or screw down loose and split boards, and sweep out the gaps between boards so water can drain. Cover plants, shrubs and grass with plastic, and wet down concrete or stone next to the deck if you’re using an oil stain; Ready Seal suggests this because the water delays penetration long enough to wipe up spills. Don’t wet the deck boards themselves.

Step 2: Remove the Old Finish

New stain can’t soak through old stain. Ready Seal, Cabot and DEFY all say their product won’t go over a previously painted, sealed or film-forming finish, so if the deck still has failing, peeling or mismatched coating, it has to come off first.

Stripping a Deck

A deck stain stripper is the fastest route on a big deck with a lot of old film. Brush it on, let it work, scrub with the grain, then rinse it off with a pressure washer at a low setting. Strippers are strongly alkaline, and that’s why the brightener in step 4 matters: Ready Seal’s protocol neutralizes a stripper with an oxalic acid solution before anything else touches the wood.

Sanding Before Staining: Stop at 60 to 80 Grit

Sanding removes the gray, loose fibers and patches of old finish a wash leaves behind, and it’s the only way to fix raised grain and splinters. The rule every stain maker agrees on is don’t sand a deck fine. TWP and Ready Seal both say to sand at 60 to 80 grit, PPG’s Sikkens data sheet specifies 60 to 80 for horizontal surfaces, and DEFY warns that fine grits stop the stain from penetrating. Sanding a deck to 120 or 150 like furniture polishes the surface shut. The full grit table and the board-by-board process are in my guide on how to sand a deck, and the sanders that do it fastest are in best sanders for deck refinishing.

Can You Stain a Deck Without Sanding?

Yes, if the deck is bare or has only a worn penetrating stain of the same type. Ready Seal actually advises against sanding, because sanding closes the pores; a good clean and brightening open them instead. Sanding becomes necessary when a cleaner can’t remove the old finish, when the grain is fuzzy or splintered, or when the makers’ prep calls for it, as PPG’s does for Sikkens SRD.

Step 3: Clean the Deck

Even a deck that looks clean carries dirt, mildew, gray UV-damaged fibers and, on new wood, mill glaze. A deck cleaner removes all of them and opens the surface so the stain can soak in evenly. Most current cleaners are oxygen bleach (sodium percarbonate) powders: DEFY’s, for example, is mixed with warm water, used within six hours, applied to damp wood with a pump sprayer and scrubbed with a stiff brush. One 2 lb container makes 5 gallons and covers 500 to 1,000 sq ft. Rinse thoroughly, by hose or with a pressure washer on a low setting: Ready Seal suggests 800 to 1,200 psi at most, and PPG 500 to 800 psi with the nozzle 8 to 12 inches away. Higher pressure tears up the grain and means more sanding.

Some makers use a bleach solution instead. Ready Seal’s own protocol uses 25% household bleach for new wood and 50% for gray old wood, and TWP’s uses one part bleach to one part water. Never mix chlorine bleach with an oxygen cleaner or with a brightener.

Step 4: Brighten the Wood

A wood brightener is an oxalic acid solution applied after the cleaner. It does three jobs: it neutralizes the alkaline cleaner or stripper, it removes the dark tannin and rust stains from nails and leaves, and it opens the pores. DEFY’s concentrate makes 5 gallons, each gallon of diluted brightener covers 100 to 200 sq ft, and DEFY says not to mix it with its own cleaner or with chlorine bleach. Apply it, let it stand, rinse, and the boards come up noticeably lighter. Cedar and redwood benefit most, because their tannins can bleed through a semi-transparent stain.

Step 5: Let the Deck Dry

This is where most deck stains are lost: they go onto wood that looks dry but isn’t. The makers give two ways to check:

  • The water test. Sprinkle a few drops on several boards. DEFY says they should soak in within a few seconds; PPG allows 30 seconds to 2 minutes depending on climate. If they bead, the wood is still wet or still glazed.
  • A moisture meter. Ready Seal wants a pin meter to read 12% or less (14 to 15% in very humid areas), and PPG 18% or less before Sikkens SRD. Check corners, knots and boards near the house, which dry last.

In good weather that usually means 24 to 48 hours after washing for oil stains, and Cabot asks for 24 to 48 hours after cleaning. Water-based DEFY can go on the same day, once the wood is visibly dry. Shaded decks and humid climates take longer.

Step 6: Apply the Stain

Stir the stain thoroughly, scraping the bottom of the can, and keep stirring as you work, because the pigment settles. If the job needs more than one container, mix them together first: Cabot and Ready Seal both say so, to keep the color even from board to board. Test the color on a hidden board before you start.

Railings, Stairs and Edges First

DEFY’s directions start with the railings, benches and the undersides of upper decks, then move to the floor. It’s the right order for any stain: drips from the railings land on boards you haven’t stained yet, and you won’t kneel on finished work. Stain the board ends too; end grain soaks up water fastest.

Brush, Roller, Pad or Sprayer?

A stain brush pushes stain into the grain and is the tool PPG prefers for Sikkens SRD. A stain pad covers one deck board per pass and is the quickest way to keep a wet edge. A roller works with oil stains like Ready Seal, though DEFY doesn’t recommend one for its water-based stains, since rollers leave a stippled surface and push stain around instead of in. A sprayer is fastest on railings and balusters, but Cabot, Olympic, DEFY and TWP all tell you to back-brush right after spraying (Ready Seal is the exception), so it saves time on application, not on brushing. On the deck boards, most people get the best result with a pad or brush.

Work Two or Three Boards at a Time

Lap marks happen when wet stain overlaps stain that has already dried. To avoid them, Cabot says to work 1 to 3 boards at a time from one end to the other, and TWP says to finish 2 or 3 continuous board lengths and never stop in the middle of a board. Keep a wet edge, brush out puddles and drips as you go, and don’t let stain pool in the gaps.

One Coat or Two?

Follow the label, because it changes from one product to the next. Cabot Australian Timber Oil, Sikkens SRD and Thompson’s are one-coat stains. Ready Seal goes on as two light coats. DEFY and TWP apply the second coat wet-on-damp or wet-on-wet, within 10 to 30 minutes, and only on wood that absorbed the first; on dense woods, both say one coat is all it will take. Solid stains like Olympic Maximum go on as two thin coats a few hours apart.

Remove What Doesn’t Soak In

Penetrating stains protect from inside the wood, not on top of it. TWP tells you to remove any excess 30 to 60 minutes after the last coat with a dry cloth, brush or pad, and Penofin’s data sheet for its Red Label oil says to wipe the surface after 20 to 30 minutes. Stain left on the surface stays tacky, turns glossy and peels. DEFY’s rule is the easiest to remember: a flat stain that dries shiny was over-applied.

Step 7: Let It Dry and Cure

Dry times range from a few hours to three days. DEFY needs 24 hours before use, Olympic Maximum 24 to 48 hours before foot traffic or furniture, Sikkens SRD 48 hours to light foot traffic and 72 to full service, and Cabot Australian Timber Oil 24 to 48 hours to dry. Ready Seal dries within hours on properly prepared wood, but takes up to 14 days to cure and reach its final tone. Wait a few days before putting rugs back, and soak oily rags in water in a sealed metal container before throwing them away: TWP, PPG and Penofin all warn they can catch fire on their own.

How Much Stain Do You Need?

Coverage runs from about 100 sq ft per gallon (DEFY Extreme, two coats) to 600 (Cabot Australian Timber Oil on smooth boards), and weathered wood sits at the bottom of every range. Measure the deck boards, add the railings and stairs, and divide by your stain’s rate for each coat, or let my deck stain calculator do it with the makers’ figures. Buy it all at once so the color matches.

⚠️ Common Deck Staining Mistakes

Staining in direct sun or on hot boards. Staining wood that hasn’t dried, or new treated lumber too soon. Sanding to 120 grit or finer. Putting a penetrating stain over old film-forming finish. Over-applying and leaving the excess on the surface. Stopping halfway along a board. Skipping the brightener after a stripper. Each one is in the makers’ instructions as a cause of peeling, blotches or a short life.

The Kit for Staining a Deck

Apart from the stain itself (my picks are in the best deck stain comparison) and a sander for the prep, this is what makes the job easier. Specs are from each maker’s site or, where the maker doesn’t publish them, the Amazon listing.

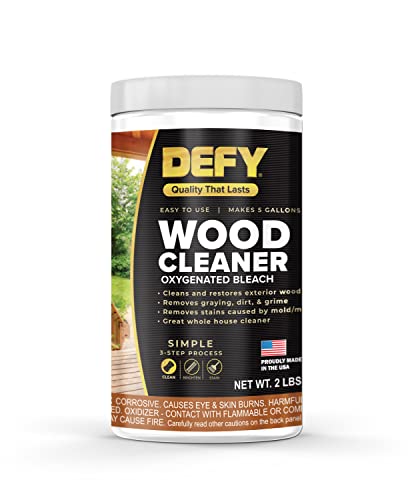
DEFY Wood Cleaner

DEFY Wood Cleaner powdered oxygen bleach deck cleaner concentrate, 2 lb

Best Deck Cleaner Before Staining

An oxygen bleach powder (sodium percarbonate) that you mix with warm water: a 2 lb container makes 5 gallons and cleans about 500 to 1,000 sq ft. DEFY says it removes graying, mildew stains and mill glaze, won’t harm wood fiber, grass or most plants, and doesn’t need a pressure washer if you scrub with a stiff brush. Use the mix within six hours.

Check price on Amazon

  • ✅ Removes mill glaze from new boards
  • ✅ Safe around most plants
  • ❌ Needs scrubbing on horizontal surfaces

Best For: Gray, dirty or new decks before any stain.


DEFY Wood Brightener

DEFY Wood Brightener oxalic acid deck brightener concentrate, 1 gallon

Best Wood Brightener

A liquid oxalic acid concentrate that makes 5 gallons, with each diluted gallon covering 100 to 200 sq ft. It brings the wood back to a neutral pH after a cleaner or stripper, removes tannin and rust stains, and opens the pores, which DEFY says helps its stains absorb. Apply it after the cleaner, never mixed with it.

Check price on Amazon

  • ✅ Neutralizes cleaners and strippers
  • ✅ Removes tannin and rust stains
  • ❌ An extra step and an extra rinse

Best For: Cedar and redwood decks, and any deck that was stripped.


General Tools MMD4E Pin Moisture Meter

General Tools MMD4E pin moisture meter for checking deck boards before staining

Best Way to Know the Deck Is Dry

Ready Seal calls checking the moisture content one of the two most critical steps for its stain, and says an entry-level meter is enough. This pin meter reads 5 to 50% moisture in wood on a backlit display, with low, medium and high tones, a hold button, spare stainless steel pins and a cap that doubles as a calibration check, according to its listing. Push the pins into a few boards, including the shaded ones, and stain when they read 12% or less.

Check price on Amazon

  • ✅ Takes the guessing out of dry time
  • ✅ Reusable at every maintenance coat
  • ❌ Leaves two small pin holes

Best For: Oil-based stains and humid climates where “looks dry” isn’t dry.


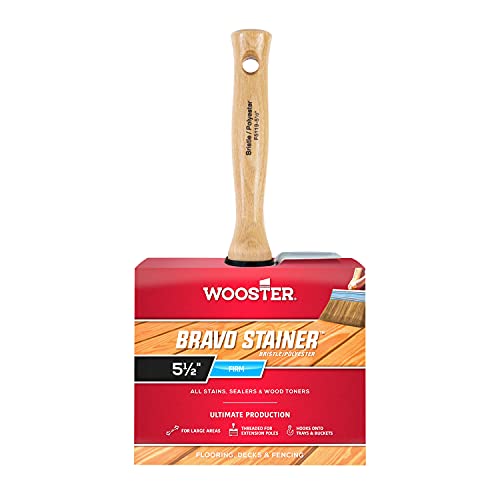
Wooster Bravo Stainer 5-1/2″ Deck Stain Brush

Wooster Bravo Stainer 5-1/2 inch deck stain brush

Best Deck Stain Brush

A wide stain brush for both oil-based and water-based stains and sealers. The listing describes a white China bristle and polyester blend with a square trim, a nickel-plated ferrule and a threaded hardwood handle that takes an extension pole, so you can back-brush deck boards standing up. At 5-1/2″ wide, it matches the actual width of a standard 6-inch deck board.

Check price on Amazon

  • ✅ Works with oil and water-based stains
  • ✅ Threaded handle for an extension pole
  • ❌ Slower than a pad on open boards

Best For: Back-brushing and stains whose maker prefers a brush.


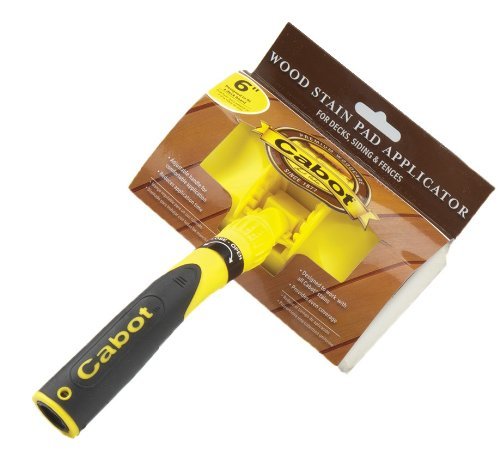
Cabot 6″ Stain Applicator Pad

Cabot 6 inch stain applicator pad for smooth deck boards

Best Applicator for Deck Boards

Cabot lists stain pads among its application methods, and a 6″ pad is about one deck board wide, which makes it easy to work end to end and keep a wet edge. This one is made for smooth surfaces such as deck boards and planed fence pickets, and it works with stains, sealers and other finishes. Use a brush for railings and the pad for the floor.

Check price on Amazon

  • ✅ One board per pass
  • ✅ Even coat with less dripping
  • ❌ Not for rough-sawn wood

Best For: Fast, even coats on smooth deck boards.


How I Put This Guide Together

The steps, temperatures, dry times, coats and waiting periods come from the makers’ own documents: Ready Seal’s 2023 information and protocol sheet, the TWP 1500 product data sheet, PPG’s data sheet for ProLuxe (Sikkens) SRD, Cabot’s data sheet for Australian Timber Oil, Olympic’s data sheet for Maximum Solid, Penofin’s Red Label sheet, and DEFY’s and Thompson’s WaterSeal product pages. The sanding grits match my deck grit guide. The kit is on sale on Amazon today; I don’t show customer ratings or prices, which change daily. More on how I choose the products I recommend.

🏆 The Bottom Line

A deck stain is only as good as the wood under it. Strip or sand off failing finish at 60 to 80 grit, clean with a deck cleaner and a brightener, wait until the boards absorb water in seconds or read 12% or less on a moisture meter, and stain in mild, dry shade, two or three boards at a time, leaving nothing on the surface.

❓ Frequently Asked Questions

What not to do when staining a deck?+
Don’t stain in direct sun, on damp wood or with rain on the way. Don’t sand finer than 80 grit, and don’t put a penetrating stain over an old film. Never leave excess stain sitting on the boards, and don’t stop halfway along a board, or you’ll see the lap mark for years.
What month is the best time to stain a deck?+
In most of the US, late spring (May and June) or early fall (September and October), when days are mild, nights stay above the stain’s minimum and rain is less frequent. Summer works in the early morning or evening. Check your product’s limits, since some need 50°F for 48 hours.
Is it better to spray or roll stain on a deck?+
Neither on its own. Spraying is quick on railings, and a roller is fine for some oil stains, but the makers want the stain worked into the wood with a brush right after either one. For deck boards, a 6-inch stain pad or a wide brush gives the most even result with the least waste.
What if it rains 3 hours after I stain my deck?+
With most water-based stains, rain that soon can leave spots or wash some stain off the surface; let the deck dry and touch up those areas. Oil-based stains that soaked into dry, bare wood usually survive, and Ready Seal says rain within hours is fine. Over-applied stain is the most likely to wash or spot.
Do I really need to sand my deck before staining?+
Not always. A bare, sound deck often needs only a cleaner and a brightener, and Ready Seal even advises against sanding. Sand when old finish won’t wash off, when boards are fuzzy or splintered, or when your stain’s data sheet requires it, and stop at 60 to 80 grit so the pores stay open.
How do you stain a new deck for the first time?+
Wait until the wood is dry enough, from 30 days to a year depending on the stain and lumber, or until a meter reads 12% or less. Then wash off the mill glaze with a deck cleaner, rinse, let it dry, and apply one light coat; dense new boards often won’t absorb a second.

Conclusion

Learning how to stain a deck is mostly learning to wait: for the right weather, for the wood to dry, and for each coat to soak in before you add more. Get the prep right, with a 60 to 80 grit sanding where it’s needed, a cleaner, a brightener and dry boards, and almost any good stain will last as long as its maker says. To choose the stain, see my best deck stain picks; to work out how much to buy, use the deck stain calculator; and if the boards need sanding first, start with how to sand a deck. Questions about your deck? Ask in the comments.

How to Buff and Polish Hardwood Floors (Without Damaging the Finish)

How to buff and polish hardwood floors: a glossy herringbone wood floor catching the light

To polish hardwood floors, clean them until they’re free of dust and residue, then spread a thin, even coat of a polish made for your finish with a microfiber applicator, working with the grain, and keep traffic off for 24 hours. To buff them, run a low-speed or orbital floor machine with a soft white pad over the clean, cured finish. Buffing evens out the sheen of the finish that’s already there; polishing adds a thin new layer on top. Neither one removes wood or replaces a worn-out finish.

Below is how to tell which your floor needs, how to identify its finish first (polyurethane, oil or wax each take a different product), how to buff with a machine or by hand, the polish method step by step from the polish maker’s instructions, how often to do it, and when a floor is past both and needs a recoat. The guidance comes from the National Wood Flooring Association (NWFA) and from the finish and polish makers Bona and Junckers.

⚡ Quick Answer

Buff when the finish is intact but looks dull or uneven: a clean floor, a white pad and a slow floor machine such as the Oreck Orbiter.

Polish when fine scratches and traffic lanes show: a polish matched to your finish, such as Bona Hardwood Floor Polish on polyurethane, applied thin with a microfiber pad.

Recoat when the finish is worn through in places: buffing and polish can’t rebuild it.

Buffing vs Polishing Hardwood Floors: What’s the Difference?

The two words get used for the same thing, and contractors also say “buff and coat” when they mean a recoat. On a hardwood floor they’re three different jobs.

Buffing

Buffing is mechanical: a floor machine with a soft pad, or a cloth by hand, rubs the surface of the existing finish to even out its sheen. Nothing is added. The NWFA’s maintenance guidance puts it simply for waxed floors: if the floor dulls, try buffing before adding more wax.

Polishing

Polishing adds a thin, temporary layer. Bona describes its hardwood floor polishes as a urethane acrylic blend that restores a floor’s protective layer, adds sheen and fills micro-scratches so they’re less noticeable. It’s a maintenance coat that sits on top of the real finish and wears away with traffic.

Buff and Coat (Screen and Recoat)

A buff and coat is the step beyond both: a buffer with a sanding screen scuffs the old finish and a fresh coat of floor finish goes on top. That’s a permanent new layer of polyurethane, not a polish, and it’s covered step by step in my guide on how to refinish hardwood floors without sanding.

First, Identify Your Floor’s Finish

Junckers, which makes both wood floors and the products to maintain them, divides home floors into three finishes and says the polish has to match: using the wrong product leads to residue, slippery floors or damage. Check before you buy anything.

Polyurethane or Lacquer

Most floors finished in the last few decades, and almost all prefinished boards. The surface looks like a clear film with a distinct sheen. These floors take a polish made for sealed, synthetic finishes, such as Bona Hardwood Floor Polish, which Bona says is for unwaxed, unoiled, polyurethane-finished floors. Junckers warns against wax-based products on them because wax interferes with future recoating.

Oiled

Oiled floors (hardwax oil, penetrating oil) feel more like wood than plastic and look matte. Junckers says they don’t need a traditional polish at all: they take a maintenance oil or a soap with a little oil in it, and periodic re-oiling.

Waxed

Older floors, often over a penetrating sealer, with a soft, low sheen. Junckers recommends a compatible paste wax and warns that water-based or solvent polishes can break the wax down. To test for wax, the NWFA describes rubbing a little mineral spirits on a white rag (yellow or brown residue means wax) or putting two drops of water on the floor (white spots after about 10 minutes suggest wax); the full tests are in my screen and recoat guide.

How to Buff Hardwood Floors

With a Floor Buffer

  1. Clean the floor first. Vacuum, then clean with a hardwood floor cleaner that leaves no residue. Any grit under the pad gets dragged across the finish.
  2. Fit a white pad. White is the softest standard floor pad; a red pad is slightly more aggressive. Don’t use the green scrubbing or black stripping pads sold for tile.
  3. Practice in the middle of the room. On a rotary buffer, the NWFA advises starting with a polishing pad in an open area and setting the handle at waist height: raise the handle and the machine moves right, lower it and it moves left. An orbital machine doesn’t pull, which is why it’s the easier choice for a first time.
  4. Work with the grain, keep moving. Overlap each pass by about half the pad width and never let the pad sit in one spot while it’s turning.
  5. Finish the edges by hand. A buffer can’t reach the last inch or two along baseboards; a microfiber cloth or a white hand pad does the same job there.
  6. Dust mop afterwards to pick up the fine residue the pad lifts.

A low-speed or orbital machine is what you want; high-speed burnishers made for vinyl tile are a different tool. My roundup of the best floor buffers for hardwood floors compares six machines, from a 10″ orbital for small rooms to a 17″ rotary.

By Hand

In a small room, hallway or bathroom, you can buff by hand with a clean microfiber cloth or a white non-woven pad on a pole or a flat mop. Work a small area at a time, with the grain, using light, even pressure. It’s slow but safe, and on a waxed floor it’s the traditional way to bring the wax back up to a sheen.

How to Polish Hardwood Floors

These steps follow Bona’s instructions for its Hardwood Floor Polish, made for polyurethane-finished floors. Other polishes work the same way, but always read the label of the one you buy.

  1. Test first. Bona says to try the polish in a small area to make sure you like the look.
  2. Measure the room. Length times width gives the square footage. Bona says a 32 oz bottle covers 500 sq ft and a 24 oz bottle 350 sq ft, so buy enough for the whole floor before you start.
  3. Clear and clean. Move the furniture out, dry-dust or vacuum, then clean the floor so it’s free of scuffs, spills and residue. Let it dry.
  4. Rock the bottle, don’t shake it. Bona says to rock it gently for 30 seconds to a minute for an even sheen; shaking adds bubbles.
  5. Pour in an S pattern and spread. Pour a little polish directly on the floor and guide the puddle back and forth with the grain using a microfiber applicator pad and fingertip pressure. Work in small sections toward the door.
  6. Keep it even, not thin. Bona warns against rubbing polish in like a cleaner and against spreading it too thin; it needs an even layer at the right coverage.
  7. Wait. Socks only for 1 to 2 hours; furniture, rugs, pets and normal traffic after 24 hours. If you want a second coat, Bona says to wait a full 24 hours.

What Not to Do

Bona lists the mistakes that cause a cloudy or milky floor: pouring polish into a spray mop, a spray bottle or a bucket; applying it with a sponge, string or wring mop; dampening the applicator with water; and rinsing and wringing the pad mid-job. Bona also says it doesn’t recommend polish on a newly installed or newly refinished floor; let a new finish do its job first.

How to Buff a Waxed Hardwood Floor

A paste-waxed floor is the one floor where buffing really is the main maintenance. The NWFA’s advice is not to over-wax: when the floor dulls, buff it before adding wax, and in light-traffic areas and under furniture, wax only every other time so build-up doesn’t form. When you do rewax, spread a thin coat of a paste wax made for floors, let it dry as the label says, then buff with a white pad or a cloth until it shines. Never put a water-based polish or a polyurethane recoat on a waxed floor; Junckers and the finish makers both warn against it.

How Often to Buff and Polish

Bona’s polish guide says to polish every 2 to 6 months in high-traffic homes and every 6 to 12 months in low-traffic ones. Buffing a cured finish can be done whenever the sheen looks uneven, since it adds nothing. Junckers’ advice is to keep to a maintenance schedule rather than waiting until the floor looks dull, and to dust often in between: grit underfoot is what scratches a finish in the first place.

💡 Pro Tip

If you think you’ll screen and recoat in the next year or two, buff rather than polish. Polish has to come off before a new coat of finish will bond: Bona’s recoat finish data sheet requires a floor free from wax, polish and oily residues, and Bona sells a separate polish remover for that job.

When Buffing and Polishing Aren’t Enough

Buffing and polish only work on the finish you already have. If the finish is worn through to gray wood in traffic lanes, peeling, or scratched into the wood itself, no polish will fix it. A dull floor with an intact finish needs a screen and recoat; bare or damaged wood needs a full sand and refinish, which my guide on how to refinish hardwood floors walks through, with the machines compared in my guide to the best sanders for floors. To compare what each option costs for your rooms, use the hardwood floor refinishing cost calculator.

Common Mistakes

  • Using the wrong product for the finish: wax on polyurethane, a water-based polish on wax, or a tile polish on wood. The NWFA specifically warns that self-polishing acrylic waxes made for vinyl and tile make wood slippery and dull quickly.
  • Polishing a dirty floor: the polish seals the dirt in.
  • Wet-mopping before or after: the NWFA says standing water can dull the finish and damage the wood.
  • Too much polish, too often: layers build up and look cloudy. Strip with the polish maker’s remover and start again.
  • A high-speed burnisher or a stiff scrubbing pad: both are made for tile and concrete, not a wood finish.

What You Need

Everything to buff and polish a polyurethane floor, plus the machine and pad if you buff with a buffer. Specs come from the makers; I don’t show prices or ratings, which change daily.

Bona Hardwood Floor Polish, Low Gloss

Bona Hardwood Floor Polish low gloss 32 ounce bottle

Polish for Polyurethane-Finished Floors

A urethane acrylic polish for unwaxed, unoiled, polyurethane-finished wood floors. Bona says one 32 oz bottle covers 500 sq ft, socks are fine after 1 to 2 hours, and furniture, rugs and pets can go back after 24 hours. The low gloss version gives a satin look that hides scuffs; for a mirror finish there’s a high gloss version of the same polish.

Check price on Amazon

  • ✅ Fills micro-scratches and evens the sheen
  • ✅ No machine needed
  • ✅ Dries to walk on in 1 to 2 hours
  • ❌ Must be removed before any recoat
  • ❌ Not for waxed or oiled floors

Best For: Refreshing a dull but intact polyurethane floor between recoats.


Bona Microfiber Applicator Pad

Bona microfiber applicator pad for floor polish

Applicator for Spreading Polish

The pad Bona’s instructions call for to spread its polish: you guide a puddle of polish back and forth with the grain using fingertip pressure on the mop. Bona is specific that polish should not go on with a sponge, string or wring mop, or with a pad dampened with water, which is the usual cause of a cloudy, streaky result.

Check price on Amazon

  • ✅ The applicator Bona’s method is built around
  • ✅ Even, thin coat without streaks
  • ❌ Needs a compatible Bona mop frame

Best For: Anyone applying a floor polish by hand.


Bona Floor Polish Remover

Bona floor polish remover 32 ounce squirt bottle

To Strip Polish Build-Up Before a Recoat

Bona makes this remover specifically to take off its Hardwood Floor Polish and heavy build-up. It comes in a 32 oz ready-to-use squirt bottle that covers 200 sq ft, and Bona says to use it with a nonabrasive pad. Keep a bottle on hand if you polish regularly: a floor that’s going to get a screen and recoat has to be free of polish first.

Check price on Amazon

  • ✅ Made for Bona’s own polish
  • ✅ Works on wood and other hard floors
  • ❌ Covers only 200 sq ft per bottle

Best For: Removing polish build-up, or prepping a polished floor for a recoat.


3M White Super Polish Pad 4100, 13″

3M 4100 white super polish floor pad 13 inch

Pad for Machine Buffing

White is the softest of the standard floor machine pads, and 3M sells the 4100 as its Super Polish Pad. This case has five 13″ pads for 13″ machines; buy the 17″ size for a rented rotary, and the maker’s own pads for an Oreck or a 12″ machine. Use it dry to buff a cured finish or to buff in a wax.

Check price on Amazon

  • ✅ Gentlest standard pad for wood
  • ✅ Five pads per case
  • ❌ Check your machine’s pad size before ordering

Best For: Machine buffing a finished hardwood floor.


Oreck Orbiter ORB600MW Floor Machine

Oreck Orbiter ORB600MW random orbit floor machine

Buffer for Beginners

If you want to buff with a machine, an orbital one is the easiest to start with. Oreck builds the Orbiter’s head to move in a random orbit, so it doesn’t kick sideways or leave swirl marks the way a rotary buffer can, and Oreck lists polishing, waxing, scrubbing and sanding among its uses. The motor has a 5-year warranty. It’s my top pick in the best floor buffer for hardwood floors roundup, which compares it with five other machines.

Check price on Amazon

  • ✅ Random orbit, easy to control
  • ✅ Also scrubs and screens
  • ❌ Uses Oreck-size pads

Best For: Homeowners buffing their own floors for the first time.


How I Put This Guide Together

The finish types and product matching come from Junckers’ wood floor polish guide; the polish method, coverage, dry times and frequency from Bona’s instructions for its Hardwood Floor Polish and its polish guide; the wax test, buffer handling and maintenance warnings from the National Wood Flooring Association’s Sanding and Finishing Guidelines. Product specs come from the makers. More on how I choose what I recommend.

🏆 The Verdict

Identify the finish first. On a dull but intact polyurethane floor, buff it with a white pad or apply a thin coat of a polyurethane floor polish such as Bona Hardwood Floor Polish with a microfiber pad, and keep traffic off for 24 hours. Oiled floors take maintenance oil, waxed floors take paste wax and buffing. If the finish is worn through, skip the polish and recoat.

❓ Frequently Asked Questions

How do I get my dull hardwood floors to shine again?+
Start with a thorough, residue-free clean, which often brings back more shine than people expect. If the floor still looks flat, buff the cured finish with a white pad, or apply a polish made for your finish type. When the finish is worn through to bare wood, only a recoat or a full refinish will make it shine again.
Is it better to wax or polish hardwood floors?+
It depends on the existing finish. Polyurethane and lacquered floors take a polish made for sealed finishes, and wax on them interferes with any future recoat. Floors that were already waxed should keep getting paste wax and buffing, because water-based polishes can break the wax down. Oiled floors take a maintenance oil instead of either.
Can you buff hardwood floors without refinishing?+
Yes. Buffing with a soft white pad only evens out the sheen of the existing finish and adds nothing, so there’s no refinishing involved. What people often call a “buff and coat” is different: the buffer scuffs the finish with a screen so a new coat of finish can go on top, which is a recoat.
Should hardwood floors be buffed?+
Occasionally, yes, if the finish is intact and the sheen looks patchy. Buffing a waxed floor is standard maintenance, and the NWFA suggests buffing before adding more wax. On polyurethane, gentle buffing with a white pad is safe; aggressive pads and high-speed burnishers are not, because they wear the finish you’re trying to protect.
Can I buff my own hardwood floors?+
Yes. An orbital floor machine is the easiest way for a homeowner, because it doesn’t pull sideways like a rotary buffer, and you can rent or buy one. Fit a white pad, clean the floor first and work with the grain. In small rooms, a microfiber cloth or a white hand pad does the same job by hand.
What is the difference between buffing and polishing a floor?+
Buffing is mechanical: a pad or cloth rubs the existing finish to an even sheen and adds nothing. Polishing applies a thin, temporary layer of polish that fills micro-scratches and adds shine, and it wears away with traffic. A polished floor has to be stripped of that layer before it can be recoated.
Can you buff hardwood floors by hand?+
Yes, it’s practical in bathrooms, hallways and small rooms. Use a clean microfiber cloth or a white non-woven pad on a flat mop, work small areas with the grain and keep the pressure light and even. For whole rooms, a floor machine with a white pad gives a more even result in far less time.

Conclusion

Buffing and polishing are the cheapest ways to keep a hardwood floor looking good between recoats, as long as the product matches the finish and the finish is still intact. Identify the finish, clean thoroughly, buff with a soft pad or apply a thin coat of the right polish, and keep a polish remover in mind if a recoat is coming. When you want a machine for the job, start with my best floor buffer for hardwood floors picks. Questions about your floor? Ask in the comments.

Dust Collection for Woodworking Tools: Table Saw, Router Table, Sander and Planer

Dust collection for a table saw: sawdust on the table around the blade insert as a board is cut

Dust collection for woodworking tools works tool by tool, because each machine throws its waste a different way. A table saw needs a 4″ collector on the cabinet and, ideally, a guard over the blade. A router table needs two pickups: one at the fence and one under the table. A sander needs a vacuum or dust extractor on its small port, never a dust collector. A planer or jointer needs a collector with a 4″ hose, because the chip volume clogs a shop vac.

Below is a quick tool-by-tool chart, then the setup for the table saw, router table, sander and planer in turn, how to connect several machines to one collector, and the guards, kits and collectors worth buying. The miter saw has its own guide: miter saw dust collection. If you’re still deciding between a vacuum and a collector, read dust extractor vs shop vac vs dust collector first.

⚡ Quick Picks

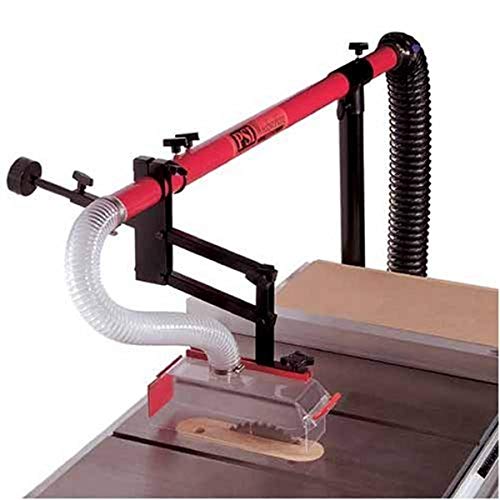
Table saw: the PSI TSGUARD – an overarm guard with a 4″ hose connection that catches dust above the blade.

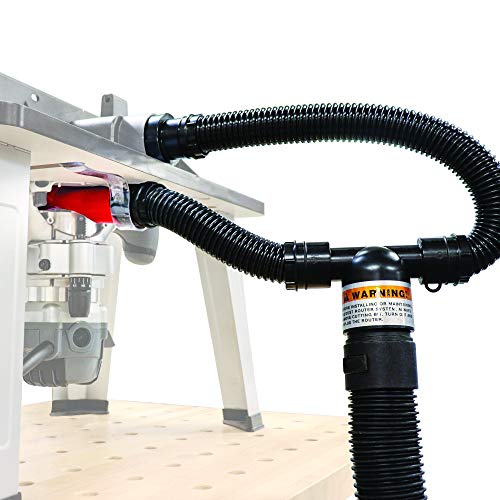
Router table: the Milescraft 1501 DustRouter, picking up at the fence and under the table.

One collector for several machines: the RIKON 60-100 with the POWERTEC 4″ fittings kit and its blast gates.

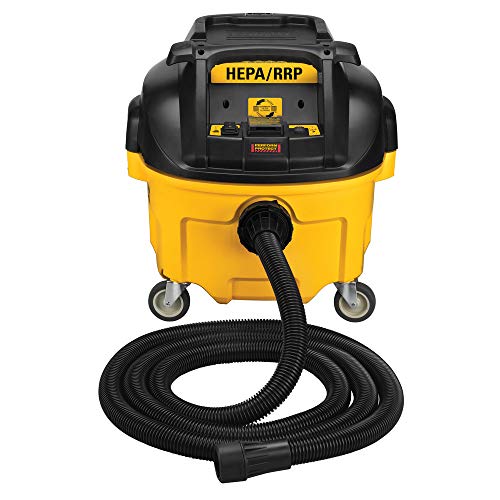
Sanders: a dust extractor; my best dust extractor picks start with the DEWALT DWV010.

Dust Collection by Tool at a Glance

Tool Where the waste goes Machine Add-on worth having
Table saw Down into the cabinet, and up off the top of the blade Dust collector, 4″ Overarm guard with dust port
Router table Behind the fence for edge cuts, below the table for grooves Shop vac or extractor at the fence; collector below Fence port plus under-table cup or box
Random orbital and sheet sanders Through the holes in the pad Dust extractor or shop vac Multi-hole discs, port adapter
Benchtop belt, disc and spindle sanders Down and out of a small port Shop vac or extractor Hood behind the abrasive
Planer and jointer Large volume of chips out of a chute Dust collector, 4″ Cyclone separator in front of the collector
Miter saw Into the guard and out the back Vacuum on the port, collector on a hood Hood behind the saw

Table Saw Dust Collection

A table saw throws dust two ways. Most of it falls into the cabinet below, pushed down by the blade’s rotation. The rest is thrown up off the back of the blade, toward you and the ceiling, and that’s the fine dust you breathe. Good table saw dust collection handles both.

The Cabinet Port

Most cabinet and hybrid saws have a 4″ port at the back or bottom of the cabinet, and that port wants a dust collector, not a shop vac: the volume of sawdust from a full day of ripping overwhelms a vacuum. Jobsite saws usually have a smaller port at the blade shroud, where a shop vac with a cyclone is the practical match. Check your saw’s manual for the port size before you buy hoses.

Above the Blade: Overarm Guards

The dust that comes off the top of the blade can only be caught above the table. An overarm guard with a dust port, such as the PSI TSGUARD, hangs a clear hood over the blade on a boom and connects to a 4″ hose. It works with any saw that has an extension table, or from the ceiling. SawStop sells its own dust-collecting guards for its saws.

How to Seal a Table Saw for Better Dust Collection

On a contractor or hybrid saw, the cabinet leaks air through the slot where the blade tilts, the open back and the motor opening. Every leak lets the collector pull room air instead of dust-laden air from around the blade. Close the openings with magnetic sheet, thin plywood or a fabric cover that still allows the blade to tilt, and use a zero-clearance insert so less dust escapes around the blade. Leave the motor enough ventilation to stay cool, as your manual specifies.

Can You Use a Shop Vac for Table Saw Dust Collection?

On a jobsite saw with a small shroud port, yes, and a cyclone separator in front keeps the vac’s filter clear. On a cabinet saw with a 4″ port, a shop vac moves too little air to keep the cabinet clean, and chips pile up inside. My dust collector for a small shop guide covers 115V collectors that fit a garage.

Router Table Dust Collection

A router table creates waste in two places. When you cut an edge profile against the fence, the bit throws chips behind the fence; when you cut a groove or a dado in the middle of a board, the chips go down through the table around the bit. One pickup can’t catch both. If you’re still choosing a table, my best router table picks list which ones have a fence port, a cabinet port or both.

At the Fence

Most router table fences have a dust port behind the bit opening, often for a 2-1/2″ hose. A shop vac or extractor suits it, because the opening is small and needs suction rather than volume.

Below the Table

Under the table, a dust cup around the router base or an enclosed box with a port catches what falls through. Milescraft’s DustRouter does both from one hose: a silicone cup with a hook-and-loop fastening fits around most routers and lifts, a fence connector picks up behind the bit, and a T-connector joins the two to a 1-1/2″ or 2-1/2″ hose. Milescraft says the router base or lift needs an opening of at least 3-3/8″.

How to Collect Dust From a Handheld Router

For a handheld router, use the maker’s dust shroud or port adapter for your base and a dust extractor or vacuum. Plunge cuts and edge profiles throw chips in different directions, so expect to clean up some chips even with the hose connected. For the routers themselves, see my best router for woodworking picks.

Sander Dust Collection

Sanders produce the finest dust in the shop, and they extract it through small holes in the pad, so they need suction, not volume. That rules out a dust collector and makes a dust extractor the best match: auto-start through its outlet, a HEPA filter and, on many models, automatic filter cleaning. A shop vac with a fine-dust filter and a cyclone separator is the budget alternative. My best dust extractor and best shop vac for dust collection pages compare the machines.

Which Sander Is Best for Dust Collection?

The sanders that collect best are built around extraction: multi-hole pads that match multi-hole discs, a port that fits standard hoses, and a design meant for a vacuum rather than a bag. Festool and Mirka build their sanders around extractors; see my Festool vs Mirka comparison and the best dustless sanders. The on-board bag or canister on most sanders catches the heavier dust but lets fine dust escape. For hand sanding and sanders without a port, a downdraft sanding table on your dust collector catches what falls toward the bench.

Benchtop Sanders

Belt, disc, spindle and drum sanders have a dust port under or behind the abrasive. Spindle and small belt-disc sanders suit a shop vac; drum sanders move enough dust to need a collector. On an oscillating spindle sander, WEN’s manuals say running without dust collection voids the warranty, so connect something before the first cut.

Planer and Jointer Dust Collection

Planers and jointers produce the most waste by volume in a small shop: thick shavings, fast. They need a dust collector with a 4″ hose. DeWalt’s manual for its DW735 planer goes further and says a shop vac isn’t recommended, because most vacs can’t handle the volume of chips and the hose may clog. A cyclone separator in front of the collector catches the chips in a drum before they reach the bag or filter. If you’re comparing planers, my DW735 vs DW734 vs Makita 2012NB page covers how each handles chips.

💡 Pro Tip: Run One Machine at a Time

A 1 HP to 1.5 HP collector has enough airflow for one machine at a time. Put a blast gate at each machine and close every gate except the one you’re using, or roll the collector to the machine and connect it directly.

Connecting Several Machines to One Collector

A small shop doesn’t need a ducted system to share one collector. Two simple layouts work:

  • Mobile: a collector on casters and one flexible 4″ hose that you move from the table saw to the planer to the jointer. Short hose, no losses, no fittings.
  • Branch with blast gates: a short run with Y-fittings and a blast gate at each machine, so you open only the one you use. POWERTEC sells a three-machine kit with two Y-fittings, two 45° elbows, three blast gates and hose clamps.

Use Y-fittings and 45° elbows instead of T-fittings and 90° elbows where you can, and keep flexible hose short: both cost airflow. For the collector itself, see my best dust collector reviews and the dust separators that turn a single-stage collector into a two-stage one. No setup catches everything at the tool, so for the fine dust left floating in the room, an air filtration unit is the last layer: my best shop air filtration systems guide compares them.

The Guards, Kits and Collectors Worth Buying

PSI Woodworking TSGUARD Table Saw Dust Collection Guard

PSI TSGUARD overarm table saw dust collection guard with clear hood

Best for Dust Above the Table Saw Blade

Penn State Industries’ overarm guard catches the dust a cabinet port can’t reach. The hood is one piece of clear, shatterproof plastic on a steel mast and boom that extends to 83″, and it connects to a standard 4″ dust hose. PSI says it accepts blades up to 16″, works with dado blades, allows 45° tilts, accommodates a splitter and anti-kickback pawls, and adjusts to the thickness of the stock. A counterbalance lets it swing out of the way, and it mounts on an extension table or the ceiling.

Check price on Amazon

  • ✅ Catches dust thrown up off the blade
  • ✅ Fits most saws with an extension table
  • ✅ Swings clear when not needed
  • ❌ Needs a dust collector, not a shop vac
  • ❌ Takes space above the saw

Best For: Cabinet and hybrid table saws in shops that already have a collector.


Milescraft 1501 DustRouter for Router Tables

Milescraft 1501 DustRouter router table dust collection kit with dust cup and fence connector

Best Router Table Dust Collection Kit

The DustRouter solves the router table’s two-pickup problem with one kit. A flexible silicone dust cup fastens around the router or lift with hook and loop, a fence connector picks up behind the bit, and 20″ and 35″ dust tubes join at a T-connector that takes a 1-1/2″ or 2-1/2″ hose. Milescraft lists a standard 1-1/2″ hose size for shop vacuums and dust collectors, says it works with or without the fence, and notes the base or lift needs an opening of 3-3/8″ or larger. The cup can be cut along a marked line to change bits.

Check price on Amazon

  • ✅ Fence and under-table pickup from one hose
  • ✅ Fits most routers and lifts
  • ✅ Lowest price tier here
  • ❌ Base opening must be 3-3/8″ or larger
  • ❌ Hook-and-loop needs a clean, flat surface

Best For: Open-base router tables connected to a shop vac or extractor.


DEWALT DWV010 8-Gallon HEPA Dust Extractor

DEWALT DWV010 HEPA dust extractor for sander dust collection

Best for Sanders and Handheld Tools

For sanders, routers and the small ports on jobsite tools, the DWV010 is the machine. It lists 150 CFM, a HEPA filter pulsed clean every 30 seconds, and a tool-activated outlet so the extractor starts with the sander. The 15 ft, 1-1/4″ anti-static hose fits sander ports with the swiveling universal connector, and DEWALT’s own random orbital sanders are designed to fit it directly.

Check price on Amazon

  • ✅ Starts with the tool
  • ✅ HEPA with automatic filter cleaning
  • ✅ Hose sized for sanders
  • ❌ Not for planer or cabinet saw chips

Best For: Random orbital, sheet and detail sanders, and handheld routers.


RIKON 60-100 1 HP Dust Collector

RIKON 60-100 1 HP dust collector with 4 inch inlet for table saw and planer dust collection

Best Collector to Share Between Machines

The RIKON 60-100 is a compact 1 HP collector with published numbers: 624 CFM at its 4″ inlet, 3.25″ of static pressure, a 9″ steel blower wheel and a 7 A, 115V TEFC motor. Its footprint is 32-1/4″ x 15″, it weighs 60 lb, and RIKON rates it under 78 dB at 3 feet. The bag filters to 5 microns and holds 2.1 cubic feet, a locking toggle switch prevents accidental starts, and RIKON gives it a 5-year warranty.

Check price on Amazon

  • ✅ Runs on a standard 115V outlet
  • ✅ Small footprint
  • ✅ 5-year warranty
  • ❌ 5-micron bag: upgrade it for fine dust
  • ❌ One machine at a time

Best For: A table saw, planer and jointer shared through blast gates or one moved hose.


POWERTEC DC5371 Wall Mount Dust Collector

POWERTEC DC5371 1 HP wall mount dust collector with 1 micron bag

Best Wall-Mount Collector

If floor space decides, the DC5371 hangs on a bracket and weighs 35.5 lb. A 1 HP induction motor moves 560 CFM on 120V at 12 A or 240V at 6 A, and the 1-micron bag has a window to check the level and a zipper to empty it. A single 4″ inlet takes a hose straight from the machine, and a grate behind it protects the impeller from offcuts; POWERTEC advises checking it regularly, because debris there cuts airflow.

Check price on Amazon

  • ✅ Takes no floor space
  • ✅ 1-micron bag
  • ✅ Runs on 120V or 240V
  • ❌ 560 CFM, one machine at a time
  • ❌ Inlet grate needs regular checks

Best For: A garage shop where the planer or table saw sits next to a wall.


POWERTEC 4″ Dust Collection Fittings Kit with Blast Gates

POWERTEC 4 inch dust collection fittings kit with Y fittings, elbows and blast gates for three machines

Best Kit to Connect Three Machines

This kit is the shortcut to sharing one collector between three machines. It includes two 4″ 45° elbows, two Y-fittings, three clog-resistant blast gates and twenty 4″ hose clamps, all in ABS plastic, for 4″ ID hoses and machines with 4″ ports. POWERTEC lists table saws, jointers, planers and router tables among the machines it suits. Using Ys and 45s instead of tees and 90s keeps airflow losses down.

Check price on Amazon

  • ✅ Everything for a three-machine branch
  • ✅ Y-fittings and 45° elbows, not 90s
  • ✅ Low price tier
  • ❌ Hose sold separately
  • ❌ Only for 4″ hoses and ports

Best For: Running a table saw, planer and jointer from one collector.


🏆 The Verdict

Match the machine to the tool. A dust collector such as the RIKON 60-100 handles the table saw cabinet, the planer and the jointer, shared through blast gates. Add the PSI TSGUARD for the dust above the table saw blade and the Milescraft DustRouter for the router table. Sanders and miter saw ports belong on a dust extractor or a shop vac with a cyclone.

❓ Frequently Asked Questions

What is the best dust collection system for table saws?+
A dust collector on the saw’s 4″ cabinet port combined with an overarm guard that has its own dust port. The collector clears what falls into the cabinet, and the guard catches the fine dust thrown up off the top of the blade, which a cabinet port alone can’t reach.
Can you use a shop vac for table saw dust collection?+
On a jobsite saw with a small shroud port, yes, ideally with a cyclone separator in front. On a cabinet or hybrid saw with a 4″ port, a shop vac moves too little air and chips build up inside the cabinet, so a dust collector is the better match.
How can I seal my table saw for better dust collection?+
Close the cabinet’s open back, the bevel slot and gaps around the motor with magnetic sheet, thin plywood or a fabric cover that still lets the blade tilt, and fit a zero-clearance insert. Leave the motor the ventilation its manual asks for.
How do you collect dust from a router?+
On a router table, use two pickups: a port behind the fence for edge cuts and a cup or enclosed box under the table for grooves, joined to one vacuum or collector. On a handheld router, fit the maker’s dust shroud and connect a dust extractor or shop vac.
Which sander is best for dust collection?+
Sanders designed for extraction: multi-hole pads that match multi-hole discs, a port that fits standard hoses and a vacuum rather than a bag. Festool and Mirka build theirs around extractors, and any random orbital sander collects far better on a dust extractor than with its own bag.
Do you need a dust collector for a planer?+
Yes, if you plane more than a few boards. Planers make a large volume of chips, and DeWalt’s DW735 manual advises against a shop vac because the hose may clog. A collector with a 4″ hose, ideally with a cyclone separator, keeps the chute clear.

Setting up dust collection for a specific tool? Tell me what it is in the comments and I’ll suggest the simplest setup that works.

Miter Saw Dust Collection: Hoods, Ports and the Right Vacuum

Miter saw dust collection: a sliding miter saw blade and fence in a workshop

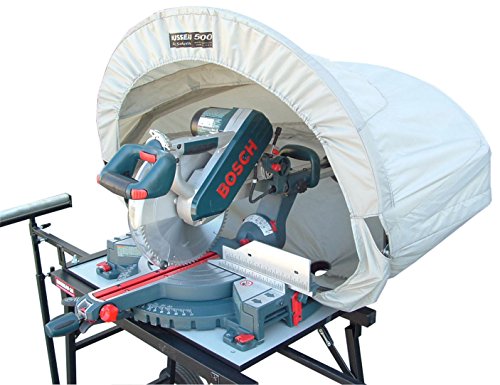
Good miter saw dust collection needs two things working together: a vacuum on the saw’s own dust port to catch what the blade throws into the guard, and a hood behind the saw to catch the plume that sprays out the back. A shop vac or dust extractor on the port alone leaves most of the mess on the wall; a hood on a 4″ hose alone misses the fine dust at the blade. Combine a hood like the Rousseau 5000 with an extractor or a shop vac and cyclone at the port, and the bench stays far cleaner.

Below is why a miter saw is the hardest tool in the shop to keep clean, what each fix catches, how to set up the port, the hood and the vacuum, DIY options, and the hoods and machines worth buying. For dust collection at the table saw, router table, sander and planer, see my guide to dust collection for woodworking tools.

⚡ Quick Picks

Best miter saw hood: the Rousseau 5000 Dust Solution – a folding nylon hood with interior baffles and a 4″ port.

Best vacuum for the saw’s port: the DEWALT DWV010 dust extractor, which starts with the saw.

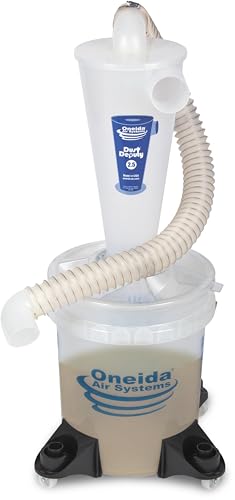
Budget setup: a 2-1/2″ shop vac like the CRAFTSMAN CMXEVBE17595 with the Dust Deputy 2.5 Deluxe.

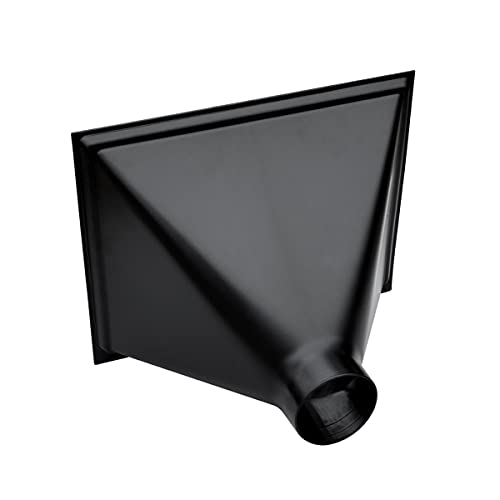
Cheapest hood: the POWERTEC 70122 Big Gulp on a 4″ collector hose.

Why Miter Saws Are So Hard to Keep Clean

A miter saw blade spins toward you at the top and away from you at the bottom, so it throws chips backward and up from the point where the teeth leave the wood. On most saws the dust port sits in the blade guard, above and behind the blade, and only the stream that goes straight into the guard reaches it. The rest sprays out the back of the saw in a wide fan. Sliding saws add a second problem: as the head moves along its rails, the cut point moves and the port moves with it, so the angle of the plume changes during every cut. Bevel and miter angles change it again.

That’s why the stock bag on a miter saw catches so little, and why connecting a vacuum to the port helps but doesn’t finish the job. Miter saw dust collection works when it covers both paths: the port, for the fine dust in the guard, and the space behind the saw, for the chips that escape.

Miter Saw Dust Collection Options Compared

Option What it catches What it misses Price tier
Stock dust bag Some chips that enter the port The plume behind the saw; fine dust passes through the fabric Included
Vacuum on the port Dust thrown into the guard, including fine dust Most of the chips sprayed out the back $ to $$$
Hood behind the saw The plume behind the blade, at any angle Dust that drops in front of the fence $ to $$
Hood + port together Both paths A little at the front of the table $$ to $$$
DIY box hood The plume, if sized to the saw’s swing Fine dust unless it has a strong collector $

How to Collect Dust From a Miter Saw: The Setup

1. Put a Vacuum on the Saw’s Port

Connect a dust extractor or a shop vac to the port with the right adapter; most saw ports are small and most shop vac hoses are 1-7/8″ or 2-1/2″, so a stepped rubber adapter is worth having. An extractor with a tool outlet, like the DEWALT DWV010, starts when you pull the trigger, so the saw never runs without suction. With a shop vac, add a plug-in auto switch. Keep the hose short and smooth: corrugated hose and long runs cost suction.

2. Add a Hood Behind the Saw

A hood catches what the port misses. It sits behind the saw, wide and tall enough to cover the blade’s swing at full miter and bevel, and connects to a 4″ hose. A dust collector moves the volume a hood needs; a shop vac on a hood helps less, because the open front spreads its small airflow over a large area. If you only have a shop vac, connect it to the saw’s port and let the hood work as a catch box that you empty.

3. Close the Gaps

The space under the saw’s table and around the fence lets dust fall through. Some woodworkers close it with a strip of cardboard or a curtain under the table; others mount the saw in a station with walls on both sides. Keep the opening above the table clear so the head can still slide and tilt.

4. Separate Before the Filter

Miter saws make a mix of fine dust and chips, and a shop vac filter clogs fast. A cyclone separator in front of the vac, such as the Oneida Dust Deputy, catches most of it in a bucket first. Oneida claims 99% of dust and debris for its cyclones. My best dust separator guide compares them.

💡 Pro Tip: Let the Blade Stop Before You Lift It

Finish the cut, release the trigger and let the blade stop inside the guard before you raise the head. The vacuum keeps pulling while the blade spins down, and the last puff of dust goes into the port instead of into the air.

Are Dust Extractors Worth It for Miter Saws?

For a saw that lives indoors or in a finished garage, yes, mainly for the auto-start and the HEPA filter. The fine dust from cutting MDF, plywood and trim is what hangs in the air, and an extractor’s HEPA filter catches it, where a standard shop vac filter lets it through. On a job site where the saw cuts framing lumber outdoors, a shop vac with a cyclone does the job for less. Either way, the extractor or vac only handles the port; add a hood for the chips that fly out the back. My dust extractor vs shop vac guide explains the difference in more detail. For the fine dust that still escapes into the room, an air filtration unit is the last layer; my best shop air filtration systems guide compares them.

Do Miter Saw Dust Bags Work?

Only partly. A bag on the port collects the chips that are thrown straight into it, which is a small share of what the saw produces, and the woven fabric lets the finest dust back into the room. Treat the bag as the minimum for cutting outdoors. Indoors, replace it with a vacuum on the port and a hood behind the saw.

DIY Miter Saw Dust Collection

A homemade hood is a box open at the front, as wide as the saw’s swing at full miter and tall enough for the head at full bevel, with a 4″ port at the back or bottom and a sloped floor so chips slide toward it. Kreg publishes plans for one, and many woodworkers build theirs into a miter saw station. Plywood is sturdier than cardboard and doesn’t collapse under a collector’s suction. If you don’t want to build, a ready-made hood is the same idea that folds away: the Rousseau 5000 packs into a bag, and the POWERTEC Big Gulp is a 13″ x 16″ scoop you can mount on a station.

What Machine Should Power Your Miter Saw Dust Collection?

The Hoods and Machines Worth Buying

Rousseau 5000 Dust Solution for Miter Saws

Rousseau 5000 Dust Solution folding miter saw dust collection hood with 4 inch port

Best Miter Saw Dust Hood

Rousseau’s hood is a high-density nylon tent that sits behind the saw, captures the plume and directs the airflow to a 4″ vacuum port. Rousseau says it fits all miter saws, comes fully assembled and folds into a heavy-duty carry bag, and it’s made in the USA. The Amazon listing adds interior baffles to stop fine dust escaping and mounting stanchions in the box. Connect it to your shop’s dust collector or a vacuum. A lighted version, the Rousseau 5000-L, wraps LED lighting around the work area.

Check price on Amazon

  • ✅ Folds into a bag for storage or the job site
  • ✅ 4″ port for a dust collector
  • ✅ Covers any miter or bevel angle
  • ❌ Fabric hood needs a stand or bench to mount on
  • ❌ Higher price tier than a plastic scoop

Best For: Miter saw stations and portable setups that want a real hood without building one.


DEWALT DWV010 8-Gallon HEPA Dust Extractor

DEWALT DWV010 HEPA dust extractor for a miter saw dust port

Best Vacuum for the Saw’s Port

On the miter saw’s own port, an extractor beats a shop vac for two reasons: the tool-activated outlet starts it with every cut, and the HEPA filter holds the fine MDF and plywood dust. The DWV010 lists 150 CFM from a 15 A motor, pulses its filter clean every 30 seconds, and comes with a 15 ft, 1-1/4″ anti-static hose and a swiveling universal connector. Plug the saw into it and forget the switch.

Check price on Amazon

  • ✅ Starts with the saw
  • ✅ HEPA with automatic filter cleaning
  • ✅ Anti-static hose
  • ❌ Can’t power a large hood on its own
  • ❌ Higher price tier than a shop vac

Best For: Indoor miter saw stations cutting MDF, plywood and trim.


CRAFTSMAN CMXEVBE17595 16-Gallon Wet/Dry Shop Vac

CRAFTSMAN CMXEVBE17595 16 gallon shop vac with 2-1/2 inch hose for miter saw dust

Best Budget Vacuum for a Miter Saw

A miter saw makes chips as well as dust, and a big tank with a wide hose handles them. The CRAFTSMAN CMXEVBE17595 has a 16-gallon tank, a 6.5 peak HP motor and a 2-1/2″ x 7 ft Dual-Flex hose that swivels at both ends. The kit includes extension wands, nozzles, a filter and a dust bag, and CRAFTSMAN lists a 3-year limited warranty. Add a stepped adapter for the saw’s port, a cyclone separator and an auto switch.

Check price on Amazon

  • ✅ Large tank for chip-heavy cutting
  • ✅ 2-1/2″ hose fits most cyclones
  • ✅ Low price tier
  • ❌ No tool outlet
  • ❌ Stock filter isn’t meant for fine dust

Best For: Garage and job-site saws, paired with a Dust Deputy.


Oneida Dust Deputy 2.5 Deluxe 5-Gallon Cyclone Kit

Oneida Dust Deputy 2.5 Deluxe cyclone separator kit for 2-1/2 inch shop vac hoses

Best Cyclone for a Shop Vac on a Miter Saw

The Dust Deputy 2.5 Deluxe is built around the 2-1/2″ hoses that come with most full-size shop vacs. Oneida says it captures 99% of dust and debris before the vac. The kit includes the cyclone, a 5-gallon bucket and lid, four casters, a 4.5 ft hose with swivel cuffs, on-board accessory storage and a tether kit that links it to the vac so they move together.

Check price on Amazon

  • ✅ Sized for 2-1/2″ shop vac hoses
  • ✅ Tether kit keeps vac and cyclone together
  • ✅ Collapse-resistant bucket
  • ❌ Needs a reducer for small saw ports
  • ❌ Adds height and floor space

Best For: Keeping a shop vac’s filter clear behind a busy miter saw.


POWERTEC 70122 Big Gulp Dust Hood

POWERTEC 70122 Big Gulp dust hood with 13 by 16 inch opening and 4 inch port

Cheapest Hood

The Big Gulp is a plastic scoop with a 13″ x 16″ opening and a 4″ OD port that fits any 4″ ID dust collection hose. POWERTEC makes it from ABS plastic and suggests placing it behind or under the machine, close to where the dust comes off. Behind a miter saw it won’t cover a full sliding swing like a tent hood, but on a saw station it catches the main plume for very little money. POWERTEC lists miter saws, table saws, drill presses, lathes, sanders and planers among its uses.

Check price on Amazon

  • ✅ Lowest price tier here
  • ✅ Standard 4″ port
  • ✅ Easy to mount on a station
  • ❌ Smaller opening than a tent hood
  • ❌ Needs a dust collector, not a shop vac

Best For: Fixed miter saw stations with a dust collector already in the shop.


WEN DC3401 Rolling Dust Collector

WEN DC3401 rolling dust collector to power a miter saw dust hood

Budget Collector to Power the Hood

A hood needs volume, and the WEN DC3401 is the least expensive way to get it. Its 5.7 A motor and 6″ impeller move up to 660 CFM through a 4″ port into a 12-gallon, 5-micron zippered bag. At 17 lb it rolls on locking casters or hangs on its built-in wall mount next to the saw station, and WEN covers it for 2 years.

Check price on Amazon

  • ✅ Moves enough air for a hood
  • ✅ Hangs on the wall
  • ✅ Low price tier
  • ❌ 5-micron bag passes fine dust
  • ❌ One machine at a time

Best For: Powering a miter saw hood in a garage shop.


🏆 The Verdict

Miter saw dust collection works when you attack both paths. Put a DEWALT DWV010 extractor, or a shop vac with a Dust Deputy, on the saw’s port, and a hood like the Rousseau 5000 behind the saw on a 4″ hose. If you can only buy one thing, start with the vacuum on the port and a cheap scoop like the POWERTEC Big Gulp behind it.

❓ Frequently Asked Questions

How do you collect dust from a miter saw?+
Use two pickups. Connect a dust extractor or shop vac to the saw’s dust port for the dust thrown into the guard, and place a hood behind the saw on a 4″ collector hose for the plume that sprays out the back. Closing the gaps under the table and around the fence helps too.
What is the best miter saw dust collection device?+
No single device catches everything. The most effective combination is a hood behind the saw, such as the Rousseau 5000 with its 4″ port and interior baffles, plus a vacuum on the saw’s port. If you buy only one item, choose a dust extractor that starts with the saw.
Are dust extractors worth it for miter saws?+
Indoors, yes. An extractor starts with the saw through its tool outlet and its HEPA filter catches the fine dust from MDF and plywood that a standard shop vac filter lets through. Outdoors or for framing cuts, a shop vac with a cyclone separator is enough.
Do miter saw dust bags work?+
Only a little. The bag fills with the chips thrown straight into the port, a small share of the total, and the finest dust passes through its fabric. It’s fine for cutting outdoors; indoors, replace it with a vacuum on the port and a hood behind the saw.
How do you build a DIY dust collector for a miter saw?+
Build an open-front plywood box behind the saw, wide enough for its full miter swing and tall enough for full bevel, with a sloped floor and a 4″ port at the back. Connect it to a dust collector, and keep a vacuum on the saw’s own port for the fine dust.
Can a shop vac handle miter saw dust?+
On the saw’s port, yes, especially with a cyclone separator to keep the filter clear and an auto switch so it starts with the saw. On a large hood a shop vac moves too little air to clear the plume; use a dust collector with a 4″ hose there.

How is your miter saw set up? Describe your station in the comments and I’ll suggest where the dust is escaping.

How to Refinish Hardwood Floors Without Sanding (Screen and Recoat)

Refinish hardwood floors without sanding: an empty bedroom with a glossy wood floor and white trim

You can refinish hardwood floors without sanding them to bare wood, as long as the existing finish is intact and you’re not changing the color. The standard way is a screen and recoat: clean the floor, scuff the old finish with a buffer and a fine sanding screen, vacuum, and apply one or two fresh coats of floor finish. The other way is a chemical recoat, where a liquid etches the old finish instead of a screen. Either way, the old finish has to be roughed up somehow, or the new coat won’t stick.

Below is how to tell whether your floor qualifies, the two tests to run before you start, the screen and recoat method step by step, how the chemical recoat systems work, and what to do with a floor that only needs cleaning and polish. The criteria come from the National Wood Flooring Association (NWFA) guidelines and from the finish makers Minwax and Bona.

⚡ Quick Answer

Works when: the finish is dull or lightly scratched but not worn through, peeling or waxed, and you’re keeping the same color.

Method: clean, screen with a buffer (or a pad by hand in small rooms), vacuum and tack, then 1 to 2 coats of a floor finish such as Bona Traffic HD or Minwax Ultimate Floor Finish.

Doesn’t work for: deep scratches, dents, gray worn-through wood, a color change or a waxed floor. Those need a full sand and refinish.

Can You Refinish Hardwood Floors Without Sanding?

Yes, within limits. “Without sanding” really means without sanding to bare wood. What you’re doing is adding a new layer of finish on top of the old one, and finish only bonds to finish that has been cleaned and abraded. The NWFA describes two basic recoat methods: a screen and recoat, which lightly abrades the top of the old finish with a screen or pad and then adds a topcoat, and a chemical etching and recoat system, where the old surface is etched with a solution and recoated with no sanding or screening at all.

What a Recoat Can Fix

  • A dull, matte look in traffic lanes where the finish is worn but still there.
  • Fine surface scratches and scuffs that sit in the finish, not in the wood.
  • A floor that looks “dry” and patchy after years of cleaning.

What It Can’t Fix

The NWFA is explicit: if the floor has visible dents, wear patterns or permanent cupping, recoating is not a viable solution and it needs a full sanding. Minwax’s floor finish instructions add three more cases where you must sand to bare wood: you want to change the color; the finish is cracking, peeling or completely worn away in areas; or shellac, lacquer, wax, or products containing wax or stearates have been applied. If any of these describe your floor, my guide on how to refinish hardwood floors covers the full sand and refinish.

Screen and Recoat vs Full Refinish

Screen and recoat Full sand and refinish
Removes wood No, only scuffs the finish Yes, down to bare wood
Machines Buffer with screen (or a pad by hand) Drum or orbital floor sander, edger, buffer
Coats of finish 1 to 2 2 to 4
Fixes deep scratches, dents, gray wood No Yes
Color change No Yes
Time for one room About a day Two to four days

For what each option costs in your rooms, DIY or with a contractor, use my hardwood floor refinishing cost calculator; it has a screen and recoat setting.

Two Tests Before You Start

Most failed recoats fail for one reason: the new finish doesn’t stick to whatever is already on the floor. The NWFA notes that adhesion is affected by surface contaminants such as wax, grease and many maintenance products, and that one brand or type of finish may not be compatible with another. These two tests take ten minutes and tell you whether to go ahead.

Test 1: Is There Wax on the Floor?

The NWFA describes three ways to check for wax. Try them in a spot that gets traffic and regular cleaning, not in a closet, because closets often never got the same maintenance products:

  • Mineral spirits: rub a little on a clean white rag over the floor. A yellow or brown stain on the rag means paste wax is probably present.
  • Scratch: lightly abrade the floor with a piece of screen or sandpaper. If the residue balls up, it’s a paraffin-based product.
  • Water drops: put two drops of water on the floor. If white spots appear after about 10 minutes, the finish is probably wax.

If the floor is waxed, a polyurethane recoat is off the table. The NWFA suggests rewaxing a waxed floor whenever possible rather than resanding.

Test 2: Will the New Finish Stick?

The NWFA says to always test in several areas, following the finish maker’s recommendations, to be sure the new finish will adhere and dry properly. Clean and screen a small patch in a hidden spot and in a traffic lane, apply the finish you plan to use, let it dry for a day, then press a strip of painter’s tape onto it and pull it off sharply. If finish comes away on the tape, or the coat looks crawled, fish-eyed or cloudy, stop: the floor has a contaminant or an incompatible finish, and it needs either a chemical recoat system or a full sanding.

How to Screen and Recoat Hardwood Floors

The NWFA’s screen and recoat method has four steps: clean the floor as the finish maker recommends, lightly abrade the old finish, vacuum and tack, and apply the finish at the maker’s coverage rate with the maker’s recommended applicator. Here’s what each looks like in practice.

Step 1: Empty and Deep-Clean the Floor

Take everything out of the room and clean the floor with a hardwood cleaner that leaves no residue, not an oil soap or a “shine” product. Bona’s Traffic HD data sheet says the floor must be free from wax, polish and oily residues before recoating. Let the floor dry completely.

Step 2: Screen the Old Finish

Fit a buffer with a fine sanding screen under its driver pad and run it over the whole floor with the grain, overlapping each pass by half the machine’s width, as the NWFA’s intercoat abrasion guidance describes. Keep the machine moving smoothly to avoid swirls. You’re not trying to remove the finish, only to turn the shiny surface into an even, dull haze. Bona’s recoat instructions use 120 grit to hand-abrade the corners and edges the buffer can’t reach; a sanding block or a pad on a pole does the same along the baseboards.

  • Which buffer: a 175 rpm rotary floor machine is the standard. Rental shops carry 17″ models, and smaller 13″ machines are sold for home use. Match the screen size to the pad.
  • Small rooms by hand: in a bathroom, hallway or closet, you can screen by hand with a sanding sponge or a pad on a pole sander. It’s slower, but the abrasion is the same.
  • Don’t go through: if you see bare wood appear on the edges of boards, stop on that spot. Recoated bare wood shows as a lighter patch.

Step 3: Vacuum and Tack

Vacuum the floor twice, including the gaps between boards and the top of the baseboards, then tack it. The NWFA says to tack with a clean cloth wet with a solvent compatible with your finish: water for waterborne finishes, mineral spirits for oil-based ones. Bona specifies its microfiber tacking pad, dry or slightly dampened with water. Any dust left now ends up in the new coat.

Step 4: Apply One or Two Coats

Cut in the edges with a brush, then pull the finish across the floor with the grain using a T-bar or a pad applicator, keeping a wet edge, working toward the door. Minwax says a screen and recoat with its Ultimate Floor Finish needs only two coats, with at least two hours between them and no sanding between coats if the second goes on within 24 hours. Bona’s Traffic HD goes on at 350 to 400 sq ft per gallon, and its data sheet warns in capitals not to spread it too thin.

Step 5: Let It Cure

Minwax says floors finished with its Ultimate Floor Finish take light foot traffic in 24 hours, and that you shouldn’t put rugs down or clean the floor for seven days. Bona Traffic HD is about 80% cured after one day and fully cured in about three. Lift furniture back in, never drag it, and put felt pads under the legs.

💡 Pro Tip

Do the recoat before the finish wears through, not after. A floor that gets a screen and recoat every few years, while the finish is still intact, can go much longer between full sandings, and every full sanding removes wood you can’t put back.

Chemical Recoat: Refinishing With No Screening at All

Chemical recoat systems replace the screen with a liquid that cleans and etches the old finish so a new coat can bond. They are what “sandless refinishing” services and kits usually mean.

How the Bona Recoat System Works

Bona’s Recoat System is a professional process that, according to its technical data sheet, removes contaminants and prepares the floor for a new coat of Bona Traffic or Traffic HD, with Bona’s guarantee covering the cost of sanding and refinishing if the finish doesn’t adhere when the process is followed. The steps, in short:

  1. Spread Bona Remover at 400 to 500 sq ft per gallon, about 200 sq ft at a time.
  2. Abrade it into the floor with a 175 rpm buffer fitted with Bona’s recoat abrasive drive plate.
  3. Squeegee it out and rinse the floor with Bona’s PowerScrubber and Bona Rinse.
  4. Repeat the whole preparation a second time, which the warranty requires.
  5. Rinse again, wet-tack, let it dry and apply one coat of Bona Traffic or Traffic HD.

Bona recommends it for all polyurethane-finished floors and for prefinished floors with aluminum oxide finishes, which are hard to screen. Two cautions from the data sheet: on hand-scraped or distressed floors, test first by hand-abrading a hidden spot with a 220 grit screen, and don’t proceed if that removes finish from the high points; and if you need a second coat, abrade only with a 320 grit maroon pad, because the process temporarily weakens the finish.

Is Sandless Refinishing Any Good?

For the right floor, yes: it gives the same result as a screen and recoat with less dust, and it’s the safer route for prefinished floors. It does exactly what a recoat does and nothing more, so it won’t remove deep scratches, gray wood or dents, whatever a service’s marketing says. Ask any sandless refinishing company which finish they apply and whether they run an adhesion test first.

Engineered and Prefinished Floors

Engineered and factory-finished floors are the best candidates for a recoat, because their thin top layer can only be sanded a limited number of times. The finish is the question. The NWFA notes that factory finishes with high-abrasion aluminum oxide may need to be pretreated with a chemical etching solution approved by the finish maker, and Bona lists prefinished aluminum oxide floors as a recommended use for its recoat system. Before recoating a prefinished floor, check the flooring maker’s care instructions: some specify their own recoat product or warn that a recoat voids the finish warranty.

Making Old Floors Look Better Without Any Recoat

If the finish is in good condition and the floor just looks tired, cleaning may be enough. A neutral hardwood floor cleaner and a microfiber mop remove the film that makes floors look gray, and a dedicated floor machine with a soft pad can deep-clean a whole room.

The Problem With Floor Polishes and Restorers

Hardwood floor polishes and “restorers” add a temporary shiny layer on top of the finish. They can make a dull floor look better for months, but they are exactly the kind of residue that finish makers say must be removed before any recoat. If you think you’ll want a screen and recoat later, clean the floor rather than polishing it, or plan to strip the polish first with the remover its maker sells. If you do want to polish, my guide on how to buff and polish hardwood floors covers matching the polish to the finish and applying it without streaks.

What You Need

Everything for a DIY screen and recoat. The specs come from the makers; I don’t show prices or ratings, which change daily.

Bona Traffic HD Waterborne Floor Finish

Bona Traffic HD satin waterborne floor finish, 1 gallon

Best Recoat Finish for Busy Floors

A two-part waterborne finish (finish plus hardener) used by many flooring pros, and the finish Bona’s own recoat system is built around. Bona’s data sheet gives 350 to 400 sq ft per gallon, 2 to 3 hours between coats, no abrasion needed between coats within 48 hours, and about three days to full cure. Once mixed, Bona says it must be used within 4 hours, so mix only what you’ll apply.

Check price on Amazon

  • ✅ Hardener for high scratch resistance
  • ✅ Fast recoat and cure
  • ❌ Two-part mixing, 4-hour pot life

Best For: Kitchens, hallways and homes with pets.


Minwax Ultimate Floor Finish

Minwax Ultimate Floor Finish water based satin gallon

Easiest One-Part Recoat Finish

A one-part waterborne floor finish with screen and recoat instructions printed in its data sheet: two coats for a recoat, at least two hours apart, no sanding between coats within 24 hours, and about 500 sq ft per gallon. Minwax says it doesn’t amber quickly and cleans up with soap and water. Light foot traffic in 24 hours; no rugs for seven days.

Check price on Amazon

  • ✅ No mixing
  • ✅ Two coats in one day
  • ❌ Not over wax, shellac or lacquer

Best For: A first DIY recoat on a polyurethane floor.


Prolux Core 13″ Floor Buffer

Prolux Core 13 inch floor buffer and scrubber

Buffer to Own for Regular Recoats

If you’ll screen and recoat every few years, owning a buffer beats renting one each time. Prolux’s 13″ model has a low-speed 150 rpm high-torque motor, a 13″ cleaning path, a 50 ft cord and a 5-year motor guarantee, and Prolux designed it for home and office use. Pair it with 13″ sanding screens for the screening step; between recoats it machine-scrubs the floor.

Check price on Amazon

  • ✅ Slow speed suits screening
  • ✅ Doubles as a floor scrubber
  • ❌ Smaller path than a 17″ rental machine

Best For: Homeowners and landlords who recoat regularly.


17″ Floor Sanding Screens, 120 Grit

17 inch 120 grit mesh floor sanding screens for a floor buffer

For a Rented 17″ Buffer

If you rent the buffer, buy the screens online in advance in the size the machine takes. This pack has ten 17″ mesh screens in 120 grit, silicon carbide, which suits screening an intact finish before a recoat. One screen does a fair amount of floor because the open mesh doesn’t clog quickly; flip it when it stops cutting.

Check price on Amazon

  • ✅ Fits standard 17″ buffers
  • ✅ Mesh resists clogging
  • ❌ Check the pad size before ordering

Best For: Screening with a rented buffer.


Bona Hardwood Floor Cleaner, 128 oz Refill

Bona Hardwood Floor Cleaner refill 128 ounce unscented

For the Pre-Clean and Ongoing Care

A waterborne hardwood floor cleaner from the same maker as the recoat finish, in a gallon refill for spray mops and bottles. Use it for the deep clean before screening, and afterwards for regular cleaning instead of polishes or oil soaps, which leave residues that make the next recoat harder.

Check price on Amazon

  • ✅ Residue-free cleaning before a recoat
  • ✅ Large refill size
  • ❌ Cleans only; won’t hide scratches

Best For: Prep cleaning and everyday care on finished floors.


How I Put This Guide Together

The recoat methods, wax tests and the limits of recoating come from the National Wood Flooring Association’s Sanding and Finishing Guidelines and Methods. The screen and recoat criteria and the cure times come from the Minwax Ultimate Floor Finish technical data sheet, and the chemical recoat process from the Bona Recoat System and Bona Traffic HD technical data sheets. Product specs come from the makers. More on how I choose the sanders I recommend.

🏆 The Verdict

If the finish is dull but intact, the color is right and nobody has waxed the floor, you don’t need to sand to bare wood. Test for wax and adhesion, deep-clean, screen with a buffer, vacuum and tack, and apply two coats of a floor finish such as Minwax Ultimate Floor Finish or Bona Traffic HD. For prefinished aluminum oxide floors, use a chemical recoat system. Deep scratches, dents and gray wood still need a full refinish.

❓ Frequently Asked Questions

What is screen and recoat for hardwood floors?+
Screen and recoat is a way to renew a floor’s finish without sanding to bare wood. A buffer with a fine abrasive screen scuffs the existing finish so a new coat can bond, the floor is vacuumed and tacked, and one or two fresh coats of finish go on top. It refreshes the look and protection, but doesn’t remove deep damage.
How can I make my old hardwood floors look better without refinishing?+
Start with a thorough clean using a residue-free hardwood cleaner, which often removes the gray film that makes floors look worn. Add felt pads and rugs in traffic lanes. Avoid polishes and restorers if you may recoat later, since their residue has to be stripped before a new finish will stick.
Is sandless refinishing any good?+
It works well on floors whose finish is intact, and it’s often the best option for prefinished floors with hard aluminum oxide finishes. A chemical etch replaces the screening step, so there’s less dust. It can’t remove deep scratches, dents or color problems, so judge a sandless service by the condition of your floor, not its marketing.
Can you screen and recoat engineered hardwood floors?+
Yes, and it’s often the best way to maintain them, because a recoat removes no wood from the thin top layer. Test adhesion first. Factory finishes with aluminum oxide may need a chemical etching product instead of a screen, and some flooring makers specify their own recoat product, so read the care guide before you start.
Is it possible to recoat prefinished hardwood floors?+
Yes, but prefinished floors are harder to recoat than site-finished ones because many have an aluminum oxide finish that resists abrasion. The NWFA notes they may need pretreatment with a chemical etching solution approved by the finish maker, and Bona lists them as a recommended use for its Recoat System.
Does buffing hardwood floors remove scratches?+
Only scratches that sit in the finish. Buffing with a screen dulls and blends light surface scuffs, and the fresh coat fills them in, so they mostly disappear. Scratches that have cut into the wood, or that show gray or white wood at the bottom, remain visible after a recoat and need sanding.

Conclusion

A screen and recoat is the cheapest, fastest way to make a tired hardwood floor look finished again, and doing one before the finish wears through is the best way to put off a full sanding for years. Run the wax and adhesion tests first, clean thoroughly, and let the finish cure before the furniture goes back. If the tests fail or the damage is in the wood, see my guide on how to refinish hardwood floors and the floor sander rental guide. Questions about your floor? Ask in the comments.

Floor Sander Rental: What It Costs, Which Machine to Rent and When to Buy

Floor sander rental: a room under renovation with bare wood floorboards and a dust extractor ready for sanding

Renting a floor sander costs roughly $65 to $95 a day for the main machine and $35 to $60 a day for an edger, based on the rates rental shops publish online (checked October 1, 2026). Where shops publish a weekly rate, a week costs about three and a half times the daily rate. Sandpaper, a deposit and transport come on top, and you’ll almost always need both a sander and an edger for a full refinish.

Below are the published rates, what each type of rental floor sander does and which one to pick, the costs that aren’t on the price tag, and the simple sum that tells you whether buying a machine makes more sense than renting one. Home Depot, Lowe’s and Sunbelt Rentals price floor sanders by location rather than publishing one national rate, so the figures here come from rental shops that print their prices, and the last section explains how to get a quote from the big chains.

⚡ Quick Answer

Daily rates (published, October 2026): drum sander $70 to $75, square-pad orbital $65 to $75, multi-disc orbital $95, 7″ edger $35 to $48, 17″ buffer $55.

Which to rent: a drum sander plus an edger for worn or uneven floors; a square-pad orbital for a first-timer or a floor in fair shape; a buffer for a screen and recoat.

Rent or buy: rent for a one-off refinish. Buying pays off for small rooms you can do with a handheld like the Bosch GET75-6N, or for regular screen-and-recoat maintenance with a buffer you own.

How Much Does It Cost to Rent a Floor Sander?

These are the rates two independent rental shops publish on their own sites, read on October 1, 2026. They are local prices, one in California and one in New Hampshire, so treat them as a guide to the range rather than the price at your nearest store.

Machine Rental shop Day Week 4 weeks
8″ drum sander (Clarke EZ-8) Cal-West Rentals, CA $75 $255 $725
Drum sander (Essex Silver-Line) Westville Grand Rental Station, NH $70 n/a n/a
Square-pad orbital, 12″ x 18″ (American Sanders) Cal-West Rentals, CA $65 $225 $595
Square-pad orbital, 12″ x 24″ Westville Grand Rental Station, NH $75 n/a n/a
Four-pad random orbit (U-Sand Pro) Westville Grand Rental Station, NH $95 n/a n/a
7″ edger (American Sanders Super 7R) Cal-West Rentals, CA $35 $125 $355
7″ edger (Essex SL7) Westville Grand Rental Station, NH $48 n/a n/a
Drum sander + edger together Westville Grand Rental Station, NH $95 n/a n/a
Radiator / toe-kick edger Westville Grand Rental Station, NH $60 n/a n/a
17″ floor buffer / polisher Westville Grand Rental Station, NH $55 n/a n/a

Two patterns stand out. First, the edger is a separate rental, and you’ll need it: a drum or orbital can’t reach the last few inches along the walls. Westville’s package price for both machines is $95 a day, against $118 for the two separately. Second, weekly rates are far cheaper per day than daily ones: at Cal-West, a week of the drum sander costs $255, the same as three and a half days at the daily rate. If there’s any chance a job runs past the weekend, ask for the weekly price before you sign.

Home Depot, Lowe’s and Sunbelt Rentals

The big chains are where most people rent, but none of them publishes a single national price: rates are tied to a store or a location. Home Depot rents Clarke American Sanders drum sanders, edgers and floor polishers through its tool rental centers, Lowe’s has its own rental counters, and Sunbelt Rentals lists an electric walk-behind drum floor sander for rent. To compare, pick your store on each site (or call), and ask for the 4-hour, daily and weekly price of both the sander and the edger, plus the per-piece price of sandpaper. Then compare the total, not the headline rate.

Which Floor Sander Should You Rent?

Rental counters usually offer three kinds of floor sander, plus the edger and the buffer. They’re not interchangeable: each one suits a different floor and a different level of experience.

Drum Sander: Fastest, and the Least Forgiving

A drum sander wraps a sanding belt around a spinning drum and cuts hard. The 8″ Clarke EZ-8 that Cal-West rents has a 1-1/2 HP motor and an 8″ drum turning at 1,800 rpm, and it breaks down into pieces for transport. It’s the machine for floors with worn-through finish, deep scratches, old paint or boards at different heights, because it flattens as it sands. The catch is that it removes wood fast enough to dig a dip in a second if you stop moving with the drum down. The EZ-8’s own manual recommends plugging it into a dedicated 20 amp circuit to avoid nuisance breaker trips.

Square-Pad Orbital: Slower, and Very Hard to Ruin a Floor With

The square-pad orbital (often sold as a “square buff”) vibrates a flat, rectangular pad with sandpaper stuck to it. The American Sanders model at Cal-West runs a 12″ x 18″ pad at 3,600 orbits per minute and weighs 125 lb, and its weight does the work. It sands with or across the grain without gouging, which makes it the beginner’s choice. It won’t flatten cupped or uneven boards, and on a floor with several coats of old finish it can take a full day per room on the first grit.

Multi-Disc Random Orbit (U-Sand and Similar)

Machines like the U-Sand Pro spin several small random-orbit pads under one housing. Westville describes it as four-pad random orbit technology that makes floor sanding easy. Like the square-pad orbital, they’re forgiving and leave no directional scratches, which suits parquet and floors where boards run in different directions. They cost a little more per day.

Edger: You’ll Need One Too

A 7″ edger is a heavy rotary disc sander you work on your knees along the walls, in closets and on landings. The American Sanders Super 7R that Cal-West rents has a 1 HP motor turning a 7″ disc at 2,800 rpm and weighs 30 lb. Use the same grit sequence as the main machine. For under radiators and kitchen toe-kicks, some shops rent a low-profile toe-kick or radiator edger.

Buffer: For Screening and for Screen and Recoat

A buffer (a slow-speed rotary floor machine, typically 17″) runs a sanding screen under a pad. After a full sanding it blends the drum and edger scratches; on its own, it’s the main tool for a screen and recoat, which refreshes the finish without sanding to bare wood. Westville’s 17″ polisher runs at 175 rpm with a 1.5 hp motor. If your floor only looks dull, read my guide on refinishing hardwood floors without sanding before you rent anything bigger. If you’d rather own a buffer for regular recoats, I compare six machines in my roundup of the best floor buffers for hardwood floors.

The Costs That Aren’t on the Rental Tag

  • Sandpaper. Shops sell the matching belts, sheets, discs and screens, usually priced by the piece. For a full refinish you need three grits for the main machine, the same for the edger, and screens for the buffer. Ask what happens to unused paper: some shops take back unopened pieces, some don’t.
  • Deposit and damage. Expect a card hold. A drum sander returned with a gouged drum or a torn dust bag can cost you.
  • Minimum rental period. Cal-West lists a 4-hour minimum on its floor machines. A 4-hour rate is good for an edger you only need for one pass, rarely for the main sander.
  • Transport. A drum sander, edger and buffer won’t fit in a small car, and delivery is extra where it’s offered.
  • Finish and safety gear. Floor finish, applicators, a P100 mask and hearing protection are bought, not rented.
  • Extra days. Sanding always takes longer than planned the first time. Price the weekly rate before you need it.

Is Renting a Floor Sander Worth It?

For a one-off refinish of a few rooms, yes. You get professional-grade machines for a fraction of what they cost to own, and a full refinish genuinely needs a drum or orbital floor sander plus an edger. The step-by-step method is in my guide on how to refinish hardwood floors.

When Buying Pays Off

The sum is simple: the price of the machine you’d buy, divided by the daily rental rate, is the number of rental days at which buying breaks even. For example, a machine that costs $450 against a $75 daily rate breaks even at six rental days. Buying wins when you’ll pass that number over the machine’s life, which happens in four situations:

  • Small rooms, done slowly. A hallway, closet or small bedroom can be sanded with a powerful 6″ random orbital sander over a few evenings, without booking a machine for a fixed day. The Bosch GET75-6N below is the one to look at.
  • Regular screen-and-recoat maintenance. A floor that gets a fresh topcoat every few years needs a buffer each time. A home-size buffer like the Prolux Core 13″ does that job and cleans floors the rest of the time.
  • Several properties. Landlords and flippers who refresh floors between tenants rent often enough that owning an upright orbital machine like the Oreck Orbiter makes sense.
  • Stairs and edges. Rental drum sanders can’t do stair treads at all, so you’ll need a handheld sander anyway. My guide to the best sanders for stairs covers them.

When Renting Wins

Professional drum sanders and edgers cost thousands of dollars to buy, and the homeowner versions sold online are a different class of machine. For a whole floor that needs flattening and finish removal, rent. The roundup of the best floor sanders explains which machines are worth owning and which are rental-only.

Renting vs Hiring a Pro

Renting saves the labor bill, but you take on the risk of damaging the floor and three or four days of hard work. If the floor is engineered with a thin wear layer, badly cupped, or an antique you can’t replace, the safest money is on a professional with a dust-contained system. For a solid oak floor in fair condition, a careful first-timer with a square-pad orbital can get a good result. To see the gap in dollars for your own rooms, the hardwood floor refinishing cost calculator compares a pro quote with the DIY bill for rentals, sandpaper and finish, and lets you type in your local rental rates.

Tips for Rental Day

  1. Reserve the machines a few days ahead for a weekend; floor sanders go fast on Saturday mornings.
  2. Prep the room the day before so the rental clock isn’t running while you pull baseboard and set nails.
  3. Check the machine at the counter: spin the drum or pad, look at the cord, and make sure the dust bag is intact. Ask staff to show you how to load the paper.
  4. Buy more paper than you think, in every grit, and confirm the return policy for unused pieces.
  5. Find the right outlet: a drum sander on a shared 15 amp kitchen circuit trips breakers all day.
  6. Empty the dust bag often and never leave dust in it overnight; floor-sanding dust can self-ignite.
  7. Practice in a closet before you take the machine into the main room.

What to Buy If You’d Rather Own a Machine

These are machines and abrasives you can buy online today. The specs come from the makers and the rental shops’ published specs; I don’t show prices or ratings, which change daily.

Bosch GET75-6N 6″ Dual-Mode Random Orbital Sander

Bosch GET75-6N 6 inch dual mode random orbital sander

Best Buy Instead of Renting, for Small Rooms

A 7.5 amp random orbital with a 6″ pad and a Turbo mode that switches to a direct-drive rotation for aggressive removal, then back to random orbit for finishing passes. Bosch rates it at 3,300 to 7,300 OPM. It won’t match a drum sander on a big room, but for a hallway, a small bedroom, edges and stair treads, it does the job without a rental clock running.

Check price on Amazon

  • ✅ Turbo mode removes old finish fast
  • ✅ Also sands stairs and edges
  • ❌ Too slow for a large room

Best For: Small rooms, edges and stairs, done over several evenings.


Oreck Orbiter Multi-Purpose Floor Machine

Oreck Orbiter multi-purpose floor machine

Best Stand-Up Machine You Can Own

An upright orbital floor machine for the home. Oreck says it sands, refinishes, strips, scrubs, waxes and polishes floors, and its head moves in a random orbit rather than spinning, which is what makes it easy to control. With Oreck’s 12″ sandscreens under the pad it can scuff-sand a finish for a recoat from a standing position. It’s not a substitute for a drum sander on a floor that needs the finish taken off. Oreck backs the motor for 5 years and other parts for 1 year.

Check price on Amazon

  • ✅ Stand-up screening and scrubbing
  • ✅ Random orbit head: no swirl marks
  • ❌ Too light for removing old finish

Best For: Landlords and homeowners who recoat and deep-clean floors regularly.


Prolux Core 13″ Floor Buffer

Prolux Core 13 inch floor buffer and scrubber

Best Buffer to Own for Screen and Recoat

A compact rotary buffer with a 13″ cleaning path, a low-speed 150 rpm high-torque motor, a 50 ft cord and a 5-year motor guarantee, according to Prolux. Prolux designed the 13″ model for home and office use. Fitted with 13″ sanding screens rated for 175 to 350 rpm buffers, it handles the screening step of a recoat. It’s smaller than a 17″ rental buffer, so a large room takes longer.

Check price on Amazon

  • ✅ Low speed suits screening
  • ✅ 50 ft cord, 5-year motor guarantee
  • ❌ 13″ path is slow on big rooms

Best For: Screen and recoat every few years, and machine-scrubbing floors in between.


8″ x 19″ Sanding Belts for the EZ-8 Drum Sander

8 x 19 inch sanding belts in assorted grits for the EZ-8 drum floor sander

Abrasives for the Most Common Rental Drum

A 10-pack of 8″ x 19″ aluminum oxide sheets in 40, 60, 80, 100 and 120 grit, sold for the Clarke EZ-8. Ask your rental shop whether you can use your own paper before you buy; some require their own abrasives. For the edger, 7″ discs with a 7/8″ hole fit the Super 7R and most rental edgers, such as these Mercer zirconia cloth edger discs.

Check price on Amazon

  • ✅ The full grit sequence in one pack
  • ✅ Sized for the EZ-8
  • ❌ Two of each grit won’t cover a large room

Best For: A small room with a rented EZ-8, or spares for the last grit.


How I Put This Guide Together

Rental rates and machine specs come from the published rental pages of Cal-West Rentals (Petaluma, San Rafael and San Mateo, California) and Westville Grand Rental Station (Plaistow, New Hampshire), read on October 1, 2026. Home Depot, Lowe’s and Sunbelt Rentals price by location, so no national figure is quoted for them. The 20 amp circuit advice is from the Clarke EZ-8 operator’s manual, and the dust safety advice from the National Wood Flooring Association’s sanding and finishing guidelines. Product specs come from Bosch, Oreck and Prolux. More on how I choose the sanders I recommend.

🏆 The Verdict

For a one-off refinish, rent a drum sander and an edger (or a square-pad orbital if it’s your first floor): budget $65 to $95 a day for the main machine and $35 to $60 for the edger at published rates, plus sandpaper, and ask for the weekly price. Buy only when you’ll beat the break-even days: a Bosch GET75-6N for small rooms and stairs, or a buffer for regular screen-and-recoat maintenance.

❓ Frequently Asked Questions

How much do floor sanders cost to rent?+
Published rates checked in October 2026 run from $65 to $95 a day for the main floor sander, depending on type, and $35 to $60 a day for an edger. Where a weekly rate is published, it’s about three and a half times the daily one. Sandpaper is extra and is usually sold by the piece at the rental counter.
How much is it to rent a floor sander at Lowe’s or Home Depot?+
Neither chain publishes one national rental price; the rate depends on your local store. Select your local store on the retailer’s tool rental page, or call the rental desk, and ask for the 4-hour, daily and weekly price of the sander and the edger, and the price of each sheet or disc of sandpaper.
Is renting a floor sander worth it?+
For a single refinish, yes: you get professional machines for a few days’ rent instead of buying equipment you’ll rarely use. It stops being worth it when the job is a small room a handheld sander can handle, or when you’ll screen and recoat often enough that owning a buffer costs less than repeated rentals.
Can I sand my floor myself?+
Yes. Most homeowners can sand a solid hardwood floor with rental machines if they prepare the room, follow the grit sequence and keep the drum moving. A square-pad orbital is the safest choice for a first floor. Leave thin engineered floors, badly cupped boards and valuable antique floors to a professional.
What is the best floor sander to rent?+
A drum sander for floors with worn-through finish, deep scratches or uneven boards, because it flattens as it cuts. A square-pad or multi-disc orbital for beginners and floors in fair condition, because it can’t gouge. In both cases, rent a 7″ edger as well for the strip along the walls.
Can you rent a floor buffer at Home Depot?+
Yes, Home Depot’s tool rental centers list floor polishers and buffers alongside their floor sanders, priced by store. For a screen and recoat you need a slow-speed buffer and sanding screens that match its pad size, so check the pad diameter before you buy screens.

Conclusion

Floor sander rental is the cheapest way to get a professional-grade machine for a single job, as long as you budget for the edger, the sandpaper and an extra day. Compare the weekly rate, rent the machine that matches your floor and your experience, and buy only when the break-even sum says so. When the machines are booked, my guide on how to refinish hardwood floors walks through every stage, and the grit chart for floors lists the grit sequence. Questions about a specific rental machine? Ask in the comments.

How to Refinish Hardwood Floors: Grits, Finishes and Cure Times, Step by Step

How to refinish hardwood floors: worn oak floorboards with the old finish gone grey

To refinish hardwood floors, you sand the old finish off with a drum or orbital floor sander and an edger, working through three grits (typically 36 or 40, then 60, then 80 to 100), screen the whole floor with a buffer, vacuum and tack, then apply two to four coats of floor finish. Plan on two to four days for a typical room, most of it waiting for finish to dry, and up to a month before rugs go back down.

This guide walks through the whole job in the order you’ll do it: deciding whether the floor needs a full refinish at all, prepping the room, each sanding stage with the grit that goes with it, the edger and the buffer, dust, stain, the finish itself and the cure. The sanding sequence follows the National Wood Flooring Association’s (NWFA) Sanding and Finishing Guidelines, and the coat counts and dry times come from the finish makers’ own technical data sheets.

⚡ Quick Answer

Machines: a drum or orbital floor sander and a 7″ edger (usually rented), a buffer with screens, a scraper and a sanding block. For a small room, a 6″ turbo random orbital like the Bosch GET75-6N works.

Grits: 36 or 40 to cut the old finish, 60 to remove those scratches, 80 to 100 to finish; edge with the same grit you’ll use on the next drum pass; screen at 100 to 150.

Finish: 2 to 3 coats of oil-based poly or 3 coats of a waterborne floor finish. Light foot traffic after 12 to 24 hours, furniture after 48 hours, rugs after 7 to 30 days.

Refinish, Recoat or Replace: Decide Before You Rent Anything

A full refinish (sanding to bare wood and starting again) is the most work and removes wood every time you do it. Before you book a sander, check whether the floor actually needs it. The NWFA guidelines are blunt about this: it isn’t necessary to fully sand a floor unless it has visible dents, wear patterns or permanent cupping, or you want to change its color. If the finish is just dull and lightly scratched, a screen and recoat may be all it needs.

If you’re weighing DIY against a contractor, put your room sizes into my hardwood floor refinishing cost calculator first: it prices both options side by side and writes the sandpaper and finish shopping list for the DIY route.

When a Full Refinish Is the Right Call

  • Worn-through traffic lanes: grey or dark wood showing where the finish has gone, usually in doorways and in front of the sink or sofa.
  • Deep scratches, dents and pet damage that go into the wood, not just the finish.
  • A color change. You can’t go lighter or darker without getting to bare wood.
  • Peeling or cracking finish, or a floor that has been waxed. Minwax’s floor finish instructions say you need to sand to bare wood if the finish is cracking, peeling or worn away, or if shellac, lacquer, wax or products containing wax or stearates have been applied.

When a Screen and Recoat Is Enough

If the color is fine, the finish is intact with no worn-through spots, and nobody has waxed the floor, you can abrade the existing finish and add a fresh coat on top. It takes a day instead of four, removes no wood and costs a fraction of the abrasives. I’ve written a full guide on how to refinish hardwood floors without sanding that covers the screen and recoat method step by step, plus the chemical recoat kits.

Check the Wood Before You Sand It

Three quick checks save a ruined floor:

  • How much wood is left. Pull a floor vent or look at a threshold to see a board’s edge. Solid strip flooring has plenty of wood above the tongue; engineered flooring has a thin top veneer that can only take a limited number of sandings, and some can’t be sanded at all. If you can’t tell, ask the flooring maker before you start.
  • Moisture and cupping. The NWFA says cupped floors should not be sanded until the moisture content of the flooring and subfloor has stabilized. Sand a cupped floor flat while it’s still wet and the boards crown when they dry.
  • Lead. Floor finishes applied before 1978 may contain lead, the NWFA notes. Test kits are sold at hardware stores; if it tests positive, follow the EPA’s lead rules or hire a certified contractor.

Tools and Materials You’ll Need

Most of the heavy machinery is rented; the abrasives, finish and safety gear you buy. Here’s the full list for a typical room, grouped the way you’ll use it.

Sanding Machines

  • Drum (or belt) floor sander for the main field of the floor. It cuts fastest and flattens uneven boards, but it will gouge if you stop moving. The 8″ Clarke EZ-8 is the standard rental machine.
  • Square-pad orbital floor sander (often called a square buff) as the beginner-friendly alternative. It’s slower and won’t flatten cupped boards, but it is much harder to gouge with.
  • 7″ edger for the strip along the walls the big machine can’t reach.
  • Buffer (a 175 rpm rotary floor machine) with sanding screens, to blend the drum and edger scratches before finish.
  • Hand scraper and sanding block for corners, under radiators and around door casings.

If you’re deciding between renting and buying any of these, my guide to floor sander rental has published rental rates and a break-even sum, and the best floor sanders roundup covers the machines worth owning.

Abrasives

Buy more than you think you need, in each grit you’ll use, for the drum, edger and buffer. Rental shops sell the matching belts, discs and screens, usually by the piece. The grit for each stage is covered below and in the floors section of my sandpaper grit chart.

Finish, Applicators and Cleanup

  • Floor finish (oil-based polyurethane, waterborne floor finish or hardwax oil), and stain if you’re changing the color.
  • Applicator: a T-bar with a pad for waterborne finish, a lambswool applicator or roller for oil-based poly, plus a brush for the edges.
  • Shop vacuum with a brush head, tack cloths or a microfiber pad, painter’s tape and plastic sheeting.
  • Wood filler matched to your finish, a putty knife and a nail set.

Safety Gear

The NWFA guidelines open the sanding chapter with one line in capitals: always wear NIOSH-approved respiratory protection. A half-mask with P100 filters, eye protection and hearing protection are the minimum; the drum and edger are loud for hours at a time. My guide to the best respirators for woodworking explains the filter classes.

Step 1: Prepare the Room

Preparation decides how much dust ends up in the rest of the house and how many belts you tear.

  1. Empty the room completely, including curtains and anything on the walls you care about.
  2. Remove floor vents and the shoe molding (the small quarter-round along the baseboard) if there is one. Number the pieces on the back so they go back in the same place.
  3. Set every nail. Run your hand over the floor and punch any proud nail head below the surface with a nail set. One raised nail tears a drum belt in seconds and can throw a spark into the dust bag.
  4. Seal the room. Plastic sheeting over doorways, tape over vents and returns, and switch the HVAC off so it doesn’t pull dust through the house. The NWFA recommends sealing with plastic or a dust blocker and covering doorways, heat registers and returns.
  5. Clean the floor so grit doesn’t load the first belt.

Step 2: Sand the Floor, Stage by Stage

This is the part people worry about, and it’s where most of the mistakes happen. The principle is simple: each grit only has to remove the scratches left by the one before. Start coarse enough to cut through the old finish and flatten the boards, then work up, never skipping more than one grit. The NWFA puts it this way: use the finest grit that will flatten the floor, and don’t skip more than one grade between cuts, because a finer grit that skips too far only knocks the peaks off the deep scratches and leaves them in the floor.

Stage Drum or orbital Edger What it does
1. First cut 36 or 40 (24 on very rough or painted floors) Same as drum Removes the old finish and flattens the boards
2. Second cut 50 or 60 The grit of your final drum cut Removes the first-cut scratches
3. Final cut 80 to 100 Done at stage 2 Leaves a scratch fine enough for finish
4. Screen Buffer: 100 to 120 before stain, 120 to 150 for clear finish Blends drum and edger marks into one pattern
Old floor in good shape Start at 50 or 60 Start at 50 or 60 The NWFA abrasive guide lists 50 as the first sanding on new floors and the second on old ones

These are starting points, not rules. Factory-finished floors with an aluminum oxide finish are much harder to cut, and the NWFA notes they may respond better to a fine grit (80 or finer) used to remove the surface finish. Test a small area: if 36 grit hasn’t cut through the old finish after two passes, it isn’t the grit, it’s the finish, and you need a different approach.

The First Cut (36 to 40 Grit)

On strip and plank floors the NWFA recommends making the first cut at a 7 to 15 degree angle to the length of the boards, which flattens boards of different heights faster than going straight along them. Lower the drum only while the machine is moving forward, keep it moving at an even pace, and lift it before you stop. When two-thirds of the room is done, turn around and sand the remaining third, overlapping the first passes by two to three feet so the two halves blend.

With an orbital floor sander you can go with the grain from the start, and it won’t flatten the floor the way a drum does, so on a badly cupped or uneven floor the first cut takes much longer. The step-by-step technique for each machine is in my guide on how to sand hardwood floors, which has a section each for the drum sander and the orbital floor sander.

Edge the Perimeter

The drum can’t get closer than a few inches to the walls. After the first cut, run the edger around the room with the same coarse grit, keeping it moving in smooth arcs and never tilting it onto the disc’s edge. The edger leaves curved scratches the drum doesn’t, which is why the buffer step later matters so much.

The Second Cut (50 to 60 Grit)

Now sand parallel to the grain, along the length of the boards, with the next grit up. This pass removes the angled scratches from the first cut. After it, the NWFA says to edge again, using the same grit you’ll use for the final drum cut, so the edge and the field finish at the same scratch depth.

Fill Gaps and Holes

Fill nail holes, gouges and small gaps before the final cut, so the last pass sands the filler flush. Use a commercial filler that’s compatible with your stain and finish, or do what floor pros do and mix the fine dust from your final edging with a compatible filler binder into a paste.

The Final Cut (80 to 100 Grit)

The last drum pass goes with the grain again, one grit finer. Finish with 100 if you’re leaving the wood natural under a clear coat, or stop at 80 if you’re staining dark and want more color to soak in (more on that below). Then hand-scrape the corners, under radiators and around door casings, and sand those spots by hand with the same grit, as the NWFA recommends.

Screen the Whole Floor With a Buffer

Finally, look at the floor in raking light from a low angle. You’ll see edger swirls along the walls and possibly chatter marks from the drum. The NWFA says to run a buffer, multi-disc sander or oscillating sander over the entire floor to remove these sanding imperfections. Bona’s technical data sheet for Traffic HD gives the grits: for an unstained floor, make the final cut at 80 to 120 grit and multidisc at 120 to 150; for a stained floor, final cut at 80 to 100 and multidisc at 80 to 120.

💡 Pro Tip

Before the final cut, scribble across the whole floor with a soft pencil. Sand until every mark is gone. Any pencil line still visible is a spot the machine skipped, and it will show the moment finish goes on.

Step 3: Control the Dust (and the Fire Risk)

Rental drum sanders and edgers have dust bags, but a lot of fine dust still escapes. Three habits keep it manageable and safe:

  • Empty the bags often. The NWFA warns that sanding dust is highly flammable and that you should never run the sanding machine with the bag more than half full.
  • Never leave dust overnight. Spontaneous combustion of floor dust is a real fire cause. Empty bags into a metal container outdoors and take dust off site at the end of each day. Never leave the machine with dust in the bag.
  • Vacuum between grits, not just at the end. Loose coarse grit trapped under a finer belt leaves deep scratches.

If you’re using your own handheld sanders on a small room, connect them to a shop vac or a dust extractor; a tool’s own dust bag doesn’t come close on a whole floor.

Step 4: Clean, Then Stain (Optional)

Vacuum the whole room, top down: walls, window sills, door frames, then the floor, including the gaps between boards. Then tack the floor with a microfiber pad or a cloth dampened with the solvent your finish maker specifies (water for waterborne finishes, mineral spirits for oil-based).

Do You Seal a Wood Floor After Sanding or Just Stain?

Stain is color only; it doesn’t protect anything. If you stain, the stain still needs a clear finish on top. If you like the natural color of the wood, skip the stain and go straight to finish (or a sealer, if your finish system calls for one). Minwax’s floor instructions, for example, say to finish sanding at 100 grit before staining and to wait 24 hours for the stain to dry before the first coat of their waterborne floor finish.

Water Popping for Darker, Even Stain

Water popping (also called grain raising) means wiping the sanded floor with water to open the grain so it takes stain darker and more evenly. The NWFA says to test it on a sample board first, record the moisture content before you start, and let the wood return to its original moisture content before you stain. A pinless moisture meter makes that check quick and leaves no holes in the floor. Too much water, or staining too soon, causes blotching.

Test the Color First

Sand a spare board or a closet corner through the same grits and test your stain there. Oak, maple and pine take the same stain very differently, and the color on the can lid means nothing until you’ve seen it on your floor under your finish.

Step 5: Apply the Finish

The finish is what you’ll live with for the next ten years. The main choice is between oil-based polyurethane and waterborne finish, with hardwax oil as a third option. For seven floor finishes compared on their makers’ data sheets, see my roundup of the best wood floor finish.

Maker’s data sheet Minwax Super Fast-Drying Poly for Floors (oil) Minwax Ultimate Floor Finish (water) Bona Traffic HD (2-part water)
Coverage per gallon 600 to 700 sq ft About 500 sq ft 350 to 400 sq ft
Time between coats 3 to 4 hours At least 2 hours, under 24 2 to 3 hours
Sanding between coats Not needed within 12 hours Not needed within 24 hours Not needed within 48 hours
Coats on bare wood 3 (2 over stain or sealer) 3 (2 over stain) Per Bona system, sealer plus finish coats
Traffic and cure Light foot traffic 12 to 18 hours after the final coat Light foot traffic in 24 hours, no rugs for 7 days 80% cured after 1 day, fully cured in about 3 days

Oil-Based Polyurethane

Oil-based poly is forgiving to apply, builds a thick film in fewer coats and covers more area per gallon. The trade-offs are a strong solvent smell, longer dry times and a warm amber tone that deepens over the years, which looks good on red oak and less so on maple or whitewashed floors. Ventilate hard: Minwax’s data sheet tells you to open windows and doors or use respiratory protection rated for organic vapors.

Waterborne Floor Finish

Waterborne finishes dry in a couple of hours, smell far less, stay clear rather than ambering, and let you put several coats on in one day. Minwax notes that its Ultimate Floor Finish needs a sanding sealer first on bare white oak, to prevent a tannin reaction that discolors the wood. Two-part commercial finishes like Bona Traffic HD add a hardener for more scratch resistance and are what many flooring pros use.

Hardwax Oil

Hardwax oils soak in rather than forming a film, give a matte, natural look and can be spot-repaired without sanding the whole room. They usually need more frequent maintenance coats than a polyurethane. Follow the maker’s coverage and buffing instructions exactly; excess oil left on the surface stays sticky.

How to Apply It Without Lap Marks

  1. Cut in along the walls with a brush first.
  2. Pour a line of finish and pull it with the grain using a T-bar or applicator pad, keeping a wet edge so each pass overlaps finish that hasn’t started to dry.
  3. Work toward the exit door so you don’t finish yourself into a corner.
  4. Don’t spread it thinner than the coverage rate on the label; Bona’s data sheet repeats this in capitals.
  5. Between coats, vacuum and tack at a minimum. If you go past the recoat window, scuff the floor with a buffer and a fine screen or pad (Minwax specifies 220 grit after 24 hours for its waterborne finish; Bona specifies 180 to 240 grit abrasives after 48 hours), then vacuum and tack again.

My guide on sanding between coats of polyurethane goes into the abrasives for that intercoat step.

Step 6: Let It Cure Before You Move Back In

Dry to the touch is not cured. The NWFA’s general guidance is that most surface-finished floors can be walked on after 24 to 48 hours; furniture should be lifted (never slid) into place after 48 hours, and area rugs wait until the finish is fully cured, generally 7 to 30 days, or as the finish maker says. Put felt pads under every furniture leg before it goes back.

How Long Does It Take to Refinish Hardwood Floors?

For one room done yourself, budget it like this:

  • Day 1: prep, three sanding cuts, edging, screening and cleanup.
  • Day 2: stain (if used) or the first one or two coats of waterborne finish.
  • Day 3: the remaining coats. Oil-based poly at three to four hours between coats can take a day longer.
  • Then: 24 to 48 hours before careful walking and furniture, up to a month before rugs.

A whole house is closer to a week, and most of that time is spent waiting for finish, not sanding.

Common Mistakes That Ruin a DIY Refinish

  • Stopping the drum in one place. It digs a dip in seconds. Lift the drum before you stop, every time.
  • Skipping grits to save time, which leaves deep scratches that show under the finish.
  • Not matching the edger to the field. Edge with the grit of the next drum pass and screen the whole floor, or you’ll see a frame of swirls around the room.
  • Finishing over dust. Every speck becomes a bump in the film. Vacuum twice and tack.
  • Rushing the cure. Dragging a sofa across a two-day-old finish is the fastest way to undo the whole job.

What You Need

The big machines are usually rented, but a few products are worth owning for the job, and buying the abrasives and finish online is often simpler. The specs below come from the makers; I don’t show prices or ratings, which change daily.

Bosch GET75-6N 6″ Dual-Mode Random Orbital Sander

Bosch GET75-6N 6 inch dual mode random orbital sander

Best Handheld Sander for Small Floors and Edges

For a closet, hallway or small bedroom, renting a drum sander can be more machine than you need. Bosch’s GET75-6N has a 7.5 amp motor, a 6″ pad and a Turbo mode that switches from random orbit to a direct-drive rotation for much faster stock removal, then back to random orbit for a swirl-free finish. It is slow on a whole living room, but it’s a genuinely useful edger substitute and stair tool. It’s the top pick in my best floor sanders roundup.

Check price on Amazon

  • ✅ Turbo mode for removing old finish
  • ✅ Random orbit mode for the final pass
  • ✅ 6″ pad covers ground faster than a 5″
  • ❌ Too slow for a large room on its own

Best For: Small rooms, edges, stair treads and touch-ups.


17″ Floor Sanding Screens, 120 Grit

17 inch 120 grit mesh floor sanding screens for a floor buffer

For the Screening Step

The common rental buffer is a 17″ machine, and its screens sit under a driver pad. This 10-pack of 120 grit silicon carbide mesh screens covers the clear-finish screening step, and 80 grit packs are sold the same way (HUAALIUCHE 17″ 80 grit) for stained floors or blending heavier edger marks. Screens are open mesh, so they don’t load up with dust as fast as paper; flip them when one side stops cutting.

Check price on Amazon

  • ✅ Fits standard 17″ rental buffers
  • ✅ Mesh resists clogging
  • ❌ Check your buffer’s pad size before you order

Best For: Screening before finish, and screen-and-recoat jobs.


Minwax Super Fast-Drying Polyurethane for Floors

Minwax Super Fast-Drying Polyurethane for Floors, satin, gallon

Best Oil-Based Floor Finish

An oil-based polyurethane formulated for hardwood floors. Minwax’s technical data sheet gives 600 to 700 sq ft per gallon, a 3 to 4 hour recoat time, no sanding between coats if you recoat within 12 hours, and light foot traffic 12 to 18 hours after the final coat. Three coats on bare wood, two over stain or sealer. This listing is a two-gallon pack in satin, which is enough for two coats on most single rooms.

Check price on Amazon

  • ✅ High coverage per gallon
  • ✅ No sanding between coats inside 12 hours
  • ❌ Strong solvent odor; ventilate well
  • ❌ Ambers over time

Best For: Red oak and warm-toned floors, and anyone who wants fewer coats.


Minwax Ultimate Floor Finish

Minwax Ultimate Floor Finish water based satin gallon

Best Waterborne Finish for DIY

A waterborne floor topcoat that Minwax says can be recoated in two hours without sanding between coats (if you recoat within 24 hours), doesn’t amber quickly and cleans up with soap and water. Coverage is about 500 sq ft per gallon; three coats on bare wood, two over stain or for a screen and recoat. Light foot traffic in 24 hours, but no rugs and no cleaning for seven days. Use a sanding sealer first on bare white oak.

Check price on Amazon

  • ✅ Three coats in one day
  • ✅ Low odor, stays clear
  • ❌ Needs a sealer on white oak

Best For: Maple, white oak and light floors, and homes that can’t be empty for long.


Duratool 18″ T-Bar Applicator

Duratool 18 inch T-bar floor finish applicator with refill pad

For Waterborne Finish

An 18″ T-bar is the tool floor finishers use to pull waterborne finish across a room in long, even strokes. This bundle includes the frame and an 18″ refill pad, which threads onto a standard broom-style handle. For oil-based poly, a lambswool applicator or a short-nap roller is the better choice.

Check price on Amazon

  • ✅ Even film, fewer lap marks
  • ✅ Refill pad included
  • ❌ Takes a little practice on the first coat

Best For: Applying waterborne finish to whole rooms.


GVS Elipse P100 Half Mask Respirator

GVS Elipse P100 dust half mask respirator

For Sanding Dust

A compact reusable half mask with P100 filters, the highest particulate filter class for half masks, which seals better around the face than a disposable dust mask over a full day of drum sanding. P100 filters stop particles, not vapors: for oil-based finish fumes, you need a cartridge rated for organic vapors.

Check price on Amazon

  • ✅ P100 particulate filters included
  • ✅ Low profile, fits under safety glasses
  • ❌ Not for solvent vapors

Best For: Drum sanding, edging and screening.


How I Put This Guide Together

The sanding sequence, edging, screening, dust safety and cure times come from the National Wood Flooring Association’s Sanding and Finishing Guidelines and Methods. Finish coverage, recoat windows and coat counts come from the technical data sheets for Minwax Super Fast-Drying Polyurethane for Floors, Minwax Ultimate Floor Finish and Bona Traffic HD. The products are on sale on Amazon today and their specs come from the makers; I don’t show customer ratings or prices. More on how I choose the sanders I recommend.

🏆 The Verdict

Refinishing hardwood floors is a weekend of sanding and a few days of finishing. Decide first whether the floor needs it, then sand in three cuts (36 or 40, 60, 80 to 100) without skipping grits, edge with the next grit up, screen the whole floor, clean twice, and lay down two to three coats of a floor-rated finish. Rent the drum and edger, and keep a Bosch GET75-6N for the corners, stairs and small rooms.

❓ Frequently Asked Questions

Is it worth refinishing hardwood floors?+
Usually, yes. Solid hardwood can be sanded and refinished several times over its life, and a refinish costs far less than new flooring. It’s not worth it when an engineered floor’s wear layer is too thin to sand, when boards are badly cupped from a moisture problem that hasn’t been fixed, or when only the finish is dull and a recoat would do.
Can you recoat hardwood floors without sanding?+
You can recoat without sanding to bare wood, but the old finish still needs abrading so the new coat bonds. That’s a screen and recoat: a buffer with a fine screen, a thorough clean, then one or two coats. It only works if the finish isn’t worn through, peeling or waxed, and you’re not changing the color.
Do you seal a wood floor after sanding or just stain?+
You always need a clear finish; stain alone only adds color and leaves the wood unprotected. Either stain and then apply two or more coats of floor finish over it once the stain is dry, or skip the stain and apply a sealer or finish directly to the bare, sanded wood.
What is the difference between resurfacing and refinishing hardwood floors?+
The terms overlap, but refinishing usually means sanding to bare wood and applying new stain and finish, while resurfacing is often used for a lighter treatment: screening the existing finish and recoating it, or sanding deeper to flatten damaged boards. Ask any contractor which one they mean before you compare quotes.
How long does it take to refinish hardwood floors?+
A single room takes two to four days: one day for sanding, edging and screening, then one or two days of finish coats, depending on dry time between coats. Allow 24 to 48 hours before walking on it normally and moving furniture back, and 7 to 30 days before laying rugs.
Can a beginner refinish hardwood floors themselves?+
Yes, if you choose the machine to match your skill. A square-pad orbital floor sander is slow but very hard to gouge with, which makes it the safer rental for a first floor. A drum sander is faster but punishes hesitation. Practice in a closet or bedroom before the living room, and follow the grit sequence exactly.

Conclusion

Most of a good refinish happens before the finish can is opened: an honest decision about whether the floor needs sanding, careful prep, and patient sanding through every grit. Get those right and the finish is the easy part. If you’re still choosing machines, start with my floor sander rental guide; if your floor only looks tired, try the screen and recoat method first. Questions about your own floor? Ask in the comments.

How to Refinish Wood Furniture: Strip, Sand, Stain and Seal

How to refinish wood furniture: sanding a round outdoor wooden table with a random orbital sander

How to refinish wood furniture, in order: clean it, repair it, remove the old finish by stripping or sanding, sand the bare wood smooth through 120, 150 and 180 grit, stain if you want a new color, and seal it with two or three thin coats of a clear finish. The stripping and sanding are most of the work and decide how good the piece looks at the end, so that’s where this guide spends the most time.

Below is how to tell whether a piece is worth refinishing, how to choose between stripping and sanding, the grits and the sander for each part of a dresser, table or chair, the finishing steps, and the tools that make it a weekend job instead of a month of evenings.

⚡ Quick Answer

Strip with a gel like Citristrip when there are several coats, carvings or veneer. Sand when it’s solid wood with a thin, worn finish.

Sand bare wood 120, then 150, then 180: a random orbital sander for tops, a 1/4 sheet sander for sides and corners, a detail sander for spindles and moldings.

Finish with stain (optional) and two or three coats of wipe-on polyurethane, sanding lightly between coats.

Painting instead? Don’t sand to bare wood: scuff-sand with 180 to 220 grit, prime, and sand the primer lightly before the paint.

Before You Start: Is the Piece Worth Refinishing?

Refinishing means removing the old finish and applying a new one. It’s the right move when the finish is worn through, cracked, flaking, badly scratched or simply the wrong color. It isn’t always necessary, and on some pieces it’s the wrong call.

Try Cleaning and Restoring First

Plenty of furniture that looks tired only needs a clean and a restorer. Wash it with a mild soap solution on a well-wrung cloth and dry it straight away. Cloudy white rings and faded patches often come back with a finish restorer, without stripping anything: see my guide on how to remove water stains from wood. If the finish is intact under the grime, stop there.

Solid Wood or Veneer?

Look at the edge of a top or a drawer front. If the grain runs over the edge and continues on the end, it’s probably solid wood. If you see a thin line of a different wood along the edge, or the grain pattern on the top doesn’t match the edge, it’s veneer: a thin layer of wood glued over a core. Veneer can be refinished, but it can be sanded through in seconds, so on veneer you strip first and sand only lightly by hand or at low speed.

Antiques and Lead Paint

On a valuable antique, the original finish is part of the value; get it appraised before you strip it. And if the piece is painted and the paint could be older than 1978, test it for lead before sanding or scraping. Even stain makers print the warning: Rust-Oleum’s Varathane data sheet says that if you scrape, sand or remove old paint, you may release lead dust, and that lead is toxic.

Step 1: Prepare the Piece and the Workspace

  1. Remove hardware, drawers and doors. Bag and label the screws. Flat parts sand far better lying flat.
  2. Clean off wax and grime with mild soap and water or mineral spirits, so it doesn’t clog paper or smear into the wood.
  3. Re-glue loose joints and let the glue cure before sanding.
  4. Set up dust control: work outside or in a ventilated garage, connect a shop vac to your sander and wear a dust mask or respirator. The best respirators for woodworking guide explains which filters to buy.

Step 2: Strip or Sand the Old Finish?

Both get you to bare wood. The choice depends on how thick the finish is, the shape of the piece and whether it’s veneered.

Situation Strip Sand
Several coats of paint or varnish ✅ Lifts them in one go Slow, clogs paper
Thin, worn clear finish on solid wood Works, but messier ✅ Fastest
Veneer ✅ Safest Light hand sanding only
Carvings, turned legs, moldings ✅ Reaches every recess Detail sander for the rest
Flat tops and panels Either ✅ Random orbital sander

Most real projects use both: strip the whole piece, then sand. Stripper removes the coating; it doesn’t smooth the wood, flatten scratches or remove stain that has soaked in, and the surface still needs sanding before a new finish.

How to Strip Furniture

  1. Apply a thick coat of gel stripper with an old brush, working on one surface at a time.
  2. Wait. Citristrip says its gel stays wet and active for up to 24 hours, which lets it work through several layers in one step. Check a corner with a scraper; when the finish lifts to bare wood, it’s ready.

  3. Scrape with the grain using a plastic scraper on flat surfaces and a contour scraper on moldings and turnings.
  4. Clean the residue as the stripper’s label directs, and let the wood dry fully before sanding.

My guide to how to strip paint from wood covers the stripper types and heat guns in detail, and the best paint stripper for wood compares the gels.

How to Sand Off an Old Finish

On solid wood with a thin clear finish, a random orbital sander with 80 or 100 grit cuts through varnish quickly. Once you’re through to bare wood everywhere, stop using the coarse grit and move on to the smoothing sequence below. Keep the sander moving and flat; tilting it to “dig out” a stubborn spot leaves a dish that shows under any finish.

⚠️ Important

Never start a veneered top at 80 grit. Strip it, then sand by hand or with the sander at its lowest speed starting at 150 or 180, and keep the pad off the edges, where veneer is thinnest and goes through first.

Step 3: Sand the Bare Wood Smooth

This is the step that decides whether the finished piece looks factory-made or homemade. The goal is one even, fine scratch pattern on every surface, with no swirls, cross-grain marks or stripper residue. The basics behind every step here are in how to sand wood.

The Grit Sequence

For most furniture: 120, then 150, then 180. Don’t skip grits: each one should remove the scratches of the one before. If you’ll stain, don’t go much finer than 180 on oak or maple, because General Finishes notes that sanding too fine makes stain lighter and less even; if you’ll use only a clear finish, 220 is fine. My guide on how to stain wood has the full table by species, and the sandpaper grit chart covers every other surface.

Which Sander for Which Part

  • Tops, sides and drawer fronts: a 5″ random orbital sander. Fast, flat and no cross-grain scratches.
  • Inside corners, frames and panels: a 1/4 sheet sander, whose square pad reaches right into a 90-degree corner.
  • Spindles, slats, carvings and moldings: a detail sander with a pointed pad or finger attachment, then a sanding sponge or folded paper by hand.

The best sanders for furniture compares the palm, detail and orbital models side by side.

Check Your Work Before Finishing

Vacuum the dust and wipe the surface with a cloth dampened with mineral spirits. The wet wood shows what the finish will: swirl marks, scratches, glue spots and patches of old finish. Sand them out with your last grit, by hand with the grain for the final pass. Fill dents and holes with a stainable filler and sand it flush; the best wood filler guide lists the ones that take stain.

💡 Pro Tip

Draw light pencil squiggles across a surface before each new grit. When they’re all gone, you’ve sanded the whole surface at that grit and can move up. It’s the easiest way to avoid a patch that stays coarser than the rest and soaks up stain darker.

Step 4: Stain (Optional)

If you like the natural color of the bare wood, skip stain and go straight to the clear finish. If you’re changing the color, test on the underside of a top or the inside of a drawer front, which has the same wood and the same sanding. Use a pre-stain conditioner on pine, maple and birch to stop blotching, wipe the stain on, and wipe the excess off at the time the can gives. All the details are in how to stain wood.

Step 5: Apply a Clear Finish

Choose a Finish You Can Apply Well

A wipe-on polyurethane is the most forgiving for a first refinish: you wipe it on with a cloth, so there are no brush marks or drips. Minwax says its oil-based Wipe-On Poly protects against water, household chemicals, food stains and wear, can be recoated after 2 to 3 hours and is dry for light use in 24 hours. Brushing polyurethane builds faster and water-based finishes stay clearer over light woods; both work too, with more care. I compare nine finishes, from wipe-on poly to hardwax oil, in my guide to the best wood finish for furniture.

Coats and Sanding Between Them

Apply thin coats with the grain. Once each coat is dry, sand lightly with a fine sanding sponge or 320 grit to knock down dust nibs, wipe off the dust and apply the next. Two or three coats are typical on furniture; tabletops that see daily use get another. My guide to sanding between coats of polyurethane covers grits and timing.

Let It Cure Before Use

Reattach hardware and put the drawers back once the last coat is dry to the touch, but be gentle with the piece for the first days. Dry for light use is not the same as fully cured: keep heavy objects, hot dishes and wet glasses off a new tabletop until the finish has hardened, as the product label directs.

Refinishing Tables, Dressers and Chairs

Tables

The top takes all the wear, so it gets the most attention: strip or sand the whole top to bare wood, keep the sander flat to avoid dips, and give it an extra coat of finish. The legs and apron need less. For a step-by-step on tables alone, including turned legs, veneer tops and staining, see how to refinish a dining table.

Dressers

Take out the drawers and remove the pulls before you start. Sand the case lying on its back so the sides are horizontal, and do the drawer fronts flat on a bench. Leave drawer sides and interiors unfinished or with a light coat of shellac; a thick film finish there can make drawers stick. Kitchen cabinets follow the same steps with more degreasing and a stain-blocking primer; see how to refinish kitchen cabinets.

Chairs

Chairs are almost all edges, spindles and curves, which is why stripping first saves the most time here. Use a contour scraper on turnings, a detail sander on slats and the flat parts of the seat, and a sanding sponge or cord-like strips of sandpaper on round spindles.

How to Sand Furniture Before Painting

Sanding furniture before painting: a paint roller resting on a sanded pine box

Painting a piece is a different job from refinishing it. You aren’t trying to reach bare wood; you’re sanding so the primer has something to grip and the paint goes on smooth. I’ve refinished dozens of pieces over the years, and the difference between a paint job that lasts and one that peels comes down to that prep, not to the paint.

Do You Need to Sand Furniture Before Painting?

Almost always, but less than most people think. Benjamin Moore’s guide to painting a wood table says sanding is required when the piece was previously painted or finished with a high-sheen product, that a few passes to dull the surface are enough, and that it isn’t necessary to remove the existing coating. Glidden’s furniture-painting guide says the same for glossy finishes and clear topcoats: sand lightly with a medium-grit block so the new paint can bond. Peeling, flaking or chipped paint is the exception: anything loose has to come off first, or the new coat fails with it.

If you’d rather not sand a sound, glossy finish at all, a liquid deglosser (liquid sandpaper) dulls it chemically; it doesn’t level scratches or remove loose paint. And if the paint could be older than 1978, test it for lead before you sand: Glidden prints the warning that sanding or scraping old paint may release lead dust.

What Grit to Use Before Painting

I’ve found that most people start too coarse when the goal is paint. A coarse grit leaves scratches that show through the paint and only creates more sanding. Here’s where to start for each surface:

Surface Grit Goal
Sound varnish, lacquer, poly or glossy paint 180 to 220 Dull the sheen everywhere; don’t remove the finish
Peeling or chipped paint Scrape, then 120, then 180 to 220 Remove loose paint and feather the edges flat
Bare or stripped wood 120, then 150 to 180 Smooth, even surface for primer
Laminate 220 Light scuff, then a bonding primer
Dry primer 220 Knock down raised grain and dust nibs
Between coats of paint 320 or a fine sanding sponge Smooth, not remove, the last coat

The 180 to 220 range for scuffing an old finish is what Benjamin Moore recommends for dulling a table’s top and legs before priming. The sandpaper grit chart has every other grit.

How to Sand Furniture to Paint, Step by Step

  1. Remove the hardware and clean the piece with a degreasing cleaner to remove wax, grease and silicone polish, which stop paint from bonding even on a sanded surface. Let it dry completely.
  2. Scrape anything loose and fill dents and holes, then sand the filler flush once it’s hard.
  3. Sand the whole piece at the right grit: a random orbital or 1/4 sheet sander on the flat parts, a sanding sponge on moldings, spindles and carvings, where finish builds up thickest and peeling usually starts. You’re done when no shiny patches are left.
  4. Remove every bit of dust with a vacuum and a tack cloth. Dust trapped under primer shows through every coat above it.
  5. Prime. Use a bonding primer over glossy finishes and laminate (Benjamin Moore names its INSL-X STIX for tables), and a stain-blocking primer, such as a shellac-based one, over dark stain, knots or water marks that could bleed through a light paint. Glidden notes that primed projects usually need fewer coats of paint.
  6. Sand the dry primer lightly with 220 and wipe it clean.
  7. Paint in thin coats, a fine-finish roller on tops and a brush on legs and details, sanding lightly with fine paper between coats as Glidden recommends, and removing the dust each time. Benjamin Moore warns that heavy coats on horizontal surfaces can crack.
  8. Respect the recoat and cure times on the can. Benjamin Moore says its ADVANCE paint can take up to 16 hours to dry before recoating and three to five days to cure before a table goes back into everyday use.

Sanding Painted Furniture to Repaint

Repainting a piece that’s already painted doesn’t mean sanding back to wood. If the existing paint is sound and well bonded, scuff it all over with 180 to 220 grit, clean it, prime if you’re changing color significantly, and paint. If it’s peeling, chipping or poorly bonded, sand or scrape until every loose edge is gone and feather the edges of the remaining paint so they don’t show through. Covering failing paint with new paint doesn’t fix the adhesion problem; it only delays it until after you’ve done all the work.

Painting Kitchen Cabinets

Cabinet doors and boxes follow the same prep, with more cleaning (kitchen grease) and a harder enamel on top; the full job is in the kitchen cabinets guide linked under Dressers above. For the paint itself, best paint for cabinets compares the cabinet enamels and the primer for each surface. If you’d rather spray than brush, my guide on how to use a paint sprayer covers thinning, tips and the order to spray doors in.

Common Refinishing Mistakes

  • Sanding through veneer with coarse grit or a tilted sander.
  • Skipping grits, which leaves scratches that show under stain.
  • Leaving stripper residue or wax, which stops stain and finish from soaking in or drying.
  • Staining without a test on the same wood and sanding.
  • Thick finish coats, which run, stay soft and take days to dry.
  • Using the piece too soon, before the finish has cured.

The Tools That Make Refinishing Faster

With these, a dresser or table is a weekend project. Specs are from the makers’ listings.

Citristrip Stripping Gel

Citristrip paint and varnish stripping gel 40 oz for refinishing furniture

Best Stripper for Furniture

Citristrip’s gel stays wet and active for up to 24 hours, so it can strip multiple layers in one step, and it clings to vertical dresser sides and chair legs. The maker says it removes dried latex and oil-based paint, varnish, lacquer, polyurethane and shellac, and that it contains no methylene chloride or NMP. This 40 oz bottle is enough for a dresser or a dining table.

Check price on Amazon

  • ✅ Long working time, several layers at once
  • ✅ Removes every common furniture finish
  • ✅ No methylene chloride
  • ❌ Slower than harsher strippers

Best For: Painted or heavily varnished furniture, veneer and carved pieces.


ALLWAY CS6 Contour Scraper Set

ALLWAY CS6 contour scraper set with six blades for moldings and spindles

Best for Moldings and Turned Legs

Stripped finish has to come out of every curve, and a flat scraper can’t follow a molding. The CS6 has six stainless steel blades shaped for concave, convex, round and flat profiles, a blade file stored in the handle and a storage case for the blades. It saves most of the sanding you’d otherwise do by hand on chair spindles and table legs.

Check price on Amazon

  • ✅ Six profiles for curves and moldings
  • ✅ File in the handle to resharpen
  • ✅ Comfortable offset grip
  • ❌ Slow on big flat surfaces

Best For: Turned legs, spindles, picture-frame moldings and carvings.


Bosch ROS20VSC 5″ Random Orbital Sander

Bosch ROS20VSC random orbital sander for refinishing a tabletop

Best Sander for Tops and Panels

On a refinishing job the random orbital sander does most of the hours: through the old finish on solid tops, then 120, 150 and 180 on every flat surface. The ROS20VSC has a 2.5 amp motor, variable speed from 7,500 to 12,000 OPM (low for veneer, high for stock removal), hook-and-loop discs and a microfilter canister with a vacuum adapter. My Bosch ROS20VSC review has the details, and the best random orbital sanders list has alternatives.

Check price on Amazon

  • ✅ Fast and swirl-free on flat surfaces
  • ✅ Variable speed for veneer
  • ✅ Good dust collection with a vacuum
  • ❌ Round pad misses inside corners

Best For: Tabletops, dresser tops and sides, doors and drawer fronts.


DEWALT DWE6411K 1/4 Sheet Palm Sander

DEWALT DWE6411K quarter sheet palm sander for furniture corners

Best for Corners and Frames

A square pad goes where a round one can’t: into the inside corners of a dresser case, cabinet door frames and raised panels. DEWALT’s DWE6411K has a 2.3 amp motor at 14,000 OPM, a foam pad for a flat sanding plane, an improved paper clamp so you can cut your own 1/4 sheets of any grit, and a locking dust port for a vacuum hose. It’s the editor’s choice in my best sanders for furniture guide, and the best sheet sanders list has larger half-sheet models.

Check price on Amazon

  • ✅ Reaches 90-degree inside corners
  • ✅ Uses cheap sheet paper in any grit
  • ✅ Locking vacuum port
  • ❌ Slower than an orbital on big tops

Best For: Dresser cases, frame-and-panel doors and final passes.


BLACK+DECKER BDEMS600 Mouse Detail Sander

BLACK+DECKER BDEMS600 mouse detail sander for chair slats and spindles

Best for Chairs and Details

Chair slats, the spaces between spindles and the curves of a carved apron are where refinishing projects stall. The BDEMS600 has a pointed pad, a detail finger attachment for narrow gaps, a 1.2 amp motor at 16,000 OPM and its own dust canister. It’s light enough to hold at any angle for an afternoon.

Check price on Amazon

  • ✅ Pointed pad and finger attachment
  • ✅ Light and easy to control
  • ✅ Dust canister built in
  • ❌ Small pad: not for tops

Best For: Chairs, spindles, slats and carved details.


Minwax Oil-Based Wipe-On Poly

Minwax oil-based Wipe-On Poly satin 1 quart

Easiest Finish for a First Refinish

Wiping a finish on with a cloth removes the two things that ruin most first refinishes: brush marks and drips. Minwax’s Wipe-On Poly is an oil-based polyurethane with a hand-rubbed look, which the maker says protects against water, household chemicals, food stains and wear, recoats in 2 to 3 hours and is dry for light use in 24 hours. Each coat is thin, so plan on more coats than with a brushing poly.

Check price on Amazon

  • ✅ No brush marks or drips
  • ✅ Durable polyurethane protection
  • ✅ Several coats in a day
  • ❌ Thin coats: more of them needed

Best For: Dressers, side tables, chairs and first-time refinishers.


How I Put This Guide Together

The sanding and grit advice follows General Finishes’ preparation guide and the stain makers’ data sheets I cite in the staining guide; the stripper, scraper, sander and finish specs are from the makers’ own listings; the lead warning is quoted from Rust-Oleum’s Varathane data sheet; and the painting prep follows Benjamin Moore’s guide to painting a wood table and Glidden’s guide to painting furniture. The products are on sale on Amazon today; I don’t show customer ratings or prices, which change daily. More on how I choose the sanders I recommend.

🏆 The Verdict

Refinishing wood furniture is mostly getting to clean, evenly sanded bare wood. Strip with Citristrip when there are layers, carvings or veneer; sand through 120, 150 and 180 with a random orbital sander on the flat parts and a detail sander on the rest; then stain if you want and wipe on two or three thin coats of polyurethane.

❓ Frequently Asked Questions

Is it better to sand or strip wood furniture?+
Strip when the finish is thick, painted, on veneer or on carved and turned parts; sand when it’s a thin clear finish on solid, flat wood. On most pieces you do both: stripper takes off the coating, and sanding then smooths the bare wood so stain and finish go on evenly.
Can you refinish wood furniture without sanding?+
You can refresh it without sanding, using a cleaner and a finish restorer that blends out scratches, rings and fading. A true refinish, with a new color or a new protective coat, needs at least a light scuff so the new finish bonds, and bare wood needs sanding after stripping to remove raised grain and residue.
What are the common mistakes to avoid when refinishing furniture?+
The big ones are sanding through veneer, skipping grits, leaving wax or stripper residue on the wood, staining without a test patch, brushing on thick coats of finish, and putting the piece back into use before the finish has cured. Almost all of them come from rushing the preparation.
Can you just paint over stained wood furniture?+
Yes, but not straight onto a glossy finish. Clean it, scuff-sand the whole piece so the paint has something to grip, remove the dust, and use a bonding or stain-blocking primer, since some stains bleed through light paint. A scuff with 180 to 220 grit is enough on a sound finish; you don’t need to reach bare wood.
Do I need to sand a piece of furniture before painting?+
On anything glossy, varnished or already painted, yes, but only enough to dull it: paint and primer don’t grip a slick surface and peel. Raw wood needs a light smoothing pass. The only real shortcuts are a liquid deglosser on a sound finish, or a bonding primer made for slick surfaces, used as its label directs.
Can I paint immediately after sanding?+
Not until the dust is gone. Vacuum the piece, wipe it with a tack cloth or a barely damp cloth, and let it dry if you used water. Then prime rather than painting straight onto sanded wood or old finish: primer seals the surface, blocks stains and gives the paint an even base.
Can you restain wood that is already stained?+
Going darker is possible over the old color once the clear topcoat is removed, or with a gel stain over a scuffed finish. Going lighter isn’t: stain can’t lighten wood, so the old stain has to be stripped and sanded out first. Test on a hidden area before committing either way.
Can you sand veneer furniture?+
Lightly, yes. Strip the finish first instead of sanding it off, then sand by hand or with a random orbital sander at low speed, starting no coarser than 150 or 180 grit. Keep the pad flat and away from edges and corners, where the thin veneer layer wears through first.

Conclusion

Learning how to refinish wood furniture is mostly learning patience with the preparation: decide whether to strip or sand, get to bare wood everywhere, sand through the grits with the right sander for each part, and only then open the stain and finish. A single good sander and a detail sander turn it from a chore into a satisfying weekend. If your project is a table, the table guide linked above has the step-by-step, and if you plan to paint the piece, go back to how to sand furniture before painting.

How to Remove Water Stains from Wood (White and Black Rings)

How to remove water stains from wood: a glass of iced water standing on a finished wooden table

How to remove water stains from wood depends on one thing: the color of the mark. A white or cloudy ring is moisture trapped in the finish, and it usually comes out without sanding: gentle heat, a finish restorer like Howard Restor-A-Finish, or a light rub of the finish itself. A black or dark gray ring means the water got through the finish into the wood. That one needs the finish taken off, the spot treated with oxalic acid wood bleach, and the area sanded and refinished.

Below is how to tell the two apart, the methods in order from gentlest to most aggressive, when sanding is the right call and which grits to use, and the few products that do the job.

⚡ Quick Answer

White ring: try low heat from a hair dryer first, then Howard Restor-A-Finish on a soft pad, wiped with the grain. No sanding needed in most cases.

Black ring: remove the finish, apply oxalic acid wood bleach to the bare wood, rinse, let dry, then sand the whole surface and refinish.

Sand when: the mark is black, a white ring survives every gentle method, or the finish is cracked or worn through.

White vs Black Water Stains: What You’re Looking At

Every water mark on wood falls into one of two groups, and they need opposite treatments. Look at the ring in good light before you do anything.

Mark Where the water is First fix Sanding?
White, cloudy or milky ring In the finish Low heat, then a finish restorer Rarely
White ring that won’t fade Deep in the finish Restorer with 0000 steel wool, or scuff and recoat Light scuff only
Black or dark gray ring In the wood Strip, oxalic acid bleach, refinish Yes
Raised, rough or cracked patch Finish failed, wood swollen Let it dry, then sand and refinish Yes

Why White Rings Happen

General Finishes calls the white, cloudy look blush and explains it as moisture caught in the finish. A cold glass, a hot mug or a damp cloth leaves a little water inside the topcoat, and the trapped moisture scatters light so the spot looks white. The wood underneath is untouched, which is why most white rings can be fixed without touching the color.

Why Black Rings Happen

When water gets through a worn or thin finish and sits on bare wood, it reacts with the wood itself, especially in tannin-rich woods like oak, and leaves a dark ring, often worst where a plant pot or a metal can stood. Savogran describes its oxalic acid Wood Bleach as made for exactly this: “black water spots and tannin stains in wood.” Because the color is in the wood, nothing you rub on top of the finish will reach it.

How to Remove White Water Stains From Wood

Work from the gentlest method to the strongest and stop as soon as the ring is gone. Test anything you rub on in a hidden spot first.

Method 1: Low Heat

Gentle heat helps the trapped moisture escape from the finish. Hold a hair dryer on its low or medium setting a few inches from the ring and keep it moving, checking every 20 to 30 seconds. Some people use a household iron on a low, dry setting over a cotton cloth, pressing for a few seconds at a time. Stop at the first sign the finish softens, wrinkles or turns tacky, and don’t use heat on veneer that’s already lifting. It’s an old restorers’ trick rather than a manufacturer instruction, so go slowly.

Method 2: A Finish Restorer

Howard Products says its Restor-A-Finish removes white heat rings and water marks, sun fade and most other blemishes without removing the existing finish. Its directions for white rings: lightly saturate a pad with the matching color, rub gently in the direction of the grain, and wipe off. For deep blemishes, Howard says to apply it with super fine 0000 steel wool, but always try a soft cloth first. Then follow up with Feed-N-Wax, which Howard recommends to protect the restored finish.

Method 3: Household Remedies (With Limits)

Mayonnaise, petroleum jelly and a dab of non-gel toothpaste are the remedies you’ll see most. The oily ones are left on the ring for a while and then wiped off; toothpaste works as a very mild abrasive. They sometimes help on fresh, shallow rings. None comes with a finish maker’s backing, toothpaste can leave a dull or glossy patch, and they do nothing at all for a black ring. If one hasn’t worked after a single try, move on to a restorer instead of rubbing harder.

Method 4: Scuff and Recoat the Finish

For water-based finishes, General Finishes gives the repair for white marks that won’t come out: scuff and sand the affected area first, apply a sanding sealer, then the topcoat. In practice that means a light sanding of the finish, not the wood, with a fine sanding sponge or 320 to 400 grit, going no deeper than the cloudy layer, then a fresh coat of a compatible clear finish over the whole panel so the sheen matches. My guide to sanding between coats of polyurethane explains how far to go without cutting through.

💡 Pro Tip

Recoat the whole tabletop or panel, edge to edge, not just a circle around the ring. A patch of new finish almost always shows as a different sheen once it dries, while a full coat over a lightly scuffed surface disappears.

How to Remove Black Water Stains From Wood

A black ring is a refinishing job. It isn’t difficult, but it has to be done in order, and the order starts with getting the finish off, because oxalic acid only works on bare wood.

Step 1: Remove the Finish

Savogran’s directions say the wood must be free of paint, waxes, oils and dirt before bleaching. On a tabletop that means stripping or sanding the old finish off the whole surface, not just the ring. A stripping gel lifts varnish and polyurethane without cutting into the wood, which matters on veneer; sanding is faster on solid wood. My guide on how to remove stain from wood walks through both, and the best paint strippers for wood compares the gels.

Step 2: Bleach the Stain With Oxalic Acid

Savogran’s Wood Bleach directions, from its product sheet:

  1. Protect your eyes with goggles and wear rubber gloves. Oxalic acid can cause burns and irritation, and the dust shouldn’t be breathed.
  2. Dissolve the contents of the 12 oz package in one gallon of hot water.
  3. Apply the hot solution liberally with a scrub brush and leave it on until the stain has lightened as much as you want. If it cools before you’re done, reheat it, but don’t boil it.
  4. Rinse repeatedly with clean water and let the wood dry.
  5. Lightly sand the dry surface. It must be clean and dry before refinishing, or the new finish may not adhere.

Treat the whole board or panel, not only the ring, so the bleached area blends in. Some old, deep stains need more than one application.

⚠️ Important

Oxalic acid is harmful if swallowed and Savogran’s label warns not to let the solution soak through gloves or clothing. Mix it in a bucket you’ll never use for food, keep children and pets away, and rinse the wood thoroughly so no acid residue stays under the new finish.

Step 3: Sand Before Refinishing

Water makes the grain stand up, so after bleaching and rinsing the surface feels rough. Once it’s completely dry, sand the whole surface with a random orbital sander: 120 grit to flatten the raised grain and blend the bleached area, then 150 and finish at 180. On veneer, skip the 120, go lightly with 180 by hand or with the sander at low speed, and keep the pad flat at the edges, where veneer is easiest to sand through.

Step 4: Restain and Refinish

Bleaching lightens the surrounding wood as well as the stain, so most pieces need restaining to match. Follow my guide on how to stain wood for the grits and conditioner, test the color on the underside, and seal it with a clear topcoat.

When to Sand a Water Stain (and When Not To)

Don’t Sand a White Ring First

A white ring sits in the finish, usually in its upper layer. Sanding into it removes the finish you’re trying to save and, if you go through, exposes bare wood that will look lighter than the rest. Heat and a restorer cost nothing in finish, so try them first.

Sand When the Finish Has Failed

If the area is rough, cracked, flaking, swollen or black, the finish is no longer protecting the wood and a patch won’t last. Let the wood dry completely (a few days for a swollen spot), then sand or strip the whole surface back to bare wood and refinish it. That’s also the time to decide whether the piece needs a full refinish: my guide on how to refinish wood furniture covers the whole process.

Sand the Whole Surface, Not the Spot

Spot-sanding a ring leaves a dish in the surface and a patch that takes stain differently. Sanding the entire top with a random orbital sander keeps it flat and gives one even scratch pattern. A detail sander or a fine sanding sponge handles the edges and moldings.

Water Stains on Floors, Veneer and Beams

Hardwood Floors

White marks on a coated floor are in the finish and respond to the same gentle methods. Black marks under a plant pot or radiator usually mean the finish wore through: the boards need to be sanded and the oxalic acid treatment applied to the bare wood, then refinished. My guide on how to sand hardwood floors covers the machines and grits.

Veneer

Treat white rings on veneer exactly like solid wood, but keep heat low, because veneer glue softens with heat. Black stains on veneer are risky to sand out: bleach on the stripped surface is safer than sanding, and the final sanding should be light and by hand.

Exposed Beams and Unfinished Wood

On unfinished wood there’s no finish to clear, so any water mark is already in the wood. Lighter marks often sand out with 120 then 150 grit; dark ones respond to oxalic acid. Seal the beam afterwards if it’s anywhere it can get wet again.

What You Need

Most white rings need only the first two products. The rest is the kit for black stains, where sanding is part of the fix. Specs and claims are the makers’ own.

Howard Restor-A-Finish

Howard Restor-A-Finish Neutral 16 oz for removing white water rings from wood

Best for White Rings

Howard’s finish-penetrating restorer contains a small amount of stain, solvent and restoring oils, and the maker says it removes white heat rings and water marks and restores the finish without removing any of it. It comes in nine colors (Neutral, Maple-Pine, Golden Oak, Cherry, Walnut, Mahogany, Dark Walnut, Dark Oak and Ebony Brown); Neutral, linked here, is the safe choice if you’re unsure of the match. Wipe it on, rub with the grain, wipe it off.

Check price on Amazon

  • ✅ Made for white rings and water marks
  • ✅ Keeps the existing finish
  • ✅ Nine colors to blend scratches
  • ❌ Won’t touch black stains in the wood

Best For: Cloudy rings on varnished, lacquered or shellacked tables and dressers.


Howard Feed-N-Wax

Howard Feed-N-Wax beeswax wood polish and conditioner 16 oz

Best Follow-Up After Restoring

Howard calls Feed-N-Wax the follow-up to Restor-A-Finish: a polish with beeswax and carnauba wax plus conditioning oils, with no silicone or linseed oil. It leaves a soft luster over the restored area and evens out the sheen across the top, so the spot where the ring was doesn’t look different from the rest.

Check price on Amazon

  • ✅ Evens the sheen after a repair
  • ✅ No silicone
  • ✅ For antiques, tables and cabinets
  • ❌ Wax must be removed before any future refinish

Best For: Finishing off a white-ring repair on furniture.


Savogran Wood Bleach (Oxalic Acid)

Savogran oxalic acid wood bleach 12 oz for black water stains

Best for Black Water Stains

Savogran’s concentrated Wood Bleach is oxalic acid in a 12 oz tub that you dissolve in one gallon of hot water. The maker says it bleaches unfinished or stripped wood and is excellent for black water spots and tannin stains. It’s the right tool for the dark rings from plant pots and the gray marks around wet spots on oak. It does nothing on a finished surface, so strip first.

Check price on Amazon

  • ✅ Targets black water and tannin stains
  • ✅ One tub makes a gallon
  • ✅ Clear printed directions
  • ❌ Needs gloves, goggles and bare wood

Best For: Dark rings on stripped tabletops, floors and doors.


Bosch ROS20VSC 5″ Random Orbital Sander

Bosch ROS20VSC random orbital sander for sanding a water-stained tabletop

Best for Sanding Out a Damaged Top

When the stain is black or the finish has failed, the whole surface has to be sanded flat and even, and a random orbital sander is the tool for it. The ROS20VSC runs at 7,500 to 12,000 OPM on a 2.5 amp motor, with variable speed for a gentle pass on veneer and a microfilter canister with a vacuum adapter. It flattens raised grain after bleaching without the cross-grain scratches a sheet of paper on a block leaves. Read the full Bosch ROS20VSC review.

Check price on Amazon

  • ✅ Even scratch pattern for restaining
  • ✅ Low speed for veneer
  • ✅ Dust canister and vacuum port
  • ❌ Overkill for white rings

Best For: Tabletops, dresser tops and doors that need a full refinish.


3M Fine Sanding Sponge

3M fine grit sanding sponge block for scuffing a finish

Best for Scuffing the Finish and Edges

For the scuff-and-recoat repair, you want something gentler than a power sander. 3M’s fine grit sponge block is 2-7/8 x 8 inches with an angled edge, works wet or dry and can be rinsed and reused. It follows moldings and edges, where a sander can cut through the finish in a second.

Check price on Amazon

  • ✅ Gentle enough for a finish
  • ✅ Wet or dry, reusable
  • ✅ Angled edge for corners
  • ❌ Slow on bare wood

Best For: Scuffing a cloudy finish before a fresh topcoat, and edges after bleaching.


How I Put This Guide Together

The explanation of white marks and the repair for water-based finishes come from General Finishes’ troubleshooting pages. The restorer directions come from Howard Products, and the oxalic acid directions from Savogran’s Wood Bleach product sheet. The heat and household remedies are traditional methods, not manufacturer instructions, and I’ve marked them that way. The products are on sale on Amazon today; I don’t show customer ratings or prices, which change daily. More on how I choose the tools I recommend.

🏆 The Verdict

Read the color first. A white ring is in the finish: low heat and Howard Restor-A-Finish fix most of them with no sanding. A black ring is in the wood: strip the finish, treat it with oxalic acid wood bleach, then sand the whole surface from 120 to 180 with a random orbital sander and refinish.

❓ Frequently Asked Questions

Does water permanently stain wood?+
Not usually. White rings live in the finish and can almost always be removed or recoated. Black marks are in the wood, but oxalic acid bleach lightens most of them on bare wood. Only very old, deep stains or rot that has softened the fibers are truly permanent, and those need the board replaced.
How do you get white cloudy stains out of wood?+
Start with a hair dryer on low, moved over the cloudy area for short bursts, so the trapped moisture can escape. If the haze stays, rub in a finish restorer such as Howard Restor-A-Finish with the grain. As a last step, lightly scuff the finish and apply a fresh clear coat over the whole surface.
Does vinegar remove water stains on wood?+
There’s no finish maker that recommends it, and it’s a poor bet. Vinegar is a mild acid that can dull or etch some finishes, and it doesn’t draw moisture out of a white ring. For black stains, the acid that does work is oxalic acid, used on bare wood after the finish is removed.
Does mayonnaise remove water rings on wood?+
Sometimes, on fresh and shallow white rings. It’s a traditional remedy: the oil is left on the ring for a few hours and then wiped off. It has no effect on black rings, can leave a greasy residue in open-pored wood, and a product made for the job, like a finish restorer, is more predictable.
Why does wood turn white when wet?+
It isn’t the wood turning white but the finish on it. Moisture from a glass, mug or spill gets trapped inside lacquer, shellac or varnish and scatters light, which finishers call blush. Humidity during finishing causes the same cloudiness. The wood below keeps its color, which is why white marks can be repaired.
Can you undo water damage on wood?+
Mostly, yes. Let swollen wood dry fully first, which can take days. Rings and haze come out with heat, a restorer or a recoat; black stains with oxalic acid on stripped wood. Raised grain and rough spots are sanded flat and refinished. Delaminated veneer or soft, rotten wood needs repair rather than refinishing.

Conclusion

Knowing how to remove water stains from wood comes down to knowing where the water is. If it’s in the finish, keep the sander in the box and work on the finish. If it’s in the wood, take the finish off, bleach the stain and sand the surface even before you refinish. And once the top is restored, coasters and a fresh coat of finish every few years keep the next ring out.