
As an Amazon Associate I earn from qualifying purchases. All claims are strictly my personal opinion.
My top pick

Sylvania Headlight Restoration Kit
Ends with a UV Block clear coat after a surface activator, and covers two headlight lenses by hand.

Yellow, cloudy headlights are not dirt. The best headlight restoration kit is the one that sands off the failed factory UV coating, polishes the lens clear and then puts a new UV clear coat back on. Sanding removes the yellowing, but bare plastic has no sun protection, so a kit that stops at polish will fade again. The sanding steps decide how clear the lens looks. The final sealer decides how long it stays that way.
Below are four ways to do the job, a comparison table, short reviews, and the part most kit boxes skip: the grit sequence that actually clears a yellowed lens, and why each step exists. Where a maker or its listing does not give a kit’s grits or contents, the table says “not stated” rather than guessing.
Headlight Restoration Kits: Comparison
The table lists what each maker or its Amazon listing states. Anything else is marked “not stated”; check the box before you buy.
| Product | ⭐ Sylvania Headlight Restoration Kit 🏆 EDITOR’S CHOICE |
3M Ultra Headlight Restoration Kit | Meguiar’s Two Step Headlight Restoration Kit | 3M Wetordry sheets |
|---|---|---|---|---|
| Image | |
 |
 |
 |
| Price | $$ | $ | $$ | $ |
| Grits in the box | Sandpaper included, grits not stated | 500 and 800 grit discs, a 3000 grit Trizact refining disc | No sandpaper, abrasive pads with a cleaner | 1000, 1500, 2000 and 2500 assortment |
| Hand or drill | By hand, no tools needed | Disc pad holder for a drill | By hand, no drill | By hand, or on a sanding block |
| UV sealer | UV Block clear coat with a surface activator | 3M Quick Headlight Clear Coat; UV rating not stated | A headlight coating against re-oxidation | None, buy a UV clear coat separately |
| Headlights covered | Two lenses, per the listing | Not stated | Not stated | Sheets only |
| Best For | A complete kit that ends in a UV coat | Heavily yellowed lenses and a drill | Light haze, without sanding | Controlling the grit sequence yourself |
| Availability | Shop Now | Shop Now | Shop Now | Shop Now |
Key takeaways
- The yellow is the oxidized factory UV coating. Sanding removes it; only a new UV clear coat keeps it from coming back.
- A kit that ends in polish alone leaves bare plastic in the sun. Look for a UV clear coat or sealer in the box.
- The grit sequence matters more than the brand: every step has to erase the scratches of the one before it.
- A drill saves effort on a badly oxidized lens, but it also makes it easy to burn or gouge the plastic. Keep it moving.
- Toothpaste, WD-40 and bug spray can improve a light haze but do not replace the coating.
Headlight Restoration Kits: Reviews
Facts come from the maker pages I could open and from each kit’s Amazon listing. Where neither states something, I say so instead of guessing at the contents.
Editor's ChoiceHeadlight restoration kit
Sylvania Headlight Restoration Kit
Sylvania Headlight Restoration Kit
A complete hand kit that ends with a UV Block clear coat, enough for two headlight lenses.
Best for
A first restoration where you want the sealing step included.
- Ends with a UV Block clear coat
- Enough for two lenses
- No tools needed
Skip it if
You want to choose your own grit sequence.
- Grits not stated
Read full review
Best Complete Kit That Ends With a UV Coat
Sylvania’s kit is built around the same logic as every good restoration: sand and polish first, then seal. Sylvania’s page describes the sealing part as a UV Block clear coat with specially formulated UV blockers, applied after a surface activator, and says the components are good for two headlight assemblies, so one box covers both sides of most cars.
The Amazon listing adds the rest of the box: surface activator, sandpaper, a clarifying compound and the UV Block clear coat, with everything needed for two headlight lenses and no tools needed. Neither page gives the grits, so read the grit list on the box and compare it with the sequence further down this page.
Best for heavy yellowingDrill headlight restoration kit
3M Ultra Headlight Restoration Kit (39195)
3M Ultra Headlight Restoration Kit (39195)
A drill-driven kit with 500, 800 and 3000 grit discs that ends in a clear coat.
Check price on AmazonSpecs: Amazon listing (Creators API, November 2026)
Best for
Badly yellowed lenses and a household drill.
- Three sanding steps
- Ends with a clear coat
Skip it if
You don't own a drill.
- Needs a drill
- UV rating of the coat not stated
Read full review
Best Drill-Driven Kit for Heavy Yellowing
3M sells several versions of its headlight kits, and the contents differ between them. This one, the Ultra kit 39195, lists a disc pad holder, six 500 grit gold sanding discs, four 800 grit white finishing discs, a 3000 grit Trizact refining disc and 3M Quick Headlight Clear Coat, plus masking tape. That is a real three-step sanding sequence ending in a clear coat. The listing does not give a UV rating for the coat, so I don’t claim one.
If you buy a different 3M version, check what it puts on the lens at the end: a kit that stops at a polish or a wax-type protectant needs a UV clear coat of your own. A drill step is a real time saver on an oxidized lens; my guide to drill sanding attachments covers how to use a drill without burning plastic.
No-sand headlight kit
Meguiar's Two Step Headlight Restoration Kit
Meguiar’s Two Step Headlight Restoration Kit
A two-step hand kit, cleaner on abrasive pads then a protective coating, with no sanding.
Check price on AmazonSpecs: Amazon listing (Creators API, November 2026)
Best for
Lenses with light haze.
- Two steps, no drill
- Protective coating included
Skip it if
The lens is deeply yellow and rough.
- No sanding, may not fix deep yellowing
Read full review
The Light-Haze Option From a Detailing Brand
Meguiar’s Two Step kit works differently from a sanding kit. Its listing describes no sandpaper and no drill: you put the headlight cleaner on the included abrasive pads, work the lens by hand, then apply the headlight coating, which Meguiar’s says protects against yellowing and re-oxidation for up to 12 months. That suits light haze. A lens that is deeply yellow and rough usually needs sanding first, so this is not the kit for it.
Wet or dry sandpaper
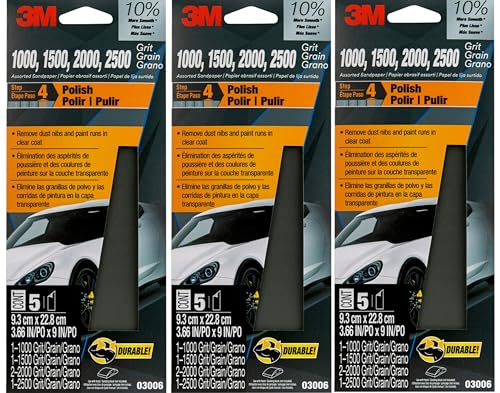
3M Wetordry Sandpaper 03006
3M Wetordry Sandpaper Sheets
A 1000 to 2500 grit wet or dry assortment for a hand sequence you control; you supply polish and a UV clear coat.
Check price on AmazonSpecs: Amazon listing (Creators API, November 2026)
Best for
Anyone who already has polish and a UV clear coat.
- Fine grits in one pack
- No drill needed
Skip it if
You want everything in one box.
- No UV coat included
- Add a coarser grit for rough lenses
Read full review
Best for Doing the Sanding Your Own Way
If you already have a UV clear coat, or want to choose your own grits, waterproof sheets give you full control of the sequence. This 3M 03006 pack is an assortment of 1000, 1500, 2000 and 2500 grit, the fine end of the table below. They are the same kind of paper I describe in my wet sanding guide, used by hand with water or soapy water. You supply the sealer.
Why Headlights Turn Yellow
Modern headlight lenses are polycarbonate plastic, and the factory protects them with a thin UV-blocking hardcoat. According to the restoration brand Smartwax Pro, that coating, not the plastic, is the weathering barrier. When it breaks down, sunlight oxidizes the polycarbonate underneath and the lens goes dull, then yellow, then chalky.
Why Restored Headlights Yellow Again
Sanding removes the failed coating, which leaves the plastic exposed. Smartwax Pro states that if a new UV-resistant clear does not go back on, the bare plastic yellows again, commonly within months rather than years, and that a polish-only restoration leaves bare polycarbonate in the sun. That is the single most useful thing to know when you compare kits, so check the box for the sealing step before the grit count. Note that Smartwax Pro sells restoration products, so treat the timeframe as an indication, not a guarantee.
What a Kit Cannot Fix
Sanding works on the outside of the lens. Moisture inside the housing, a cracked lens or a lens with deep pitting is a different problem. If the haze is on the inside, no kit will clear it.
The Grit Sequence That Works
Why the Order Matters
A restoration kit is really a grit sequence in a box. The rule is the same as on a painted panel: each grit has to remove the scratches the previous one left, and you should never skip more than one step. This is a practical sequence for yellowed polycarbonate. Your kit may use fewer steps; the logic is what matters. For the full ladder of grits across every surface, see my sandpaper grit chart.
| Step | Grit | What it does |
|---|---|---|
| 1 | 400 (only if the lens is rough) | Cuts through the failed coating and deep oxidation |
| 2 | 600 to 800 | Evens the surface and erases the first scratches |
| 3 | 1000 | Smooths the surface to an even matte |
| 4 | 1500 | Starts to turn the matte into a satin haze |
| 5 | 2000 | Leaves scratches fine enough for polish to remove |
| 6 | 3000 | Last sanding step before polish; the lens is nearly clear when wet |
| 7 | Polish | Brings the clarity back before the sealer |
How Many Steps You Really Need
Most kits fold this into three or four steps, which is fine for a lens with moderate yellowing. The step that matters most is the last sanding grit: if the lens still looks hazy when it is wet, it is not ready for polish, and no amount of polishing will fix a surface that is under-sanded. A kit that jumps from a coarse grit straight to polish leaves scratches that no sealer will hide.
Step by Step: Restoring a Headlight
- Clean the lens. Wash off dirt and road film so grit from the surface does not scratch the plastic as you sand.
- Tape the surrounding paint. Use a couple of layers of painter’s tape around the lens. A slipped sheet or a spinning drill pad can mark the paint in seconds.
- Sand wet, one grit at a time. Keep the lens and the paper wet, and work in straight lines. Switch direction at 90 degrees with each finer grit so you can see when the previous scratches have gone. My wet sanding guide explains the lubricant and the pressure.
- If you use a drill, keep it moving. Staying in one spot generates heat and can cut a dip into the plastic. Light pressure and slow speed are safer than speed and force; see my notes on drill sanding attachments.
- Polish. Polish removes the fine scratches left by the last sanding grit. A machine polisher does it faster; my picks for the best car polisher show which to pair with a polishing compound.
- Wipe the lens clean and apply the UV clear coat. Follow the kit’s instructions exactly, in a shaded, dry spot, and keep the lens out of the sun and rain for the time the label gives.
⚠️ Never Skip the UV Coat
A lens that is sanded and polished but left uncoated looks perfect for a while and then yellows again, because the plastic has nothing left to protect it from the sun. Treat the UV step as part of the job, not an optional extra.
Wear Eye and Skin Protection
Sanding sprays slurry and the clear coats and activators in kits are chemicals. Wear eye protection and gloves, work in a ventilated space, and read the label of each product before you open it.
Kits vs Toothpaste, WD-40 and Bug Spray
These home fixes come up in nearly every search, so here is the honest comparison. All of them act, at best, on the surface haze. None of them puts a UV coating back.
Toothpaste
Toothpaste is a mild abrasive. On a lens with light haze it can brighten the surface for a short while. It cannot remove a yellowed, cracked coating, and it leaves the plastic unprotected.
WD-40
WD-40 is an oily solvent. At most it may make a hazy lens look clearer for a short time, and then it wears off. It does not restore or protect the coating, so a lens that looks better after WD-40 is not repaired.
Bug Spray
Bug spray comes up as a quick fix for the same reason as other solvents. I have no maker source saying it is safe on lenses or trim, so I would not use it on either.
The common thread is the one from the start of this page: whatever you use, the failed UV coating has to be removed and replaced. A proper kit does both. A home trick does neither. For a lens that is only lightly hazy, a quick clean or a polish may give you a few good weeks, and that can be enough if you are selling the car. For a lens you want to keep clear, use a sanding kit with a UV coat.
How I Chose These Headlight Restoration Kits
I started from what people ask: what works, what to clean headlights with, and whether home fixes do anything. Then I looked for kits from established makers with a sanding step, a polish and a UV sealing step. The criteria, in order:
- A UV sealing step: the one feature that decides how long the result lasts.
- Grit progression: enough steps from coarse to fine, or sheets you can sequence yourself.
- Clear instructions: a maker that says what is in the box and what it covers.
- Published contents: where neither the maker nor the listing states something, the table says “not stated” instead of guessing.
I don’t show star ratings or prices: prices change daily, so each pick carries a price tier and the Amazon button shows the live price. This page has not been put through a bench or field trial; it reads maker pages and applies sanding practice.
🏆 The Verdict
For a first restoration, the Sylvania Headlight Restoration Kit is my pick because it ends with a UV Block clear coat and covers two headlight lenses by hand. If you own a drill and the lens is badly yellowed, the 3M Ultra Headlight Restoration Kit runs 500, 800 and 3000 grit before its clear coat. If you want to control the grits, buy 3M Wetordry sheets and a UV clear coat of your own.
❓ Frequently Asked Questions
Does a headlight restorer work?+
What is the best thing to clean your car headlights with?+
Does WD-40 really restore headlights?+
How much does it cost to professionally restore headlights?+
Conclusion
The kit matters less than the sequence: sand through the grits without skipping, polish, and finish with a UV clear coat. Pick a kit that includes the sealer, or buy sheets and your own coating if you would rather control each step.
For the full grit ladder, see my sandpaper grit chart. For paint work on the rest of the car, my guide on what grit sandpaper to use for car paint covers the same sequence on body panels. Questions about your lenses? Leave a comment below.
