
As an Amazon Associate I earn from qualifying purchases. All claims are strictly my personal opinion.
My top pick
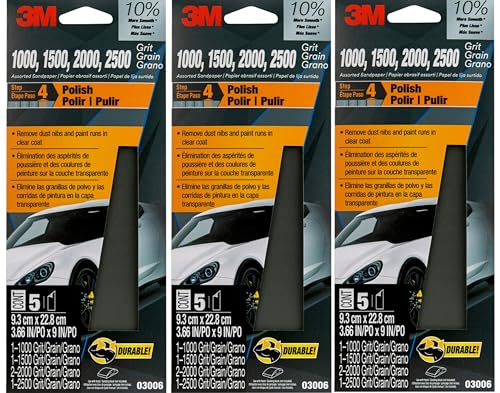
3M Wetordry 03006 Sandpaper, Assorted 1000 to 2500 Grit
Waterproof silicon carbide sheets in 1000, 1500, 2000 and 2500, sold by 3M for clear coat sanding and paint defect removal, wet or dry.

Wet sanding means sanding with waterproof paper while the surface and the paper stay wet, and you use it to refine a finish, not to remove material. The water (usually with a drop of soap) carries away dust, keeps the paper from loading up and leaves a finer scratch than the same grit used dry. It is the right move for flattening and smoothing a cured clear coat, rubbing out a final coat of varnish or polyurethane, and sanding cured epoxy before polishing. It is the wrong move on bare wood, MDF and drywall, where water does damage.
Below is how wet and dry sanding differ, which sandpaper works wet, what to put in the water, the steps from start to finish, the grit sequence for each surface, when to keep the water away, and the paper and blocks I would buy for the job.
⚡ Quick Answer
Paper: waterproof silicon carbide wet/dry sheets, such as the 3M Wetordry assorted pack, with a firm block behind it on flat areas.
Water: clean water with a drop of dish soap, kept on the panel and the paper the whole time.
Sequence: work up one grit at a time and never skip more than one step. For cured clear coat that is 1500, then 2000, then 3000, then compound and polish.
Wet vs Dry Sanding at a Glance
| Point | Wet sanding | Dry sanding |
|---|---|---|
| Dust | Caught in the water as slurry | Airborne unless you use extraction |
| Paper loading | Slower, because the water flushes particles out | Faster, especially on paint and finishes |
| Heat | Water carries it away | Builds up, and can soften epoxy or cloud a water-based finish |
| Scratch pattern | Finer for the same grit | Coarser for the same grit |
| Removal rate | Slow and controlled | Faster |
| Best use | Final leveling and pre-polish steps | Shaping, stripping and raw wood |
| Cleanup | Wipe, squeegee and dry the surface | Vacuum and tack cloth |
| Risk | Water on anything that swells or rusts | Heat, clogging and airborne dust |
The first row is the reason many people reach for water. Wet sanding doesn’t make dust disappear, it changes where the dust goes: into a slurry on the surface and the paper, which you rinse and wipe away. You should still wear a mask when you sand old paint, because the slurry dries into dust if you let it, and lead paint in older homes is a hazard wet or dry.
What Wet Sanding Is For
Wet sanding is a finishing technique. You use it at the end of a job, when the surface is already close to flat and you want it perfectly flat and ready to polish or recoat. You don’t use it to take off paint, remove material quickly or shape wood. If a surface needs real removal, dry sand it with a coarser grit first and switch to water for the fine steps.
The Jobs It Does Well
- Leveling cured clear coat. Orange peel, dust nibs and small runs are high spots on a glossy surface. Wet sanding cuts them down to a flat, evenly dull haze that compound and polish then bring back to gloss.
- Rubbing out a final coat. On varnish or polyurethane, wet sanding a fully cured last coat gives a smooth base for rubbing compound or wax.
- Finishing cured epoxy. Resin softens with heat, and water keeps the surface cool while you work from a medium grit up to a fine one before polishing.
- Smoothing plastic. Headlight lenses and trim pieces can be sanded wet to remove haze and scratches before a clear coat or polish.
The Jobs It Doesn’t
Wet sanding won’t fix a bad surface in one pass. Deep scratches, sanding marks from coarse grit and dents need dry work or filler first. It also won’t rescue a clear coat that is too thin: once you cut through the clear on a car panel, the only repair is paint. That limit is why the habit of checking how much finish you have, and sanding gently with fine paper, matters more than the water itself.
Which Sandpaper Works Wet
You need paper that is made to get wet. Ordinary sandpaper on a standard paper backing swells, softens and tears in water, and the glue that holds the grit lets go. Look for the words wet/dry, waterproof or wet or dry on the back of the sheet. The abrasive on these sheets is almost always silicon carbide, which is sharp and holds up well on hard finishes.
What the Makers Say
3M’s Wetordry listings describe the sheets as silicon carbide on waterproof paper, for use wet or dry. The 03006 automotive pack, with 1000, 1500, 2000 and 2500 grit sheets, is sold for clear coat sanding and paint defect removal, and the 320 grit Wetordry sheets are sold for final or between-coat sanding, with water or cutting oil to reduce clogging. Meguiar’s describes its Unigrit 2000 sanding block as safe on all paint finishes, including clear coats.
Choosing the Grit
Grit numbers on wet/dry paper run higher than most people expect. Where bare wood sanding stops at 220 or 320, wet sanding a finish starts in that range and climbs to 1500, 2000 or 3000. The sandpaper grit chart shows how those numbers sit on the CAMI and P scales, and types of sandpaper explains the abrasives behind them. A rule that holds for every surface: each grit has to remove the scratches the previous one left, so the steps stay close together.
Foam Pads and Sponges
Wet/dry paper isn’t the only choice. Fine sanding sponges and foam-backed pads also work with water and follow curves better than a flat sheet. For flat panels a firm block behind the paper gives a flatter result, while a soft pad is the better partner on rounded edges and contours.
Water, Soapy Water or Lubricant?
For almost every job the answer is clean water with a very small amount of dish soap or car wash soap. The soap helps the water spread, the paper glide and the slurry rinse away. Soak the sheet in the bucket for several minutes before you start so it is limp and ready to wrap around a block.
- Plain water: fine for a quick pass on cured clear coat or epoxy, but it beads more, so you’ll re-wet more often.
- Water with a drop of soap: the standard for clear coat and plastic. Use a spray bottle to keep the panel wet.
- The maker’s lubricant: Meguiar’s recommends its M34 Mirror Glaze Final Inspection as the lubricant for its Unigrit block. If a maker names a product for its paper, use that.
- Mineral spirits or oil: traditional for oil-based finishes on furniture, but never on a water-based finish, and not something to use on car paint. Read the can of the finish you applied.
Keep it wet the whole time. If the panel dries under the paper, stop and re-wet before the next stroke, because dry paper drags and cuts deeper scratches.
How to Wet Sand, Step by Step
These steps cover the general method for a flat painted or clear coated panel. Adapt the grits for other surfaces using the table in the next section.
- Make sure the finish is cured. Fresh finishes are soft. Follow the technical data sheet of the paint or clear coat for cure time; the abrasives maker eQualle suggests waiting at least 30 days on fresh automotive paint. Check the can for a varnish or polyurethane.
- Clean the surface. Wash and dry it so no grit gets dragged under the paper.
- Mask edges and body lines. Edges and creases have the thinnest finish and cut through first.
- Soak the paper in water with a drop of soap for 10 to 15 minutes, then wrap it around a block.
- Start with the right grit. The finest grit that will remove the defect is the right one, not the coarsest.
- Sand wet, light and straight. Use light pressure and straight, overlapping strokes rather than circles, and keep the surface wet with the spray bottle.
- Wipe, dry and look. A wet surface hides scratches, so squeegee or wipe one spot dry and check it in angled light. You want an even, flat haze with no shiny low spots.
- Move up one grit. Turn the sanding direction 90 degrees so the new scratches cross the old ones and you can see when the old ones are gone. Rinse the block and change the water.
- Finish with compound and polish. Sanding leaves a matte surface. Cutting compound and then a finishing polish bring the gloss back.
How Much Pressure
Less than you think. The paper cuts when it is allowed to; pressing harder only drives deeper scratches and wears through edges. Let the block do the work and keep the strokes moving.
When to Stop at Each Grit
Stop when the surface looks uniformly dull when wiped dry and you cannot see the scratches of the previous grit. If you can still see individual scratches from the last paper, you haven’t spent enough time at the current grit and the next step won’t remove them. Go back and keep working rather than skipping ahead.
⚠️ Important
On a car, check how much clear coat you have before you start, and leave the edges, body lines and any area with a previous repair alone unless you know the film is thick enough. Sanding through the clear means a respray. If you are not sure, a fine polish with no sanding is the safer first try.
Grit Sequences by Surface
These sequences are starting points built from the manufacturer and guide sources listed at the end of this article. Always check the product instructions for the paint, clear coat, resin or finish you are working on, because they set the real limits.
| Surface | Grit sequence (wet) | Then |
|---|---|---|
| Car clear coat (orange peel, dust nibs) | 1500, 2000, 3000 | Cutting compound, then finishing polish |
| Car clear coat (heavy runs, fresh paint only) | 1000 or 1200, then 1500, 2000, 3000 | Compound and polish |
| Wood finish between coats | 320, or 400 before the last coat | Wipe off slurry, dry, recoat |
| Cured wood finish, final rub-out | Fine grits only, from about 400 and up | Rubbing compound or wax |
| Cured epoxy resin | From 400 to 600 for the first wet pass, then 800 to 1000, 1500 to 2000 and 3000 | Rubbing compound, then finishing compound |
| Plastic and headlight lenses | Fine to very fine grits, working up through the sequence | Polish, then UV clear coat |
Car Clear Coat
The car is a single line in this article because it has its own full guide. For the sequence, masking and compound details, see what grit sandpaper to use for car paint, and the dedicated guide to wet sanding clear coat. The short version: 1500, 2000 and 3000, all wet, then compound and polish.
Wood Finishes
Between coats of polyurethane most guides use 320, and 400 before the final coat. Dry sanding is simpler for most people between coats; wet sanding is more often used to rub out a fully cured last coat. When you do use water, use very little, wipe the slurry off completely and let the surface dry before recoating. The full method is in sanding between coats of polyurethane. Never dry sand a water-based finish hard: heat from friction can turn it cloudy.
Epoxy Resin
Epoxy cures hard but softens with heat, which is why it suits wet sanding so well. Our guide to sanding epoxy resin gives the full sequence: switch to water by 400 grit, change the water between grits instead of reusing slurry from coarser paper, and keep friction low so the resin doesn’t smear. Check the resin maker’s data sheet for its own recoat and polish instructions.
Plastic and Headlights
Plastic can be wet sanded with fine grits to remove haze and light scratches, and it is a standard step in headlight restoration. Plastic scratches easily and heats quickly, so keep the water running and the pressure light. Skip the coarse grits unless there is real damage. The kits in our best headlight restoration kit roundup include the sanding steps, the polish and the UV sealer you need after.
When Not to Wet Sand
Water is the enemy of anything that swells, stains or rusts. Keep it away from these:
- Bare wood. Water raises the grain, can leave dark stains and, on glued joints, can weaken the joint. Bare wood needs dry sanding, followed by a damp wipe only if you are deliberately raising the grain before a water-based finish.
- MDF and particleboard. The fibers swell the moment they get wet and the edges won’t recover. Dry sand and seal.
- Drywall and joint compound. Water softens and smears the compound and the paper face. Dry sand with a pole sander and a vacuum attachment, or use a damp sponge only where the compound maker allows it.
- Uncured or fresh finishes. Soft paint, clear coat or varnish gums up the paper and can scar. Wait for full cure.
- Bare metal that can rust. Water leaves a fine rust film on bare steel, so prime soon after if you sand it wet.
- Anywhere near electrics or electronics. Don’t let water run into panels, switches or instruments.
The Kit: Paper, Blocks and Sponges
The facts below are the makers’ own where I could confirm them, and anything I couldn’t confirm is marked as not stated. I don’t show customer ratings or prices, which change daily.
3M Wetordry Automotive Sandpaper, Assorted Grits 1000 to 2500
Best for Wet Sanding Clear Coat
This is the pack I would start with for paint and clear coat. The listing is a 3 pack of the 03006 assortment, 3 2/3 in x 9 in sheets, and each package holds one sheet of 1000, 1500 and 2500 and two sheets of 2000. 3M sells it for clear coat sanding and paint defect removal, wet or dry. It covers 1500 and 2000 of the usual sequence, so for a full 1500, 2000, 3000 run you’d need a separate 3000 sheet.
- ✅ Four fine grits in one pack
- ✅ Silicon carbide on waterproof paper, wet or dry
- ✅ Sheet size cuts into easy block-sized pieces
- ❌ No 3000 grit in the pack
Best For: Leveling orange peel and dust nibs on cured clear coat.
3M Wetordry Assorted Sandpaper Pack
Best for Mixed Jobs
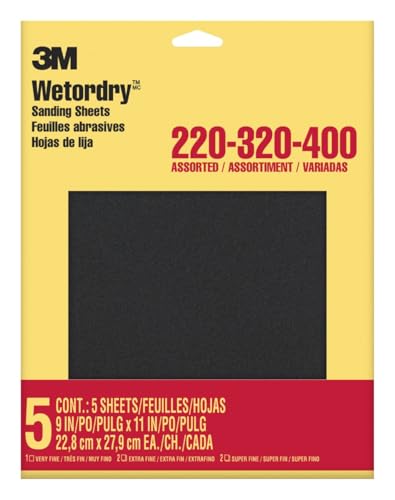
A second assorted Wetordry pack, this one in full 9 x 11 inch sheets (5 per pack), sold for sanding between coats of varnish, lacquer, paint and other finishes. The listing doesn’t state which grits are in the assortment, so read it before you order and compare it with the sequences in the table above. Like the rest of the Wetordry line, it is silicon carbide on waterproof paper.
- ✅ Waterproof wet/dry paper in full 9 x 11 sheets
- ✅ Sold for between-coat sanding of finishes
- ❌ Grit range not stated on the listing
Best For: A general-purpose supply of wet/dry sheets.
3M Wetordry Sandpaper, 320 Grit, 25 Sheets

Best for Between Coats
320 grit is the grit most guides use between coats of polyurethane or varnish. The listing is for 25 sheets of 9 x 11 inch paper, which cut into quarters for a sanding block. It is also a sensible first step for a wet pass on cured epoxy that needs real leveling before you climb to the fine grits.
- ✅ Full 9 x 11 sheets cut to any block
- ✅ The standard between-coat grit
- ❌ Too coarse for clear coat finishing
Best For: Wood finishes and the first wet step on epoxy.
Dura-Block 6 Piece Sanding Block Set

Best for Flat Panels
Fingertips leave grooves that show once the surface is polished, which is why a block matters. A firm block spreads the pressure so the paper levels the surface instead of following its dips. This set has six closed cell EVA foam blocks (long and short flat blocks, a round block and two scuff blocks) that, per the listing, don’t soak up water, so they work wet or dry. They take sticky backed PSA sandpaper, which is not included.
- ✅ Spreads pressure for flatter results
- ✅ Closed cell foam that won’t soak up water
- ❌ Needs PSA sandpaper, sold separately
Best For: Flat panels, doors and tabletops.
Meguiar’s Unigrit 2000 Sanding Block
Best for the 2000 Grit Step
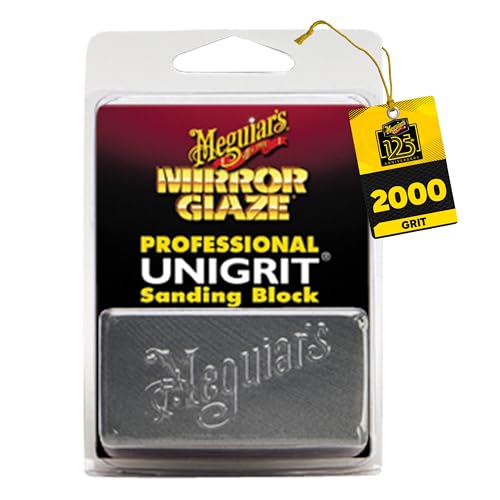
This is 2000 grit Unigrit paper already wrapped around a shapeable block, which Meguiar’s sells for removing runs, sags and small isolated defects on top of any paint surface. The maker describes the grit particles as uniform and the block as safe on all paint finishes, including clear coats. Used after 1500, it leaves a surface ready for compound. Meguiar’s recommends its M34 Mirror Glaze Final Inspection as the lubricant.
- ✅ 2000 grit paper on a ready-made block
- ✅ Described as safe on all paint and clear coat
- ❌ A single grit, so you need 1500 and 3000 from elsewhere
Best For: Pre-polish refinement of cured clear coat.
How I Put This Guide Together
The product and process facts come from the sources listed in the notes: 3M’s Wetordry listings, Meguiar’s listing for the Unigrit 2000 block, eQualle’s clear coat guide, and published guides on clear coat, epoxy and wood finishes. I don’t describe any of the products as personally used, and I don’t show customer ratings or prices. More on how I choose the products I recommend.
🏆 The Verdict
Wet sand at the end of a job, on a cured finish, with waterproof silicon carbide paper, a block, water with a drop of soap and one grit step at a time. For clear coat the road is 1500, 2000 and 3000, then compound and polish. Keep water off bare wood, MDF and drywall. A good starting kit is the 3M Wetordry assorted pack and a Dura-Block.
❓ Frequently Asked Questions
What sandpaper to use for wet sanding?+
How is wet sanding different than dry sanding?+
Does wet sanding reduce dust?+
When wet sanding do you just use water?+
What are the disadvantages of wet sanding?+
Can you wet sand plastic?+
Conclusion
Wet sanding is the last, careful part of a finish: a cured surface, waterproof paper, a block, soapy water and patience through each grit. Save the water for clear coat, cured finishes, epoxy and plastic, and keep it away from bare wood, MDF and drywall. For the car-specific steps go to wet sanding clear coat, and for choosing numbers across every job use the sandpaper grit chart.

