
As an Amazon Associate I earn from qualifying purchases. All claims are strictly my personal opinion.
My top pick
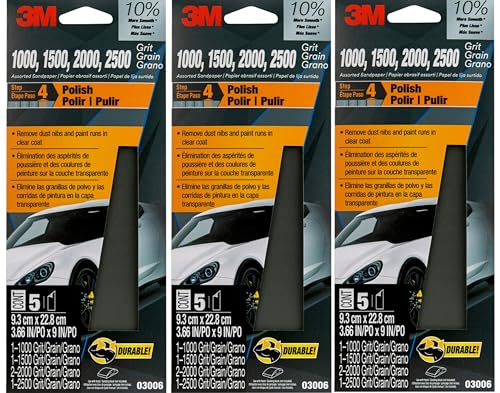
3M Wetordry Sandpaper Assortment 03006, 1000 to 2500
One matched 3M pack that covers the 1500 and 2000 steps of the clear coat sequence.

Wet sanding clear coat levels orange peel, dust nibs and small runs, but only if the clear is fully cured and thick enough to give up a few tenths of a mil. The job is a controlled trade: you remove the high spots of the surface until it is flat, then polish out the sanding scratches. Go too thin, too early or too hard on an edge, and you burn through to the color coat, which only a respray fixes.
Below is how to tell whether your clear is thick enough, how long to wait, the grit sequence, how to sand with a block instead of your fingers, where burn-through happens, and how to polish the panel afterward. If you are working on a whole car rather than the clear layer, my guide to what grit sandpaper to use for car paint covers the full job.
⚡ Quick Answer
Check first: measure the paint with a thickness gauge. One source treats under 1.2 mils of estimated clear as risky to sand.
Wait: follow the technical data sheet of your clear. Published examples range from 8 to 24 hours for a light polish and days for a full cure.
Sand: 1500 wet to level, then 2000, then P3000, on a flat block, never your fingertips.
Finish: compound, then polish. See Meguiar’s M105 in the kit below.
Is Your Clear Thick Enough to Sand?
Factory clear is thin. eQualle’s guide to checking clear coat thickness says modern automotive finishes are usually only 1.5 to 2 mils thick, with a factory finish at 4.0 to 6.0 mils in total and a repainted surface at 6.0 to 9.0 mils total with roughly 2.5 to 3.0 mils of clear. A mil is a thousandth of an inch. That is the whole budget you are sanding into.
What a Paint Thickness Gauge Tells You
A paint thickness gauge (a digital or magnetic induction meter) is the only way to know what is left. eQualle advises at least six to eight readings per panel, including the edges, which read thinner than the middle, and re-measuring after each grit. Gauges read the total paint film, not the clear alone, so the clear depth is an estimate: eQualle subtracts roughly 3 to 4 mils for the primer and base layers.
How Much You Can Take Off
The same guide gives a safe margin of 25 to 30 percent of the clear, or 0.3 to 0.5 mils, and says each sanding stage removes about 0.1 to 0.2 mils depending on grit and pressure. Its cautions are blunt: an estimated clear under 1.2 mils is risky for sanding, and if the gauge reads below 4.0 mils in total, skip sanding and use light polishing only. These figures come from one retailer’s guide, and body shops and paint makers can set their own limits, so treat them as a conservative guide, not a law.
⚠️ Important
Without a gauge you are guessing. Repainted panels can hold more clear than factory ones, but nothing on the surface shows you how much. If you cannot measure, polish first and see whether it is enough before you sand anything.
How Long to Wait Before Wet Sanding
Sanding clear that has not cured clogs the paper, smears and can leave the surface soft under the scratches. The right wait is the one printed on your clear’s technical data sheet (TDS), and it changes with the product, the hardener and the temperature.
| Clear (as listed by the source) | Light polish | Heavy compound | Full cure |
|---|---|---|---|
| Axalta Challenger CH3050 (standard 2K) | 8 hours at 77°F | 24 hours | 7 days at 77°F |
| Axalta Metalux 9354 (high-solids 2K) | 16 hours at 77°F | 24 hours | 7 days at 77°F |
| Sherwin-Williams FC720 | After 24 hours air dry | Within 48 hours | Not stated |
Source: Fannon Infrared’s guide to curing clear coat before buffing, read on November 20, 2026. Its own advice is to pull the TDS before estimating a window, because manufacturer times should override general rules of thumb, and cold slows curing below 60°F.
2K Clear vs 1K Clear
2K clear is a two-part product that cures chemically with a hardener, and it is what the table shows. A 1K clear, such as most aerosol cans without a hardener, dries by solvent evaporation, and I have no published wait time for one that I can cite, so I am not giving a number. Read the can or the TDS, and if it gives no sanding window, wait longer than you think you need to.
Can You Wet Sand After 24 Hours?
For the clears in the table, 24 hours is the point where a heavier cut becomes possible, not a guarantee. Fresh paint, thick coats, cold garages and baked-versus-air-dried clear all move the date. Press a fingernail into a hidden spot: if it marks, the clear is not ready.
Grit Sequence for Clear Coat
The sequence goes from the coarsest paper that levels the texture to a finishing grit that a polish can erase. eQualle suggests starting at 1500 for clear thicker than 1.5 mils and at 2000 for borderline areas. Stepping down in grit never skips a stage by more than one grade: each step has to remove the scratches of the one before it.
| Step | Grit (wet) | Use it for | Leaves |
|---|---|---|---|
| 1. Level | 1500 (1000 only if a gauge shows plenty of clear) | Flattening orange peel and nibs | An even dull haze |
| 2. Refine | 2000 | Removing the 1500 scratches | A fine, uniform scratch |
| 3. Finish | 3000 or P3000 (optional) | Making the polish job quick | A satin finish |
| 4. Compound and polish | Not sandpaper | Restoring gloss | A clear finish |
Watch for a “P” before the number when you shop: P grades (the European FEPA scale) and US CAMI grades do not line up number for number at the fine end, so a P2000 and a 2000 are not the same paper. My grit guide for car paint explains the two scales.
What to Use for Lubricant
Clean water with a drop of car-wash soap is the usual choice. Keep the panel and the paper wet the entire time, because dry paper loads up with clear and scratches deeper than its grit says.
Step by Step: Block, Not Fingers
- Wash and degrease the panel. One speck of grit under the paper cuts a deep scratch.
- Measure first. Mark the thin spots (edges, high points) with a gauge and note them.
- Soak the paper in a bucket for a while so it softens and stops cutting like a dry sheet.
- Wrap it around a flat block. Fingertips press unevenly, and each press dips into the peel instead of shaving off the top of it. A block spreads the pressure and flattens the surface.
- Sand in one direction with light, even pressure and short, overlapping strokes. Wipe and look often: the glossy low points of the peel disappear first, and you stop when the surface is a uniform haze, not when it is dull on the high spots only.
- Change direction at 90 degrees when you go up a grit, so you can see when the previous scratches are gone.
- Re-measure after each grit. eQualle puts each stage at roughly 0.1 to 0.2 mils, so three steps can use up most of a thin clear.
By Hand or With a Sander?
By hand is the safe way to learn. A machine removes clear faster, and that is the problem here, not the benefit. If a whole car needs flattening, the guide to the best sander for auto body work covers the tools, and my wet sanding guide explains the technique in general terms.
Edges and Body Lines: Where Burn-Through Happens
Paint is thinnest on edges, and a body line is a ridge where the block rides on the crest while your pressure peaks. That is where a burn-through usually starts. eQualle notes that edges read thinner than the middle of the panel, which matches the geometry.
- Leave the edges and sharp lines alone. Level the flat and move on, or tape them with masking tape so the paper can’t touch them.
- Use less pressure near any ridge and lift the block before you reach it.
- Stop when you see a color change on the paper or a dull color patch on the panel. Clear coat on the surface of metallic paint turns the slurry cloudy, but a color tint means you are into the base coat.
- Do not chase a deep scratch or a deep run. If it needs more than the margin above, the repair is a re-clear.
After Sanding: Compound and Polish
The sanded panel looks flat but cloudy. A compound cuts the fine scratches out, and a polish brings the gloss back. If you are not sure which is which, my comparison of rubbing compound vs polishing compound sorts it out, and the best car polisher roundup covers the machines. Wash the panel to remove all the sanding residue before you polish; any leftover grit will scratch the pad’s work.
Compound Cuts Deeper Than the Last Grit
Start with the lightest combination that works. If a polish and a soft pad clear the haze, you do not need compound at all, and that saves you more clear.
Mistakes That Ruin Clear Coat
- Sanding before the clear is cured. The paper clogs and the surface can smear.
- Skipping the gauge. It turns a controlled job into a guess.
- Using fingers instead of a block. It leaves dips and uneven spots that stay visible after polishing.
- Jumping two grits. Deep scratches from the earlier step survive and show up under the polish.
- Letting the paper run dry. It cuts deeper and clogs.
- Pressing on edges and body lines. This is where most burn-throughs start.
The Kit: Paper, Block and Compound
The picks below are the products I would put in a clear coat kit. I list no customer ratings or prices, which change daily, and technical specifications that I could not confirm from the makers are marked “not stated” and left out.
3M Wetordry Sandpaper Assortment, 1000 to 2500
Best Starter Pack for the Whole Sequence
3M’s 03006 assortment holds 1000, 1500, 2000 and 2500 grit in 3 2/3 by 9 inch sheets, so the leveling and refining steps come from one maker in one order. It is the easiest way to run the sequence without hunting for odd grades.
- ✅ 1000 to 2500 grit in one order
- ✅ Made for wet use
- ❌ No 3000 sheet in the pack
Best For: Leveling orange peel, then refining.
Meguiar’s Unigrit 2000 Grit Sanding Block
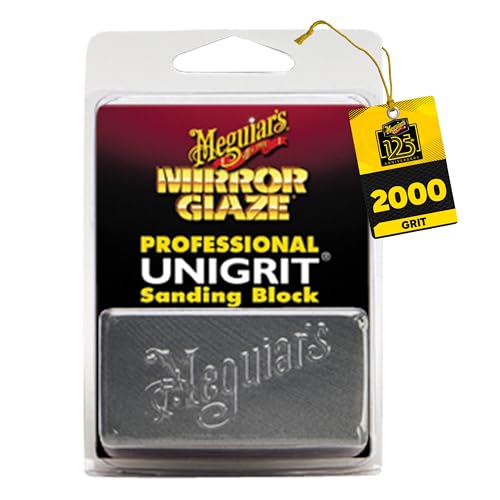
Best for Spot Repairs on Runs and Nibs
This is 2000 grit Unigrit paper already wrapped around a small block that can be shaped to an angle or curve. Meguiar’s sells it for removing runs, sags and other small, isolated defects on any paint surface including clear coat, and suggests its M34 Final Inspection as the lubricant. It is also the grit eQualle suggests for borderline clear that cannot take a 1500 pass.
- ✅ Paper and block in one piece
- ✅ Finer starting point for thin clear
- ❌ Small: for spots, not whole panels
Best For: A single run, sag or dust nib in otherwise good clear.
3M Trizact Performance 3000 Grit Sandpaper
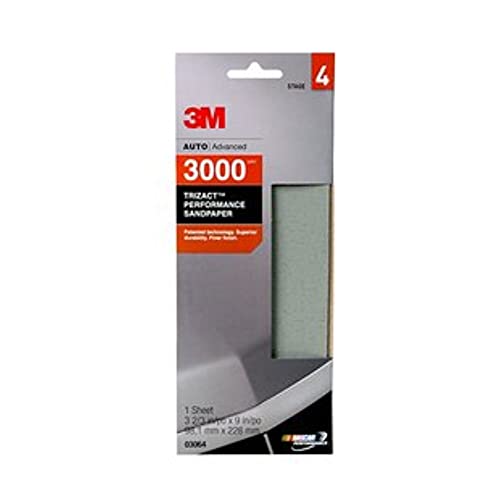
Best Finishing Step Before Polish
3000 is the last abrasive stage. 3M sells these 3 2/3 by 9 inch Trizact sheets (03064) as the finish step for auto clear coats, saying they remove very small scratches to reduce or eliminate compounding and shorten polishing time. Less compounding means less clear removed overall.
- ✅ Very fine final scratch
- ✅ Shortens the polish
- ❌ Does not level anything on its own
Best For: The last step before compound and polish.
Dura-Block 6-Piece Sanding Block Set

Best Blocks for Panels and Body Lines
A block is what separates leveling from scalloping. It bridges the dips in the peel and takes only the high spots. This set gives you six closed-cell EVA foam blocks that don’t soak up water: a standard 11 inch block, a 2/3 block, a 1/3 block, a round block for creases and two small scruff blocks. They take sticky-backed PSA paper, which is not included, so order a PSA roll in your grits with them.
- ✅ Spreads pressure evenly, wet or dry
- ✅ Sizes from large panels to recessed creases
- ❌ PSA sandpaper sold separately
Best For: Flat hoods, roofs and doors.
Meguiar’s M105 Ultra-Cut Compound

Best Compound After Sanding
After the sanding stages, you need a compound that cuts out the fine scratches. Meguiar’s says M105 removes 1200 grit or finer sanding marks, is safe on clear coats and works by hand, with a DA polisher or with a rotary. Finish with a polish to bring back full gloss.
- ✅ Removes 1200 grit or finer marks, per Meguiar’s
- ✅ Hand, DA or rotary
- ❌ Needs a polish after it
Best For: Removing the haze from a sanded panel.
How I Put This Guide Together
The thickness and margin figures come from eQualle’s guide to checking clear coat thickness, and the cure examples from Fannon Infrared’s guide to curing clear coat before buffing, both read on November 20, 2026. Both are retail or trade guides, not paint makers, so the technical data sheet of your own clear always wins. Product details come from each item’s Amazon listing. More on how I choose the products I recommend.
🏆 The Verdict
Wet sanding clear is safe when you measure first, wait for the cure on your TDS, work through the grits on a flat block and stay off the edges. Start with the 3M Wetordry assortment, back it with a Dura-Block, and finish with a compound. If the gauge says the clear is thin, polish and leave the paper in the drawer.
❓ Frequently Asked Questions
What sandpaper to use for wet sanding clear coat?+
Can I wet sand clear coat after 24 hours?+
Will wet sanding ruin clear coat?+
How long should clear coat sit before wet sanding?+
How much does it cost to have a car wet sanded?+
Conclusion
Wet sanding clear coat rewards patience and a gauge. Measure, wait for the cure, level with 1500 on a block, refine with 2000, finish with P3000 and polish. For the wider picture, see my wet sanding guide and the grit guide for car paint.

