
As an Amazon Associate I earn from qualifying purchases. All claims are strictly my personal opinion.
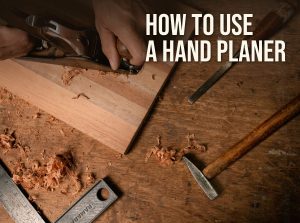
To use an electric hand planer, clamp the workpiece, set a shallow depth, rest the front shoe flat on the wood with the blades clear, switch on and wait for full speed, then push the planer forward along the grain with pressure on the front handle at the start of the pass and on the rear handle at the end. Carry the planer past the end of the board without tipping it, and wait for the cutter to stop before you set it down.
This guide shows how to use a hand planer step by step, based on the instruction manuals for the Makita KP0800 and the WEN 6530: safety, depth of cut, blades, technique for doors, chamfers, rabbets and flattening, and a short section on manual hand planes, since many people searching for a “hand planer” own one of those. If you need a planer first, see my best hand planer picks.
⚡ Quick Answer
Depth: WEN suggests passes of 1/64″ or less for a good finish; deeper only for rough removal.
Pressure: front handle at the start, rear handle at the end, even feed in between.
Direction: along the grain, never against it, and never on end grain with the WEN.
Always: clamp the work, use both hands, and let the cutter stop before you put the planer down.
Electric Hand Planer or Manual Hand Plane?
“Hand planer” usually means a power planer: a handheld electric tool with a spinning drum that carries two blades, typically 3-1/4″ wide. It removes wood fast and is the tool carpenters use to trim doors, flatten framing, scribe and chamfer. A hand plane is the traditional, non-powered tool with one blade set in a sole: slower, quieter and better for fine finishing. Most of this guide is about the electric planer; the manual plane is covered at the end.
Neither one is a thickness planer. A handheld planer follows the surface it rides on, so it can level and trim, but it can’t make a board an even thickness from end to end. For that, see how to use a thickness planer.
Hand Planer Safety: What the Manuals Say
Makita and WEN print almost the same list. The points that matter most:
- Secure the workpiece with clamps or another stable method. Both manuals say never to hold the work in your hand; Makita adds against your body, and WEN across your legs.
- Hold the planer with both hands, by the insulated grips.
- Make sure the blades aren’t touching the wood when you switch on, and wait until they reach full speed before cutting. WEN warns the planer can vibrate and kick back if the cutting speed is too low.
- Wait for the cutter to stop before setting the tool down. Both manuals put this first: a spinning cutter can catch the surface and throw the tool.
- Check for nails and remove them or set them well below the surface.
- Never put your fingers into the chip chute. It can jam when cutting damp wood; Makita says to clear it with a stick, and WEN says to unplug the planer before you remove chips.
- Never pull the planer backwards over the work (WEN).
- Unplug before changing blades or adjusting, and handle the blades carefully: they are very sharp.
- Wear safety glasses, hearing protection and a dust mask.
Set Up the Planer
Set the Depth of Cut
The knob on the front of the planer raises or lowers the front shoe, and the difference between the shoe and the blade is the depth of cut. The Makita KP0800 cuts up to 3/32″ per pass and the WEN 6530 up to 1/8″. Maximum depth is for rough stock only: WEN’s manual says the optimum is 1/64″ or less per pass, building up to the final depth with several passes, and to test the setting on scrap of the same material. When you finish, set the knob back to zero.
Check the Blades
Dull or chipped blades leave a rough, torn surface and make the motor work harder. Most planers use reversible, double-edged blades: unplug the tool, flip the blades to the fresh edge or replace them, and tighten every installation bolt. Makita says to change both blades at the same time, because an unbalanced drum vibrates and shortens tool life, and to run the planer for a moment before use to check for vibration.
Chips and Dust
Choose the side you want the chips to come out, if your planer lets you, and fit the dust bag or a vacuum hose. A clogged chute is the most common reason a planer stops cutting cleanly.
Use the Kickstand
Most current planers have a spring-loaded stand or kickstand at the rear that keeps the blades off the bench when you set the tool down. Check it swings freely before you start.
How to Use an Electric Hand Planer, Step by Step
- Clamp the work to a bench, with the surface you’ll plane facing up and nothing under the planer’s path.
- Mark the line you’re planing to, on both faces for an edge.
- Set a shallow depth and check the grain direction: plane with the grain so the fibers are cut, not lifted.
- Rest the front shoe flat on the end of the board, blades clear of the wood.
- Switch on and wait for full speed.
- Push forward at an even rate, pressing on the front handle at the start of the pass. Makita and WEN both describe it this way.
- Move the pressure to the rear handle as the front shoe leaves the far end, so the planer doesn’t dip and gouge the end.
- Carry it off the end without tilting it down, switch off and wait for the cutter to stop.
- Check against your line and repeat. Lower the depth for the last passes to get a cleaner finish.
Feed rate matters as much as depth. WEN explains that moving too fast gives a poor cut and strains the blades and motor, while moving too slowly can burn or mar the surface. If the motor labors, reduce the depth or the feed.
Hand Planer Techniques
Trimming a Door
The long edges of a door are long grain and plane easily: clamp the door on edge in a door jack or against a bench leg, mark the line on both faces, and plane in long, even passes from one end to the other. Plane a slight back-bevel on the latch side if the door binds as it closes. The top and bottom are trickier, because the stiles there are end grain, and WEN’s manual says not to plane end grain at all. Follow your planer’s manual: where end grain is ruled out, cut the top or bottom with a circular saw and a straightedge guide, then ease the edge with a sanding block.
Chamfering an Edge
The V-groove in the front shoe guides the planer along a corner. Set the groove on the edge, keep the base pressed flat against the edge, and push along the grain. Makita’s KP0800 has one groove; the Makita XPK02Z has three for different chamfer sizes.
Cutting a Rabbet
Attach the edge fence to set the rabbet width and, if your planer has one, the depth guide to set the rabbet depth, then take repeated passes until the guide touches. The Makita KP0800 rabbets up to 11/32″ deep. Draw a cutting line first and line the blade edge up with it.
Flattening and Leveling
To level a high spot or a slightly uneven surface, take passes diagonally across it in two directions with a shallow setting, then finish with passes along the grain. Check with a straightedge often: a power planer removes material much faster than a belt sander. If the surface is wider than a board or two, a belt sander is easier to control; see belt sander vs planer.
Planing Framing and Rough Stock
For crowned joists or studs, plane the high spots in short passes and keep the planer moving. Makita’s manual notes that planing is easier if you set the workpiece at a slight incline so you can plane somewhat downhill.
⚠️ Old Paint and Hidden Nails
On old doors and trim, check for nails, screws and staples before planing: anything the blades hit can be thrown out of the chute. If the paint may contain lead (homes built before 1978), test it first. Planing lead paint produces chips and dust you don’t want in the house.
How to Use a Manual Hand Plane
If your “hand planer” has no cord, the principles are the same, only slower and quieter:
- Sharpen first. A manual plane only works with a sharp blade; most problems come from a dull iron.
- Set a thin shaving. Advance the blade until it just takes a shaving, and keep the edge parallel to the sole with the lateral lever.
- Plane with the grain, pressing on the front knob at the start, evenly in the middle and on the rear handle at the end, the same pattern as with a power planer.
- Skew the plane slightly in difficult grain to take a slicing cut.
- Block planes are for end grain, chamfers and small parts; bench planes (No. 4 smoother, No. 5 jack) are for faces and edges.
Common Hand Planer Mistakes
- Taking the full depth on every pass. The surface comes out rough and the motor strains.
- Dipping at the ends. Keep pressure on the front shoe at the start and the rear shoe at the end.
- Starting with the blades touching the wood. The tool can jump.
- Setting it down while the cutter spins.
- Planing against the grain. Flip the board or plane from the other end.
- Holding small parts by hand. Clamp them, or use a different tool.
Hand Planers I’d Start With
Both are covered in more detail in my electric hand planer reviews, chosen from the makers’ specifications rather than shop testing.
Makita KP0800K 3-1/4″ Planer

Light, Balanced and Easy to Control
The KP0800K is the planer whose manual this guide quotes. Makita lists a 6.5 A motor, a two-blade drum at 17,000 RPM, 3-1/4″ width and up to 3/32″ per pass, with a click-stop depth knob in 0.1 mm steps. It weighs 5.7 lb, has a spring-loaded stand that keeps the blades off the bench and comes with double-edged carbide blades, an edge fence and a case. Rabbets go up to 11/32″ deep.
- ✅ Light for a corded planer
- ✅ Fine click-stop depth adjustment
- ✅ Carbide blades and case included
- ❌ 1-year warranty
- ❌ 3/32″ maximum depth
Best For: Doors, trim and finish carpentry where control matters more than speed.
WEN 6530 6-Amp 3-1/4″ Electric Hand Planer
Budget Planer for Occasional Jobs
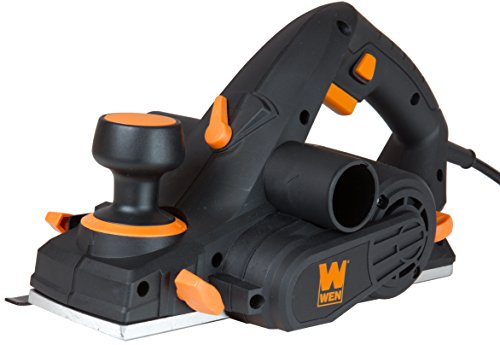
WEN’s 6530 has a 6 A motor at 17,000 RPM, a 3-1/4″ cut up to 1/8″ deep in 1/128″ steps, a safety kickstand, a parallel fence, a rabbeting depth stop and a dust bag, with chips ejected to either side. It weighs 6.8 lb. It sits in the lowest price tier, which makes it a sensible first planer for the odd sticking door or deck board.
- ✅ Lowest price tier
- ✅ Kickstand, fence and rabbet guide included
- ✅ Chips eject left or right
- ❌ Heavier than the Makita
- ❌ Carbide blades are an extra (6530B-TCT)
Best For: Homeowners who need a planer a few times a year.
🏆 The Verdict
A hand planer is easy to control once you get the rhythm: work clamped down, a shallow cut, front pressure at the start and rear pressure at the end, and the cutter stopped before the tool touches the bench. Take several light passes rather than one heavy one, and keep end grain for the saw.
❓ Frequently Asked Questions
How do you use a hand planer as a beginner?+
Is hand planing difficult?+
How much will a hand planer take off?+
What do you use a hand planer for?+
How do you adjust a hand planer?+
Can you flatten a board with a hand planer?+
Have a planer question I didn’t answer? Ask in the comments and I’ll reply.

