
As an Amazon Associate I earn from qualifying purchases. All claims are strictly my personal opinion.
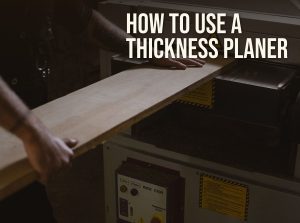
To use a thickness planer, start with one flat face, set the planer to take no more than 1/16″ from a board that size, switch it on, and feed the board flat-face down with the grain until it comes out the other side; then lower the head a little and repeat, flipping the board between passes, until it reaches the thickness you want. Support long boards at both ends to avoid snipe, and keep your hands out of the feed path.
Below is how to use a thickness planer the way the manuals describe it, using DeWalt’s manual for the DW735 as the main reference: setup, depth of cut, the step-by-step process, how to plane cupped, bowed and twisted boards, how to stop snipe, and when to sand afterwards. If you’re shopping, see my best thickness planer picks and the DeWalt DW735 vs DW734 vs Makita 2012NB comparison.
⚡ Quick Answer
First: one flat face, from a jointer, a planer sled or a hand plane.
Depth per pass: 1/32″ to 1/16″; the DW735’s maximum is 1/8″, and only on boards 6″ wide or less.
Minimum length: DeWalt says never plane material shorter than 12″.
Snipe: keep the board level going in and coming out, and support long boards.
What a Thickness Planer Does
A thickness planer makes the top face of a board parallel to the bottom face and brings the board to a set thickness. Rubber feed rollers pull the board under a cutterhead, the head shaves the top, and a second roller pushes it out. The bed is the reference, so the planer copies whatever is underneath: a warped board comes out the same shape, only thinner. That’s why the first face needs to be flat before the planer sees it, and why the jointer and the planer work as a pair. My jointer vs planer guide explains the division of labor, and how to use a jointer covers the face-jointing step.
Planer Safety: What the Manuals Say
From DeWalt’s DW735 instruction manual, plus the points every benchtop planer manual shares:
- Never plane material shorter than 12 inches. Short pieces can tip into the cutterhead or shoot back out.
- Keep hands away from the underside of the cutterhead carriage and out of the infeed opening.
- Don’t switch the planer on with a board already under the carriage. Wait until the rollers and head are up to full speed, then feed.
- Don’t stand between the back of the planer and a wall or other fixed object while a board is feeding, and leave clearance on the outfeed side.
- Plane only clean wood: no nails, grit or loose knots, and as few tight knots as possible. DeWalt says not to plane wood that is severely warped, twisted, knotted or bowed.
- Clear chips only with the power off and the cutterhead stopped, with a brush or vacuum.
- Wear hearing protection. DeWalt’s manual calls for ANSI S12.6 hearing protection, and safety glasses at all times.
- Mount the planer firmly. DeWalt suggests bolting it to 1/2″ or thicker plywood that you clamp to the bench, so it doesn’t walk.
⚠️ Chips Come Out Fast
On a planer with fan-assisted chip ejection like the DW735, chips leave the port at high speed. DeWalt warns not to operate it without the chute locked in place and to keep your face and hands clear of the port.
Set Up Before You Plane
Check the Thickness Scale
Plane a scrap, measure it with calipers and compare the reading with the scale. DeWalt’s manual explains how to recalibrate the DW735 scale if the two disagree. On the DW735, one full turn of the crank moves the head 1/16″ and a half turn moves it 1/32″, which is an easy way to count passes.
Set the Infeed and Outfeed Tables
The tables, or roller stands, should be level with the bed or a hair above it at the far ends. This is the single most effective snipe fix, covered in detail below. On the DW735X, the infeed and outfeed tables come in the kit.
Choose the Feed Speed
Two-speed planers trade speed for finish. On the DW735, speed 2 gives 96 cuts per inch for dimensioning, and speed 1 gives 179 cuts per inch for the final pass and for figured wood, where the slower feed reduces tear-out and knife wear. DeWalt says to change speeds only while the planer is running.
Connect Dust Collection
Planers make more chips than any other benchtop tool. DeWalt says a shop vac isn’t recommended on the DW735, because most can’t handle the volume and the hose clogs; use a dust collector with a 4″ hose. My guide to dust collection for woodworking tools covers the setup, and the best dust collector for a small shop lists collectors that run on 120V.
How to Use a Thickness Planer, Step by Step
- Flatten one face first on the jointer, or with a sled (see below). Mark the flat face with an X.
- Read the grain. Feed so the knives cut with the grain, not into it. If you see tear-out, flip the board end for end.
- Set the first pass. Raise the head above the board’s thickness, slide a few inches of the board under the middle of the carriage, and lower the head until it just touches. On the DW735, the material removal gauge shows how much the head will take at that height. Pull the board out, then lower the head about 1/32″ to 1/16″.
- Start the planer and wait for full speed.
- Feed the board flat-face down, square to the bed, and let the rollers take it. Don’t push or pull once the rollers grab it.
- Catch the board at the outfeed side and keep it level as it leaves.
- Flip and repeat. DeWalt recommends taking equal amounts from both faces: to remove 1/8″, take 1/16″ from each side. That keeps the moisture in the board balanced and gives finer cuts.
- Take the last pass light, at the slow feed speed if you have one, to reach the final thickness with the cleanest surface.
How Much to Take per Pass
The DW735 can take up to 1/8″ in one pass, but only on boards 6″ wide or less; DeWalt’s table scales the depth down for wider boards. Lighter cuts are the safer habit: 1/32″ to 1/16″ keeps the motor from bogging, reduces tear-out and makes snipe smaller. A board that comes out with a rough, fuzzy surface usually needs a lighter cut or sharper knives, not a heavier one.
Narrow and Thin Stock
DeWalt doesn’t recommend planing material less than 3/4″ wide. If you must, plane several narrow pieces side by side as one wide board. The DW735’s minimum planing thickness is 1/8″; for thinner parts, plane on a carrier board so the head never gets close to the bed.
Planing Cupped, Bowed and Twisted Boards
A planer works best when the board already has one flat face. DeWalt’s manual gives these workarounds when it doesn’t:
Cupped Boards
Rip the board down the middle and plane the two pieces separately: the cup is smaller on each narrower piece. If you can’t rip it, plane one face until it is flat, then plane the other face. In this case DeWalt says not to flip the board between every pass.
Bowed Boards
The feed rollers press a bow flat while the board passes, so the board comes out smooth but springs back to its bowed shape. Flatten it on the jointer, crown up, or cut it into shorter pieces first.
Twisted Boards
For a slight twist, alternate faces until you reach thickness. A heavily twisted board can jam the planer: if it does, turn the power off, unplug it and raise the carriage to free the board.
No Jointer? Use a Planer Sled
A planer sled is a flat board, usually melamine or MDF, longer than the workpiece. Shim the board on the sled so it can’t rock, hot-glue or wedge the shims in place, and run the sled and board through together. The sled becomes the flat reference, so the top face comes out flat. Flip the board, remove the sled, and plane the second face directly. It’s slower than a jointer, but it also handles boards wider than a jointer could.
How to Avoid Planer Snipe
Snipe is a deeper cut at the start or end of a board. DeWalt’s manual explains it: the unsupported end of the board drops, which lifts the other end into the cutterhead. The fixes:
- Keep the board level going in and coming out. Lift the trailing end slightly as it enters and the leading end slightly as it leaves.
- Support long boards with the planer’s tables or roller stands set level with the bed.
- Feed boards end to end, butted together, so the rollers never release a board until the next one has taken its place.
- Leave the board long and cut the sniped ends off after planing.
- Lock the head if your planer has a manual carriage lock. The DW735 has an automatic one built into its four posts.
Do You Need to Sand After Planing?
Usually, yes. A planer leaves faint ripples, called knife marks or mill marks, one per cut, and they show under stain and gloss finishes. A higher cuts-per-inch setting makes them smaller, and a spiral head leaves a different, scalloped pattern. Start with a random orbital at 120 grit and work up to 150 or 180 for most finishes; see what grit sandpaper for wood and how to use an orbital sander. If you’d rather sand to thickness than plane highly figured wood, read drum sander vs planer.
Common Planer Mistakes
- Planing a warped board with no flat face. The planer copies the warp.
- Taking the full 1/8″ on wide boards. It overloads the motor and tears grain.
- Planing against the grain. Flip the board and try again.
- Short pieces. Respect the manual’s minimum length.
- Letting long boards hang. The fastest route to snipe.
- Running dull knives. On a straight-knife planer, flip or replace the knives as soon as the surface goes fuzzy or lines appear.
Planers I’d Start With
Chosen from the makers’ specifications, not shop testing. The full list is in my thickness planer reviews.
DeWalt DW735X 13″ Two-Speed Thickness Planer

The Planer This Guide Follows
Most of the numbers in this guide come from the DW735 manual, and the DW735X is the same planer with infeed and outfeed tables and a spare set of knives in the box. It has a 15 A motor, a three-knife head at 10,000 RPM, 13″ width and 6″ thickness capacity, and two feed speeds for 96 or 179 cuts per inch. The automatic carriage lock reduces snipe without you engaging anything, and fan-assisted chip ejection clears the head. It is heavy and loud, like every straight-knife planer.
- ✅ Two feed speeds for dimensioning and finishing
- ✅ Automatic carriage lock against snipe
- ✅ Tables included in the X kit
- ❌ Heavy to move
- ❌ Straight knives are loud
Best For: A first planer that will last through years of rough lumber.
WEN PL1326 13″ Spiral Benchtop Thickness Planer
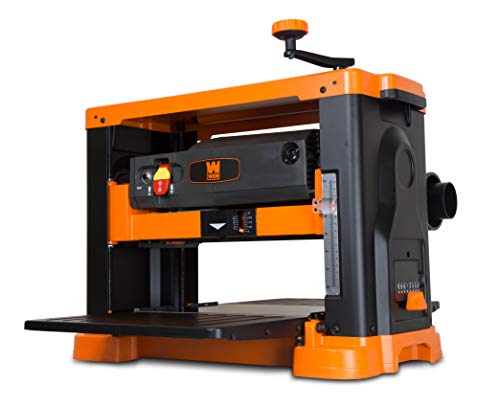
A Spiral Head in a Mid-Range Planer
The PL1326 uses a spiral cutterhead with 26 staggered, rotatable HSS inserts that take a shearing cut, which helps on figured and interlocked grain, and you rotate a chipped insert instead of replacing a whole knife. It planes boards up to 13″ wide and 6″ thick, turns the head at 10,000 RPM on a 15 A motor and feeds at 26 ft/min. A material removal gauge and depth stop are built in. It has one feed speed, so there’s no slow finishing pass.
- ✅ Spiral head with rotatable inserts
- ✅ Quieter cut than straight knives
- ✅ Depth stop and removal gauge
- ❌ Single feed speed
- ❌ HSS inserts, not carbide
Best For: Figured, reclaimed or interlocked-grain lumber.
🏆 The Verdict
Using a thickness planer well comes down to one flat face first, light passes from both sides, and boards supported level on the way in and out. Respect the 12″ minimum length, keep your hands out of the infeed, and finish with a light, slow pass before you sand.
❓ Frequently Asked Questions
How long does a board have to be to go through a planer?+
How do I use a wood planer correctly?+
How thin can a thickness planer cut?+
Do I need to sand if I use a planer?+
How do you stop planer snipe?+
Can you use a thickness planer without a jointer?+
Have a planer question I didn’t answer? Ask in the comments and I’ll reply.

