
As an Amazon Associate I earn from qualifying purchases. All claims are strictly my personal opinion.
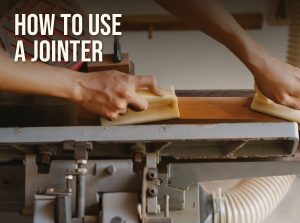
To use a jointer, set a light cut of about 1/32″, lay the board on the infeed table with any crown facing up, and push it across the cutterhead with steady pressure that moves from the infeed to the outfeed table, repeating until the whole face is flat; then hold that flat face against the fence and joint one edge square to it. Push blocks do the pushing whenever the board is thin or narrow, and the guard stays on.
This guide covers how to use a jointer from setup to the last pass: the safety limits printed in the jointer manuals, how to check the tables and fence, face and edge jointing step by step, straightening a bowed or crooked board, and the mistakes that leave a snipe or a taper. If you’re still choosing a machine, my best benchtop jointer picks compare the 6″ and 8″ models.
⚡ Quick Answer
Order: flatten one face first, then joint one edge square to that face.
Depth of cut: 1/32″ per pass; 1/8″ is the usual maximum on a benchtop jointer.
Pressure: on the infeed table at the start, on the outfeed table once a few inches have passed the cutterhead.
Never: joint end grain, stock shorter than the manual allows, or anything thin or narrow without push blocks.
What a Jointer Does (and What It Doesn’t)
A jointer has two flat tables with a rotating cutterhead between them. The infeed table sits slightly lower than the outfeed table, and the difference is your depth of cut. As you push a board across, the cutterhead removes the high spots, and the outfeed table, set level with the top of the knives, supports the freshly cut surface. After enough passes, the face or edge is flat and straight.
Face Jointing
Face jointing flattens one wide face of a board: it takes the cup, bow and twist out of rough lumber. It is the first operation in milling, and the jointer’s width limits it. A 6″ jointer can only flatten a board up to 6″ wide.
Edge Jointing
Edge jointing straightens one edge and makes it square to the face you just flattened. That gives you a reference edge for the table saw and a glue-ready edge for panels.
What a Jointer Can’t Do
A jointer makes one face flat and one edge square. It does not make the opposite face parallel, so it can’t bring a board to a consistent thickness. That’s the thickness planer’s job, and my jointer vs planer guide explains why you need both for rough lumber.
Jointer Safety: What the Manuals Say
Every jointer manual repeats the same short list, and almost every jointer injury breaks one of them. These are taken from WEN’s manual for the JT630H and JT833H benchtop jointers; other makers print the same limits with small differences, so check yours.
- Mount the jointer on a flat, stable surface or stand before you use it.
- Minimum stock size: WEN says not to joint material shorter than 8-1/8″, narrower than 3/4″ or thinner than 1/4″.
- Use a push block or push stick for anything narrower or thinner than 3″.
- Never cut deeper than 1/8″ in one pass. WEN recommends 1/32″.
- Keep the cutterhead guard in place. On a jointer it covers the knives the moment the board passes.
- Don’t stand in line with the cutterhead’s rotation, and keep others out of that line: kickback and thrown debris travel that way.
- Don’t wear gloves, loose sleeves or jewelry while the machine runs. Wear eye and hearing protection and a dust mask.
- Check the board for nails, staples, splits and loose knots before it touches the knives.
- Never back the board toward the infeed table while the cutterhead is turning.
- Let the jointer reach full speed before feeding, and unplug it before any adjustment.
⚠️ Hands Never Pass Over the Cutterhead
Your hands move over the guard, not past an exposed cutterhead, and they always stay on top of the board. When a board is too short or thin to keep your fingers well clear, it is too small for the jointer: plane it by hand or use a sled on a planer instead.
Set Up the Jointer Before the First Board
Check the Outfeed Table Height
The outfeed table must sit exactly level with the top of the knives at their highest point. Unplug the machine, rotate the cutterhead with the wrench until a knife or insert is at top dead center, and lay a straightedge on the outfeed table so it reaches over the head. The knife should just brush the straightedge. WEN’s manual has you check both ends of the cutterhead and adjust in tiny steps, about 1/20 of a turn of the adjustment screw at a time. If the outfeed table is too high, the board hits its edge and the cut tapers off; if it’s too low, the knives take a bite at the end of the board, called snipe.
Square the Fence
Set the fence to 90° with an accurate square resting on the outfeed table, then lock it. Joint an edge on a scrap, check it with the square, and adjust if needed. Recheck it with the square after you tilt the fence for a bevel and bring it back, and before every glue-up.
Set the Depth of Cut
Lower the infeed table to 1/32″ on the scale for normal work. That light cut gives a smoother surface, puts less load on a 10 A benchtop motor and wears the knives more slowly. Go up to 1/16″ for the first passes on a rough board, never past the manual’s maximum. On wider jointers the maximum drops with width: WEN’s manual for the 8″ JT833H says to reduce the depth by 1/32″ for each inch of width over 6″.
Connect Dust Collection
A jointer throws a lot of chips for its size, and a clogged chute stalls the cut. Benchtop jointers have a 2-1/2″ port; some 8″ models add a 4″ adapter. WEN recommends running the collector on a separate circuit from the jointer. A shop vacuum works on a 6″ benchtop jointer for light jointing, but a dust collector keeps up better: see my guide to dust collection for woodworking tools.
How to Use a Jointer, Step by Step
Read the Board First
Sight down each face and edge to find the cup, bow and crook. Place a cupped board cup-side down so it rests on its two edges and doesn’t rock. Place a bowed board crown up, so it rests on both ends and the jointer removes the ends first. Then look at the grain on the edge: feed so the knives cut “downhill” with the grain, the same way you’d stroke a cat. Feeding against the grain tears out fibers, and WEN’s manual says to take extremely light cuts and feed slowly if you have no choice.
Face Jointing
- Mark the face with a few pencil squiggles. They disappear where the knives have cut, so you can see progress.
- Start the jointer and wait for full speed, with the board clear of the cutterhead.
- Place two push blocks on the board, one near the front and one near the back.
- Feed at an even rate. Keep the board down on the infeed table at the start. WEN warns that any pause cuts a step into the board.
- Shift pressure to the outfeed side once a few inches of board have passed the cutterhead. The outfeed table now references the flat surface you just made. Keep moving your hands forward one at a time, never over an exposed cutterhead.
- Feed all the way through and lift the board away from the outfeed table.
- Repeat until the pencil marks are gone from the whole face. Check the face with a straightedge across, along and diagonally.
Edge Jointing
- Hold the jointed face against the fence, with the edge down on the infeed table.
- Keep your hands high on the board, pressing it into the fence and down onto the table at the same time. On a narrow board, use a push stick at the back end.
- Feed steadily, again moving pressure to the outfeed side once the cut is under way.
- Stop when the edge is straight end to end and check it against the face with a square.
Jointer Techniques for Real Boards
How to Straighten a Bowed or Crooked Board
Put the board crown up, so it rocks on its ends. Take a few short passes on each end, without feeding the whole length, until the middle almost touches the knives, then run full-length passes. For a crooked edge, joint the concave side with the hollow down, so the board sits on its ends. On a long, badly crooked board, it is faster to snap a line and rip close to it on the band saw or table saw, and then joint the edge.
Boards Longer Than the Tables
A benchtop jointer has tables around 30″ to 34″ long, and the WEN JT833H extends to 51″. When a board hangs well past either end, set a roller stand level with the outfeed table so the board doesn’t tip at the end of the pass. WEN’s manual also says to support long workpieces at both ends. Cut long boards to rough length before you joint them when the project allows it: shorter boards come out straighter with less waste.
Boards Wider Than the Jointer
If a board is wider than the cutterhead, you have three choices: rip it into two pieces, joint them and glue them back up; flatten the face on the thickness planer with a sled; or hand-plane the face. Don’t remove the guard to take a partial-width cut.
Bevels and Chamfers
Tilt the fence to the angle you need and lock it, then joint the edge with the board pressed firmly into the fence. A chamfer usually takes one light pass; a full bevel takes several.
Common Jointing Mistakes
- Pressing on the infeed side for the whole pass. It copies the bow instead of removing it. Move your pressure to the outfeed table.
- Taking heavy cuts. A deep cut on a 6″ benchtop jointer bogs the motor, tears grain and wears the knives faster.
- Jointing both faces. A jointer can make both faces flat, but not parallel. The second face belongs to the planer.
- Outfeed table out of adjustment. Too high gives a tapered cut that stalls; too low gives snipe at the end of each board.
- Feeding against the grain. It tears out chunks, especially in figured wood. Flip the board end for end.
- Pausing mid-pass. Every stop leaves a step.
- Fingers on the end of the board or close to the guard. Use push blocks.
What Comes After the Jointer
The standard milling sequence is: joint one face, joint one edge, plane the opposite face to thickness, rip the second edge parallel on the table saw, then crosscut to length. The planer step is covered in how to use a thickness planer, and if you need a planer, the best thickness planer picks and the DeWalt DW735 vs DW734 comparison cover the benchtop models. After milling, the jointer and planer marks come off with a random orbital sander, starting around 120 grit.
Jointers and Push Blocks I’d Start With
These are chosen from the makers’ specifications and the way each machine fits a home shop, not from shop testing. For the full comparison, see my benchtop jointer reviews.
WEN JT630H 6″ Spiral Benchtop Jointer
A Good First Jointer
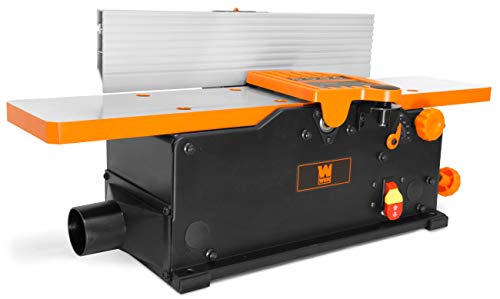
The JT630H is the jointer whose manual this guide quotes most. WEN lists a 10 A motor, 12,000 RPM, a spiral head with 12 inserts, a maximum cut of 1/8″ with 1/32″ recommended, a 30″ x 6-3/16″ table and a 2-1/2″ dust port. Two push blocks come in the box. The inserts are high-speed steel, and you rotate one to a fresh edge when it chips instead of resetting a full knife.
- ✅ Spiral head in a low price tier
- ✅ Push blocks included
- ✅ Light enough to store on a shelf
- ❌ 6″ width limit
- ❌ HSS inserts dull faster than carbide
Best For: Learning to face and edge joint on narrow stock.
Cutech 40160HB 6″ Spiral Cutterhead Benchtop Jointer

Carbide Inserts for Less Maintenance
Cutech’s 6″ jointer pairs a spiral head of 12 two-sided carbide inserts with 30″ x 6-1/4″ aluminum tables that Cutech coats to reduce friction, which helps when you’re feeding long boards by hand. It runs at 11,000 RPM on a 10 A motor, takes up to 1/8″ per pass and carries a 3-year limited warranty. Carbide holds an edge longer than steel in hardwoods and figured grain.
- ✅ Two-sided carbide inserts
- ✅ Coated tables
- ✅ 3-year limited warranty
- ❌ 6″ width limit
- ❌ Aluminum tables, not cast iron
Best For: Regular jointing of hardwood and figured boards.
POWERTEC 5-Piece Push Block and Push Stick Set (71009V)

Spare Push Blocks Worth Having
Push blocks wear out and go missing, and face jointing takes two. This POWERTEC set has one long and two short hold-down push blocks, a V-notch push stick and a straight push stick. POWERTEC lists push blocks for face jointing and the sticks for jointers, table saws, router tables and shapers. The blocks keep steady downward pressure on the board as it crosses the cutterhead, and the narrow sticks handle edge jointing on thin stock near the fence. Keep a set at every machine so you never feed a short board by hand.
- ✅ Three push blocks and two push sticks
- ✅ Works on the jointer, table saw and router table
- ❌ The blocks’ grip wears and needs checking
Best For: Replacing or adding to the push blocks that came with your jointer.
🏆 The Verdict
Using a jointer well is about a correctly set outfeed table, light 1/32″ passes, and pressure that moves to the outfeed side as the board goes through. Flatten one face, joint one edge square to it, and let the planer and table saw do the rest. Keep the guard on and the push blocks in your hands for anything thin or narrow.
❓ Frequently Asked Questions
How do you properly use a jointer?+
What are common jointing mistakes?+
Do I need a jointer if I have a planer?+
What do you use a jointer for?+
How do you straighten a bowed board on a jointer?+
How much should a jointer take off per pass?+
Have a jointer question I didn’t answer? Ask in the comments and I’ll reply.

