
As an Amazon Associate I earn from qualifying purchases. All claims are strictly my personal opinion.
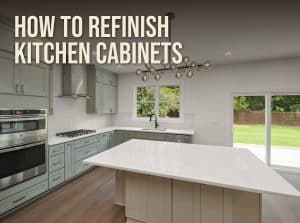
How to refinish kitchen cabinets, in order: take off the doors and drawers, degrease every surface, scuff-sand the old finish with 220 grit (or sand to bare wood if you’re restaining), fill and sand any damage, prime, then brush and roll two thin coats of cabinet enamel, or stain and clear-coat the wood. The cleaning and sanding take most of the time and decide whether the new finish lasts years or starts peeling at the handles, so this guide spends the most time there.
Below is how to choose between painting and restaining, what each cabinet material will accept, the grits and sanders for doors, frames and profiles, which primer goes over which surface, and the drying times the paint makers give, because rushing them is the other big reason cabinet jobs fail.
⚡ Quick Answer
Clean with a degreaser, rinse and dry. Grease left on the doors is the number one reason cabinet paint fails.
Sand the old finish dull with 220 grit: a square-pad palm sander on frames, an orbital on slab doors, a sanding sponge on profiles.
Prime and paint with a stain-blocking primer and two coats of a cabinet enamel such as INSL-X Cabinet Coat, waiting the full recoat time between coats.
Refinish, Paint, Restain or Reface?
“Refinishing” kitchen cabinets means keeping the boxes and doors you have and changing their finish. There are two ways to do it, painting and restaining, and a third option, refacing, that is a different job altogether.
Paint or Restain: Which Suits Your Cabinets
| Paint | Restain | |
|---|---|---|
| Changes the color | Any color, including white | Darker only, unless stripped to bare wood |
| Cabinet materials | Wood, veneer, MDF, laminate, Thermofoil | Solid wood and wood veneer only |
| Hides dents and repairs | Yes, after filling | No: filler and patches show |
| Prep | Degrease, scuff-sand, prime | Degrease, strip or sand to bare wood (gel stain: scuff only) |
| Pro cost (HomeGuide) | $30 to $70 per linear foot | $4 to $15 per sq ft of cabinet surface |
Painting is the more common choice and the more forgiving one: paint hides the grain, small repairs and the old color. Restaining keeps the wood visible, which means every scratch, glue spot and patch of old finish shows through, so the sanding has to be thorough. A stain can only make wood darker, never lighter, so going lighter means stripping to bare wood first; my guide to how to stain wood explains why.
What Your Cabinets Are Made Of Decides the Options
Look at the back of a door and the edge of a shelf. HomeGuide’s refinishing guide sorts cabinet materials like this:
| Cabinet surface | Stain or paint | Paint only |
|---|---|---|
| Solid wood (oak, cherry, maple, hickory, pine, walnut) | ✅ | |
| Plywood | ✅ | |
| Wood veneer | ✅ | |
| MDF | ✅ | |
| Laminate or melamine | ✅ (or gel stain as a faux wood finish) | |
| Thermofoil | ✅ (or gel stain as a faux wood finish) |
Many cabinets are a mix: solid wood face frames and doors, with plywood or particleboard boxes covered in a printed laminate inside. That is fine for paint, as long as each surface gets the primer it needs.
Refacing Is a Different Job
Refacing, also sold as “resurfacing”, covers the boxes with new veneer and replaces the doors and drawer fronts. HomeAdvisor puts it at $4,300 to $10,000, against an average of $3,116 to have cabinets professionally refinished. It makes sense when the doors are damaged or you hate their style, not when the finish is simply worn. To price both options for your own kitchen, use the cabinet refinishing cost calculator.
Tools and Supplies
- Prep: screwdriver or drill, painter’s tape, sandwich bags for hinges, drop cloths, a degreaser and non-scratch scrub pads.
- Sanding: a 1/4-sheet palm sander, a random orbital sander if you have many slab doors or are restaining, 120, 180 and 220 grit paper, and fine sanding sponges.
- Repair: wood filler, a putty knife, tack cloths and a vacuum.
- Finish: primer and cabinet enamel, or stain and a clear topcoat, a 2-inch synthetic brush and 4-inch foam mini rollers.
- Safety: a dust mask or respirator for sanding, gloves and ventilation for primers and stains.
Step 1: Empty the Cabinets and Remove Doors and Drawers
- Number everything. Put a strip of tape inside each opening and on the matching door’s hinge hole with the same number. Cabinet doors are rarely interchangeable once the hinges have been adjusted.
- Take off doors, drawer fronts and hardware. Bag the hinges and screws for each door together. If you are keeping the pulls, clean them now; if you are replacing them with a different hole spacing, fill the old holes in Step 4.
- Set up a finishing area. Doors dry flat on painter’s pyramids, scrap strips or a drying rack in a garage or spare room. You need room to lay out every door twice: once for the backs and once for the fronts.
- Mask the kitchen. Tape off walls, countertops, the floor and the inside of the boxes if you are not painting them.
Step 2: Degrease Every Surface
Kitchen cabinets carry years of cooking grease and hand oil, worst around the pulls and above the stove. General Finishes, which makes finishes for professional cabinet shops as well as DIYers, says dirt, oil from hands, wax and silicone dusting sprays are the number one reason refinished cabinets chip and peel, and that there is no such thing as a “no prep” paint. Every primer and paint data sheet I used for this guide starts with the same requirement: a clean, dry, grease-free surface.
How to Clean Cabinets Before Painting
- Scrub with a degreasing cleaner or dish detergent and a non-scratch pad, working one door at a time.
- Rinse with clean water. Residue left by the cleaner can stop primer from bonding as surely as grease.
- General Finishes then wipes with a 50:50 mix of denatured alcohol and water, which needs no rinsing.
- Let everything dry completely before sanding. Sanding a greasy door just pushes the grease into the scratches.
⚠️ Important
Skip TSP if you will use a Zinsser shellac or oil primer: both of Zinsser’s data sheets say not to use TSP as a cleaner. And if the cabinets have been polished with a silicone dusting spray for years, test one door through primer and paint before doing the kitchen. General Finishes says silicone is almost impossible to remove.
Step 3: Sand or Degloss the Old Finish
This is the step that decides adhesion. How far you sand depends on what you are putting on next.
Scuff-Sanding for Paint: Dull, Don’t Strip
To paint over a sound finish, you don’t need bare wood. You need every glossy surface dulled so the primer has scratches to grip. Benjamin Moore’s data sheet for its Advance cabinet paint says cabinetry should be roughened by sanding with 220 grit or coarser before priming, and INSL-X and Sherwin-Williams both say glossy surfaces should be sanded dull. Go over every face, edge and profile until there is no shine left when you look across it toward a light. Sand through to bare wood only where the old finish is peeling, chipped or crazed, and feather those edges smooth.
Sanding to Bare Wood for a Restain
A new stain needs bare wood. Strip thick or multi-layer finishes first; my guide to how to strip paint from wood covers the gels and how to use them. Then sand every surface with 120 grit and finish with 150, which is the sequence General Finishes gives before its stains; sanding much finer closes the grain and the stain takes lighter and less evenly. Many cabinet doors are veneer over plywood or MDF, so check the edges and stay off coarse paper near them. The full grit sequence by species is in how to refinish wood furniture.
Which Sander for Which Part of the Cabinet
| Cabinet part | Tool | Grit to paint | Grit to restain |
|---|---|---|---|
| Slab doors, drawer fronts, end panels | 5″ random orbital sander | 220 scuff | 120, then 150 |
| Face frames, inside the boxes, frame-and-panel doors | 1/4-sheet palm sander (square pad) | 220 scuff | 120, then 150 |
| Shaker rails, raised panels, moldings | Sanding sponge or detail sander | Fine sponge | Medium, then fine sponge |
| Between coats of primer and paint | Fine sanding sponge by hand | Light pass, 220 or finer | Fine sponge between topcoats |
If you buy one sander for cabinets, make it the square-pad palm sander: cabinets are full of inside corners a round pad can’t reach. Add a random orbital when you have a kitchen full of slab doors or a full restain. My best sanders for cabinets comparison covers the models, and its section on how to sand kitchen cabinets has the surface-by-surface routine.
Liquid Deglosser: Where It Replaces Sandpaper
A liquid deglosser such as Krud Kutter Gloss-Off cleans and dulls a glossy finish chemically. Its data sheet says you wipe it on, wipe it off, and can paint once it is dry to the touch, usually about 10 minutes later. It is useful on deep profiles and in grooves where a sponge struggles, and on the inside of boxes. It does not flatten old drips or brush marks the way sandpaper does, so treat it as a partner to scuff-sanding, not a way to skip it.
Laminate, Thermofoil and Melamine
Smooth plastic surfaces can be painted but not stained. INSL-X says melamine and Formica need only a light sand with fine paper before Cabinet Coat; Benjamin Moore specifies its Fresh Start High-Hiding All Purpose Primer under Advance on MDF, Thermofoil and laminate. Don’t sand laminate hard: the decorative layer is thin, and the particleboard or MDF under it is a poor surface for paint. Peeling or bubbled Thermofoil is not a paint job; HomeGuide suggests refacing for Thermofoil cabinets instead.
💡 Pro Tip
Lay each door on a pair of strips of scrap wood while you sand. The door sits flat, the pad can run right off the edge without catching, and the dust falls away instead of being ground into the next door. Vacuum each door and wipe it with a tack cloth before it goes to the priming area.
Step 4: Repair, Fill and Sand Smooth
Fill dents, gouges and any hardware holes you won’t reuse with wood filler, slightly proud of the surface. Once it is hard, sand it flush with the same 220 grit, and check under a raking light: paint makes every bump more visible, not less. Sherwin-Williams’ data sheet adds that patched areas must be primed. If you are restaining, use a stainable filler, which the best wood filler guide sorts out.
Step 5: Prime
Primer does three jobs on cabinets: it bonds to the old finish, it blocks stains and wood tannins from bleeding through light paint, and it gives the enamel an even surface to level on. Which one you need depends on the surface:
| Surface | Primer type | Example and maker’s notes |
|---|---|---|
| Varnished or stained wood, especially oak | Shellac or oil-based stain blocker | Zinsser B-I-N: recoat in 45 minutes, seals knots and tannin bleed. Zinsser Cover Stain: recoat in 1 hour, bonds to varnish without sanding or deglossing |
| Laminate, melamine, glossy old enamel | Bonding primer | INSL-X Stix: recoat in 3 to 4 hours, maximum adhesion after 3 to 4 days of cure; glossy paint should still be deglossed |
| MDF, Thermofoil, laminate under Advance | Maker’s all-purpose primer | Benjamin Moore Fresh Start High-Hiding All Purpose Primer (046) |
| Bare wood under Emerald Urethane | Wood primer | Sherwin-Williams lists one coat of Premium Wall & Wood Primer |
| Sound, previously painted cabinets | Often none | INSL-X says Cabinet Coat needs no primer over paint in good condition; spot-prime bare spots |
Brush and roll the primer thin, let it dry for the time on the can, then sand it lightly with a fine sponge or 220 grit to knock off dust nibs. Benjamin Moore’s cabinet instructions call for light sanding between coats with all dust cleaned off. Oak deserves a special mention: its open grain shows through paint, and its tannins can stain white paint yellow, which is why a shellac or oil primer is the safe choice there. My best paint for cabinets guide compares the primers in more detail.
Step 6: Paint the Cabinets
Choose a Cabinet Enamel
Wall paint stays soft and sticky on cabinet doors. Use an enamel made for cabinets and trim: a waterborne alkyd such as Benjamin Moore Advance, a urethane-modified alkyd such as Sherwin-Williams Emerald Urethane Trim Enamel, or a urethane acrylic such as INSL-X Cabinet Coat. HomeGuide notes professional painters usually pick a satin sheen for cabinets because it hides imperfections better than semi-gloss. The best paint for cabinets guide compares them side by side.
Brush and Roll the Backs First
- Do the backs of the doors first. Rust-Oleum’s cabinet paint instructions do the frames, rails and door backs with two coats, and only then flip the doors to do the fronts. Any small mistake ends up on the inside.
- Brush the profiles, roll the flats. Use a synthetic brush on the edges and the grooves of shaker or raised panels, then a 4-inch foam roller on the flat areas, rolling with the grain.
- Keep coats thin and leave them alone. INSL-X warns that overworking Cabinet Coat leaves brush and roller marks because it dries quickly. Lay it on, tip it off in one direction and move on.
- Paint the face frames and boxes in the kitchen while the doors dry, in the same order: profiles first, flats second.
Spraying Is an Option
Spraying gives the smoothest finish: HomeAdvisor calls it the best method for cabinets because it leaves no brush strokes, and HomeGuide prices sprayed cabinets at $40 to $100 per linear foot, against $30 to $70 brushed and rolled. Every paint here can be sprayed; the data sheets give the settings. For a DIY kitchen, though, the masking, overspray and learning curve are a project of their own, and a good foam roller gets close on flat doors. If you do spray, practice on the inside of a door first.
Respect the Recoat Time
The second coat goes on only when the first can take it. These are the makers’ recoat times at about 77°F and 50% humidity; cool or humid weather makes all of them longer:
| Paint | Type | Recoat | Back in use |
|---|---|---|---|
| Sherwin-Williams Emerald Urethane Trim Enamel | Urethane-modified alkyd, water-based | 4 hours | Not listed on the data sheet |
| INSL-X Cabinet Coat | Urethane acrylic | 6 hours | Full cure in 14 days |
| Benjamin Moore Advance | Waterborne alkyd | 16 hours | No heavy use for 5 to 7 days; full hardness up to 30 days |
| Rust-Oleum Cabinet Transformations Basics | Water-based acrylic | 2 hours at 70°F | Rehang after 12 hours, normal use after 24, full hardness in 7 days |
| Valspar Cabinet, Door & Trim Oil Enriched Enamel | Oil-enriched enamel | 4 hours | Not listed |
Sand lightly between coats with a fine sponge to remove dust nibs, vacuum and tack, then apply the second coat. Two coats over primer is the norm; a big color change, especially dark to white, can need a third.
Restaining Instead of Painting
Strip, Sand and Stain
For a true restain you work on bare wood, exactly as on furniture: stripper for the old finish, sanding through 120 and 150, a pre-stain conditioner on blotch-prone maple, birch and pine, then stain wiped on and off. My guide to how to stain wood walks through each step. On veneered doors, strip rather than sand the old finish off, and sand by hand or at low speed so you don’t cut through the veneer.
Gel Stain Over the Old Finish
If you only want to go darker, gel stain can go over the existing finish without stripping. General Finishes’ instructions: scuff clean with a synthetic pad and a 50:50 mix of denatured alcohol and water, sand lightly with a 220 to 320 grit sponge, then wipe on the gel stain and wipe off the excess. Over an existing finish it can take 72 hours or more to dry, GF limits it to two coats, and if it is still tacky after five days it may never dry and has to be stripped. Test the whole process on the back of one door first.
Seal With a Clear Topcoat
Stained cabinets need a clear topcoat. General Finishes recommends three coats of its topcoats over gel stain, and says to let oil-based products dry at least 72 hours before applying a water-based one. Sand between coats with a fine sponge and remove the dust. My guide to sanding between coats of polyurethane covers the grits.
Step 7: Let It Cure, Then Rehang
Dry to the touch is not hard enough to handle. Rust-Oleum says to wait at least 12 hours before reinstalling doors painted with its cabinet paint and 24 hours before normal use, with full hardness in seven days. Benjamin Moore says Advance shouldn’t see heavy use for five to seven days and can take up to 30 days to reach full hardness. INSL-X lists a 14-day full cure for Cabinet Coat. Rehang the doors by their numbers, adjust the hinges, add clear bumpers so painted doors don’t stick to painted frames, and be gentle with the pulls for the first few weeks.
Common Cabinet Refinishing Mistakes
- Not degreasing, which shows up months later as peeling around the pulls.
- Leaving gloss on the old finish, especially on edges and profiles.
- Using wall paint instead of a cabinet enamel.
- No stain-blocking primer on oak, so tannins turn white paint yellow.
- Thick coats and overbrushing, which leave drips and brush marks.
- Recoating too soon or rehanging doors before the paint has hardened.
- Sanding through veneer or laminate with coarse paper.
The Tools and Products I’d Use
These are the products for the steps above, all on sale on Amazon. Specs and instructions are from the makers’ data sheets and listings.
Krud Kutter Original Cleaner Degreaser
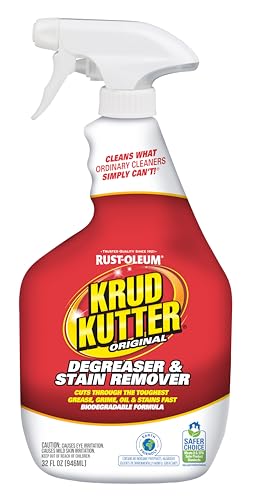
Best Degreaser for Step One
Every paint and primer data sheet in this guide starts with the same line: the surface must be free of grease. Rust-Oleum’s own cabinet paint instructions name Krud Kutter Cleaner/Degreaser for that step. It is a ready-to-use spray that breaks down grease, oil, grime and wax on washable surfaces. Spray, scrub with a non-scratch pad around the pulls, then rinse with clean water and let the doors dry before you sand.
- ✅ Named in Rust-Oleum’s cabinet paint instructions
- ✅ Ready to use, no mixing
- ✅ Cuts kitchen grease and wax
- ❌ Rinse it off before priming
Best For: The first step on every cabinet job, painted or stained.
Krud Kutter Gloss-Off Prepaint Surface Preparation

Best Liquid Deglosser
Gloss-Off is a no-rinse liquid that cleans and dulls glossy finishes so new paint bonds. Rust-Oleum’s data sheet says to wipe it on full strength with a coarse lint-free cloth and wipe it off with a clean one, and that you can paint once it is dry to the touch, usually about 10 minutes, or up to a week later. It rates the 32 oz bottle at 50 to 75 sq ft, so a kitchen usually needs three or four. Use it on the profiles and inside corners you can’t reach with a sander, not instead of sanding everywhere.
- ✅ No rinsing
- ✅ Reaches profiles and grooves
- ✅ Paint after about 10 minutes
- ❌ Covers less than you’d think: 50 to 75 sq ft a bottle
Best For: Raised-panel doors, moldings and anyone short on sanding time.
DEWALT DWE6411K 1/4 Sheet Palm Sander

Best Sander for Face Frames and Boxes
Cabinets are full of 90-degree inside corners: inside every box, where rails meet stiles, around every shaker panel. A round pad can’t reach them; the square pad of the DWE6411K can. DEWALT lists a 2.3 amp motor at 14,000 OPM, a foam pad for a flat sanding plane, a paper clamp that takes cut-down 1/4 sheets of any grit and a locking dust port for a vacuum hose. It is the editor’s choice in our best sanders for cabinets comparison.
- ✅ Square pad reaches inside corners
- ✅ Takes cheap sheet paper in any grit
- ✅ Locking vacuum port
- ❌ Slower than an orbital on big slab doors
Best For: Face frames, cabinet boxes, frame-and-panel doors.
DEWALT DWE6423K 5″ Random Orbital Sander

Best Sander for a Kitchen Full of Doors
When you are sanding 20 or 30 doors to bare wood for a restain, a random orbital does the hours. DEWALT specs the DWE6423K at 3.0 amps and 8,000 to 12,000 OPM on a 5-inch hook-and-loop pad, so you can slow it down to scuff a finish and speed it up to cut one. A separate counterweight cuts vibration over a long day, and the dust port connects straight to DEWALT extractors. Pair it with a palm sander for the corners its round pad can’t reach.
- ✅ Variable speed for scuffing or stripping
- ✅ Counterweight for long sessions
- ✅ Swirl-free on slab doors
- ❌ Round pad misses inside corners
Best For: Slab doors, drawer fronts and end panels, especially for a restain.
3M Angled Sanding Sponges, Fine Grit (6-Pack)

Best for Scuff-Sanding Profiles
A sander does the flat panels; a sponge does everything else. These 4-7/8 x 2-7/8 x 1 inch sponges have an angled edge for corners and detail work, can be used wet or dry, and wash out so one sponge lasts several doors. Fine grit is right for scuffing a sound finish before primer and for the light sand between coats, and the foam follows a shaker rail or raised-panel profile without flattening it.
- ✅ Angled edge reaches inside corners
- ✅ Washable and reusable
- ✅ Follows profiles a hard block flattens
- ❌ Too fine to strip an old finish
Best For: Shaker rails, raised panels, edges and sanding between coats.
Zinsser Cover Stain Oil-Based Primer
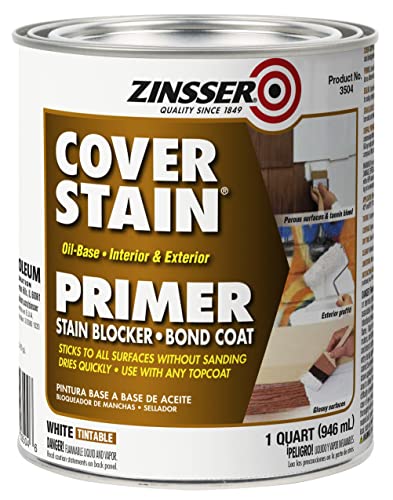
Best Primer for Glossy and Stained Cabinets
Zinsser says Cover Stain has excellent adhesion to dense, glossy surfaces such as enamel paints, varnishes, paneling and laminates without sanding or deglossing, and that it is an excellent tannin blocker, which matters on oak, where tannins can bleed through white paint. It dries to the touch in about 30 minutes and can be recoated after 1 hour, covering 400 to 450 sq ft per gallon (Zinsser data sheet CVS-03). It sands to a smooth base for the topcoat.
- ✅ Bonds to varnish and laminate
- ✅ Blocks tannin and stains
- ✅ Recoat in 1 hour
- ❌ Oil-based: strong odor, mineral spirits cleanup
Best For: Varnished oak, stained cabinets and laminate before paint.
INSL-X Cabinet Coat Urethane Acrylic Enamel
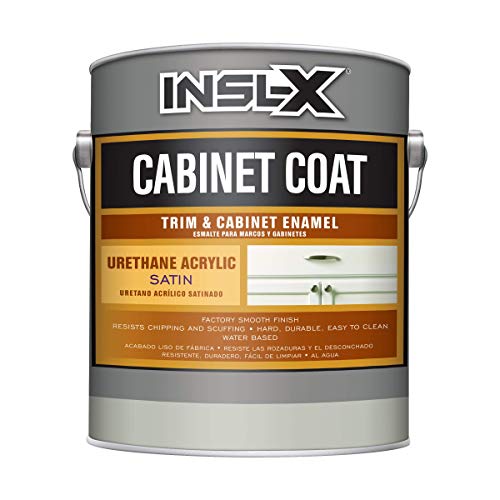
Best Cabinet Paint You Can Buy on Amazon
Made by Benjamin Moore under its INSL-X brand, Cabinet Coat is a urethane-reinforced acrylic built for cabinets. The data sheet says it resists chipping, scuffing, food stains, grease and water, covers 350 to 450 sq ft per gallon, is tack-free in 1 hour, recoats in 6 hours and reaches full cure in 14 days. Over previously painted cabinets in good condition, INSL-X says no primer is needed; bare wood gets a primer first.
- ✅ Primerless over sound paint
- ✅ Recoat in 6 hours
- ✅ Sold on Amazon in quarts and gallons
- ❌ Dries fast: overworking leaves brush marks
Best For: Repainting already painted cabinets, or a first-time cabinet painter.
Whizz Premium Foam Mini Rollers, 4″ (10-Pack)

Best Roller for Flat Cabinet Panels
A 4-inch foam mini roller lays enamel flat on slab doors, drawer fronts and the flat centers of shaker panels, which leaves a brush only the profiles and edges. These are black foam covers with a concave edge, sold in a 10-pack so you can use a fresh one for the primer and each coat. Roll a section, then lightly tip it off in one direction and leave it: cabinet enamels level as they dry, and going back over a coat that has started to set is what leaves marks.
- ✅ Smooth, stipple-free finish on flat panels
- ✅ 10 covers: a fresh one per coat
- ✅ Cheap insurance against lint
- ❌ Needs a 4″ mini frame
Best For: Slab doors, drawer fronts and cabinet sides.
General Finishes Oil Base Gel Stain (Java)

Best Stain to Darken Cabinets Without Stripping
Gel stain is heavy-bodied, so it doesn’t soak in as deeply as a liquid stain, and General Finishes says its Java color is the one featured across social media for redone furniture and cabinets. GF’s instructions allow it over a sealed surface after a scuff clean and a light sand with a 220 to 320 grit sponge, but warn that over an existing finish the dry time grows to 72 hours or more, and that you should apply no more than 2 coats. A quart covers 150 to 200 sq ft.
- ✅ Darkens without stripping
- ✅ Even color on blotchy woods
- ✅ Wipe on, wipe off
- ❌ Can only go darker
- ❌ Long dry time over an old finish
Best For: Taking oak or maple cabinets darker without sanding to bare wood.
General Finishes High Performance Water Based Topcoat

Best Clear Coat Over Stained Cabinets
Stained cabinets need a clear coat that stands up to hands and steam. GF says High Performance was voted the hardest, most durable consumer polyurethane topcoat, and lists a recoat time of 2 hours or more, light use after 7 to 10 days and a full cure in 21 days. It covers 125 to 150 sq ft per quart. GF’s own warning: don’t put a clear coat over bright white paint, because it can yellow; painted cabinets don’t need one.
- ✅ Very hard water-based poly
- ✅ Recoat in about 2 hours
- ✅ Low odor indoors
- ❌ Not for white painted cabinets
- ❌ Wait 72 hours over oil stain
Best For: Sealing restained or gel-stained wood cabinets.
How I Put This Guide Together
The cleaning, primer, recoat and cure instructions come from the makers’ own data sheets: Benjamin Moore Advance (792), INSL-X Cabinet Coat (CC-55XX), Sherwin-Williams Emerald Urethane Trim Enamel (March 2026), Rust-Oleum Cabinet Transformations Basics (CAB-11), Zinsser B-I-N (BIN-03) and Cover Stain (CVS-03), INSL-X Stix (SXA-110), Krud Kutter Gloss-Off (KRK-09) and General Finishes’ gel stain and topcoat instructions. The cost figures are from HomeGuide and HomeAdvisor’s cost guides, and the material table from HomeGuide. The sanding advice follows the same grit logic as my furniture guides. I don’t show customer ratings or prices, which change daily. More on how I choose the products I recommend.
🏆 The Verdict
Refinishing kitchen cabinets succeeds or fails before the paint can is opened. Degrease with Krud Kutter, dull every surface with 220 grit using a palm sander and sanding sponges, prime with a stain-blocking primer such as Cover Stain, and roll two thin coats of a cabinet enamel such as Cabinet Coat, waiting the full recoat time between coats. To go darker without stripping, use gel stain and a clear topcoat instead.
❓ Frequently Asked Questions
Can I refinish my kitchen cabinets myself?+
Is it cheaper to refinish cabinets or buy new ones?+
Can I just paint over my kitchen cabinets without sanding?+
Is it better to paint or restain kitchen cabinets?+
What is the difference between refinishing and resurfacing cabinets?+
How difficult is it to refinish kitchen cabinets?+
Conclusion
Learning how to refinish kitchen cabinets is mostly learning the order: label, degrease, sand dull, fill, prime, then thin coats of a real cabinet enamel with the full drying time in between. Do the backs first, give the paint days rather than hours before the doors go back up, and the finish will hold up to hands and steam for years. Before you start, price the job with the cabinet refinishing cost calculator, and if the cabinets have company, the same steps work on a dresser or table in how to refinish wood furniture.

