
As an Amazon Associate I earn from qualifying purchases. All claims are strictly my personal opinion.

How to refinish a table, in order: clean it, strip or sand off the old finish (80 grit on solid wood), sand the bare top, apron and legs through 120, 150 and 180 grit, remove every trace of dust, stain if you want a new color, and seal it with two or three thin coats of polyurethane, sanding lightly with 220 grit between coats. Sanding a table is most of the work, so the sections below cover it in detail: with an electric sander, by hand, on the legs and on veneer, and before stain.
Refinishing a table is one of the highest-value furniture DIY projects you can take on. A dining table or coffee table that looks worn out, dated, or damaged can be transformed completely, and the cost is a fraction of buying a replacement piece of similar quality. The key is understanding the full process from start to finish before you begin, because the decisions you make early (particularly around stripping, grit selection, and finish type) determine everything that follows.
⚡ Key Takeaways
- Table refinishing follows a grit sequence that can’t be skipped: 80 to cut through the old finish, then 120, 150 and 180 on the bare wood. Each grit only has to remove the scratches of the one before it.
- Dust removal between sanding stages and before applying finish is critical; any trapped dust creates a permanently gritty texture under the final coat that no additional coats can fix.
- Before stain, stop at 150 to 180 grit on oak and maple: General Finishes notes that sanding finer makes the wood take stain lighter and less evenly.
- For a dining table in daily use, oil-based polyurethane in thin coats, sanded lightly with 220 grit between them, is the most durable common choice.
- Veneer and laminate need different handling: veneer is stripped first and sanded lightly from 150 grit, laminate is only scuffed and then primed with a bonding primer.
This guide covers the complete refinishing process for all table types (solid wood, veneer, laminate) along with the sanding techniques, tool choices, and finishing tips that separate a professional result from a frustrating one. In the tables I’ve refinished, the difference between a mediocre outcome and a stunning one almost always comes down to patience with the grit sequence and obsessive attention to dust removal.
💡 Pro Tip
Before you start, identify what you’re working with. Is the table solid wood, veneer, laminate, or another material? This determines your starting grit and how aggressively you can sand. Solid wood tolerates a full grit sequence from 80 upwards. Veneer, a thin decorative layer over MDF or plywood, can be sanded through if you use coarse grit or heavy pressure, so it’s stripped first and sanded lightly from 150 grit. Laminate (Formica-type surfaces) cannot be sanded to bare material the way wood can.
How to Refinish a Table: The 9-Step Process
Here’s the full refinishing workflow laid out end-to-end, so you can see exactly where each decision fits and what to expect at each stage. I’ve found that understanding the whole sequence upfront makes the work feel less overwhelming and helps you avoid costly mistakes.
Step 1: Gather Equipment and Assess the Table
Before buying anything, spend time understanding what you’re working with. A random orbital sander is your workhorse for the main surface: it handles flat areas efficiently and the orbital motion minimizes directional scratch marks. For corners, edges, and the table apron, a palm sander offers more precise control. You’ll also need sandpaper from 80 to 220 grit, a vacuum and a tack cloth for dust removal, and whatever finish you’ve chosen (stain, paint, or varnish). If the top has dents or gouges, add wood filler for dents and gouges to the list.
Step 2: Strip the Old Finish with 80-Grit Sandpaper
Attach 80-grit paper to your orbital sander and make a full pass across the entire table surface to remove the old finish, scratches, and any surface damage. Keep the sander moving constantly in the direction of the wood grain: pausing in one spot creates low spots and uneven wear. Apply only light pressure; the sander does the work. Work in overlapping sections to ensure consistent coverage across the full surface.
At this stage, you’re removing the top layer entirely. Don’t worry about perfection; the 80-grit pass is aggressive by design. You’ll refine it in the next stages. If the table has thick paint or several layers of varnish, it is faster to strip the old finish first with a chemical stripper and sand afterward.
⚠️ Important
Never skip grit levels. Jumping from 80-grit straight to 180 or 220 doesn’t save time: it wastes it. The 80-grit leaves scratches that are too deep for a fine grit to remove efficiently. Work through each stage in sequence: 80, 120, 150, then 180. Each stage removes the scratch pattern of the one before it, and General Finishes puts it plainly: skipping a grit leaves deep valleys that the finer grits are hard-pressed to remove.
Step 3: Smooth with Medium Grit (120-Grit)
Switch to 120-grit and make a second full pass across the surface. This removes the coarse scratch pattern left by the 80-grit and continues leveling any remaining imperfections. At the end of this pass, the surface should have no visible old finish, no major scratches, and should feel noticeably smoother than after the 80-grit stage.
If rough areas or old finish patches remain, repeat the 120-grit pass before moving on. Don’t rush this stage: it’s the bridge between aggressive removal and fine finishing.
Step 4: Final Sanding Passes (150, Then 180 Grit)
The last passes remove the 120-grit scratch pattern and bring the surface to the smooth, consistent texture that takes stain and finish evenly. Go to 150, then 180. If you’ll use only a clear finish, you can take it on to 220; if you’ll stain, stop at 180 (or 150 on oak and maple with an oil-based stain), because finer sanding closes the surface and the stain comes out lighter. Sand with the grain and use light pressure throughout. By the end, the surface should feel uniformly smooth under your palm with no rough patches.
Step 5: Sand Corners and Hard-to-Reach Areas
The main orbital sander can’t reach corners, the table apron, or any carved details. Use a palm sander or hand-sanding with folded sandpaper for these areas. Match the grit to wherever you are in the sequence: if you’ve reached 180-grit on the main surface, use 180-grit for the detail work too. Consistent grit across the whole table ensures stain absorbs evenly everywhere and avoids the blotchy look that results from uneven sanding. The legs and apron get their own section below.
Take your time here. These details catch the eye first, and visible inconsistencies ruin an otherwise professional finish.
Step 6: Clean Thoroughly Before Finishing
This step is more important than it seems. Any dust left on the surface will be trapped under the finish, creating a permanently gritty texture that no amount of additional coats will fix. Vacuum the dust out of the grain, corners and crevices with a brush attachment, then follow with a tack cloth wipe across the entire surface. The surface should be completely clean and dust-free before any finish goes on. Compressed air works too, but it blows the dust around the room and back onto the top, so do it outdoors.
Step 7: Apply the First Coat of Finish
Load a brush moderately (not dripping, but confidently loaded) and apply the first coat in long strokes following the grain direction. Work in one section at a time and keep a wet edge to avoid visible joins. Don’t go back over sections that have started to set; double-brushing creates lap marks in most stains and varnishes. If you’re staining, the stain goes on first and is wiped off, as described in the staining section below; the clear coat goes over it once it’s dry.
💡 Pro Tip
Stain and varnish behave very differently and need different application techniques. A penetrating stain is applied generously, left for the time on the can, then wiped off completely; stain left to dry on the surface creates a blotchy, sticky result. A film finish (varnish, lacquer, polyurethane) goes on in thin coats, each one dry before the next: thin coats dry evenly and build properly, thick coats sag, bubble, and take far longer to cure.
Step 8: Apply Additional Coats
Allow the first coat to dry for the time on the label, then lightly sand with 220-grit to knock down any raised grain, dust nibs or minor brush marks before applying the next coat. Minwax’s directions for its Fast-Drying Polyurethane are exactly that: let it dry 4 to 6 hours, sand the entire surface lightly with 220 grit, remove the dust and apply the next coat. Wipe with a fresh tack cloth after this light sanding before the next coat goes on. My guide to sanding between coats of polyurethane covers when, what grit and how.
Minwax lists two coats as the norm for its polyurethane and recommends three for maximum durability on floors; a dining table top that’s used every day deserves the third coat too. Stain is different: you don’t build it in coats like a clear finish, and you don’t sand between coats of stain.
Step 9: Final Inspection and Cure
Once the final coat is dry, inspect the table under raking light at a shallow angle. This reveals any runs, brush marks, missed areas, or uneven sheen. Minor issues can be addressed with a very light 320 to 400 grit pass followed by a final thin top coat.
Then give the finish time. Minwax says to allow 24 hours after the final coat of its Fast-Drying Polyurethane before light use, and dry for light use is not fully cured: the finish keeps hardening for days after it feels dry. Keep hot dishes, heavy objects and wet glasses off the top for the first week if you can, and use coasters and a cloth under anything that might scratch.
How to Sand a Table
I’ve refinished dozens of tables over the years, and the sanding is where a table is won or lost: the finish only shows what the sanding left behind. Five minutes of assessment before you pick up the sander saves hours later. Check for nails or staples sitting proud of the surface (they’ll tear sandpaper and score the wood), loose joints that need regluing, and dents that need filling. And clean the table first: grease, wax and polish load sandpaper quickly, and a wipe with mineral spirits removes old wax before it smears into the wood.
| Part of the table | Tool | Grits |
|---|---|---|
| Solid wood top, old finish on | Random orbital sander | 80, 120, 150, 180 |
| Top already stripped | Random orbital sander | 120, 150, 180 |
| Veneer top | Stripper, then sander at low speed or by hand | 150, 180 |
| Square legs and apron | Palm or detail sander | Same as the top |
| Turned legs and carvings | Contour scraper, sanding sponge, strips of paper | 120, 150, 180 |
How to Sand a Table With an Electric Sander
A 5-inch random orbital sander is the right electric sander for a tabletop: fast, flat and with no cross-grain scratches. Switch it on with the pad already flat on the wood, move it slowly in overlapping passes along the grain, and let its own weight do the work. Pressing down slows the pad’s random action and leaves swirls; tilting it to dig out a stubborn spot leaves a dish that shows under any finish. Keep it moving at the edges too, where the pad overhangs and can round them over.
Sanding a table generates a substantial amount of fine dust that travels further than you’d expect. Work outside or in a garage with the door open, and a coffee table or side table is far easier to sand at waist height on a portable workbench. A shop vacuum connected to the sander’s dust port captures most of the dust at the source. Between grits, vacuum the top and wipe it: grit left behind from a coarser paper gets dragged around by the next one and cuts fresh scratches. If you’re choosing a sander, my best random orbital sanders list compares the models.
How to Sand a Table by Hand
Yes, you can sand a table by hand. It’s slow on a stripped dining top but perfectly practical on a small side table, on a top that only needs a scuff before a new coat, and on all the parts a sander can’t reach. Wrap the paper around a flat sanding block for the top, always sand with the grain (circles by hand leave swirl marks that show through stain), and use long strokes that run the full length of the board. Mark the surface with light pencil squiggles before each grit; when they’re gone, you’ve sanded the whole surface at that grit. The best sanding blocks and sponges are worth the few dollars over a bare sheet in your hand.
How to Sand Table Legs and Aprons
Square legs and aprons are flat surfaces in small pieces: a palm sander or a detail sander handles them, at the same grits as the top so they take stain the same. Turned legs are another job. Strip them first, scrape the finish out of the coves with a contour scraper, then sand with a sanding sponge or with strips of cloth-backed paper pulled back and forth around the leg like a shoe-shine cloth. Turn the table upside down on a blanket to work on the legs: you’ll reach every face and avoid sanding dust settling on a finished top.
How to Sand a Veneer Table Top
Check first: look at the underside or the inside edge of the top. Solid wood shows the same grain all the way through; veneer shows a thin line of face wood over a different core, often MDF or plywood. Veneer is thin enough to sand through quickly, and once you’re through to the core, the top can’t be stained to match. So strip the old finish instead of sanding it off, then sand with very light pressure from 150 grit, by hand or with the sander at its lowest speed, and keep the pad flat and off the edges, where the veneer goes through first. If you see the color or texture change under the paper, stop: you’re reaching the core. The finishing process afterward is the same as for solid wood.
ℹ️ Did You Know?
Some veneer tables have thick veneer that tolerates more sanding, while others are paper-thin. If you’re unsure, test a small inconspicuous corner first to gauge how much material you can remove without breaking through. Many veneer disasters could be prevented by a 30-second test pass.
How to Sand and Stain a Table
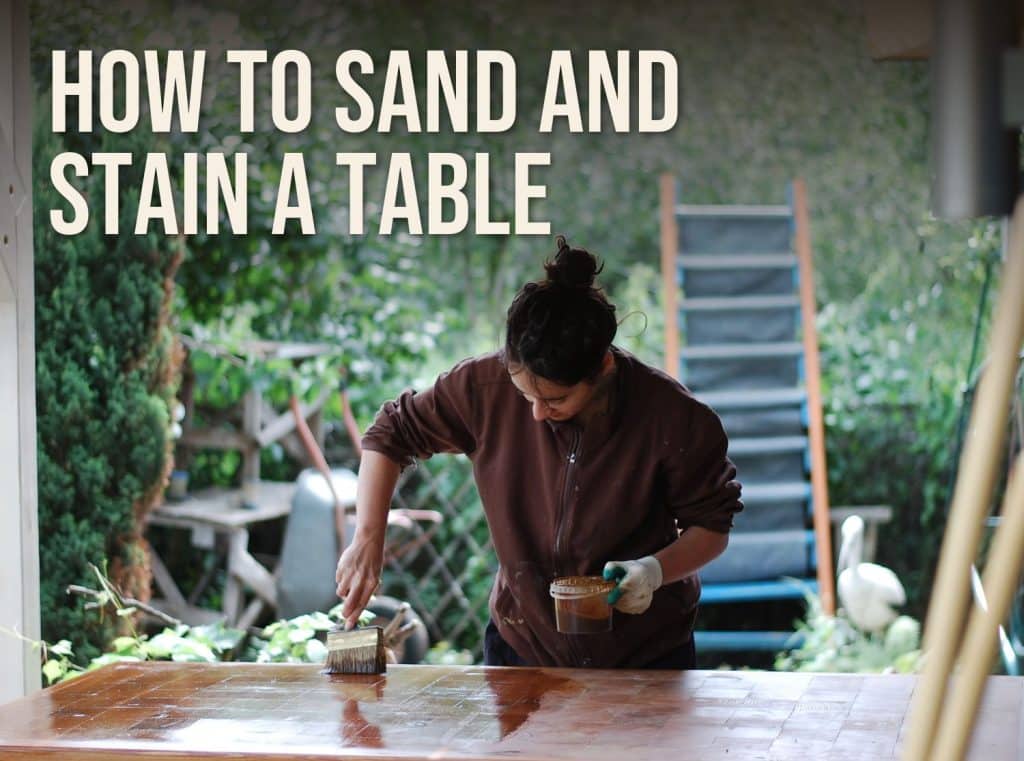
Stain shows every sanding mistake, so sanding a table to stain it is about an even scratch pattern more than a fine one. The stain makers are specific about the steps, and following them is what separates an even color from a blotchy one.
The Last Grit Before Stain
General Finishes recommends starting raw wood at 120 and finishing no finer than 180 on hardwoods like oak and maple with a water-based stain, and no finer than 150 with an oil-based stain; on softwoods like pine, finish at 180 for oil-based and 220 for water-based. Sanding finer than that burnishes the surface and the stain comes out lighter and patchier. Sand the whole table to the same last grit, legs included: a patch left coarser soaks up more stain and shows darker. The full table by species is in my guide on how to stain wood.
Conditioner on Pine, Maple and Birch
Soft and porous woods absorb stain unevenly. Minwax recommends its Pre-Stain Wood Conditioner for pine, fir, alder, aspen, birch and maple: brush it on, let it penetrate for 5 to 15 minutes, wipe off the excess, and apply an oil-based stain within 2 hours. On an oak or walnut table you can usually skip it.
Test the Color, Then Wipe On and Wipe Off
Test on the underside of the top or the inside of the apron, which has the same wood and the same sanding as the visible parts. Apply the stain with a rag or brush, leave it for the time on the can (the longer, the darker), and wipe off all the excess with the grain. Minwax’s directions for its Wood Finish stain are clear on the next point: to go darker, apply another coat, and do not sand between coats of stain.
From Stain to Clear Coat
Stain colors the wood but doesn’t protect it, so a table always needs a clear topcoat. Let the stain dry completely (Minwax Wood Finish lists 2 to 3 hours, longer in cool or humid weather), then brush or wipe on the first coat of polyurethane without sanding the stain. Sand lightly with 220 grit only once that first clear coat is dry, as in Step 8 above, so you’re smoothing the finish and not cutting through the color.
Refinishing a Laminate Table
You cannot sand laminate (Formica, melamine) to bare material the way you can with wood, and there’s no wood to stain, so refinishing a laminate table means painting it. Clean it thoroughly with a detergent to remove grease, let it dry, then lightly scuff the surface with 220-grit sandpaper to dull the sheen. Benjamin Moore’s table-painting guide calls for a bonding primer, its INSL-X STIX, on wood or laminate tables, for its bonding properties, which it says matter most when painting over an existing finish. Allow it to dry fully, then apply your paint in thin coats. Without a bonding primer, paint on laminate peels easily.
The paint is what shows in the end; the primer is the critical invisible layer that makes adhesion possible. The same sanding and priming rules apply to wood furniture you plan to paint, and they’re covered in how to sand furniture before painting.
Choosing the Right Tool for Your Project
The tool that suits your project depends on the table size, the condition of the existing finish, and your comfort with power tools. Here’s how I decide:
Random Orbital Sander
Best for: Most table refinishing projects, especially larger flat surfaces and tables in decent structural condition. The orbital motion minimizes directional scratch marks and the round pad handles flat surfaces efficiently. Suitable for every grit stage. This is the tool I reach for nine times out of ten.
Palm Sander
Best for: Precision work around edges, corners, table aprons, and carved details. Slower for large flat areas but offers more control in confined spots. I use this as a companion tool: the orbital sander handles the main surface, and the palm sander finishes the perimeter and details. The best palm sanders list has the square-pad models that reach into corners.
Belt Sander
Best for: Heavily damaged or thick-finish tables where you need fast material removal. Only recommended if you have experience with one: belt sanders remove material very quickly and can create uneven surfaces or ripples if not kept moving constantly. Most home refinishers are better served by a random orbital and extra patience.
Which Finish for a Dining Table?
The finish you choose (stain, paint, or clear varnish) depends on whether you want to reveal the wood color (stain) or cover it (paint), and how much protection you need. For a dining table in regular use, oil-based polyurethane applied in thin coats is the most durable common choice. Minwax describes its oil-based polyurethane as one of the most durable coatings for wood, protecting against scratches and spills.
The downsides: it takes longer to dry between coats than a water-based finish (4 to 6 hours on Minwax’s Fast-Drying formula) and it has an amber tone that warms the wood color and yellows over light colors. If you prefer a clear, natural look, water-based polyurethane stays clearer and dries faster. Penetrating oils (tung, Danish) look beautiful but need more frequent reapplication and offer less protection against water rings and heat marks: better suited to occasional-use tables and coffee tables than a daily dining table.
Refinishing a dresser, chairs or a whole set rather than one table? My guide on how to refinish wood furniture covers stripping versus sanding and the right sander for each kind of piece.
❓ Frequently Asked Questions
What’s the best way to sand a table?+
Can I sand a table by hand?+
What is the golden rule of sanding?+
Can you refinish just the top of a table?+
Can I refinish a wood table without stripping it?+
Can I sand already stained wood?+
How long should you wait to sand after staining wood?+
How do I sand and varnish a table for beginners?+
How do I know when a table is sanded enough before finishing?+
Can I change the color of the table completely, or must I match the original?+
✨ The Bottom Line
A refinished table looks better than a replacement because you know exactly what the piece is and what it’s been through: that history is worth preserving. The difference between a mediocre finish and a professional one comes down to three non-negotiable steps: never skip grit levels (80, 120, 150, 180), obsess over dust removal between stages and before finishing, and apply thin coats rather than thick ones. Follow that formula, stay patient, and you’ll end up with a piece that looks genuinely professional and lasts for years. The hardest part isn’t the sanding: it’s resisting the urge to rush the drying and cure time at the end.
Conclusion
Refinishing a table is entirely doable as a weekend project, even your first time. The process has no hidden tricks: it’s methodical, repetitive, and forgiving once you understand the grit sequence and why dust matters. I’ve seen people nervous about their first refinish produce results indistinguishable from professional work, simply because they were willing to work through each grit stage and take the extra 20 minutes to clean properly before applying finish.
Start by assessing your table honestly. Is it solid wood, veneer, or laminate? That one decision shapes everything that follows. Then gather your tools, follow the nine steps in order, and give yourself extra time on the dust-removal stage: that step separates a frustrating result from a beautiful one. If it’s your first project, pick a piece you like but aren’t emotionally attached to, so there’s less pressure while you learn the feel of the sander and the rhythm of moving between grits.
I’ve tackled tables from every era and finish type, and the method above works on all of them. If you have a table sitting in a corner that’s been bothering you, take a photo, write down the current condition (color, finish type, any damage), and commit to starting this weekend. You’ll be surprised how quickly it transforms, and you’ll have learned a skill that carries over to every furniture or woodworking project you take on next.
