
As an Amazon Associate I earn from qualifying purchases. All claims are strictly my personal opinion.

Yes, you can sand epoxy resin, but only once it has fully cured. To sand epoxy resin, wash off any waxy amine blush with water, level drips and high spots with 80-120 grit, smooth the whole surface with 220-320, then wet sand with silicon carbide paper through 400, 600, 800, 1000, 1500, 2000 and 3000 grit. A rubbing compound and a finishing polish bring back full clarity.
Epoxy resin produces stunning results (river tables, coasters, tumblers, countertops, art pieces) but the casting process almost always leaves the surface in need of finishing. Bubbles, drips, uneven texture, and the glossy-but-imperfect surface straight out of the mould all need sanding to reach a truly professional finish. Done correctly, sanding epoxy takes a cloudy, rough, or marred surface to something clear, smooth, and polish-ready.
The process is different enough from sanding drywall or sanding bare wood that it’s worth understanding before you start. Cured epoxy is a hard plastic that softens with heat, it clogs ordinary sandpaper quickly, and the dust needs proper protection. I’ve walked through this countless times, and this guide covers what actually matters: the grit sequence, wet sanding, using an orbital sander, coasters, tumblers, river tables and edges, and polishing back to clear. The cure, hardness and grit figures come from the resin makers’ own datasheets and guides (WEST SYSTEM, TotalBoat, ArtResin and Promise Epoxy).
⚡ Quick Answer
Best sandpaper for epoxy: silicon carbide wet/dry sheets, 120 to 3000 grit, the whole sequence in one pack.
Best for curves and the last grits: Micro-Mesh foam-backed pads, 1500 to 12000.
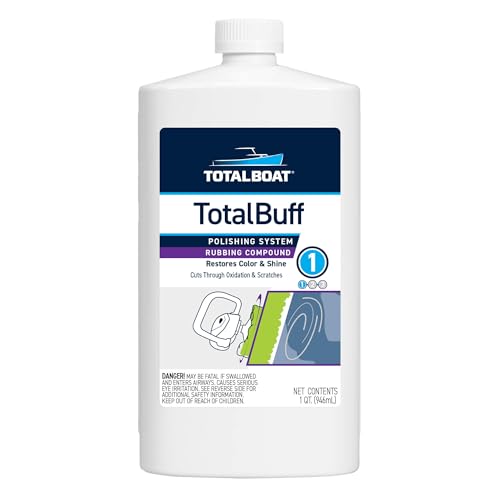
Best compound after sanding: TotalBoat TotalBuff, the rubbing compound TotalBoat names for epoxy.
Always: nitrile gloves and a dust mask or respirator.
⚠️ Safety First
TotalBoat’s TableTop Epoxy datasheet warns that its resin and hardener “may cause skin and respiratory allergic reactions”, and ArtResin tells its customers to wear at least an N95 dust mask when sanding. Wear nitrile gloves and eye protection, sand wet whenever you can so the dust ends up in the water, and never sand epoxy that is still soft or tacky: uncured resin smears, clogs the paper, and puts unreacted material on your skin.
Can You Sand Epoxy?
Yes. Every resin maker treats sanding as a normal step. WEST SYSTEM says its 105 epoxy “can be sanded and shaped when cured”; TotalBoat calls sanding “the foundation of polishing epoxy resin”; ArtResin goes further and says that if you plan to pour another coat over cured resin, you have to sand first, whether it cured “yesterday or a year ago”. What you can’t do is sand it early, and that’s where most bad results start.
How Long Before You Can Sand Epoxy?
Go by your product’s datasheet, not by touch. Promise Epoxy gives roughly 24-72 hours for a tabletop coat and 48-72+ hours for a deep pour, and says even its fast-cure resin should wait a full 24 hours before sanding. TotalBoat notes that a full cure “usually takes 5 to 7 days, depending on the formula”, which matters if you plan to put a varnish or clear coat over it. Cold rooms slow every one of these numbers down.
The test for readiness: press your fingernail firmly into the epoxy in an inconspicuous spot. If it leaves an indent, give it more time. Fully cured epoxy feels hard and rigid, with no give and no tackiness anywhere.
Is Epoxy Harder or Softer Than Wood?
Both answers get repeated, so here is what the datasheets actually say. Cured epoxy is hard: TotalBoat lists Shore D 82 for TableTop Epoxy and WEST SYSTEM lists Shore D 83 for 105/205, both by ASTM D2240. But the same sheets give a heat deflection temperature of only about 118 °F (48 °C) for a room-temperature cure, and sanding friction gets a surface there quickly. Once warm, epoxy smears instead of cutting. That’s why TotalBoat warns that “epoxy softens with heat” and why Promise Epoxy describes it as “softer than wood, so lower grits cut fast”: coarse paper removes cured resin quickly. Wood hardness is measured on a different scale (Janka), so there’s no direct comparison. On a river table, don’t assume which side will dip; sand both on a flat backing and check with a straightedge.
Step 1: Clean the Surface and Remove Amine Blush
Many epoxies leave a thin, waxy film called amine blush as they cure, especially in cool, damp air. WEST SYSTEM’s surface-prep instructions are simple: wash the surface with a Scotch-Brite pad and clean water, then dry it with paper towels before the dissolved blush dries back on. Blush clogs sandpaper fast, so this step saves paper as well as time. WEST SYSTEM adds a useful check: rinse water should sheet evenly across the surface; if it beads up, something is still contaminating it.
Step 2: Choose the Right Sandpaper for Epoxy
Standard aluminium oxide woodworking paper isn’t waterproof, so it falls apart once you start wet sanding, and it loads up quickly on resin. The better choices:
- Silicon carbide wet/dry sandpaper: the best all-round sandpaper for epoxy. It holds up to water, cuts resin cleanly, and comes in the fine grits (800-3000) you need for polishing. I use this for the entire process.
- Foam-backed abrasive pads: flex to follow curves (tumblers, rounded river table edges) without creating flat spots, and are the easiest way to reach the very fine grits.
- A firm sanding block: keeps flat tops flat. Paper held in your fingers follows every ripple instead of levelling it. My sanding blocks and sponges guide covers the options.
A 24-piece silicon carbide assortment covering 120 to 3000 grit gives you every step without buying sheets one grit at a time.
Step 3: What Grit Sandpaper for Epoxy Resin?
The grit sequence depends on how much correction the surface needs. Here’s the breakdown I’ve refined across dozens of projects, checked against what the resin makers publish:
| Grit | Stage | Wet or dry | What the surface should look like |
|---|---|---|---|
| 80-120 | Heavy correction: drips, runs, sags, high spots | Dry or wet | Flat, coarse, deeply scratched |
| 150-180 | Transition | Dry or wet | 80-grit scratches gone |
| 220-320 | Main smoothing; also the scuff before a recoat | Dry or wet | Even, uniform matte |
| 400-600 | Pre-polish smoothing | Wet | Satin, first hint of sheen |
| 800-1000 | Fine finishing | Wet | Increasingly see-through |
| 1500-2000 | Pre-polish | Wet | Almost clear, fine uniform haze |
| 3000 + compound | Final clarity | Wet, then polish | Full gloss |
The makers agree on the shape of it. WEST SYSTEM starts runs and sags at 80 grit; TotalBoat’s TableTop datasheet says to scuff with 220-320 between coats; TotalBoat’s polishing guide runs 400 or 600, 800, 1000, 1500, 2000 and 3000 before compound; and Promise Epoxy’s rule is never to jump more than one grit step, because skipped steps trap deeper scratches under finer ones. Start with the coarsest grit the surface actually needs, not with 80 by default. The grit scales themselves are in my sandpaper grit chart.
What Grit to Sand Epoxy Between Coats
If the first coat is still within its recoat window, many tabletop resins need no sanding at all: TotalBoat says TableTop can usually be recoated in 4-8 hours without prep, and ArtResin says to pour the next coat while the first is still tacky. Once it has cured past that point, scuff the whole surface with 220-320 grit (ArtResin is happy with 80-120 under a flood coat), then wipe the dust off with acetone or denatured alcohol, as TotalBoat’s datasheet specifies, and let it dry before you pour.
Step 4: Wet Sanding Epoxy Resin
Switch to wet sanding by 400 grit at the latest. Water carries away the heat that makes epoxy gum up, stops the paper loading, keeps resin dust out of the air, and leaves a finer scratch pattern. TotalBoat’s method is a spray bottle of clean water with a drop of dish soap: mist the surface and the paper, sand, and re-wet whenever the paper starts to drag.
- Use a block on flat surfaces and soft pads on curves.
- Rinse often. Loose grit and resin slurry scratch the surface you just refined.
- Dry a spot to check. A wet surface hides scratches; wipe it dry before you move up a grit.
- Change the water rather than reusing slurry from coarser grits.
⚠️ Heat Is the Enemy
With a heat deflection temperature around 118 °F on the datasheets above, epoxy doesn’t need much friction to soften. Signs you’re overheating it: the paper clogs with gummy resin, the surface looks smeared rather than scratched, and thin pieces start to flex. Keep the sander moving, use moderate pressure, and let the surface cool between passes.
Can You Sand Epoxy With an Orbital Sander?
Yes, and on large flat work like river tables and countertops it saves hours. A random orbital sander is the right machine for the levelling grits (80-320); its random pattern doesn’t leave the swirl a plain rotary tool does. Rules for resin:
- Use variable speed and keep it low to medium. Speed is heat. A model with a speed dial, like the Bosch ROS20VSC, makes this easy.
- Let the pad sit flat and keep it moving; tilting it digs an edge into the resin.
- Hook up a vacuum. Dry resin dust is fine and drifts; dust extraction keeps it off you and off the surface.
- Go to hand sanding (or a soft interface pad) for the wet fine grits. Water and an ordinary corded sander don’t mix.
I wouldn’t put a belt sander on epoxy: it removes material fast, builds heat quickly and is easy to gouge with on a flat top. For the machine itself, see my best random orbital sanders, and for discs, the best sanding discs for random orbital sanders.
Sanding Specific Epoxy Projects
Different project types present unique challenges. Here’s how I approach each one:

Epoxy Coasters
Coasters are small and easy to handle, but their size makes it easy to over-sand one area while neglecting another. Start at 120 or 150 (coasters rarely need an 80-grit pass), lay the paper flat on a block or on the bench and move the coaster over it, which keeps the face flat. Keep it wet from 400 grit onwards and check often: at this scale the change from matte to clear happens quickly. Rinse with soap and water after the final polish.
Epoxy Tumblers
Tumblers present a curved surface that flat sandpaper can’t follow. Use foam-backed pads or wrap flexible paper around the tumbler, working along the length rather than around the circumference so you don’t cut ring-shaped scratches. Start at 80 grit only where there are drips or runs, then work through the sequence. Wet sanding a cylinder is awkward: work over a basin with a wet cloth rather than a spray bottle. After 2000-grit, compound applied while the tumbler turns on a cup turner gives the most even polish.
Epoxy River Tables
River tables combine wood and epoxy sanded to the same plane, and the two don’t behave alike. Resin gums up when warm and the wood’s soft earlywood can dish, so the risk runs both ways (see harder or softer than wood above). Start at 80 grit with the orbital sander moving evenly across both materials, and check often with a straightedge that you’re not creating a low spot on either side of the channel. A long sanding block used across the full width helps keep one plane. Wet sanding is for the resin; keep water off bare wood, or let the wood dry fully before finishing it.
Epoxy Edges
Edges need to be smooth without being rounded off or chipped. Wrap a small piece of 80-grit around a block or dowel and work along the edge rather than across it, with light, consistent strokes and a constant angle. Progress through the grits as normal. For inside corners and complex profiles, a small file followed by paper wrapped around a matching profile gives the most control. Finish edges wet and polish them: edges catch light more directly than flat surfaces, so leftover scratches show.
How to Know When You’ve Sanded Enough
At each grit, wipe the surface clean and inspect it. You’re looking for one uniform scratch pattern: every scratch from the previous grit should be gone, replaced by the finer pattern of the current one. If you can still see deeper scratches, stay at the current grit. Check under a raking side light as well as overhead light; deep scratches that vanish from above show up clearly when the light skims the surface.
How to Make Epoxy Resin Shine After Sanding
Sanding to 3000 grit leaves a fine, even haze. Three ways to turn it back to gloss, all from the resin makers:
- Compound and polish. TotalBoat’s method is its TotalBuff rubbing compound followed by TotalShine finishing compound, using a variable-speed drill or polisher with foam pads; small pieces can be done by hand with a microfibre cloth. Keep the polisher moving for the same heat reason as the sander.
- A thin flood coat. ArtResin’s shortcut: brush on a very thin layer of resin over the sanded surface. It skips the polishing but means another full cure.
- A clear topcoat. ArtResin also suggests a water-based polyurethane for a gloss finish; wait for full cure before coating.
Before any of these, rinse the slurry off with clean water and let the piece dry completely.
The Best Sandpaper and Supplies for Epoxy
CooBigo 24 PCS Wet Dry Sandpaper, 120-3000 Grit

Best Sandpaper for Epoxy
Every grit in the sequence above in one pack: two sheets each of 12 grits, 120, 150, 180, 240, 320, 400, 600, 800, 1000, 1500, 2500 and 3000, in silicon carbide for wet or dry use. The 9″ x 3.6″ sheets cut down for coasters and edges, and the grit is printed on the back. Two sheets per grit runs out quickly on a full river table; for big pieces, buy extra of the grits you lean on most.
- ✅ Coarse to pre-polish in one pack
- ✅ Waterproof for wet sanding
- ❌ No 80 grit for heavy drips
- ❌ Only two sheets per grit
Best For: Coasters, trays, art pieces and anyone starting out.
Micro-Mesh Soft Touch Sanding Pads

Best for Curves and the Final Grits
Nine 2″ x 2″ foam-backed pads in 1500, 1800, 2400, 3200, 3600, 4000, 6000, 8000 and 12000, colour-coded so you don’t mix them up. Micro-Mesh lists them for resin, acrylics and solid-surface materials. The foam backing follows tumblers and rounded edges where a sheet would leave flat spots, and the range continues past 3000 for a near-polished surface before compound.
- ✅ Follows curves without flat spots
- ✅ Goes all the way to 12000
- ❌ Small pads, slow on a table top
Best For: Tumblers, jewellery, edges and the last polishing grits.
TotalBoat TotalBuff Rubbing Compound
Best Compound After Sanding
The rubbing compound TotalBoat itself names in its epoxy polishing guide. TotalBoat rates it to remove 600/800-grit wet sanding scratches, it can be worked by hand or with a variable-speed buffer, and it’s step one of a three-step system followed by TotalShine finishing compound. Sold by the quart, which is plenty for several table tops.
- ✅ Made by an epoxy maker, for this job
- ✅ Hand or machine application
- ❌ Needs a finishing polish for full gloss
Best For: Bringing table tops and bar tops back to clear after sanding.
Inspire Black Nitrile Disposable Gloves

Best Gloves for Epoxy Work
Resin makers ask for gloves at every stage, and sanding is when slurry gets everywhere. These are powder-free, latex-free nitrile exam gloves with textured fingertips, so your grip on a wet block holds, in boxes of 100 and sizes up to XXL. Change them when they tear or when you move from sanding to handling the finished piece.
- ✅ Latex-free, textured grip
- ✅ Box of 100
- ❌ Disposable; not for solvents all day
Best For: Every resin job, from mixing to the final rinse.
For dry sanding sessions on large pieces, add a half-face respirator with P100 filters; my best respirators for sanding covers the ones that fit well with safety glasses.
✨ The Bottom Line
Sanding epoxy resin rewards patience more than force. Let it cure, wash off the blush, start at the coarsest grit the surface actually needs, and never skip more than one step. Keep it cool with water from 400 grit on, use the orbital sander only for the levelling grits, and finish with compound. That’s the entire formula.
Frequently Asked Questions
What type of sandpaper should you use on epoxy resin?+
How long until epoxy can be sanded?+
Can I sand epoxy resin with an orbital sander?+
How do you smooth out epoxy?+
How do you make epoxy resin shine after sanding?+
Is epoxy harder than wood?+
Conclusion
Epoxy sanding rewards patience through the grit sequence. The moment a cloudy, scratched surface suddenly clarifies and turns glassy under the fine grits is genuinely satisfying. I’ve walked hundreds of these projects, and the outcome is always the same: follow the full sequence without skipping, keep the safety gear on, and wet sand from 400 grit onwards.
Your next step is to confirm your epoxy is fully cured (use the fingernail test), wash it, then gather silicon carbide paper covering 120-3000 grit. Start with the coarsest grit your surface actually needs, work through each stage methodically, and don’t rush the polishing stage: that’s where the magic happens. If you run into a problem surface, the comment section below is open.
