
As an Amazon Associate I earn from qualifying purchases. All claims are strictly my personal opinion.

To sand wood, start with the finest grit that removes the worst marks (usually 80 or 120), sand with the grain, and move up one grit at a time to 150-180 before stain or paint, or up to 220 before a clear finish. Vacuum the dust between every grit, and finish by hand along the grain. That’s the whole method in two sentences; the rest of this guide is the detail that makes it work on a real board, a tabletop, a floor or a deck.
Sanding separates woodworking projects that look professional from those that look homemade. A beautiful joint and clean cuts mean nothing if the final surface is rough, blotchy with stain, or covered in swirl marks that glow under a finish. Sanding and sandpaper is a big subject, big enough that there are entire books devoted to it, and big enough to get me to turn it into my profession. Grit sequence, grain direction, dust removal, grain-raising, the difference between machine and hand sanding at different stages: these details determine your result. I’ve learned through years of woodworking that getting these fundamentals right transforms the final quality, and below are the tips and tricks I’ve gathered over the years, with links to the detailed guide for each kind of project.
⚡ Key Takeaways
- Start at 80 grit on rough or finished wood and at 120 on new, smooth lumber. Finish at 150-180 before stain or paint, and up to 220 before a clear finish.
- Always finish with the grain. Cross-grain scratches light up under stain, however fine the last grit.
- Move up one grit at a time, and vacuum or wipe the surface every time you change grit.
- Use a random orbital sander on flat surfaces, a sheet or detail sander in corners, and a block or sponge by hand on profiles, curves and the last pass.
- Between coats of finish, sand lightly by hand with 320 grit, not 220.
How to Sand Wood in 7 Steps
- Pick a starting grit: 80 on rough, weathered or finished wood, 120 on new, smooth lumber.
- Set up: clamp the piece to a solid workbench, hook the sander to a vacuum and put on a dust mask.
- Sand the whole surface at the first grit, with the grain, keeping the sander flat and moving.
- Vacuum the dust and wipe the surface before every change of grit.
- Move up one grit at a time: 80, 120, 150, 180, and 220 only under a clear finish.
- Hand-sand the last pass along the grain with a block, and sand edges, profiles and corners by hand or with a detail sander.
- Check your work with a light held low or a wipe of mineral spirits, fix what shows, and clean off the dust before finishing.
What You Need to Sand Wood
Two decisions matter: the sandpaper and the tool that holds it. A solid bench and a vacuum make the rest easier.
Sandpaper
For bare wood, use aluminum oxide paper: it’s the standard on sheets and sander discs, and it cuts wood well from 60 to 220. Buy at least three grits (80 or 120, 150 and 180), and 220 if you’ll use a clear finish. Hook-and-loop discs for an orbital sander must have holes that line up with the pad. My picks are in the best sandpaper for wood.
A Sanding Block or Sponge
For hand sanding, always use a block on flat surfaces: bare paper under your fingers follows every dip and rounds the edges. A foam sanding sponge is better on profiles and curves, because it bends to the shape. The best sanding blocks and sponges compares the ones that hold paper well.
A Sander
I’ve worked with each of these sanders, and each excels at specific tasks. Pick the wrong one and the job takes twice as long and the results show it:
- Random orbital sander: the best all-round sander for wood. Its pad spins and orbits at the same time, so it doesn’t leave the directional scratches of a plain orbital. Flat panels, tabletops, cabinet faces and doors. See the best random orbital sanders, and how to use an orbital sander without swirl marks.
- Sheet sander (finishing sander): takes quarter or half sheets of standard sandpaper, and its square pad reaches into inside corners and stays flat on edges. Check out the best sheet sanders.
- Belt sander: for removing wood fast, such as an old finish, a cupped board or a proud glue line. Aggressive, so it’s always followed by finer sanding. Here’s how to use a belt sander without gouging.
- Detail sander: a pointed pad for corners, profiles and spindles that no other pad reaches.
- Oscillating spindle sander: the essential tool for inside curves (scroll-cut shapes, curved aprons), where a flat pad can’t follow the profile. See the best spindle sanders.
Which one for which job, with my picks for each, is in the best sanders for wood.
Dust Control and Safety
Sanding makes fine dust that hides scratches, clogs paper and gets into your lungs: OSHA’s wood dust page notes that breathing it may cause allergic and other respiratory symptoms, and cancer. Connect the sander to a shop vac or dust extractor, wear a respirator for anything longer than a few minutes, and keep a tack cloth for the final wipe.
Step 1: Choose Your Starting Grit
The grit number tells you how fine the abrasive particles are: the higher the number, the smaller the particles and the finer the scratch they leave. I’ve seen too many projects ruined by starting with the wrong grit or skipping grits in the sequence. The first grit has one job, removing the worst defect on the surface, so start with the finest grit that does it.
| Grit | Grade | Use it on wood for |
|---|---|---|
| 40-60 | Coarse | Stripping paint and varnish, leveling rough-sawn or weathered wood, floors |
| 80-120 | Medium | The first grit on most bare wood: planer and saw marks, filler, light scratches |
| 150-180 | Fine | The last grit before paint and most stains |
| 220-240 | Very fine | The last grit before a clear finish on closed-grain wood |
| 320-400 | Extra fine | Between coats of finish, by hand, with light pressure |
On new lumber from the store, 80 is usually more than you need: start at 120. On an old finish, a rough board or a glue line, start at 80, and drop to 60 only if 80 hasn’t removed the defect after a minute or two. The job-by-job version of this table, with the CAMI and P scales explained, is in what grit sandpaper for wood, and every other material is in my sandpaper grit chart.
Step 2: Sand With the Grain
This is the most fundamental rule in wood sanding: always sand with the grain, not across it or at an angle to it. Wood grain is the pattern of fibers you see on the surface. Sanding across it cuts across the fibers and leaves scratches that run perpendicular to the grain lines and light up once stain or finish goes on.
A random orbital sander is the exception that proves the rule: its pad moves in every direction at once, so no one direction of scratch dominates, which is why it’s safe to use on any part of a board. Even so, finish the last grit with a light pass by hand along the grain. Belt sanders, sheet sanders and hand sanding always go with the grain.
Cross-grain sanding is sometimes unavoidable: where two parts meet at 90 degrees, such as the rail and stile of a face frame or a door, sand the part that runs into the joint first, then the one that runs across it, stopping exactly at the joint line. Fine paper (150 or finer) and a last light pass along each grain direction hide what’s left.
By Hand or With a Sander?
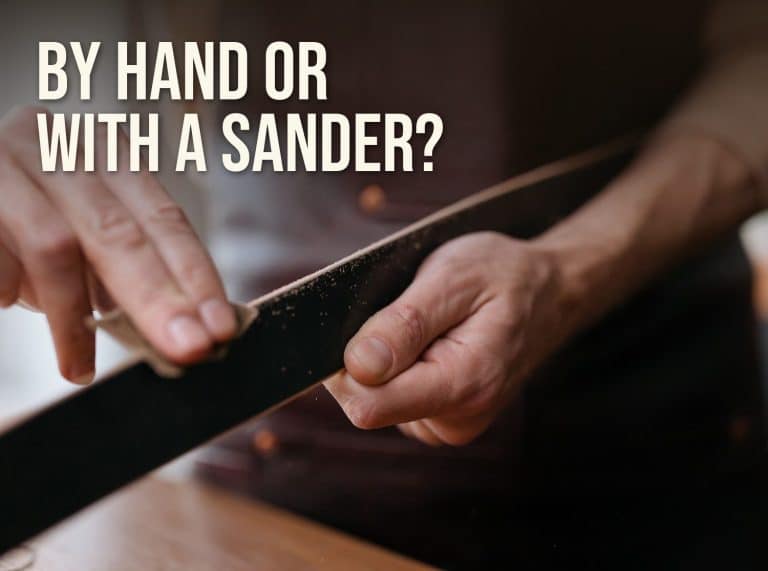
Use a sander for the coarse and middle grits on any flat surface bigger than your hand: it’s faster and flatter than you can sand by hand. Use your hand, with a block or sponge, for the last pass, for edges you don’t want to round, for moldings and curves, and for the light sanding between coats of finish.
Which Sander for Which Surface
| Surface | Tool |
|---|---|
| Tabletops, panels, doors, cabinet sides | Random orbital sander |
| Old finish, cupped or rough boards | Belt sander, then random orbital |
| Inside corners, face frames, drawer boxes | 1/4-sheet sander or detail sander |
| Moldings, spindles, carvings, chair rungs | Sanding sponge or folded paper by hand |
| Inside curves | Spindle sander, or paper around a dowel |
| Hardwood floors | Drum or orbital floor sander and an edger |
How to Sand Wood by Hand
Wrap the paper around a block, or use a sponge, and sand in long strokes along the grain with even, moderate pressure. When hand sanding without a block, fold a full sheet in half, then in half again: you get a pad with four usable faces, and you unfold and refold to expose fresh abrasive as each one wears. For curves, wrap the paper around a dowel or a piece of pipe close to the curve’s radius.
How to Sand Wood With an Electric Sander
Switch the sander on before it touches the wood and off after you lift it. Keep the pad flat, let the weight of the machine do the cutting, and move it slowly (about an inch a second is a good pace for an orbital) in overlapping passes. Pressing harder generates heat, loads the paper and leaves waves; it doesn’t sand faster once the paper is dull. Change the paper instead.
Step 3: Work Up Through the Grits
The difference between sanding that looks good and sanding that looks exceptional comes down to technique. I’ve refined these methods over hundreds of projects, and they make a measurable difference.
Move Up One Grit at a Time
A common sequence is 80, 120, 150, 180, and 220 under a clear finish. Each finer grit’s only job is to remove the scratches of the one before it. Skip too far (80 straight to 220) and the fine paper polishes the tops of the deep scratches instead of removing them, and they reappear under stain. If you want to save a step, skip in the middle of the range: 120 to 180 is far safer than 60 to 120.
⚠️ Important
Skipping grits is the most common mistake I see. The temptation is to jump from 80 grit to 220 to save time. It doesn’t work: you end up sanding for much longer than if you’d gone 80, 120, 180, 220, and the 80-grit marks still show under the finish. Stain makes them show even more.
Sand the Whole Surface at Each Grit
Complete the whole surface at one grit before you switch. A simple check: draw light pencil squiggles across the surface before each grit, and sand until they’re gone. A patch left at a coarser grit soaks up stain darker than the rest.
Keep the Sander Moving and Flat
Never stop the sander while it’s on the wood: pausing digs a shallow dish that shows after finishing. Don’t tilt it onto the edge of the pad to work on a spot, and let the pad overhang an edge by no more than a third, or it will round the edge over.
Ease the Edges by Hand
Sharp edges chip and don’t hold finish well. After the last machine grit, run a block lightly along each edge at 45 degrees, two or three strokes, to soften it.
Step 4: Remove the Dust Between Grits
This is the step most beginners skip and then wonder why their finish has stray scratches. Loose grit from a coarse sheet gets dragged around by the next, finer sheet and leaves scratches deeper than that grit should make. Between every grit change: vacuum the surface, then wipe it with a tack cloth or a barely damp microfiber cloth along the grain. Never blow the dust off with your breath or compressed air without a mask: it puts it straight into the air you breathe.
Step 5: Raise the Grain Before a Water-Based Finish
Water swells the wood fibers and makes them stand up, so the first coat of a water-based stain or finish feels rough. To get ahead of it: after your last grit, wipe the wood with a barely damp cloth, let it dry completely, and sand the raised fibers off lightly with the same last grit. The first coat then goes on smooth. With oil-based products you can skip this step.
Step 6: Check Your Work Before You Finish
Hold a light low and to one side of the surface, or wipe the wood with mineral spirits: the wet surface shows what the finish will, including swirl marks, cross-grain scratches, glue spots and patches of old finish. Sand them out with your last grit, by hand along the grain, then clean off the dust one last time.
How to Sand Wood Before Stain, Paint or a Clear Finish
The finish decides where you stop. Sanding too fine is a real problem before stain: General Finishes warns that a surface sanded too fine won’t accept a finish properly, which means pale, blotchy color.
Before Staining
Stop at 150 to 180 on hardwoods like oak and maple, especially with an oil-based stain, and at 180 to 220 on softwoods like pine. Pine, maple and birch blotch easily (cherry can too), so use a pre-stain conditioner and test on an offcut first. The full table by species is in how to stain wood.
Before Painting
Paint hides fine scratches that stain would show, so 120 then 150 is enough on bare wood. On painted furniture you’re repainting, you only need to scuff the old paint with 120 to 180 so the new coat bites. Sand primer lightly with 220 before the topcoat.
Before Varnish or Polyurethane
Go up to 150 under an oil-based clear finish and 150 to 220 under a water-based one. A close-grained wood like maple looks better at 220; an open-grained wood like oak gains little past 180.
Between Coats of Finish
Let each coat dry, then sand it lightly by hand with 320 grit, just enough to knock down the dust nibs and dull the surface, and clean off the dust before the next coat. Don’t sand the final coat. The details for each type of finish are in sanding between coats of polyurethane.
How to Sand Different Wood Projects
The steps above work on any piece of wood. What changes from project to project is the starting grit, the tool and the traps. Here’s the short version for each, and the full guide.
Furniture
Strip or sand off the old finish first, then sand bare wood 120, 150, 180. Use an orbital on tops, sides and drawer fronts, a 1/4-sheet or detail sander in corners and frames, and a sponge on spindles and moldings. Check for veneer before you start: it can be thinner than a coarse-grit pass. Full method: how to refinish wood furniture, and to take paint off first, how to strip paint from wood.
Tables
A tabletop is a big flat surface where every swirl shows under a raking light. Start at 80 if you’re removing an old finish, then 120, 150 and 180 with a random orbital, and finish by hand along the grain. Legs and aprons go by hand or with a detail sander. See how to sand and refinish a table, and for oiled kitchen worktops, how to sand wooden worktops.
Hardwood Floors
Floors are sanded with rented machines and much coarser grits: 36 to 40 on the first cut, 50 to 60 on the second, 80 to 100 on the last, with an edger along the walls at the same grits. Every grit has to cover the whole floor before you move on. Step by step: how to sand hardwood floors (including sanding a floor with an orbital sander), and for stain, finish and cure times, how to refinish hardwood floors.
Decks
Deck boards are the one project where you stop coarse: 60 to 80 grit before a penetrating deck stain, because finer sanding closes the pores and the stain can’t soak in. Wash the deck and let it dry first. Full guide: how to sand a deck, and for treated boards, can you sand pressure-treated wood.
Doors, Stairs and Railings
Doors have rails and stiles that meet at 90 degrees, so sand each part with its own grain and stop at the joint. Stairs need a sheet sander for treads and risers and a detail sander for the corners. Railings and spindles are sponge and hand work. See the best sanders for doors, the best sanders for stairs and how to sand a banister.
Removing Stains and Marks
Not every mark needs sanding. White water rings often come out without it, and dark stains need bleach rather than paper. See how to remove water stains from wood and how to remove stain from wood.
Common Sanding Mistakes (and the Fix)
- Skipping grits. Deep scratches from the coarse grit show under the finish. Fix: go back one grit and work up one step at a time.
- Leaving dust between grits. Loose grit scratches the surface on the next pass. Fix: vacuum and wipe at every change.
- Pressing too hard. Heat, clogged paper, waves and low spots. Fix: let the tool’s weight do the work and change paper when it stops cutting.
- Sanding across the grain. Scratches that light up under stain. Fix: finish every surface by hand along the grain.
- Sanding too fine before stain. Pale, blotchy color. Fix: stop at 150 to 180 on most woods.
- Rounding over edges with a sander. Fix: keep the pad flat and no more than a third over the edge, and ease edges by hand.
✨ The Bottom Line
Sanding is the foundation every fine finish sits on. Start with the finest grit that removes the worst marks, finish with the grain, move up one grit at a time, clean off the dust at every change, and stop at the grit your finish wants: 150 to 180 for stain and paint, up to 220 for a clear coat, 320 between coats. Master these fundamentals and the rest of finishing becomes straightforward.
❓ Frequently Asked Questions
What is the golden rule of sanding?+
What is the fastest way to sand wood?+
How can I sand without a sander?+
Can wood be sanded down?+
Do you sand in circles or straight lines?+
What is the correct way to sand wood?+
What grit sandpaper should I use for finishing wood?+
Thanks as always for reading, and if you have any questions about a specific wood or project, be sure to leave them below. I’ll be here to help.
